![]() With the April release of Primavera P6 Professional Release 16.1 and Enterprise Project Portfolio Management (EPPM) you may be curious to see the new software in action.
With the April release of Primavera P6 Professional Release 16.1 and Enterprise Project Portfolio Management (EPPM) you may be curious to see the new software in action.
To do that you’ll need to do an upgrade to your existing system. If you’ve running one of the earlier P6 Professional client version on a stand-alone system, the following instructional video will help you make the upgrade.
While this video features Primavera P6 Professional Release 16.1, these video instructions will be just as relevant to many of the versions that have come out over the last few year. The process has changed little. Basically you backup your existing SQL Database or databases. Next you upgrade them using the database setup utility. Finally you install the new client software. With these steps done, you will be able to enjoy using the latest version that Primavera has to offer.
This will certainly be a worthwhile exercise; particularly if you have been using the previous version, namely 15.2 that came out a the back-end of last year. Luckily Primavera didn’t make us wait too long for this upgrade as there were a couple of minor, yet frustrating issues with the interface. Specifically, on the various machines where I installed 15.2, when you clicked on a check box, say a filter for example, the background of the check box would go dark blue as you selected the row.
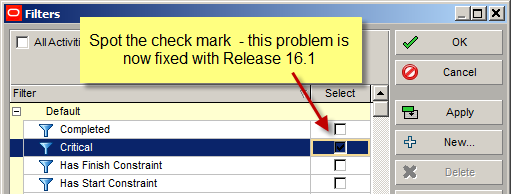 This made it nearly impossible to see if the box was checked or not. Thankfully they fixed this with 16.1 and me and my copy of Primavera P6 Professional are friends again. I’m also pleased to see that they fixed a rather hit-and-miss issue I was seeing with the Resource Usage Profile. It failed to display newly assigned resources in a Project and I would have to switch out to other existing Layouts to get them to appear. This issue is also fixed it would seem.
Anyway, to see all this in action, check out the following video and learn how to upgrade to R16.1 in just under 5 minutes.