 A recent question from a user asked us to write a blog clarifying the difference between the project and the primary baseline. Here we explain the baseline fundamentals in Primavera P6 and how they work.
The baseline in P6 functions like a ruler. A ruler is a straight strip marked at regular intervals to measure distances. The baseline is a static picture of the schedule marking the original start and finish dates of tasks to measure variance from these dates as the schedule progresses. The baseline bars on the Gantt chart are usually yellow, though the scheduler can assign any color to a baseline.
The following baselines are available: Project, Primary, Secondary, and Tertiary. Each baseline has its own set of features. Knowing the differences among baselines is helpful.
This article explains the baseline fundamentals in Primavera P6 and the differences among baseline types and demonstrates the creation of a bar definition for the project baseline.
In Table 1, we have a list of P6 Professional baseline types and their features.
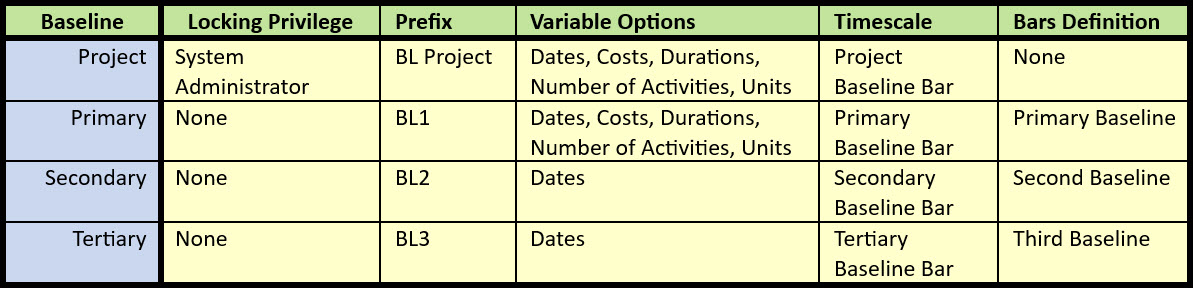 Table 1 – Baseline Features
The first demarcation of these P6 Professional baselines is listed in Table 1, the Locking privilege column. The system administrator can lock the Project Baseline so that users cannot unassign it and, therefore, cannot delete it; you cannot delete assigned baselines. The Primary, Secondary, and Tertiary baselines have no locking privileges.
Figure 1 displays a schematic of the baseline types and their locking privileges.
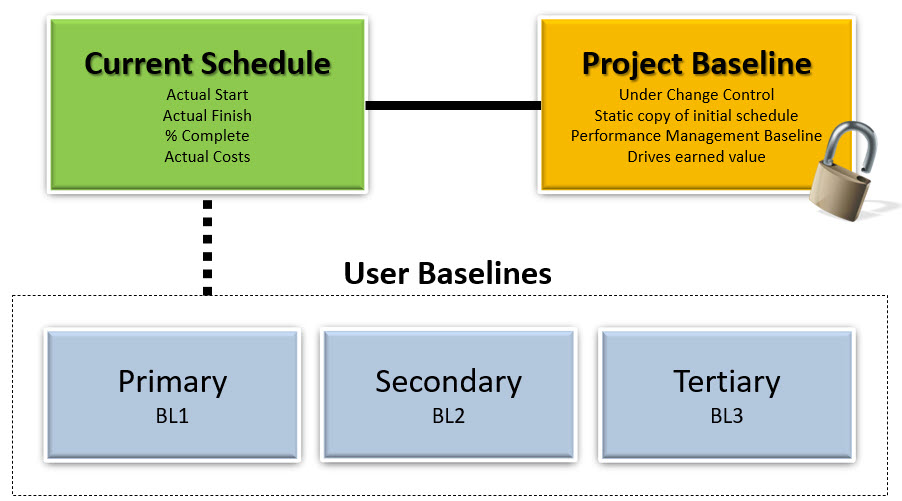 Figure 1
In this graphic, the baseline types are grouped between the project baseline and user baselines. The system administrator, again, can lock the Project Baseline, so you cannot change it. Schedulers are free to modify the user baselines.
The Baseline Prefix is the next column in Table 1. Baselines are identified by their prefix BL Project – project baseline, BL1 – primary or first baseline, BL2 – secondary or second baseline, and BL3 – tertiary or third baseline, Table 1 and Figure 1. P6 Professional appends the variable to the prefix, e.g., Finish Date appends to BL Project to become BL Project Finish Date variable, and Finish Date appends to BL1 to become BL1 Finish Date variable (or primary baseline finish date).
Table 1 lists the variable options for each baseline type. There are many variables for the Project Baseline and Primary Baseline, and the same options are available for both. The disadvantage of the Secondary and Tertiary Baselines is the limited variable options.
The only variables for the secondary and tertiary baselines are secondary, BL2 Start, and BL2 Finish; tertiary, BL3 Start, and BL3 Finish. Ten Six recommends tracking schedule progress using the Project Baseline or Primary Baseline because of the additional variables they provide.
The next column in Table 1 lists each baseline’s timescale. All four baseline types appear in the timescale dropdown list in the bars dialog box, Figure 2.
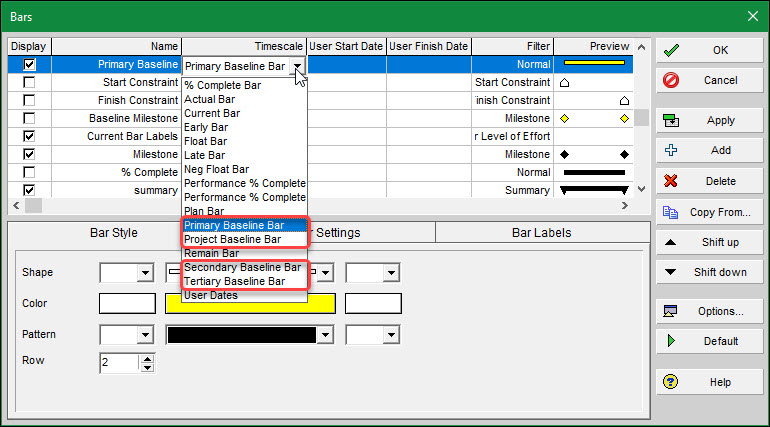 Figure 2
So, you can create Gantt chart graphics bar definitions for all four baseline types.
The final column in Table 1 lists whether P6 Professional comes standard with a predefined bar definition for the respective baseline type. P6 Professional comes standard with defined Primary, Secondary, and Tertiary Baseline bar definitions but no Project Baseline bar definition. If you want to work with the Project Baseline for both variables and Gantt chart graphics, then you must create a Project Baseline bar definition.
Demonstration
Let’s demonstrate creating a Project Baseline bar definition.
We choose View | Bars and click Add to create a new bar definition, Figure 3.
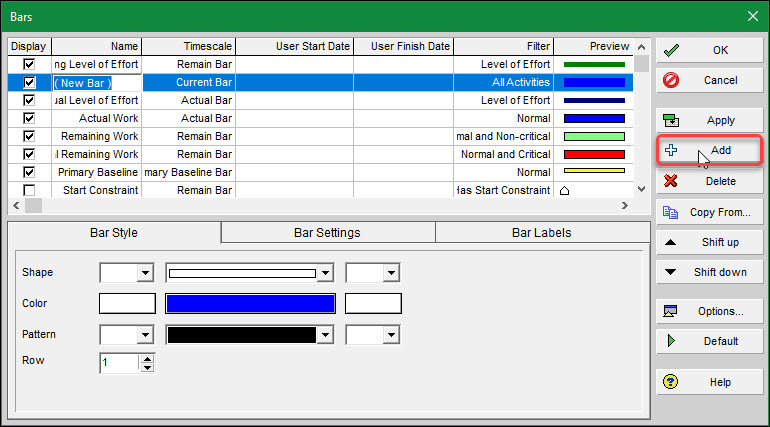 Figure 3
We name it Project Baseline and assign the Project Baseline Bar timescale, Figure 4.
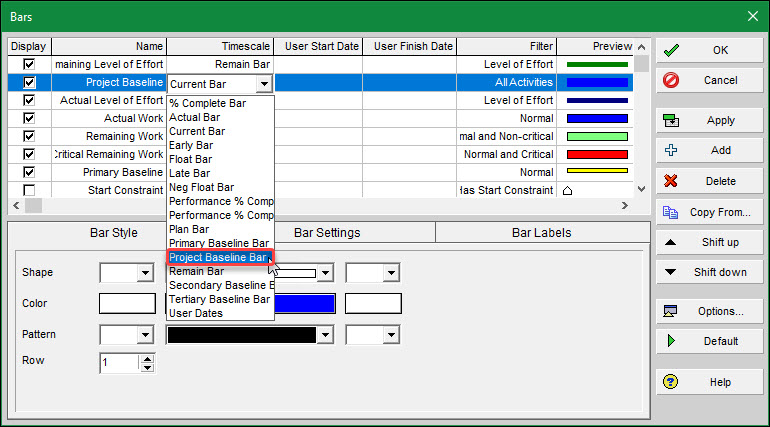 Figure 4
We assign it the Normal filter and then set the Bar Style, Figure 5.
 Figure 5
The Shape of the midsection is medium thickness and high, Figure 5. We also place it on Row 2, Figure 5. We then selected the light blue color and concluded the definition of the Project Baseline bar.
Now, we want to link a project to our schedule as a baseline and assign it as a Project Baseline.
We choose Project | Maintain Baselines …
Click Add | Convert another project to a new baseline of the current project and OK, Figure 6.
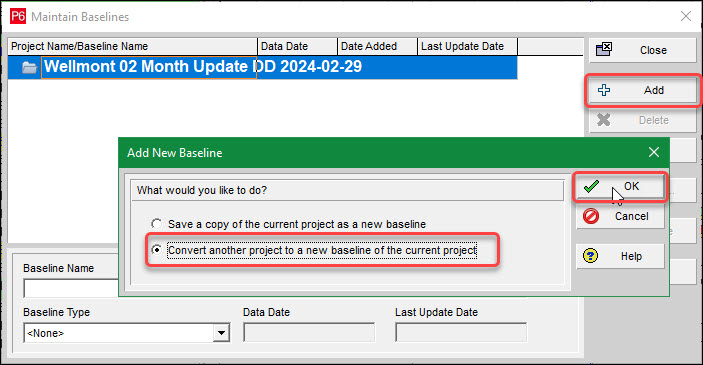 Figure 6
We have the baseline of our current project saved in the EPS. Select WELLMONT02-BL and click the select button, Figure 7.
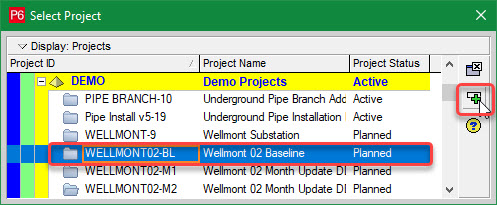 Figure 7
Assign it the baseline type “Initial Planning Baseline”, Figure 8.
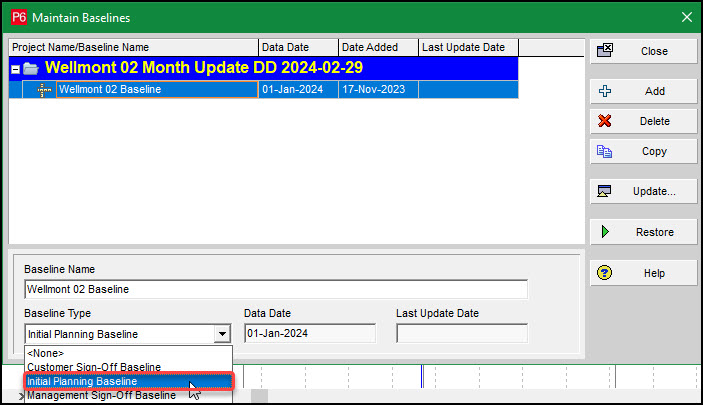 Figure 8
Choose Project | Assign Baselines … Assign Wellmont 02 Baseline to the Project Baseline, Figure 9.
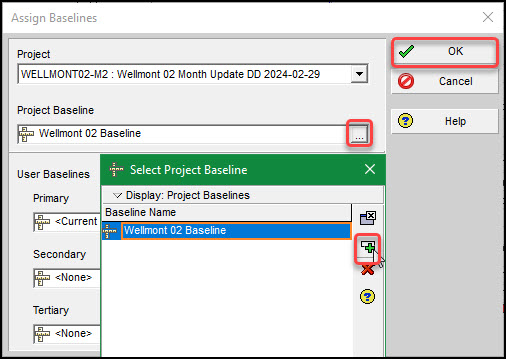 Figure 9
Confirm that Project Baseline is enabled for display and turn off the display for the Primary Baseline, Figure 10.
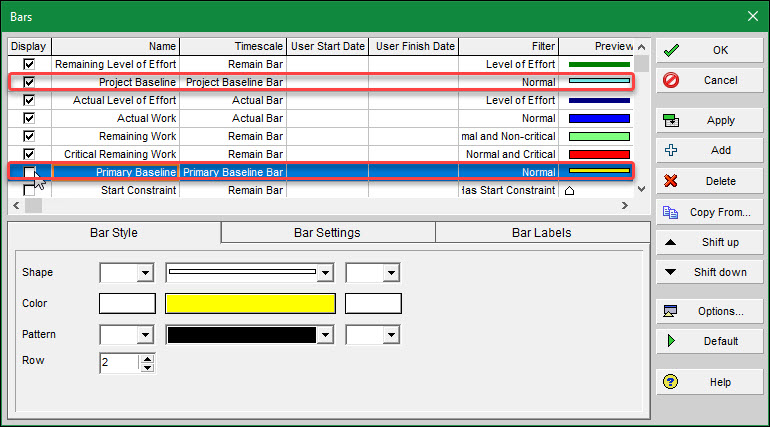 Figure 10
Figure 11 displays the current schedule and light blue baseline, Figure 11.
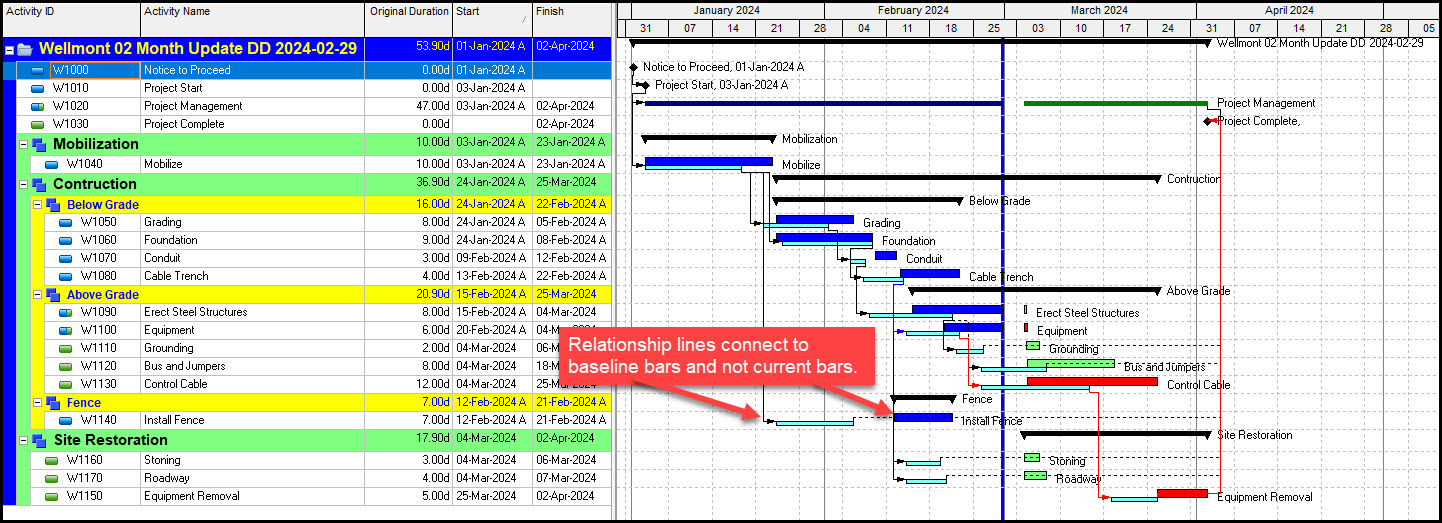 Figure 11
Note in Figure 11 that the relationship lines connect to the baseline bars, which is not what we want. They should connect to the current bars. The issue is that P6 connects relationship lines to the bar definitions that are higher in the Bars dialogue stack. We need to lower the Project Baseline bar definition in the stack, Figure 12, and locate it below the other bar line definitions.
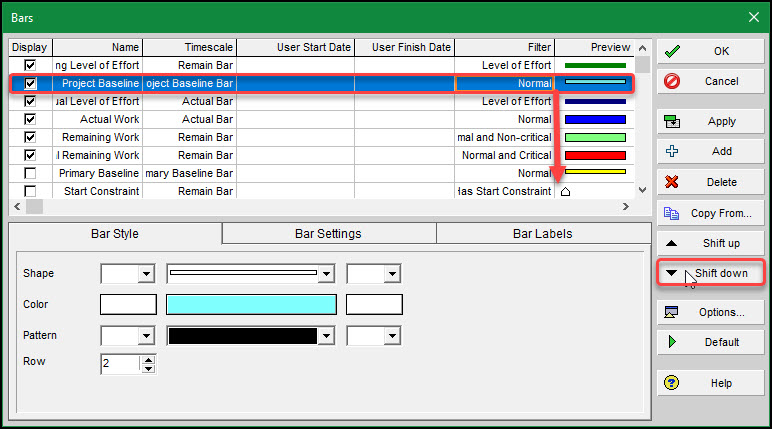 Figure 12
We lower it below the Primary Baseline bar definition. The bar definition stack appears in Figure 13.
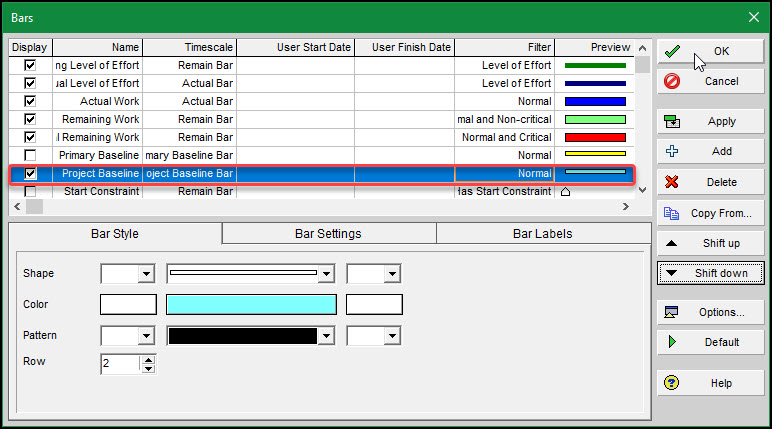 Figure 13
The Gantt chart in Figure 14 shows the correct relationship line connections.
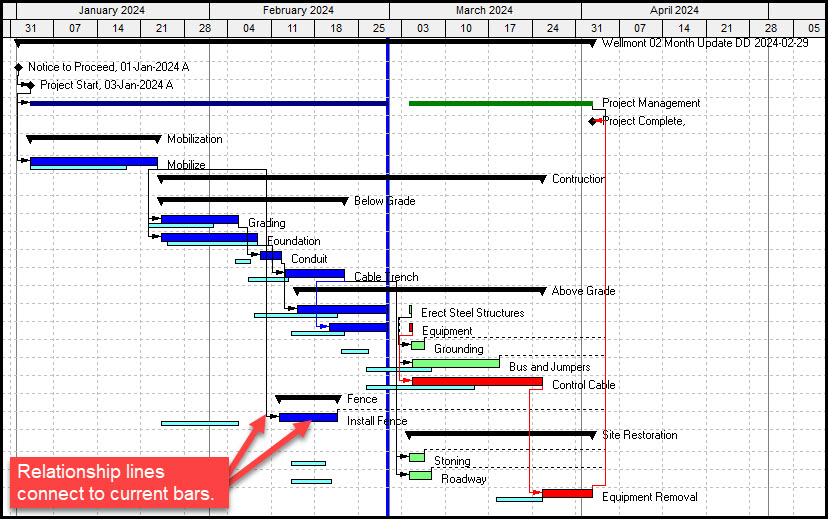 Figure 14
If you want to create a baseline of the schedule after the February update, do the following:
Choose Project | Maintain Baselines … then click Add, toggle to copy the current project as a baseline, and click OK, Figure 15.
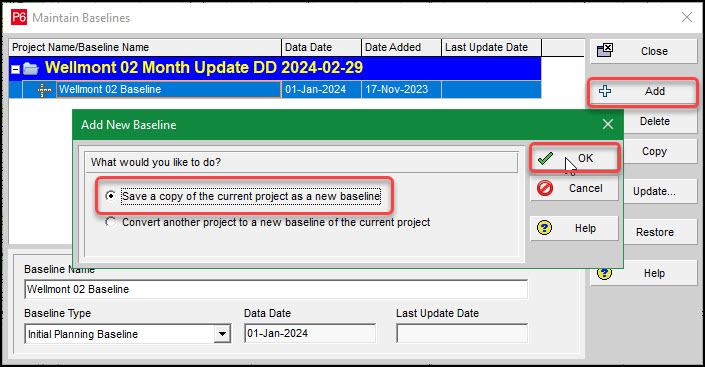 Figure 15
This makes the current bars after the data date our new baseline. Assign it the Mid Project Status Baseline, Figure 16.
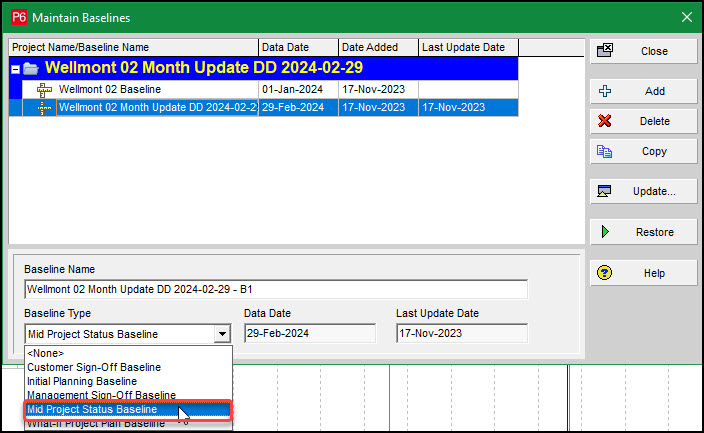 Figure 16
Choose Project | Assign Baselines …
Click the ellipse to choose the Primary baseline and select the Wellmont 02 Month DD 2023-02-29 – B1 baseline, Figure 17.
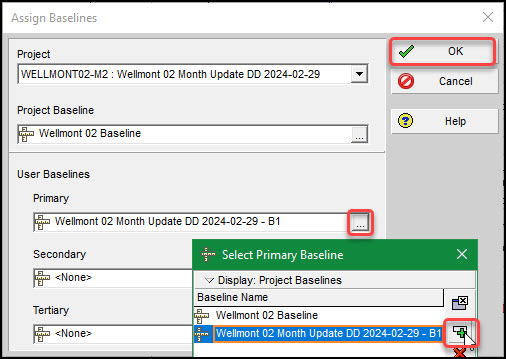 Figure 17
Choose View | Bars
Select the Primary Baseline bar definition, confirm it is on Row 2, and make its Shape midsection medium thickness and low so that it does not overlay on top of the Project Baseline bar, then click OK Figure 18.
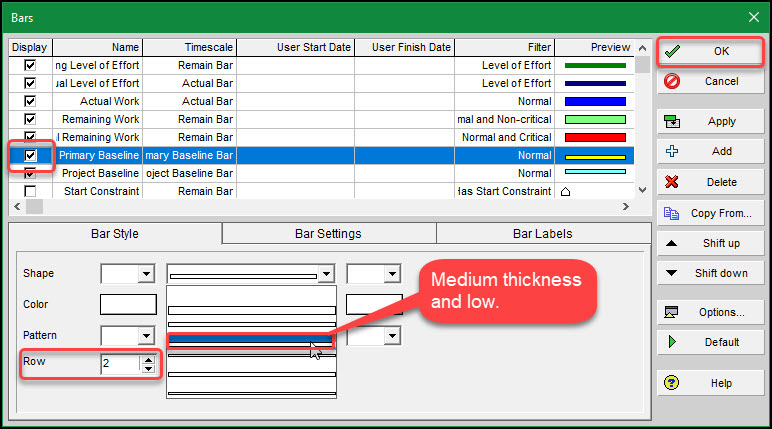 Figure 18
The schedule displays the Primary Baseline and Project Baseline bar definitions in Figure 19.
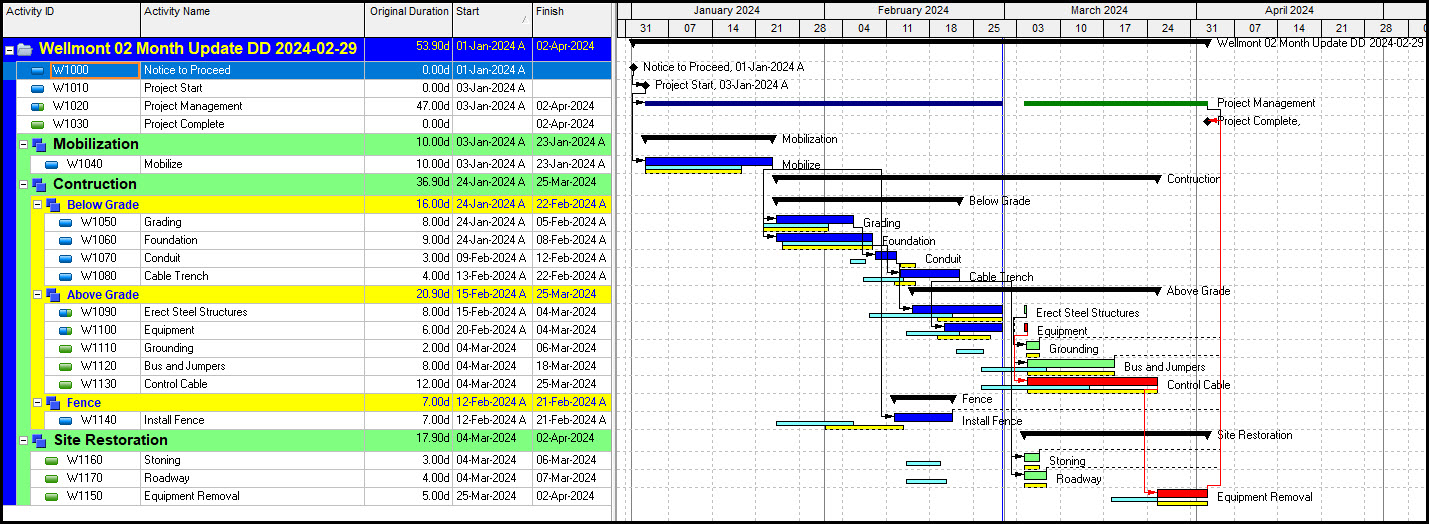 Figure 19
Observe in Figure 19 that the primary baseline bar definitions (yellow bars) after the data date are the same as the current bars.
Summary
So there you have it, an explanation of baseline fundamentals in Primavera P6.
The System Administrator can lock the Project Baseline, so no one can alter it. The Project Baseline and Primary Baseline also have numerous variable options that can be listed in the table area.
The only disadvantage of the Project Baseline is that P6 Professional has no predefined bar definition. But you can readily create one. You also can display both the Project Baseline and Primary Baseline bars on the Gantt chart row 2, provided one bar midsection shape is high, and the other bar midsection shape is low.
Ten Six recommends assigning the initial planning baseline to the Project Baseline so the System Administrator can lock it. We also recommend the Primary Baseline for ad-hoc snapshots of the current project that you can alter as you require.