![]() Creating a WBS in Primavera P6 is the first thing a scheduler will do when commencing a new project. It is an essential step in classifying all the deliverables when building a schedule. Sometimes the WBS has to be modified with elements moved or added.
Creating a WBS in Primavera P6 is the first thing a scheduler will do when commencing a new project. It is an essential step in classifying all the deliverables when building a schedule. Sometimes the WBS has to be modified with elements moved or added.
We have also produced a short video How to Modify the WBS in Primavera P6, where you can visualize the various options available and select your preference for modifying elements in the WBS.
The following article also discusses how to modify the WBS in Primavera P6.
The Projects’ WBS is managed from the WBS view in Primavera P6. Users need to be in this view to create or modify the WBS. Although the WBS is visible in the Activities view it cannot be modified there, users must be in the WBS view to make changes, as shown in Figure 1.
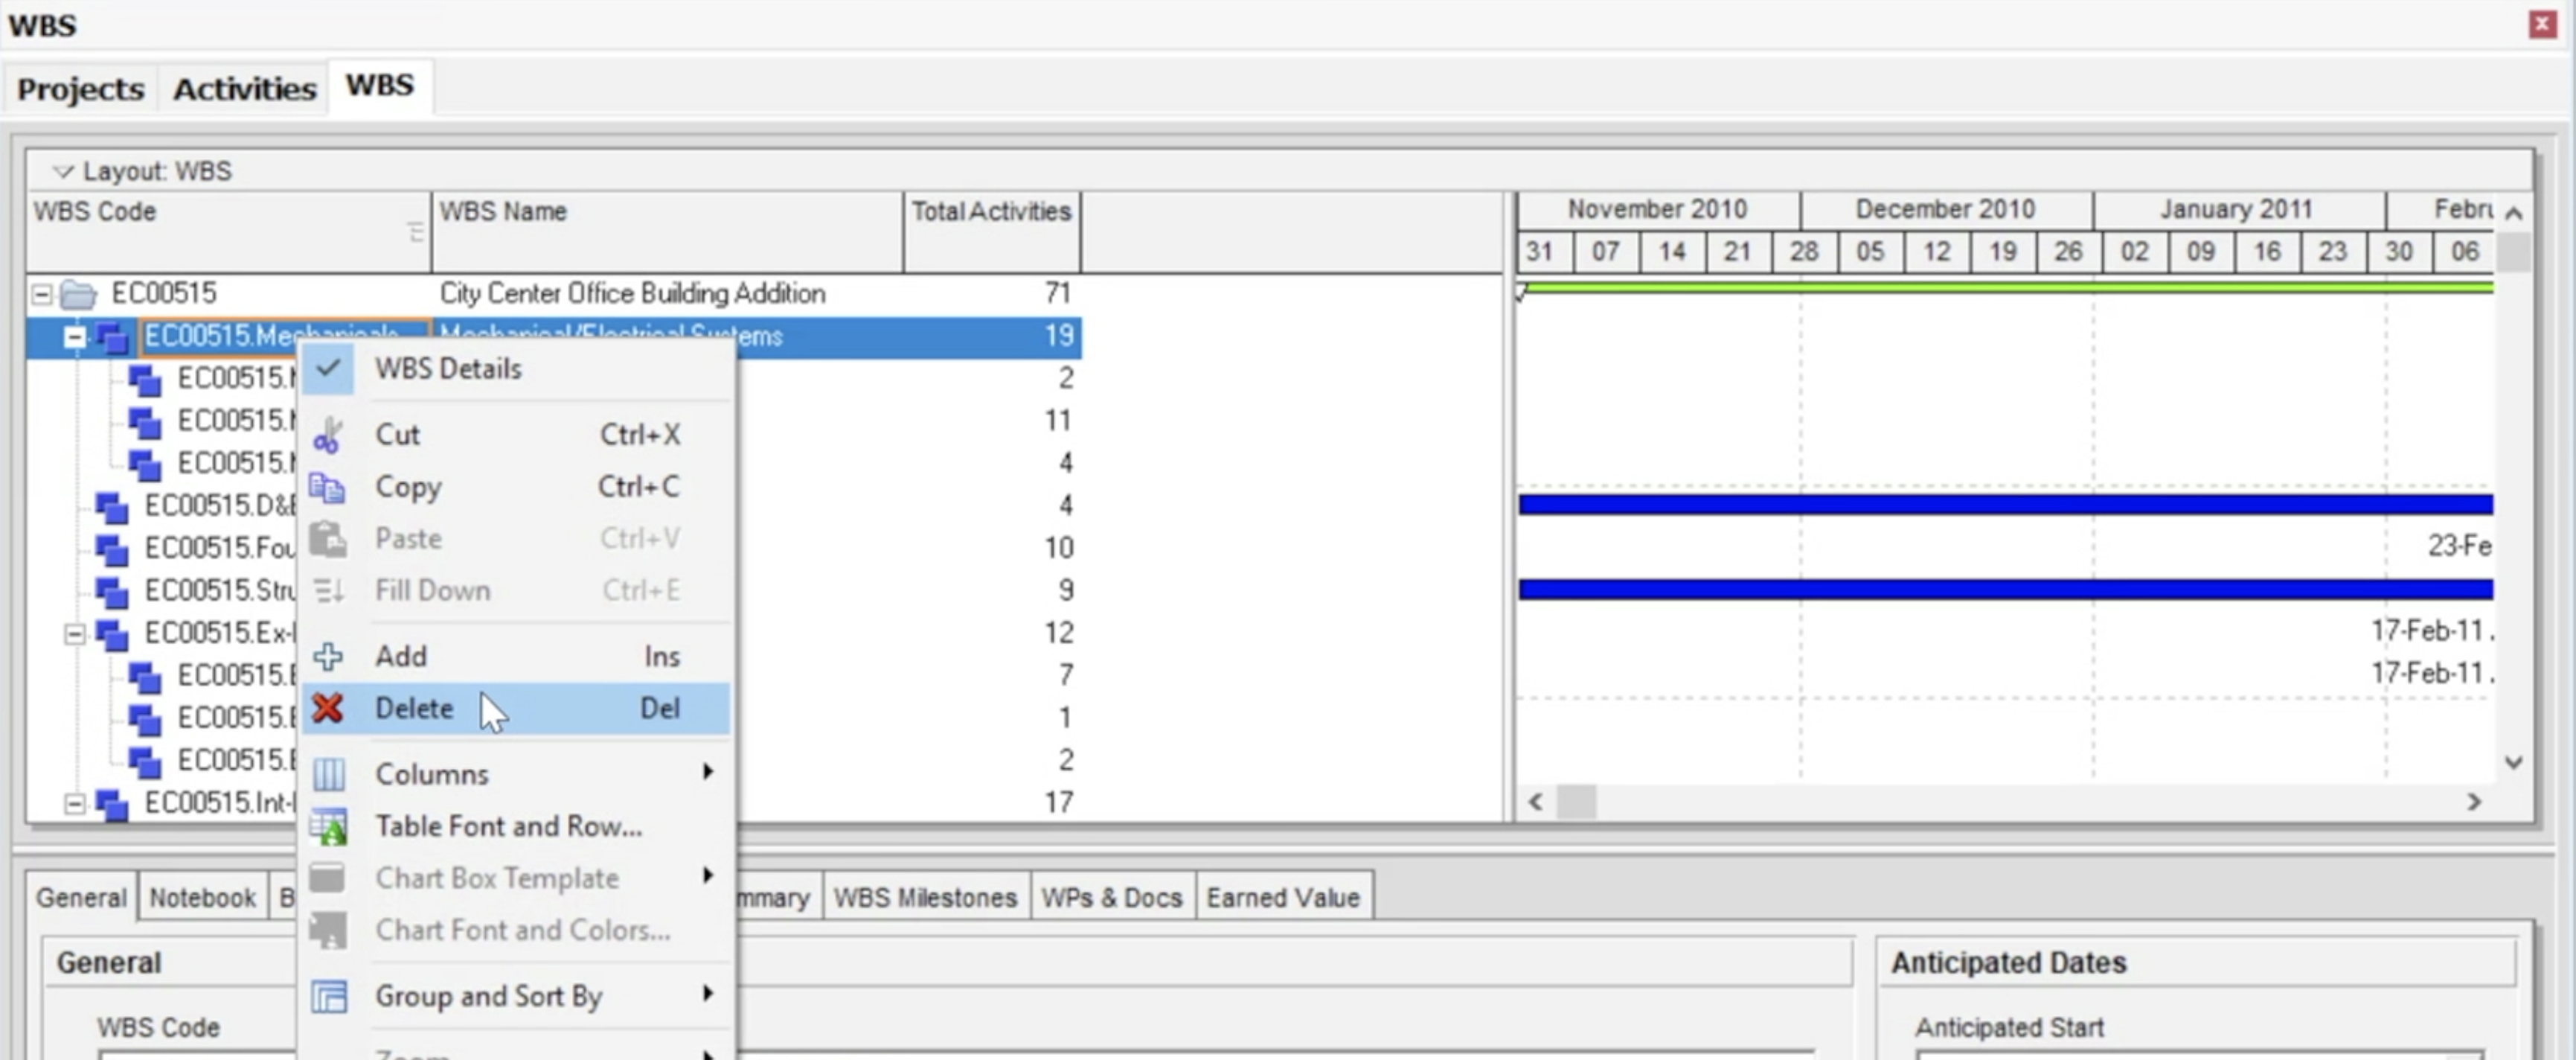 Figure 1
In the WBS view, we can add and delete WBS elements. We can also move them around in the structure using the arrow button on the right-hand vertical toolbar. We can also drag and drop elements using the mouse. Place the cursor to the far left in the WBS table area until the mouse shows a white box below the arrow. At this point, we can click and drag WBS to a new location, as shown in Figure 2.
 Figure 2
Primavera P6 uses the Project ID as the top-level code for WBS elements, as shown in Figure 3.
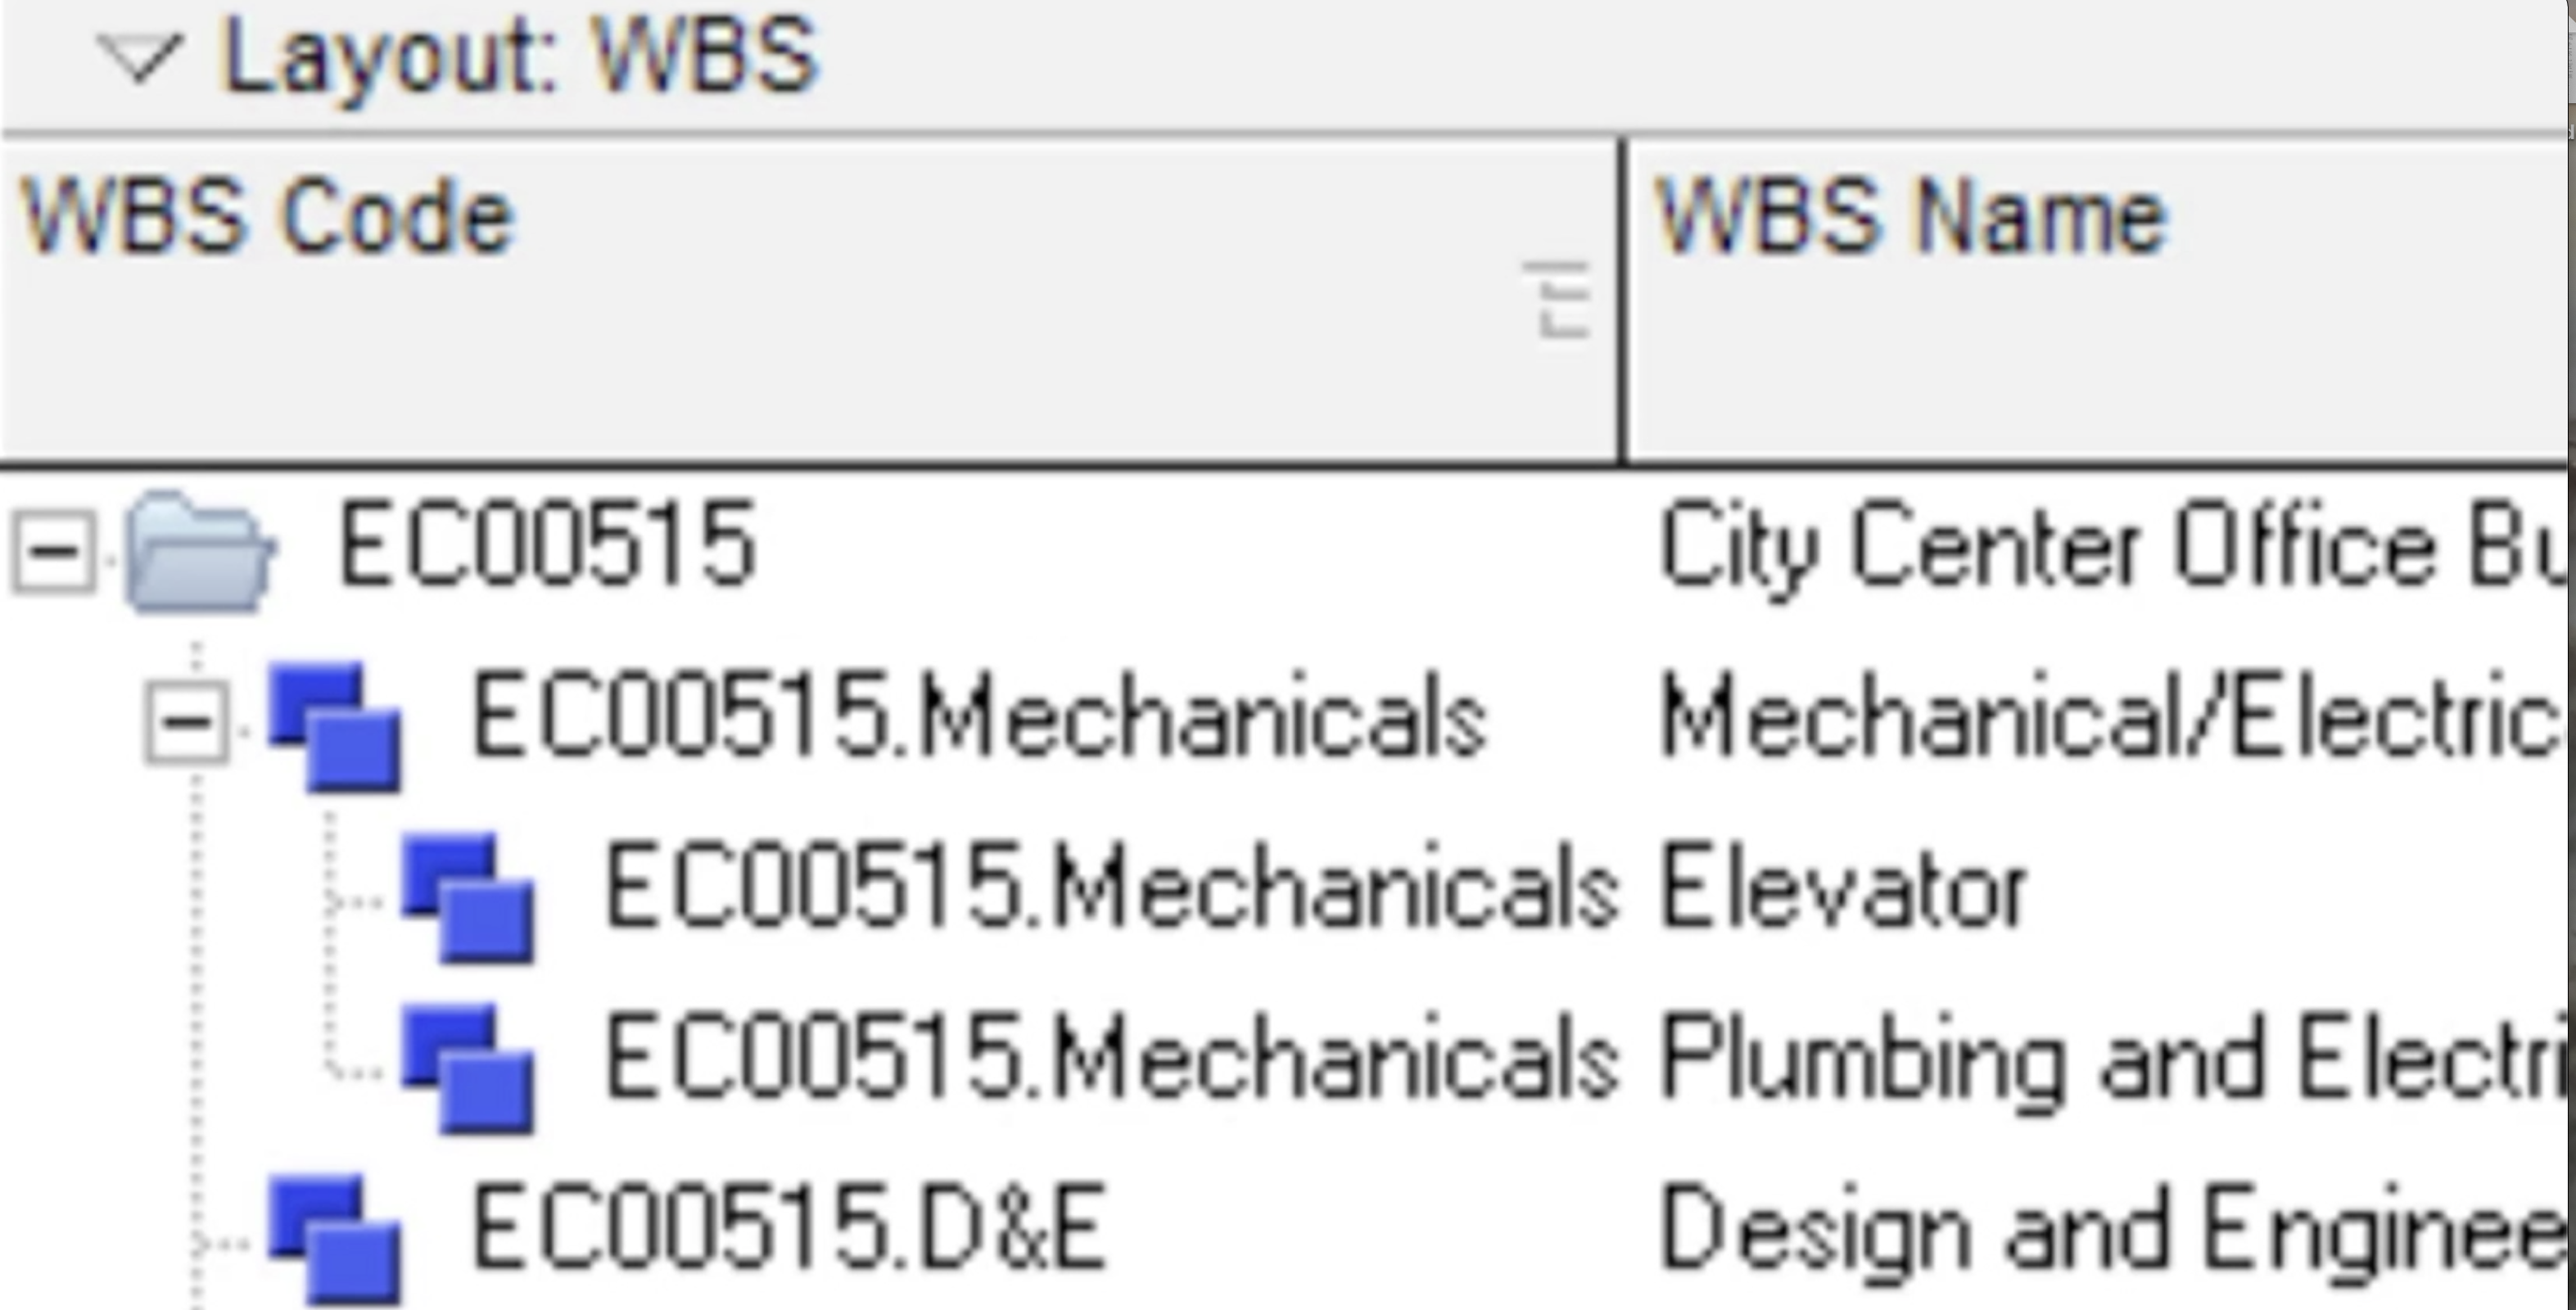 Figure 3
In our demonstration project ‘New Home Construction’ we will add a new WBS element. There are two ways that we can add a new WBS element, by right-clicking on the intended parent or in this case the project itself, as shown in Figure 4.
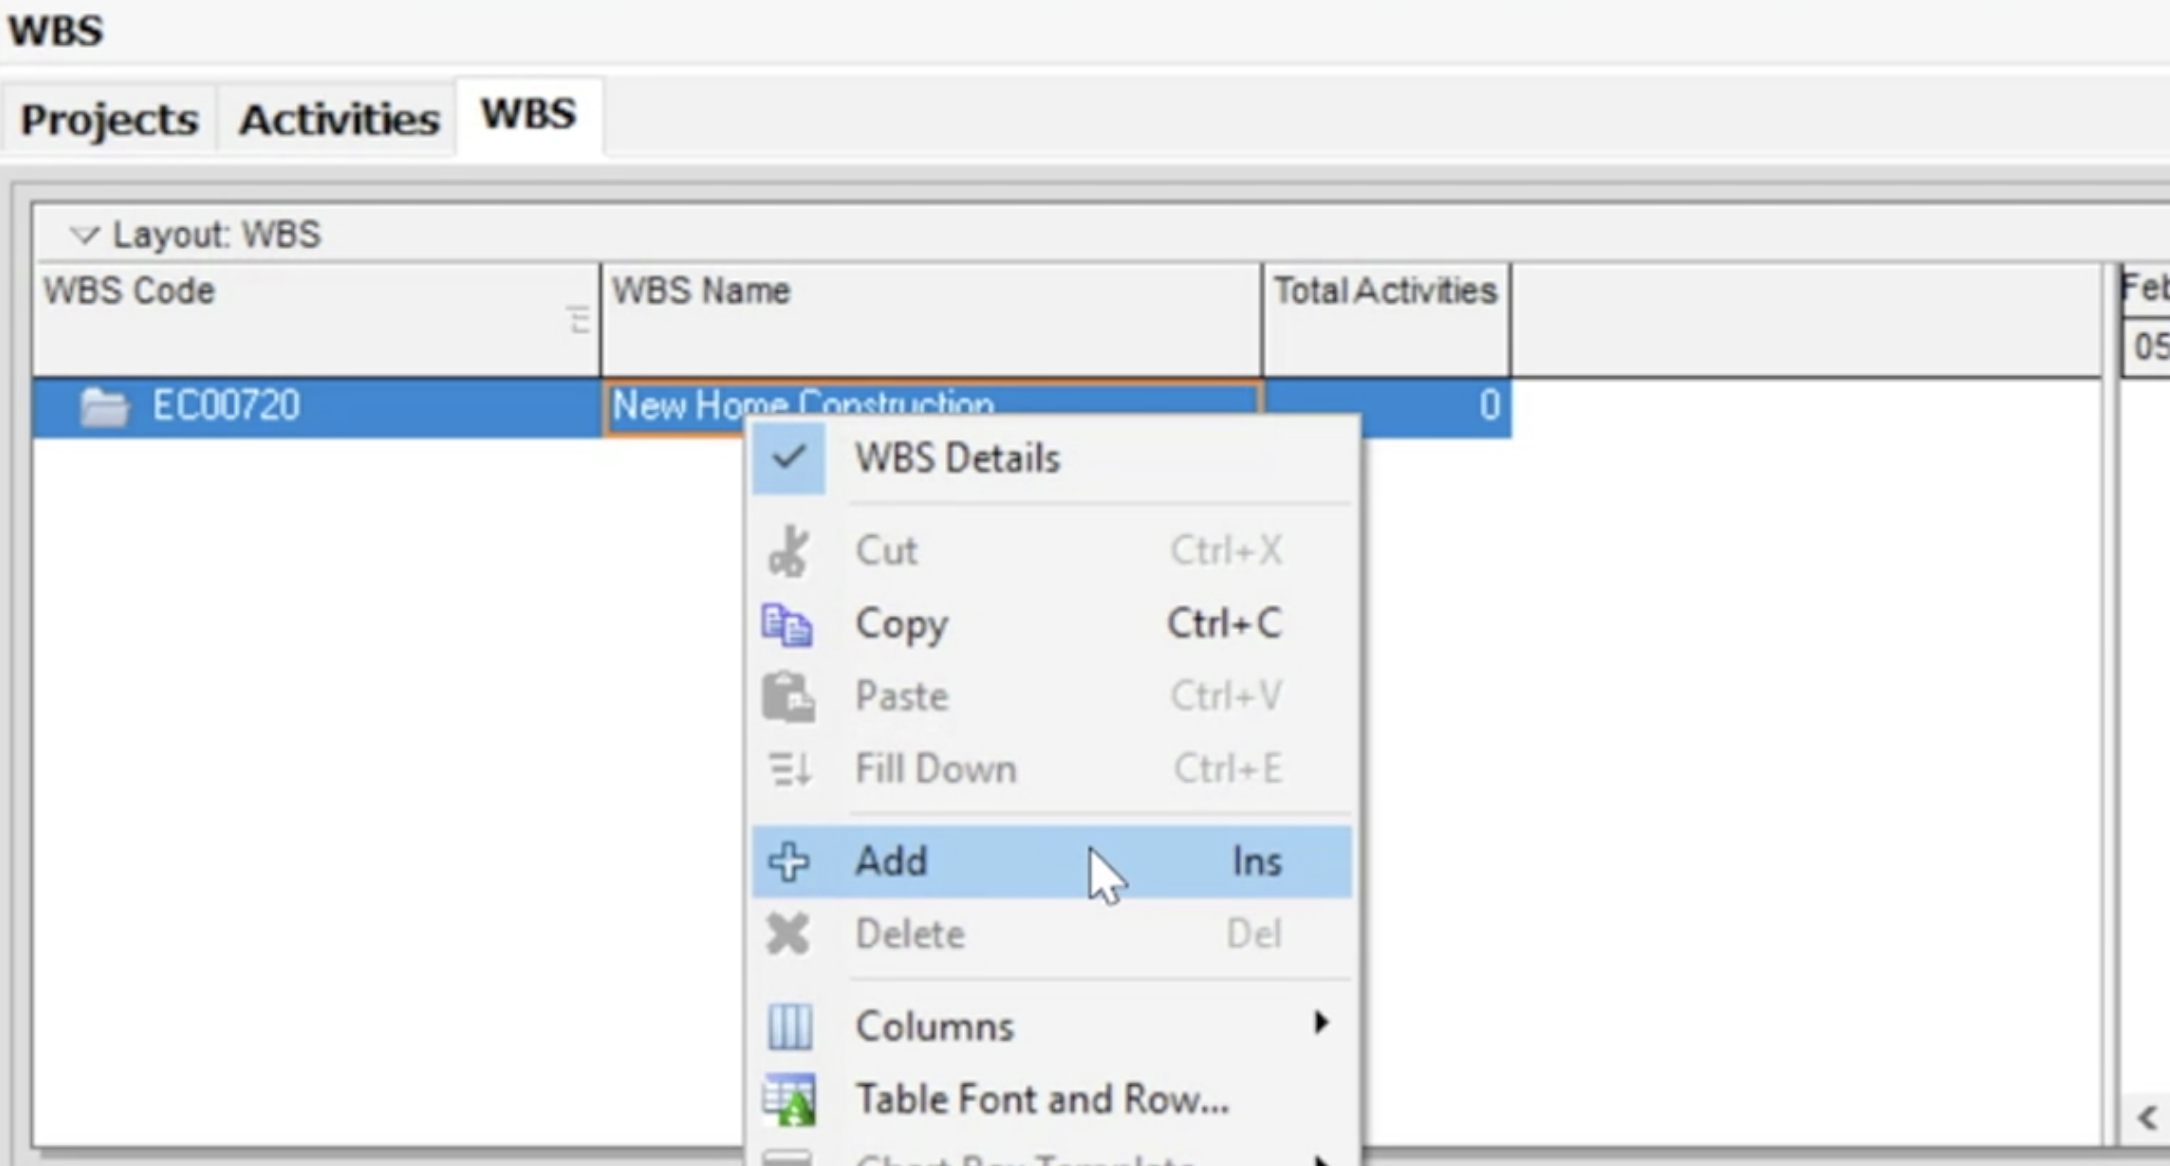 Figure 4
Or by highlighting the parent element and clicking the Add button on the vertical bar on the right-hand side as shown in Figure 5.
 Figure 5
Both of these options will add a new child WBS element, however, the Add button can only create child elements. We simply add a description for our new child element. We don’t need to add an ID as Primavera P6 will create a code ID for that level, as shown below in Figure 6.
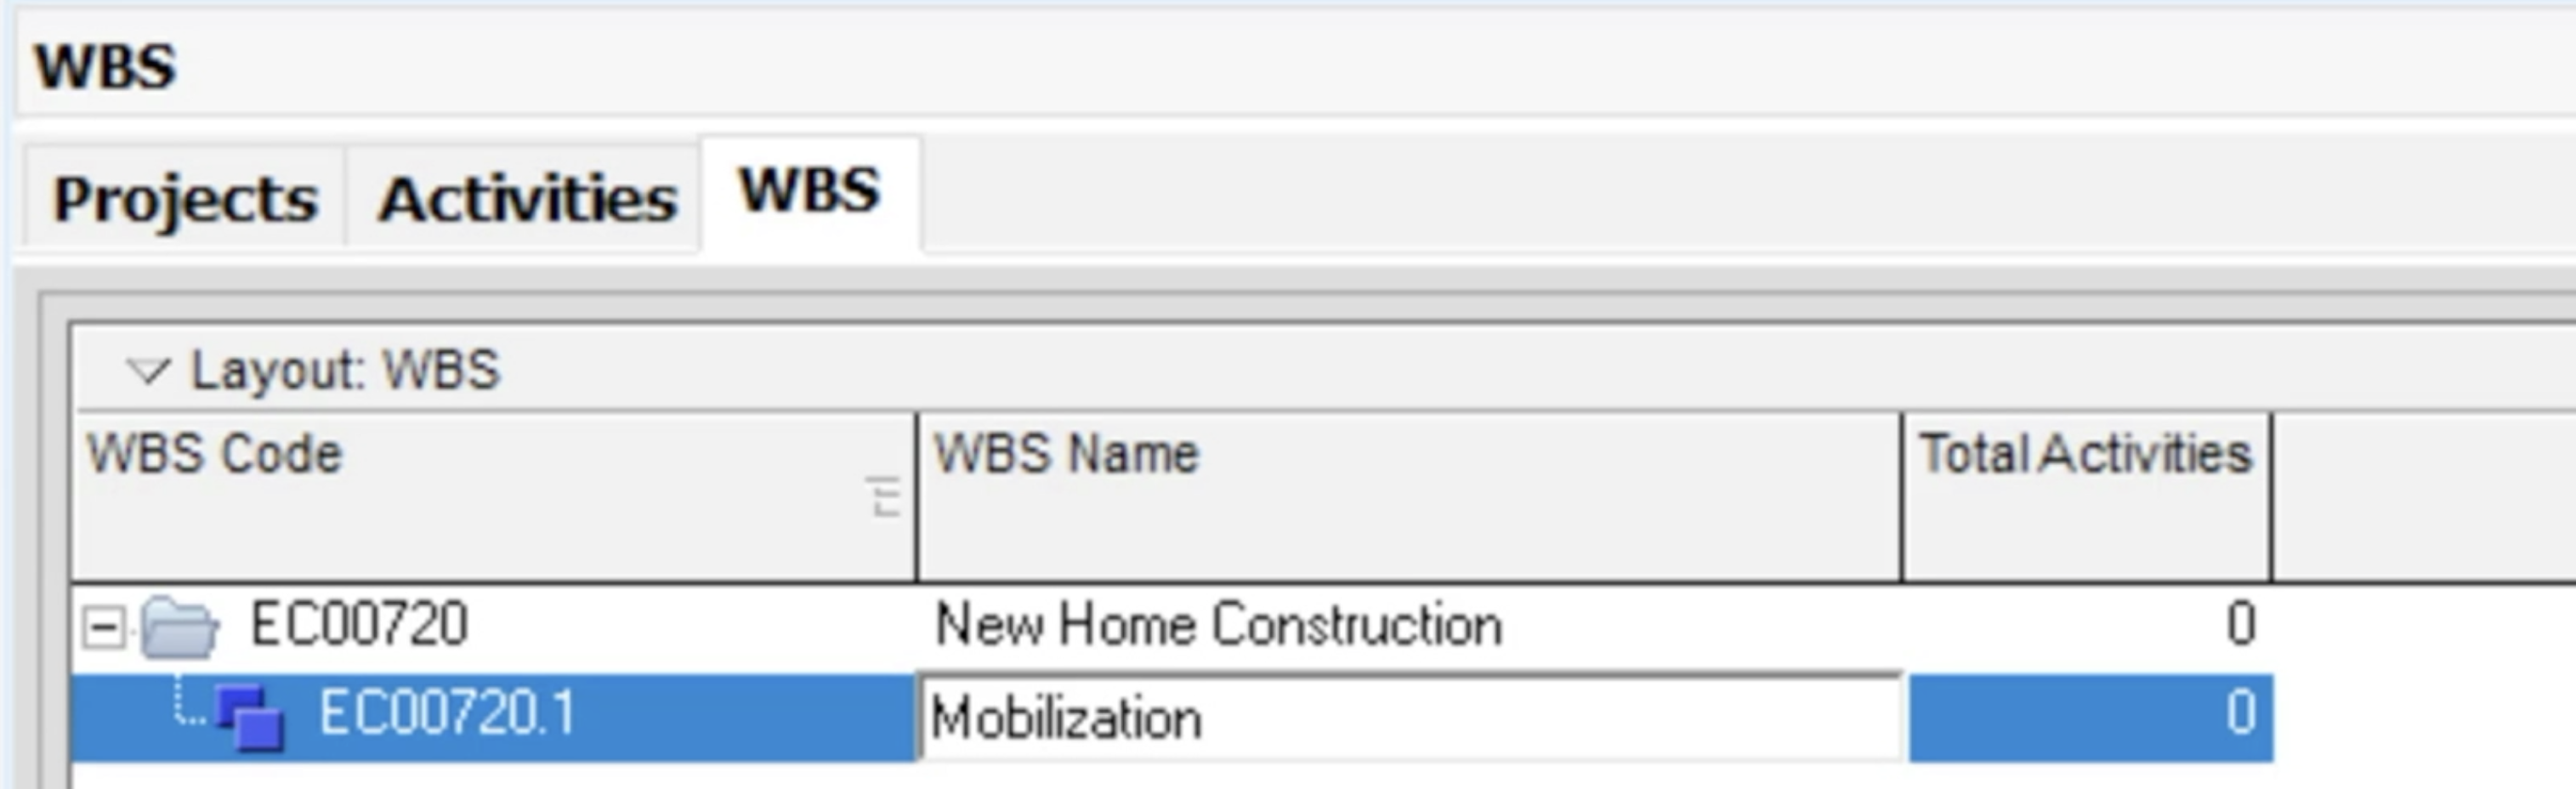 Figure 6
We need to add another element, ‘grading’ at the same level as ‘Mobilization’. How do we create a sibling when we can only add child elements?
There are two ways to do this:
Option 1
We click on the project level and add the child element from there using the Add button on the vertical bar. This places a new child directly below the selected element. We then need to use the down arrow to move the sibling to its’ correct location, as shown in Figure 7.
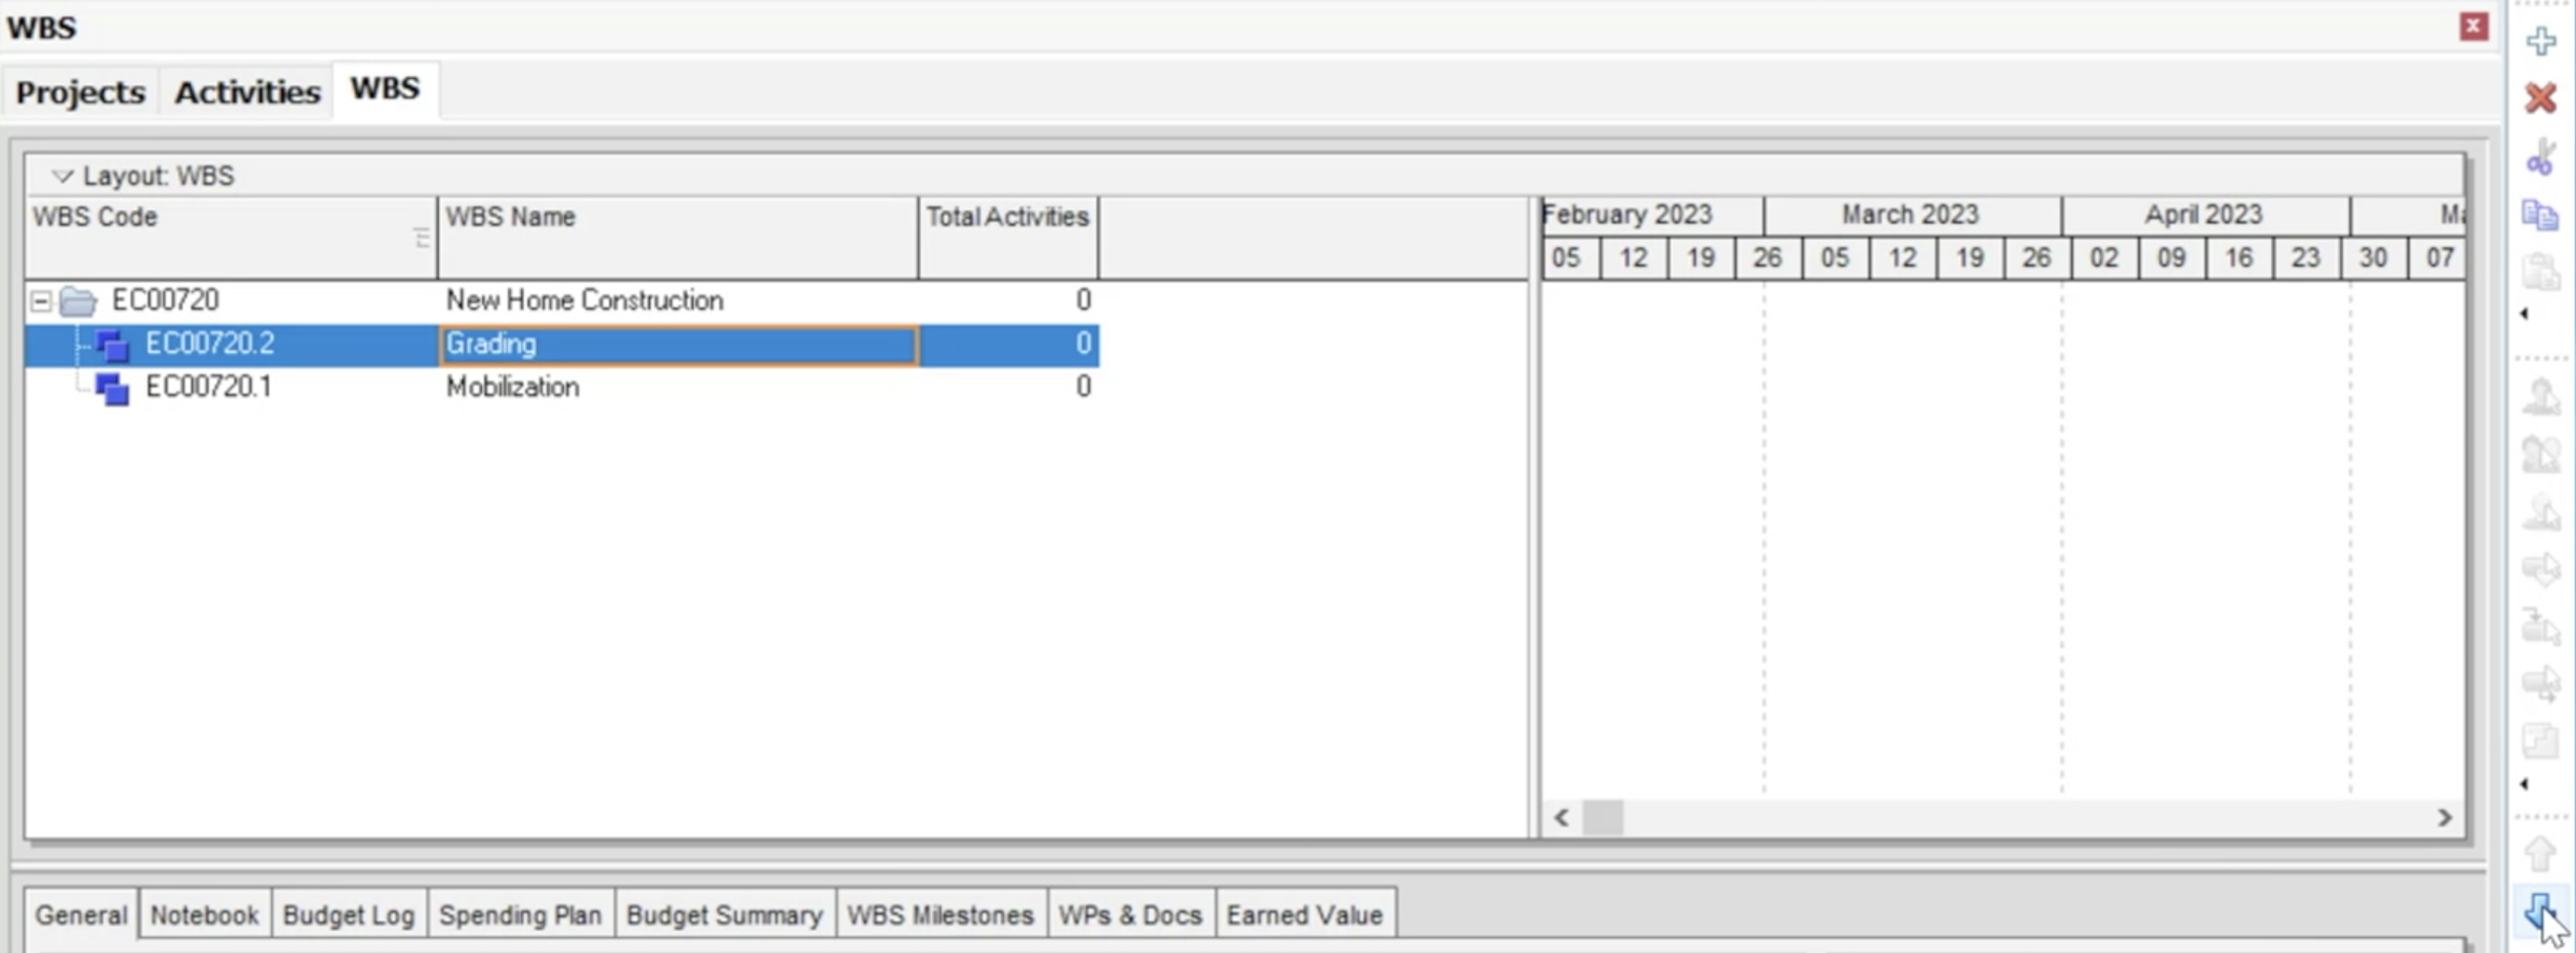 Figure 7
Option 2
We click on the ‘Mobilization’ element and add a new child element there. We use the left arrow on the toolbar to outdent the element, making it a sibling of the ‘Mobilization’ element, as shown in Figure 8.
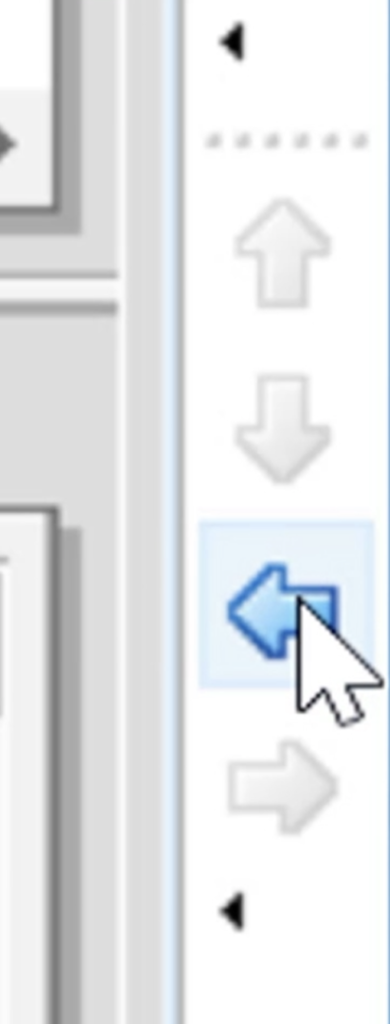 Figure 8
Option 2 of these techniques for creating siblings is recommended as it places the WBS element in the correct sequence on the screen, as shown in Figure 9.
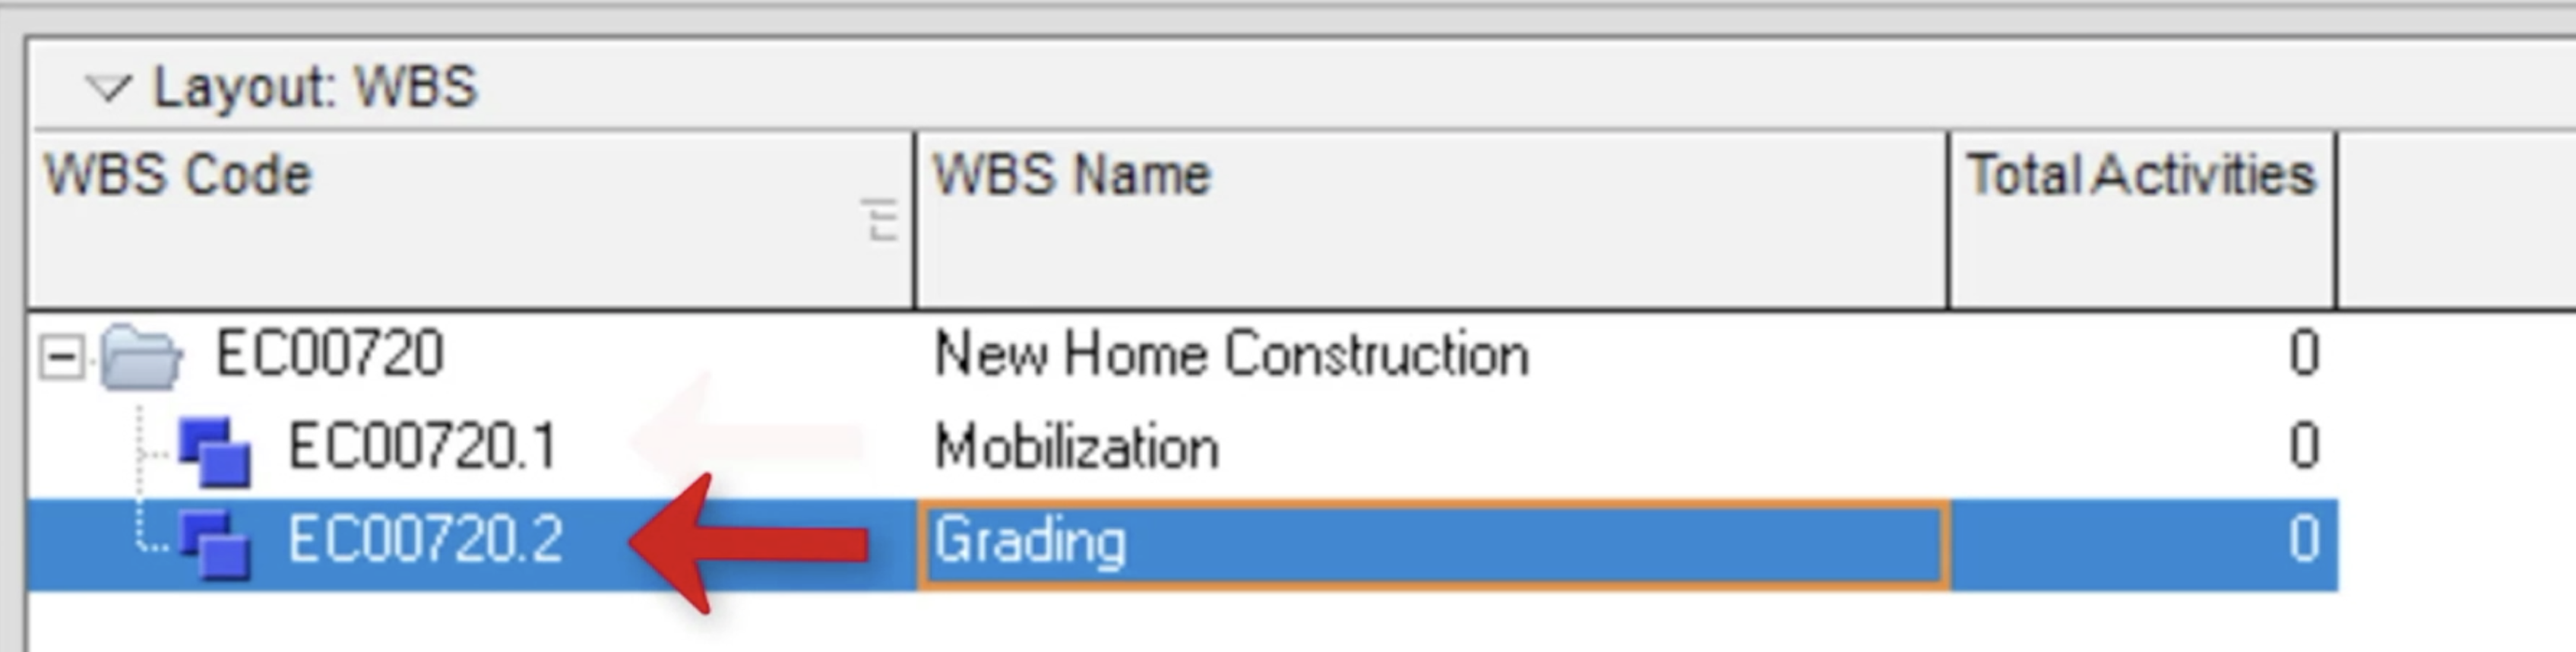 Figure 9
If option 1 is used the WBS code will be correct, but we will have to use the arrow button to adjust the order. With either option, we have to use the arrow buttons to create or move the sibling to its’ desired location.
Summary
The WBS can only be modified in the WBS view. You can add, delete and move elements using the arrow keys in the WBS. If you create an element, Primavera P6 will automatically produce an ID code so that you only have to name your element by typing it.
Primavera P6 only allows users to create child elements, however, it is possible to create a sibling. By clicking on the child element, adding a new element, naming it, and by outdenting it, it becomes a sibling of the original child.