Creation of the Work Breakdown Structure (WBS) is an important step in the scheduling process and here we show you how to create a WBS in Primavera P6 Professional.
The WBS essentially is a hierarchical breakdown of all the project deliverables. A deliverable is an end product or service that the project is producing. In regards to the WBS, Primavera P6 Professional is considered a top down scheduling program. This is because you enter the WBS first, and later define the activities required to produce the WBS elements, i.e. deliverables.
Other software programs like Microsoft Project have more of a bottom up approach. Microsoft Project is more suited to first entering tasks and later grouping these tasks together with a summary task, which is the equivalent of the WBS element.
Many consider the top down scheduling approach to be preferable as it has the scheduler first consider the project’s end product or service deliverable, which is the whole purpose of the project. Thus, Primavera P6 Professional helps the scheduler begin with the end in mind, a good and sound practice of proficient project managers.
This article demonstrates how to create a WBS in Primavera P6 Professional. Refer to the following link for a blog primer on Understanding the Work Breakdown Structure (WBS).
Creating a WBS in Primavera P6
Below in Figure 1 is our demonstration project WBS.
 Figure 1
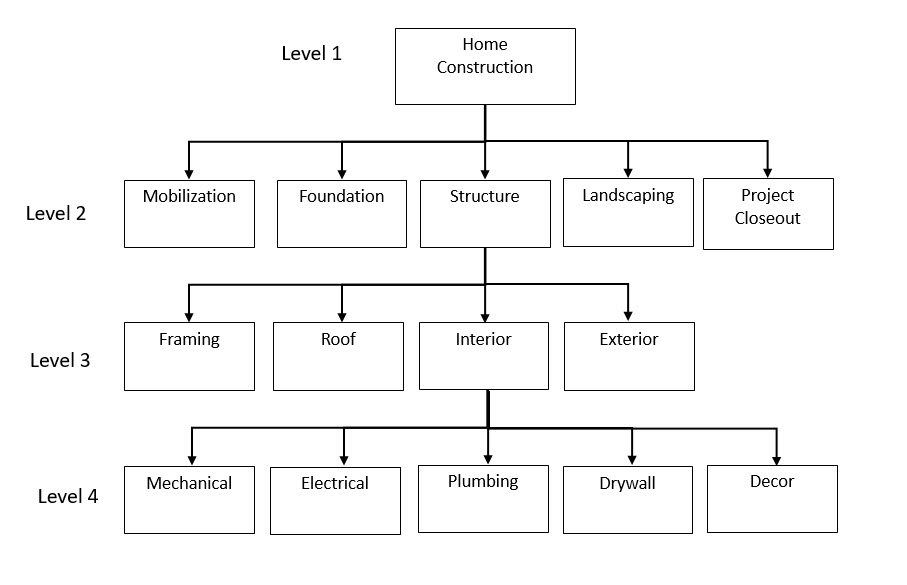
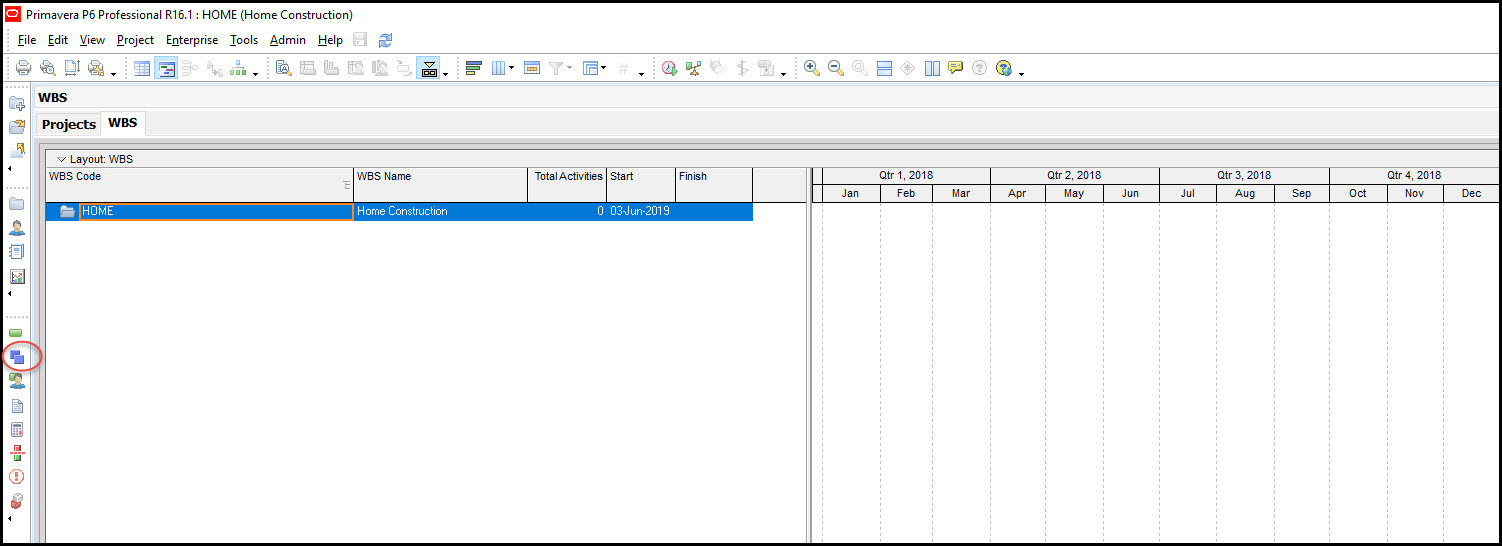
This is a WBS for a home construction project. Our demonstration begins with a recently created project. With our project selected we choose the WBS icon in the project tool group, which brings up the WBS tab, Figure 2.
Figure 2
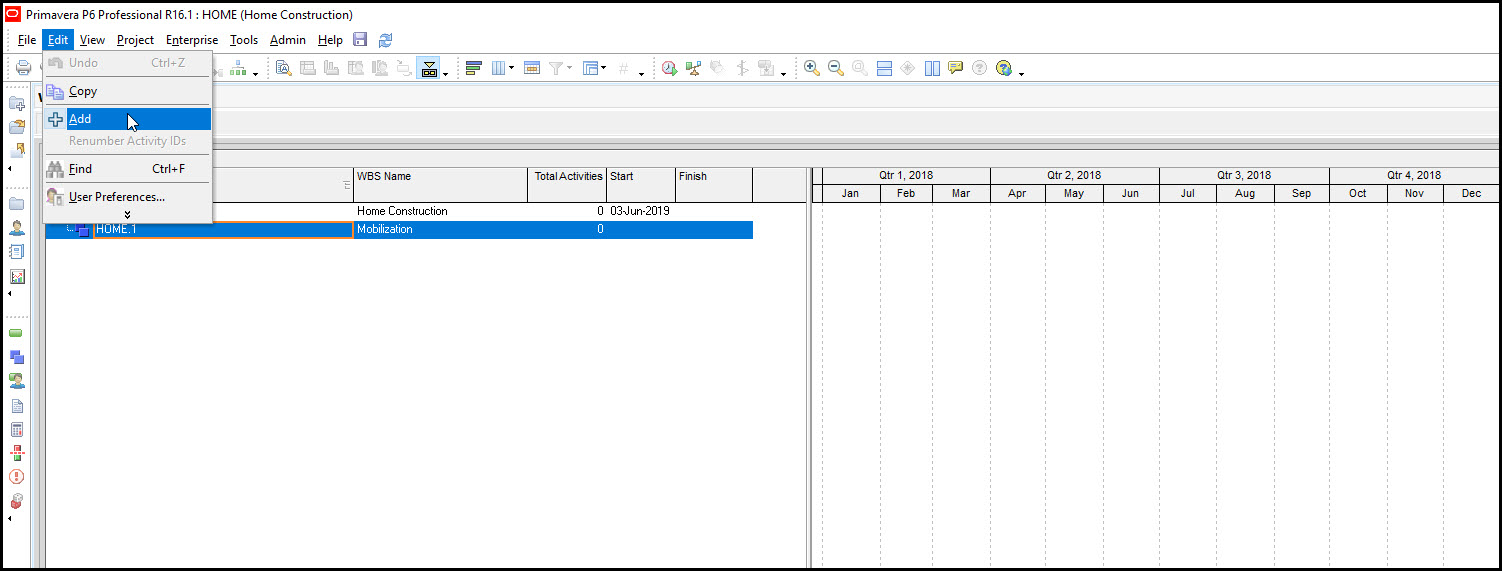
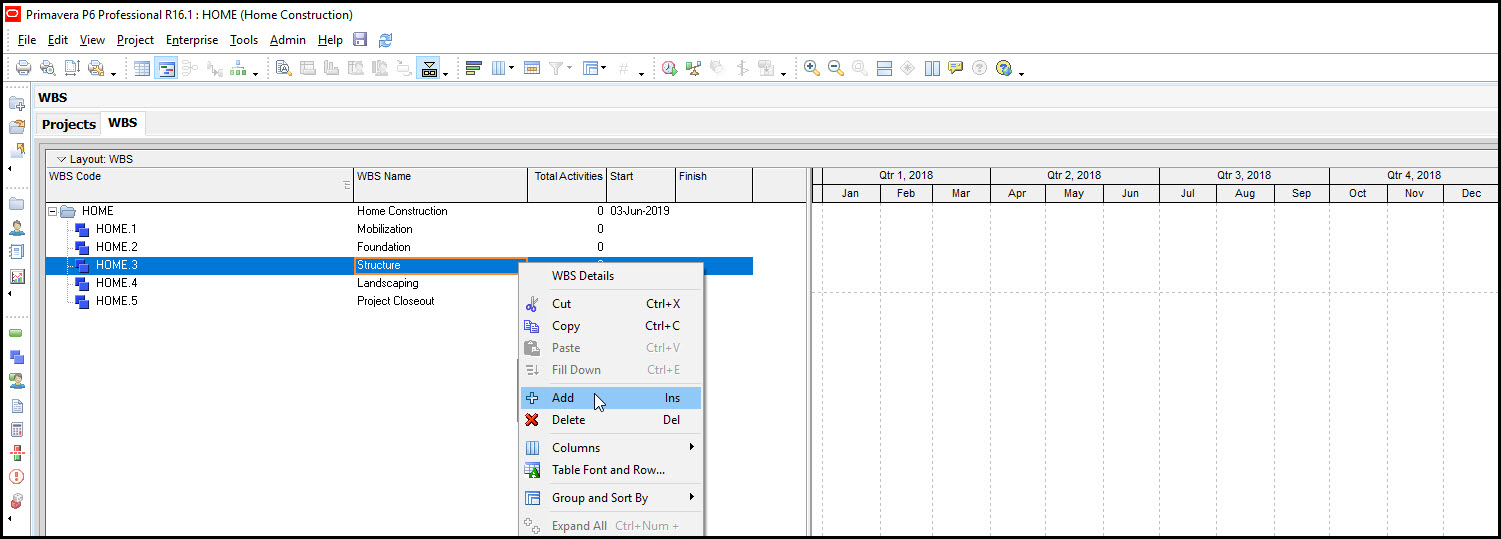
In order to insert our first WBS element we choose Edit | + Add, Figure 3.
Figure 3

This creates a child WBS element of project Home Construction, Figure 4.
Figure 4
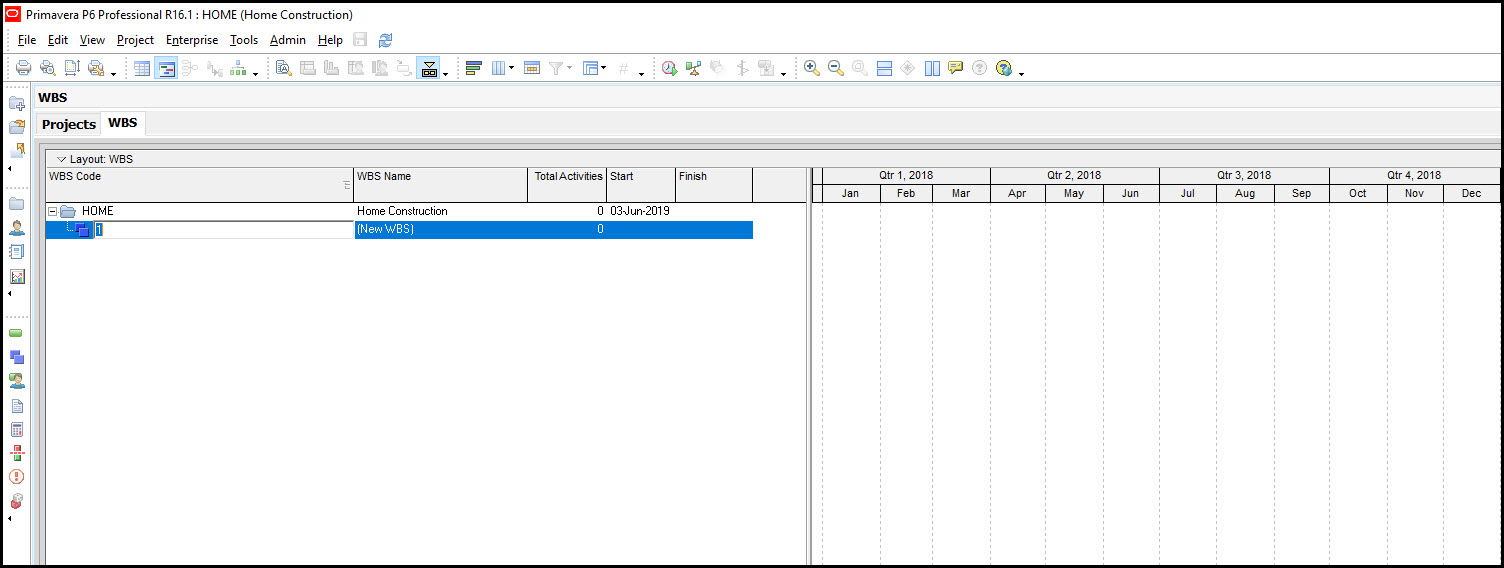
Note in Figure 4 that the cursor is set to update the WBS Code. You do not want to update the WBS Code; let the Primavera P6 software update the WBS Code for you automatically. Instead select the WBS Name field, and enter the WBS Name Mobilization, Figure 5.
Figure 5
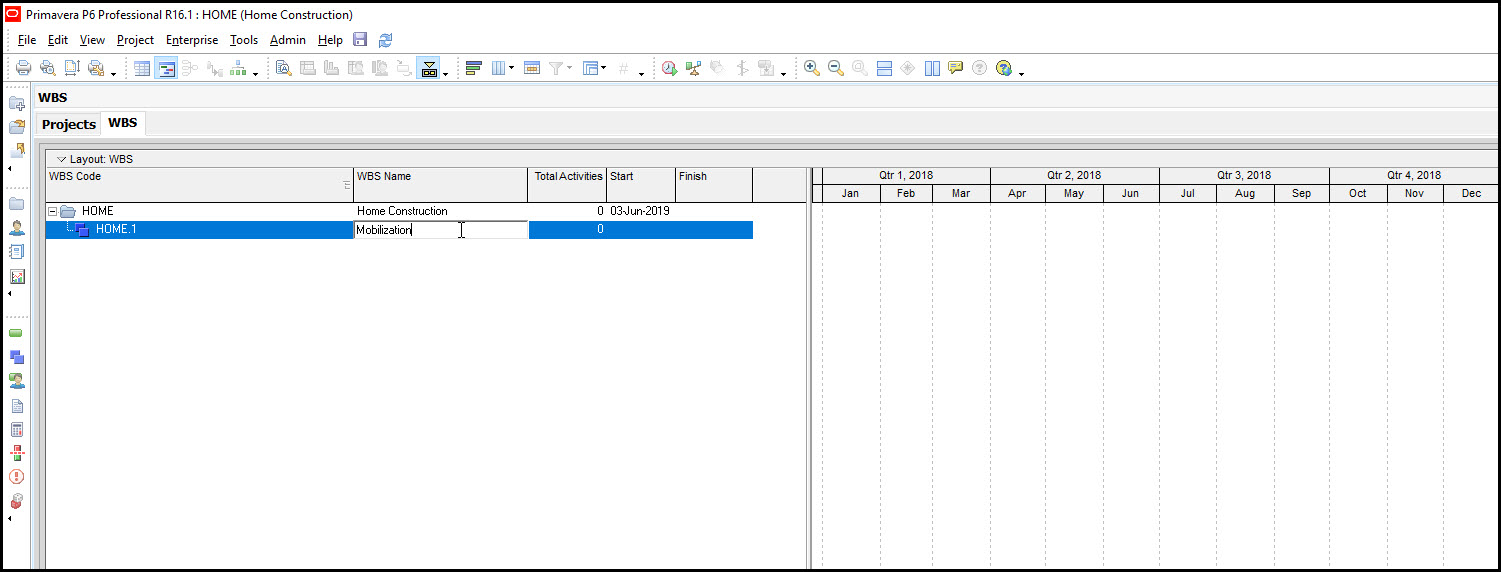
Great! Now we have our Mobilization WBS element entered.
Continue and with Mobilization selected, again, choose Edit | + Add, Figure 6.
Figure 6
This time, Figure 7, we have inserted a child WBS element of Mobilization named Foundation.
Figure 7
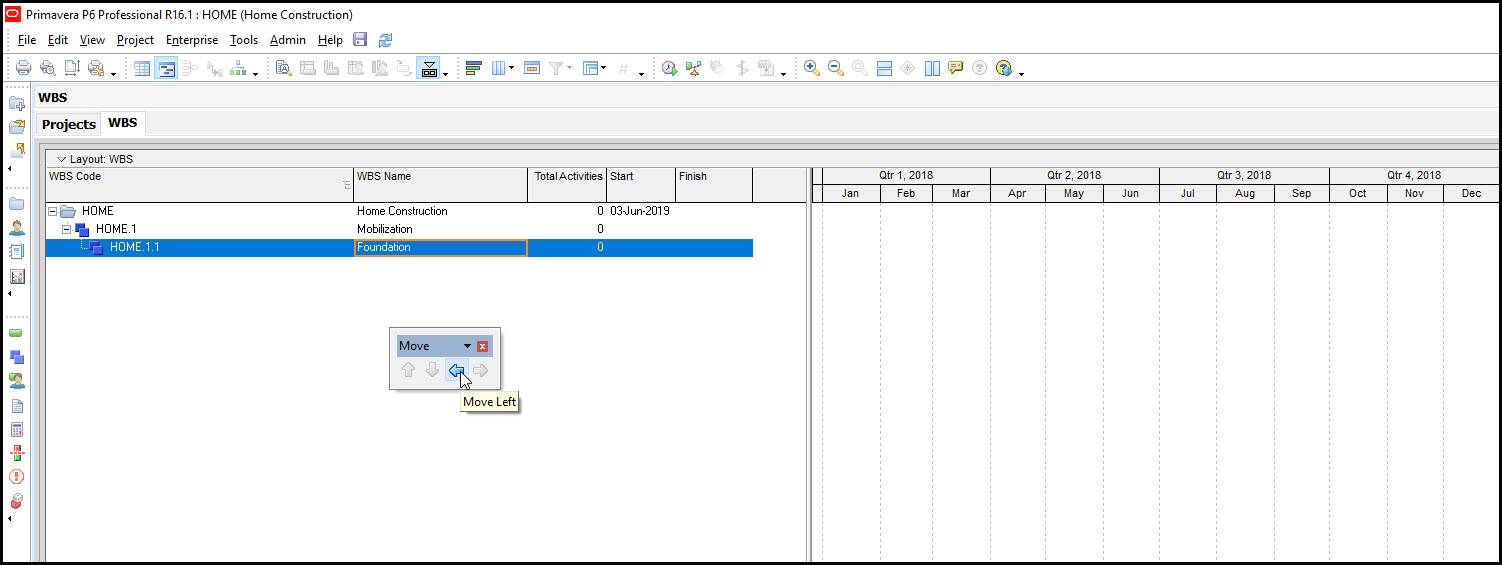
We want Foundation to be a sibling of Mobilization, not a child. We have to raise Foundation’s level in the hierarchy. On the far right of the screen is the Move tool group. Relocate this tool group in our screens current workspace, Figure 7. Click the Move Left icon to make Foundation a sibling of Mobilization, Figure 7. We also note that every time we add a new WBS element it creates a child of the highlighted WBS element.
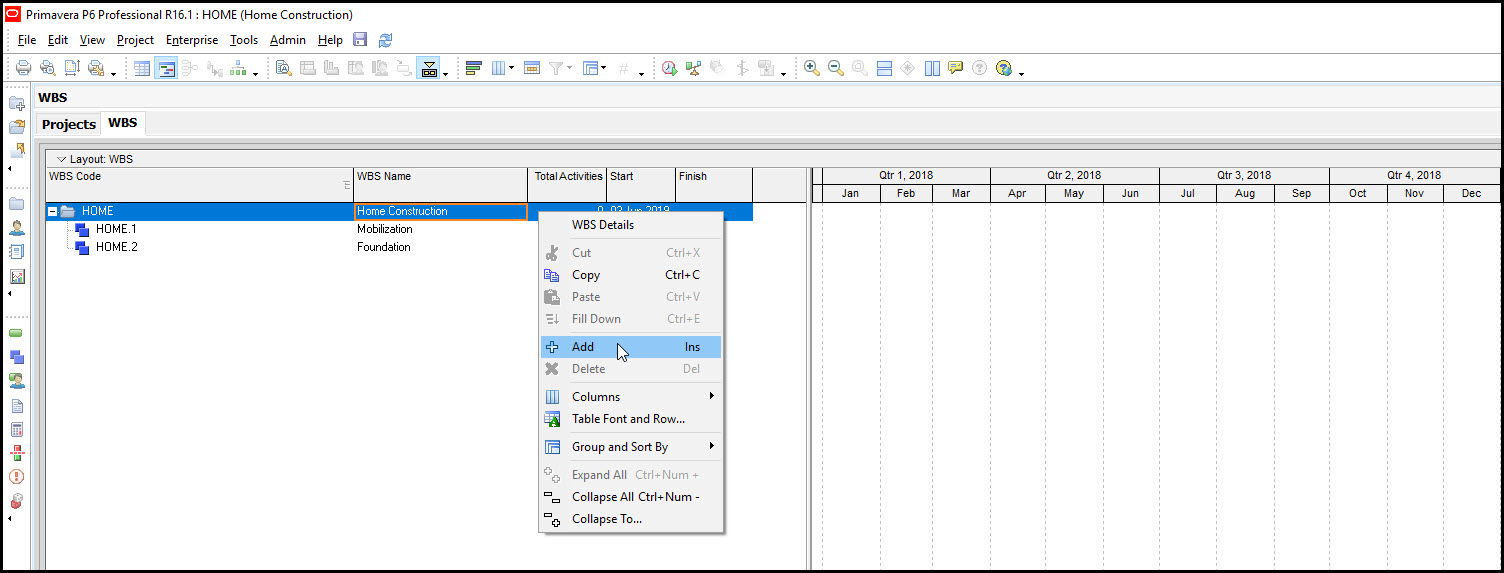
We want our next WBS element to be a sibling of Mobilization and Foundation. To do this we highlight Home and select Edit | + Add, Figure 8.
Figure 8
Enter the WBS Name Structure and we now have a sibling WBS element of Mobilization and Foundation. But the WBS elements are out of order, Figure 9.
Figure 9
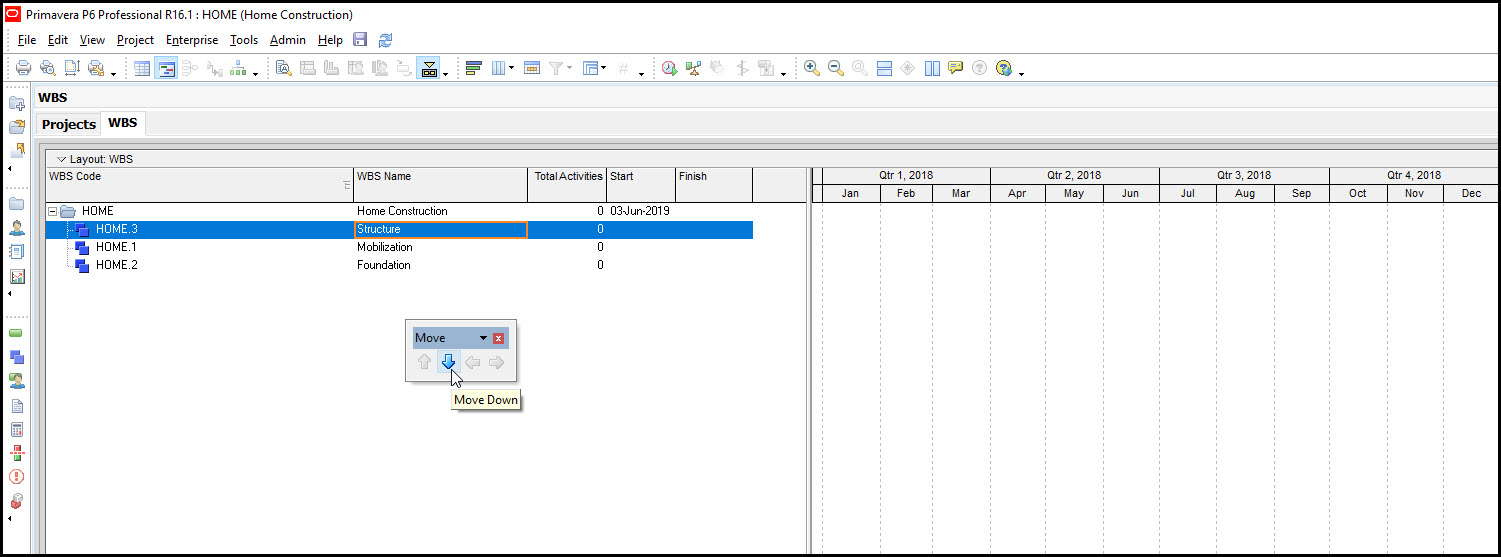
We want Structure just below Foundation, so we move it down in the list, Figure 9.
In Figure 10 we have our completed WBS level 2.
Figure 10
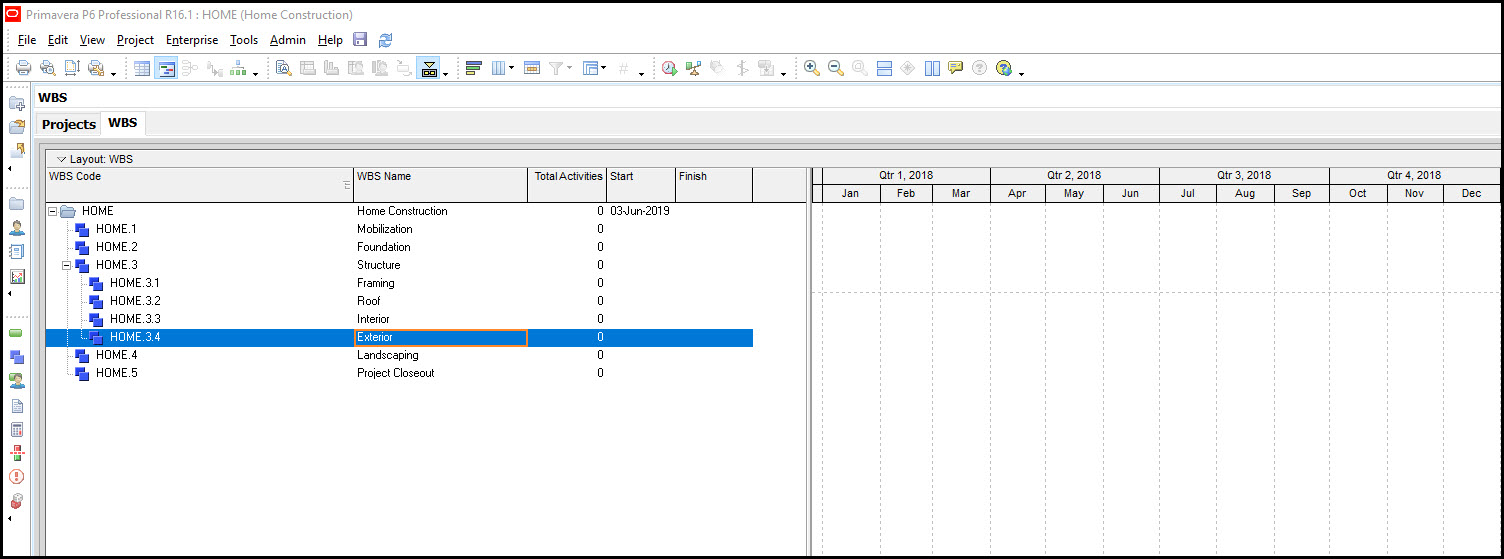
We want to continue and insert several children of Structure. Again, with Structure highlighted select Edit | + Add, Figure 10. In Figure 11 we have inserted all the children of WBS element Structure.
Figure 11
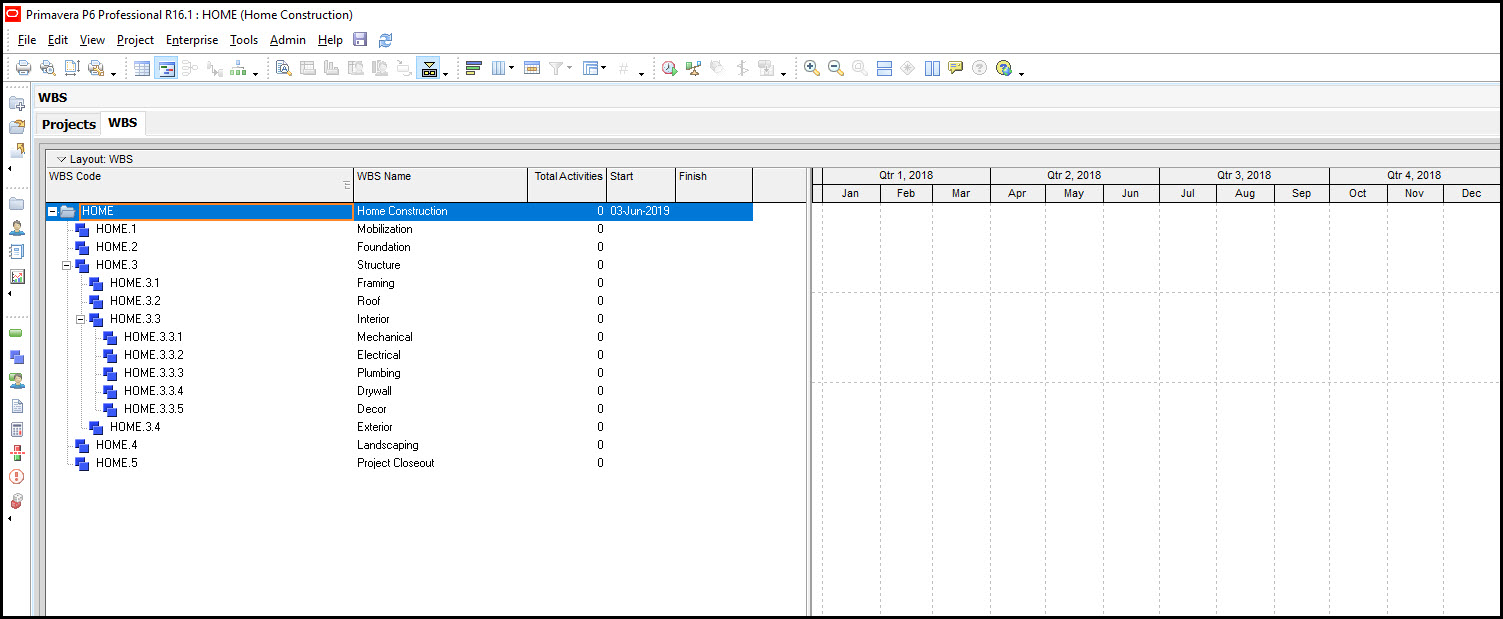
We proceed and add several children of Interior. And we now have our completed WBS for the Home Construction project, Figure 12.
Figure 12
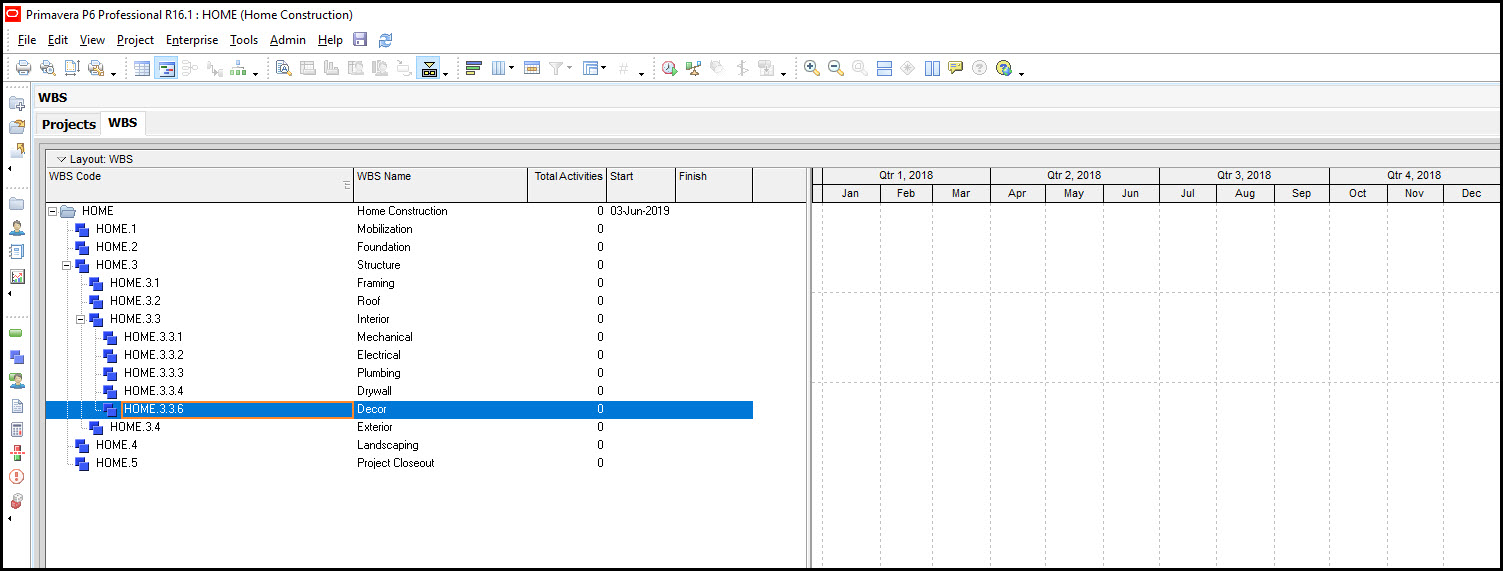
Now let’s say WBS element Décor is not labeled correctly. It should be item 6. In Figure 13 we manually enter item 6 for Décor.
Figure 13
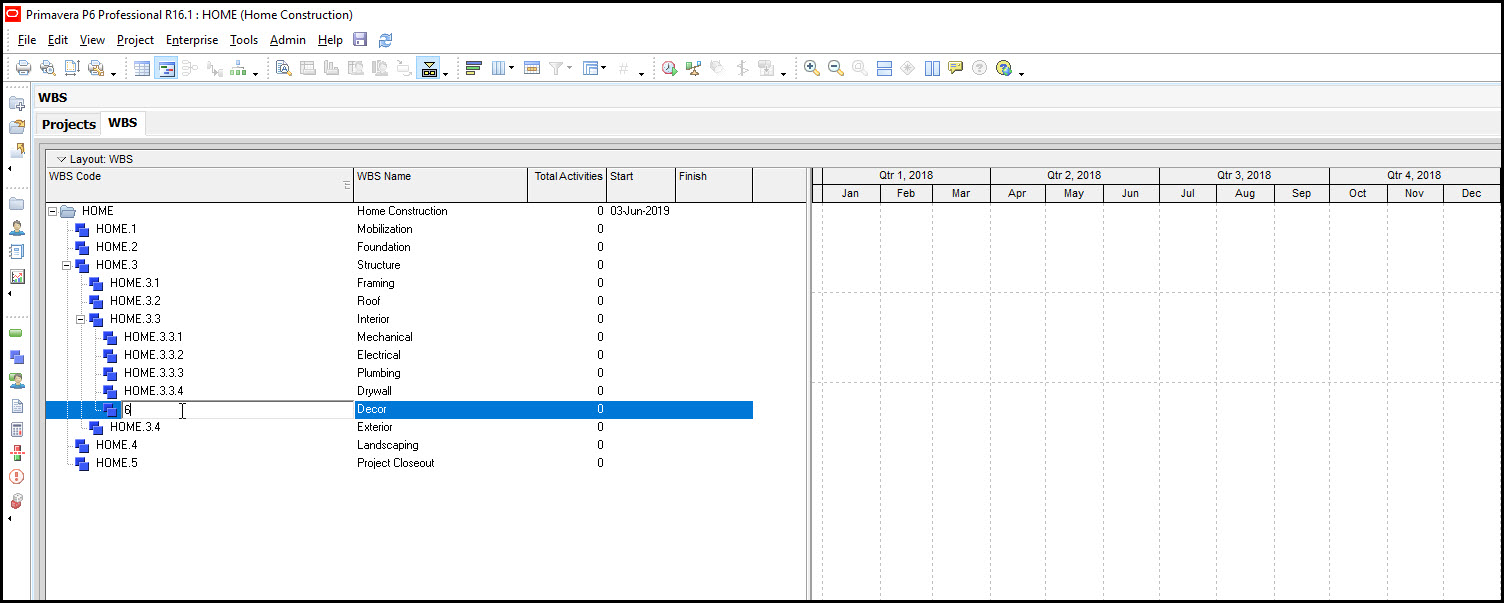
We only need to enter the last value. Primavera P6 automatically appends the 6 to the parent WBS element, Figure 14, to make the WBS element Home.3.3.6.
Figure 14
Obviously, we prefer Décor to be labeled item 5, so we change it back to Home.3.3.5.
Let’s look at our completed WBS in the chart view. Select the chart view icon, Figure 15.
Figure 15
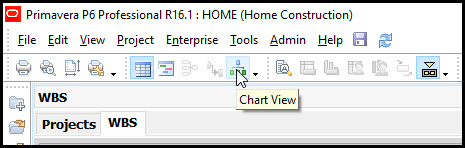
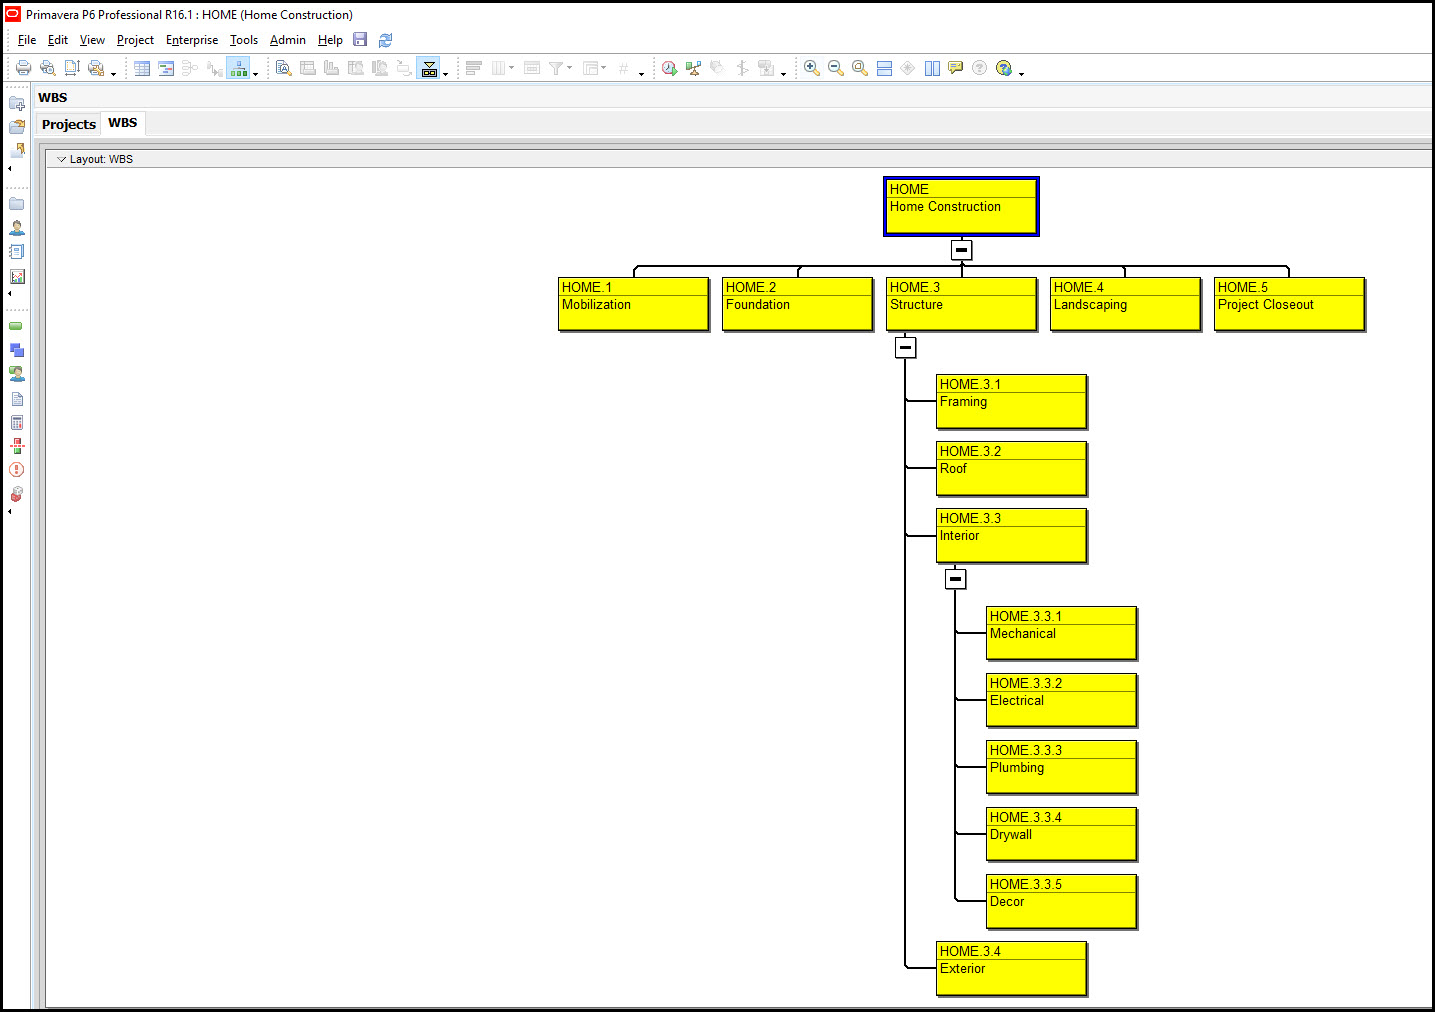
Figure 16 displays our final schedule in chart view.
Figure 16
Summary
The WBS represents a major phase in the scheduling process. The WBS provides a complete view of the final product. Primavera P6 Professional works best when the WBS is entered before any activities.
It is also good project management practice to begin with the end in mind, i.e. start with a focus on the end product or service deliverable. Primavera P6 Professional encourages this proper endgame focus throughout the planning stages of the project schedule.