Do you know how to create PDF files of your Gantt chart and activities table? One of the challenges of creating a schedule is to make it understandable to stakeholders, but if you cannot provide them your schedule in a presentable format, that’s a problem. Many of the print features in Primavera P6 EPPM are similar to what you would find in any standard Microsoft Word software program. However, it’s worth noting a few features in Primavera P6 EPPM that will make printing your schedule a smoother process.
This article briefly discusses the Primavera P6 EPPM Release 8.3 print options you will want to be aware of to make printing PDF files of your schedule an easy process.
The first step is to specify your paper size. You will find that paper size quickly becomes an issue; most of us do not have the luxury of printing on Arch-E sized sheets of paper. Most printers do have the ability to print legal or 11×17 sheets of paper. To select paper size among other settings select Actions | Page Setup… In the Page Setup dialog, Page Layout tab, Figure 1, choose the legal sized paper from the size drop down menu.
 Figure 1

Make the orientation landscape. You may also want to minimize the margins.
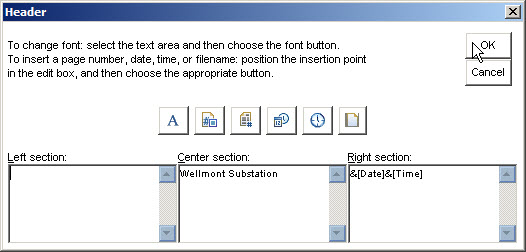
The Header/Footer Page Setup tab provides many of the same features you will find in Microsoft Word including page, number of pages, filename, and date & time stamps, Figure 2.
Figure 2
The challenging part or part that requires tweaking is the Sheet Page Setup tab, Figure 3.
Figure 3
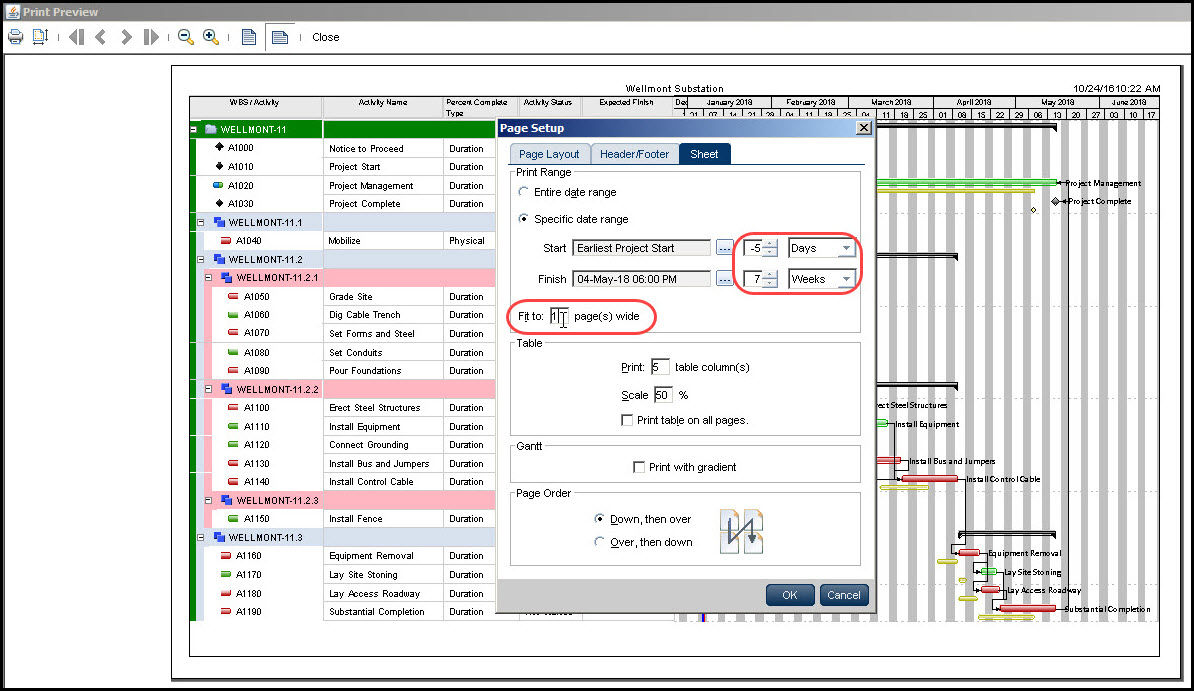
The first setting you will want to specify is how many pages wide your print out will be. Having set the pages wide the next setting to note is the Table setup. You will need to specify the number of columns to print in your activities table. No, it doesn’t just print the number of columns displayed on the screen. Select an appropriate scale so you can see all your desired columns and Gantt chart. This is where most of the tweaking takes place. If you have a really wide Gantt chart that will not fit on one page toggle ‘print table on all pages’, so the activities display next to the Gantt chart on all your sheet printouts.
Another important feature to note is the Print Range, Figure 3. You can either toggle the entire date range or a specific date range. We recommend you toggle the specific date range. From the ellipse button you can select project start, data date, current date, or custom date.
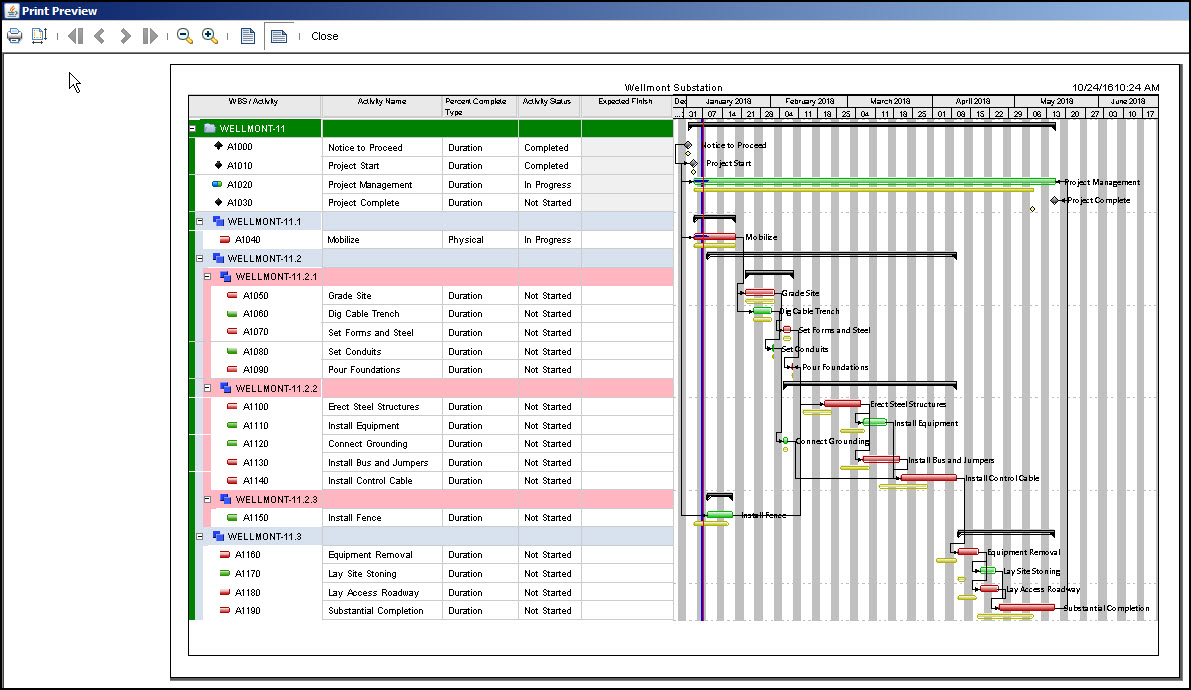
Let’s assume you want to plot from the beginning of the schedule, so select project start. Now to make certain the relationship arrows are visible on the Gantt chart modify the start date by subtracting a few days. Select custom date to enter the Finish date and modify it by adding a few weeks. Adding a few weeks this way ensures you can fit your activity labels on the Gantt chart. Now you are ready for a print preview. Your settings may require some tweaking, but with a little effort you should get a schedule PDF printout similar to Figure 4.
Figure 4
Summary
Yes, you can print a PDF of your project in Primavera P6 EPPM R8.3 to support dissemination of your schedule to stakeholders. You will want to specify how many pages wide and the number of columns to display along with the scaling. Modify the Start and Finish dates in the date range to make relationship arrows and labeling visible on the Gantt chart. Again, it may require some tweaking, but with a little effort you can create PDF Gantt charts for your stakeholders.