How to use curtains in Microsoft Project. When you’re building an Integrated Master Schedule (IMS) for an Agile environment, it’s important to not fall into the trap of making the sprints activities and instead plan the features that are going to be developed. The sprints really don’t represent work, but the time box that work is going to be done in.
But that presents a problem in that it’s not easy to see when features are going to be completed from the Agile/Sprint perspective. The good news is using curtains in Microsoft Project provides a simple reporting mechanism to show when the sprints are occurring, even when they are not defined as tasks. The trick is to use the “Non-Working Day” capabilities in the bar chart to display the sprint periods.
You’re probably going to want to setup a unique view for this. This is because you don’t always need to see the sprints in reference to all the activities in your schedule, particularly if your IMS has activities that are being executed within a different process other than Agile (PM or traditional hardware development).
Once you have copied the standard bar chart (or whichever view you use the most) you can filter the activities down to the activities that would represent work that is done during a sprint and maybe activities immediately impacted by that work (e.g. system testing done after a release).
Once you’ve filtered and/or grouped the tasks to show the areas that the sprints apply to you can right click on time scale above the graphic section of the view and select “Change Working Time…” from the popup menu. This will bring up the Change Working Time dialog seen below:
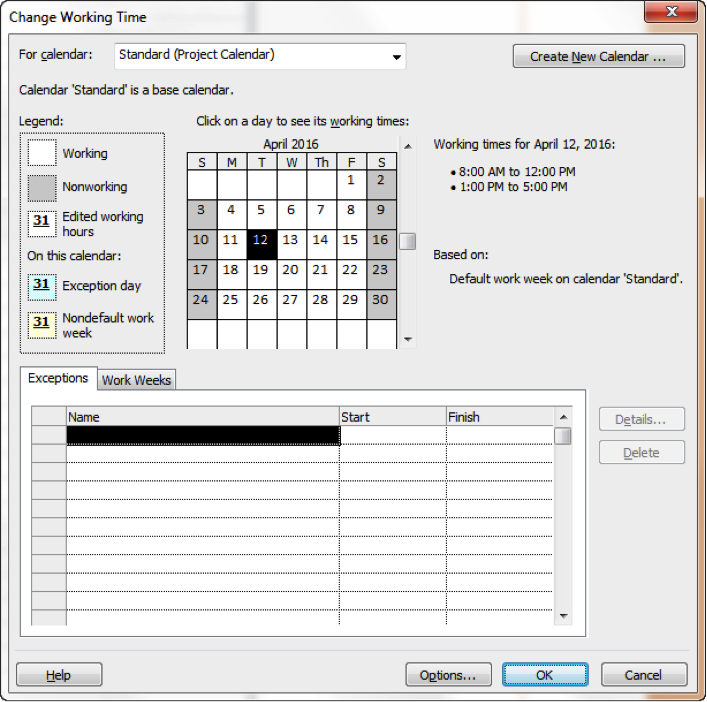 Notice that the default (Standard) project calendar has working and non-working days defined, typically with the weekends being flagged as non-working days. Microsoft Project uses these “Nonworking” periods in the bar chart to show when the weekends are occurring so you can see when an activity crosses over those periods and the remainder of the activity duration is schedule the following week.
It’s a useful tool to help the reader understand why a 3 day tasks that starts on Thursday looks like it takes 5 days to complete, there are two non-working days that occur in the middle. We are going to use the same logic to define a span of time that the sprints are occurring, but we’re not going to have Microsoft Project reschedule the activities around these periods.
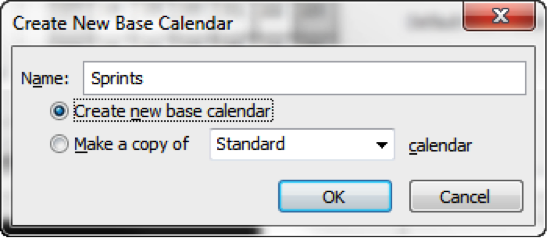
With the Change Working Time dialog open, click on the “Create New Calendar…” button in the top right of the dialog and when prompted give the calendar the name “Sprints” and select the “Create new base calendar” option.
 Now that we have our new calendar created, we are going to want to define the work week a little different for our purposes. In our case, we want to have all 7 days as working days. Click on the “Work Weeks” tab, highlight the [Default] line in the table and then click the “Details” button, which will open the dialog that allows you to define the work week.
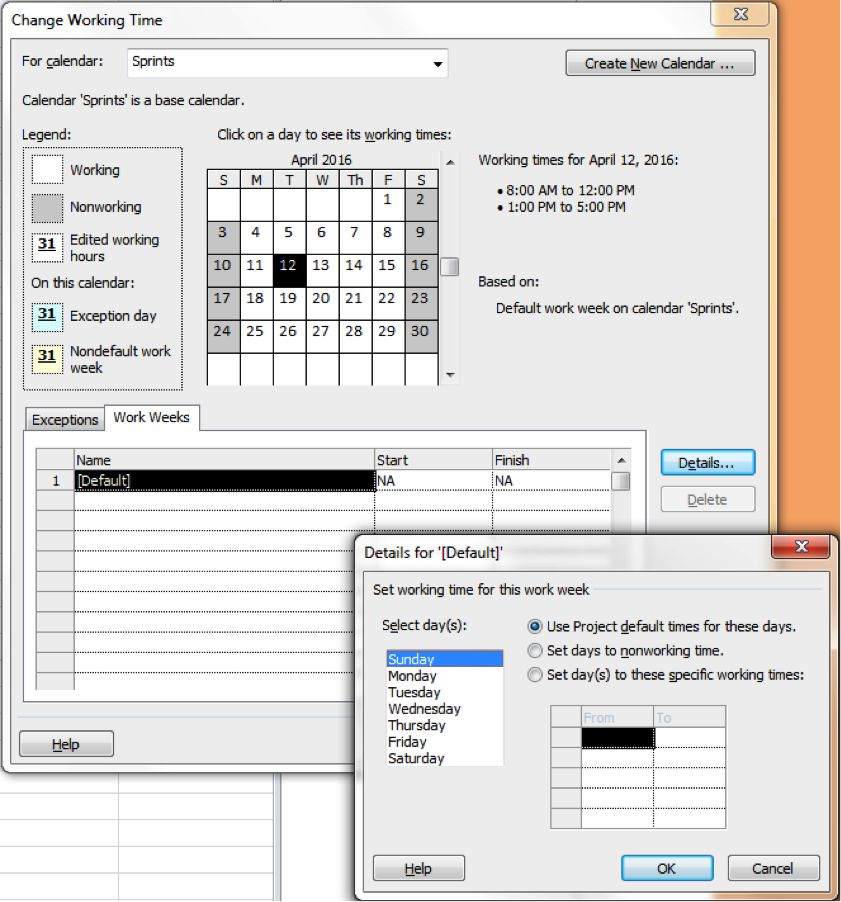 Select “Sunday” and “Saturday” using the Control + Select and then choose the “Set day(s) to these specific working times:” option. You’ll be able to enter in times to make these days working days, for example 8:00 AM to 5:00 PM. Once you’ve redefined the working week to include all days we’re ready to define the sprint periods.
Select the “Exceptions” tab, still in the Change Working Time dialog, and enter in the dates for your sprints as exceptions like below:
 Notice that I skipped Sprint 2 in this example. That is because I want to alternate the curtain color so it is easy to see when a sprint starts and finishes. This will become more apparent when we use this calendar in the Gnatt chart in a minute.
Once you’ve setup your sprint calendar you are ready to use it in the Gnatt chart so display the sprints. From the bar area of the view right click and select the “Non-Working Time” from the popup menu. (You can also get to this by right clicking on the time scale portion of the Gnatt chart). This will take you to a tab in the Timescale dialog that you identify the calendar to use for the nonworking days.
In the “Non-Working Time” tab of the Timescale dialog you will select the calendar we defined in the first part so that the bar section of the view will shade those dates we defined in the Exceptions area. You can choose which ever color you want and then select to Draw the bars “Behind task bars”.
 Once you’ve made these selections click OK and you’ll see your Features schedule against a calendar with the references for the Sprints showing as curtains.
 By using curtains in Microsoft Project, you can see that Feature A in this example will be fully done over two sprints and Feature C will be completed in the third sprint. Also note that the activities are still being scheduled using the “Standard” calendar, so you get a real representation of when the things are going to be done based on the duration input.
We did this example of using curtains in Microsoft Project with Agile as the context. But the same capability can be applied to all kinds of time-spans that you want to show within a Gantt Chart to communicate when activities are happening in reference to some time block. It might be when the warranty period starts, important project meetings are occurring, or many other examples. Do you use curtains in Microsoft Project? Let us know how you use this capability in your scheduling!