If want to display a Notebook Topic on your Gantt chart, Primavera P6 has a great way for you to display a Notebook Topic on a Gantt chart bar.
Activities displayed as single bars on a Gantt chart can have associated steps that provide further definition to these particular activities. Steps are great for providing more definition to an activity, but the Gantt chart will not display this additional defining information. Placing a Notebook Topic next to the Gantt chart bar will provide additional clarification about the respective activity bar.
This article describes how to associate Notebook Topics with Gantt chart bars to provide clarifying information about the bar.
Preparing the Gantt Chart
To get started, we have a schedule shown in Figure 1.
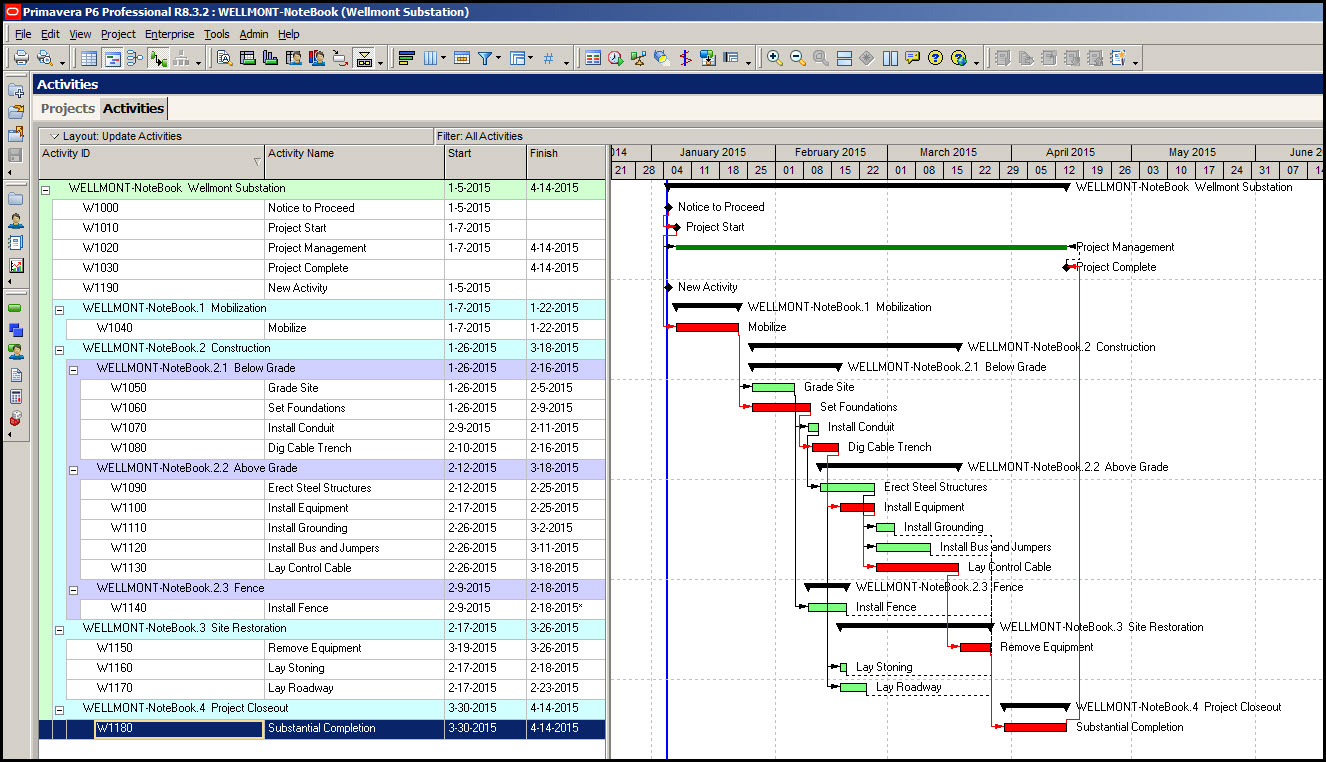 Figure 1
Note the Gantt chart labels to the right of each bar. For the purposes of our demonstration we want to delete these Activity Name labels, Figure 2.
 Figure 2
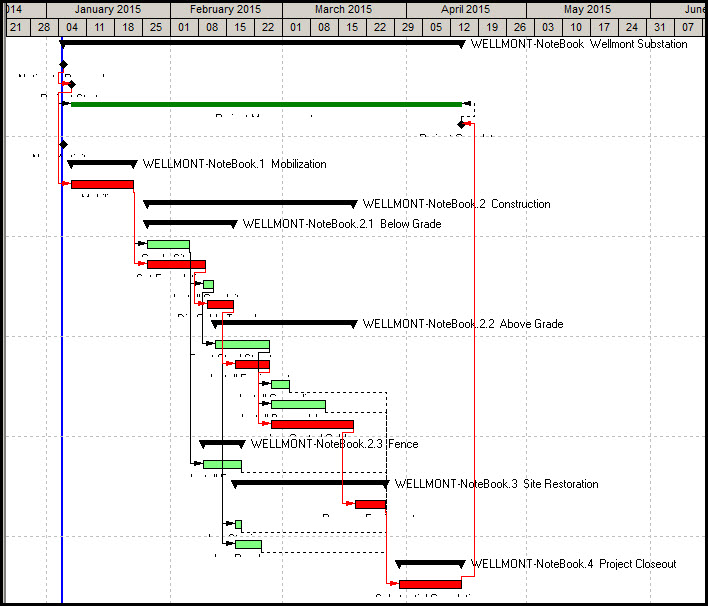
Reinsert these Activity Labels on the bottom-center of the bars, Figure 3.
Figure 3

Your Gantt chart will appear similar to Figure 4.
Figure 4
Note that you, most likely, will not be able to see the bar labels clearly because the row height is too small. To adjust the row height select View | Table Font and Row from the drop down menu at the top of the screen. This brings up the Table, Font and Row dialog, Figure 5.
Figure 5
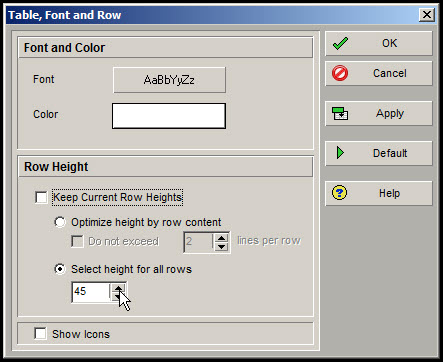
Uncheck the ‘Keep Current Row Heights’ toggle, and adjust the ‘Select height for all rows’ to a greater height, such as 45. Now the schedule will look similar to Figure 6.
Figure 6

Gantt Chart Notebook Labels
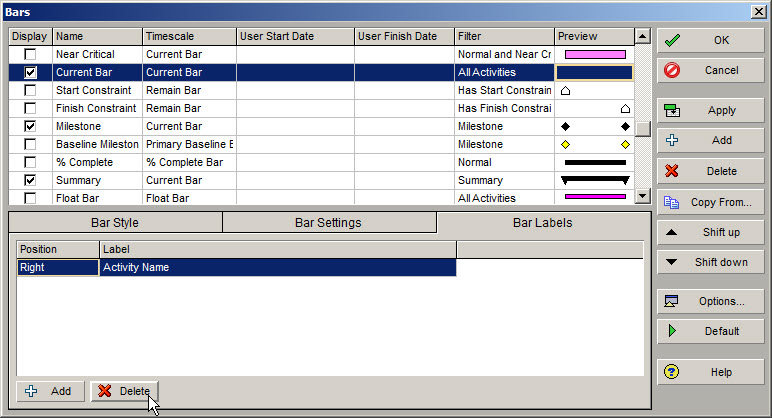
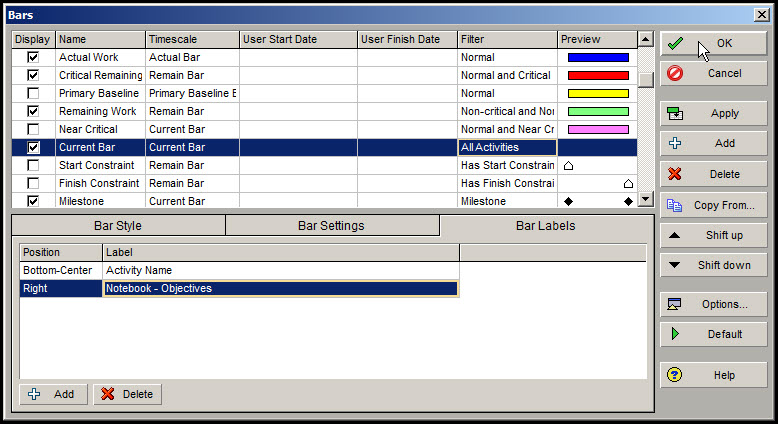
In the Bars dialog, Figure 7, add the Notebook – Objectives label to the Current Bar.
Figure 7
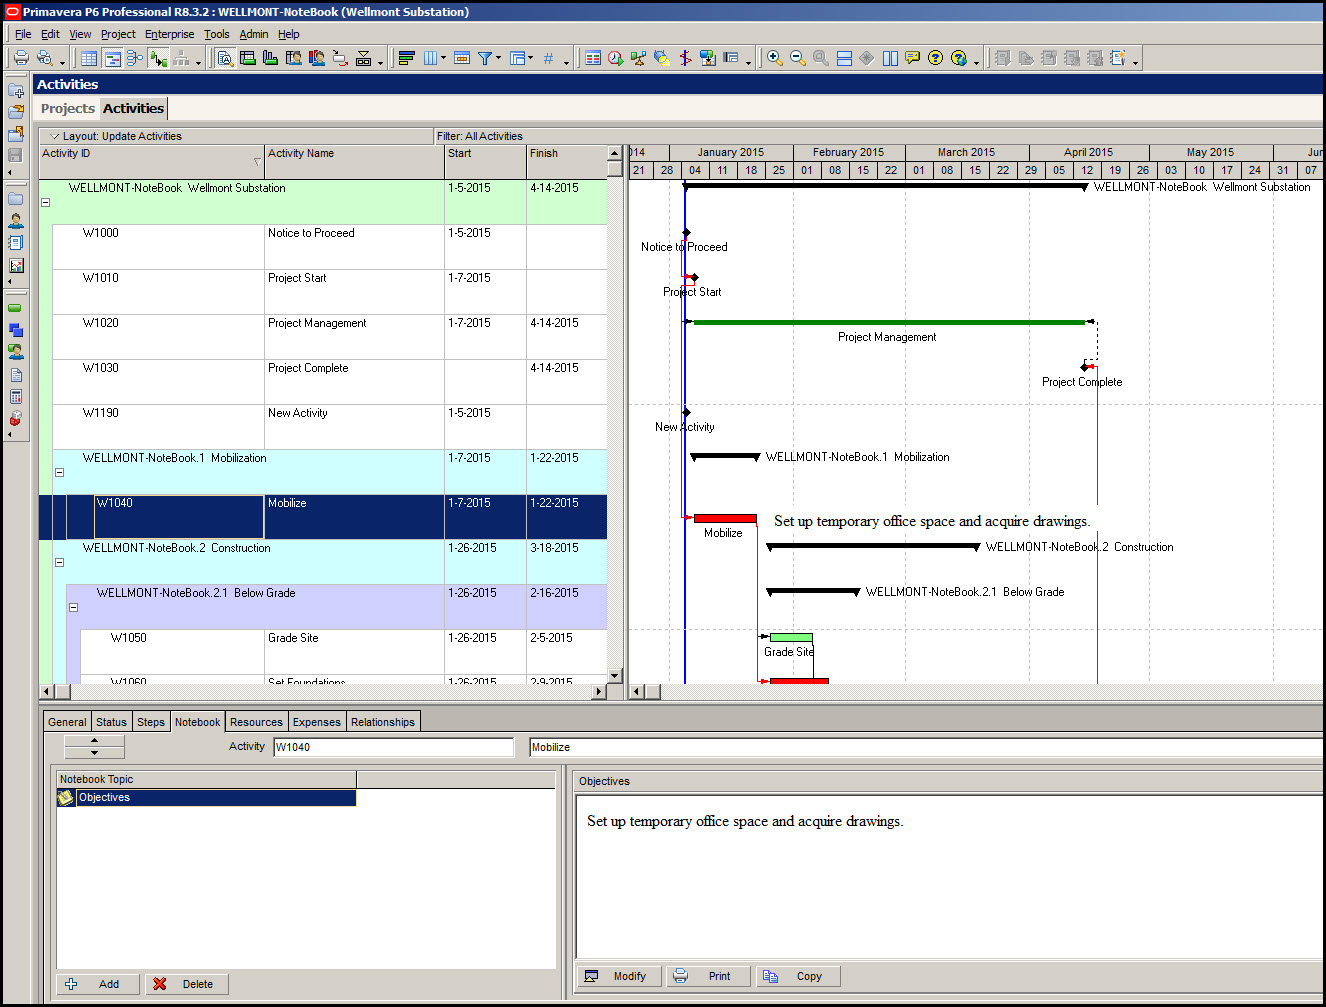
Select the activity where you want to display the Notepad label. Next display the bottom details for the selected activity. Select Notebook from the tabs displayed at the bottom of the screen, Figure 8.
Figure 8

Select the + Add button and from the resulting Assign Notebook Topic dialog select the Objectives Notebook Topic and assign it. Next select the Modify button on the right hand side and type in your Objectives Note. After typing in the Note click OK.
Now the next step may seem trivial, but it is very important. You must now left click on the Gantt chart with your mouse, Figure 8. If you don’t immediately left click on the Gantt chart after modifying the Note, your note will disappear. After left clicking on the Gantt chart your Notebook label should appear similar to the Note in Figure 9.
Figure 9
In Figure 10 we have repeated the process of adding an Objectives Note to the Set Foundations activity.
Figure 10
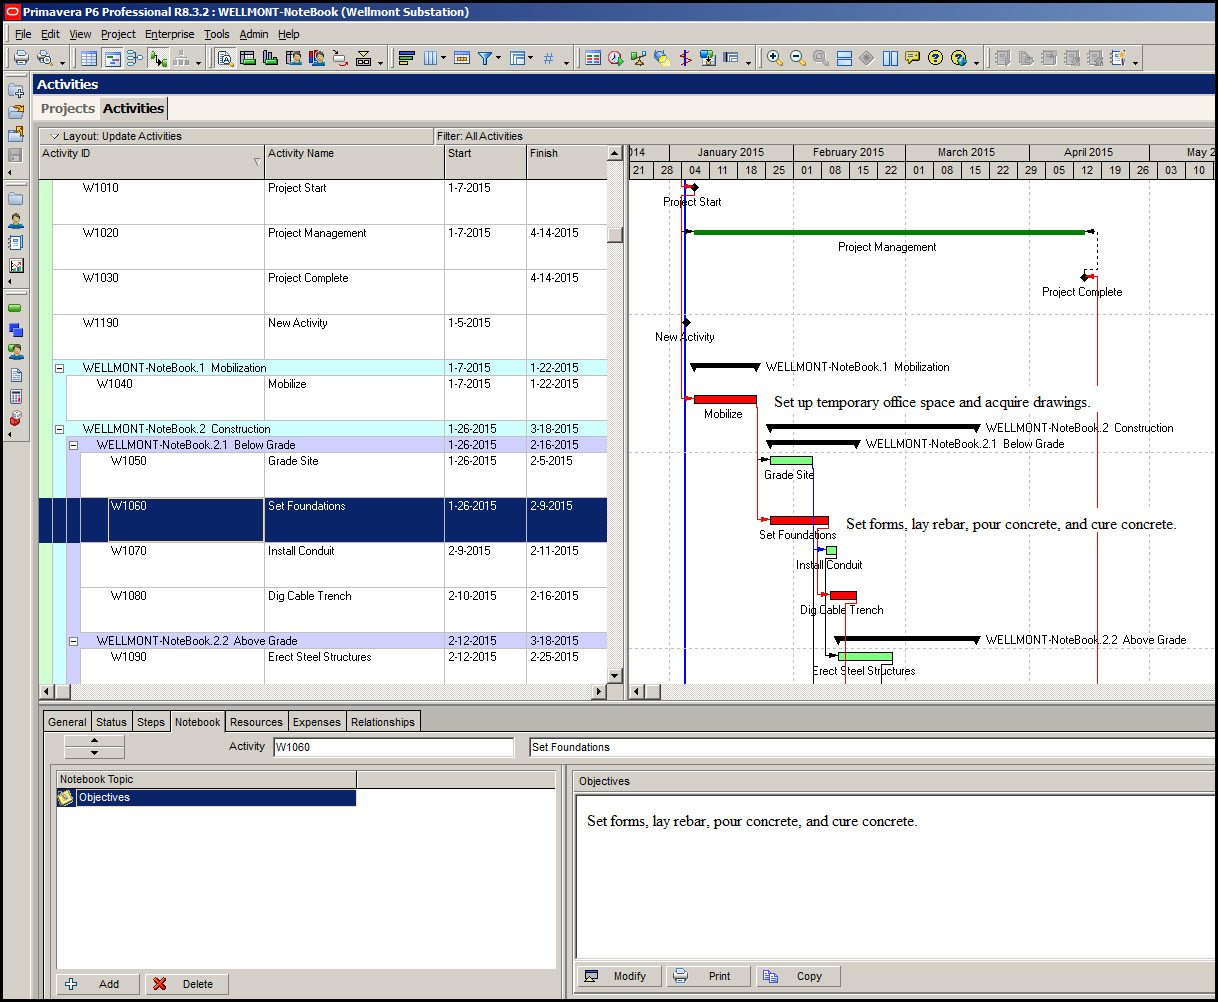
Again, the process is to:
- Add Notebook – Objectives to the appropriate Bar, in our case the current bar
- Select the activity where you want the Note to appear
- Select the Notebook tab in the bottom details
- Add/Assign an Objectives Notebook Topic
- Modify the Notebook topic
- Again, an important step, left click anywhere on the Gantt chart and your Note will appear on the Gantt chart next to the activity you assigned it to.
Summary
Sometimes you want to describe an activity on the Gantt chart in more detail. You can assign Notepad topics to the right of any Gantt chart bar. If you do this you will first want to move the Gantt chart name labels to the bottom of each respective bar.
You can choose from any number of Notepad topics. And you can write anything you want in the respective Note. Primavera P6 also allows you to add additional Notepad topics if you desire.
Remember! The secret to getting this to work is to immediately left click on the Gantt chart after you click OK in the Modify – Objectives dialog.