![]() We’ve produced a short video, ‘How to Use a Project Baseline in Primavera P6’ where you can see the different types of baselines in use and how to create them. This will help you get a real understanding on how to assign and maintain baselines, in Primavera P6.
We’ve produced a short video, ‘How to Use a Project Baseline in Primavera P6’ where you can see the different types of baselines in use and how to create them. This will help you get a real understanding on how to assign and maintain baselines, in Primavera P6.
You can also see other Oracle Primavera P6 videos by Ten Six here as well as subscribe to our YouTube channel to receive notifications of when we post a new video.
Below is an article also covering the same subject.
A project baseline in Primavera P6 is a snapshot of a schedule taken before work commences on a project, hence the name ‘project baseline.’ The project baseline is the approved copy of the project schedule. It is created with the approval of the stakeholders and remains static.
This project baseline is the benchmark and is what project performance will be measured against to make sure the project remains on track.
It is generally accepted best practice that every project should have a baseline schedule model in place before the beginning of any project work. When the project commences, when there are changes to the schedule, these variances will show against the baseline. Any variances may include dates, durations, or costs, as shown below in Figure 1.
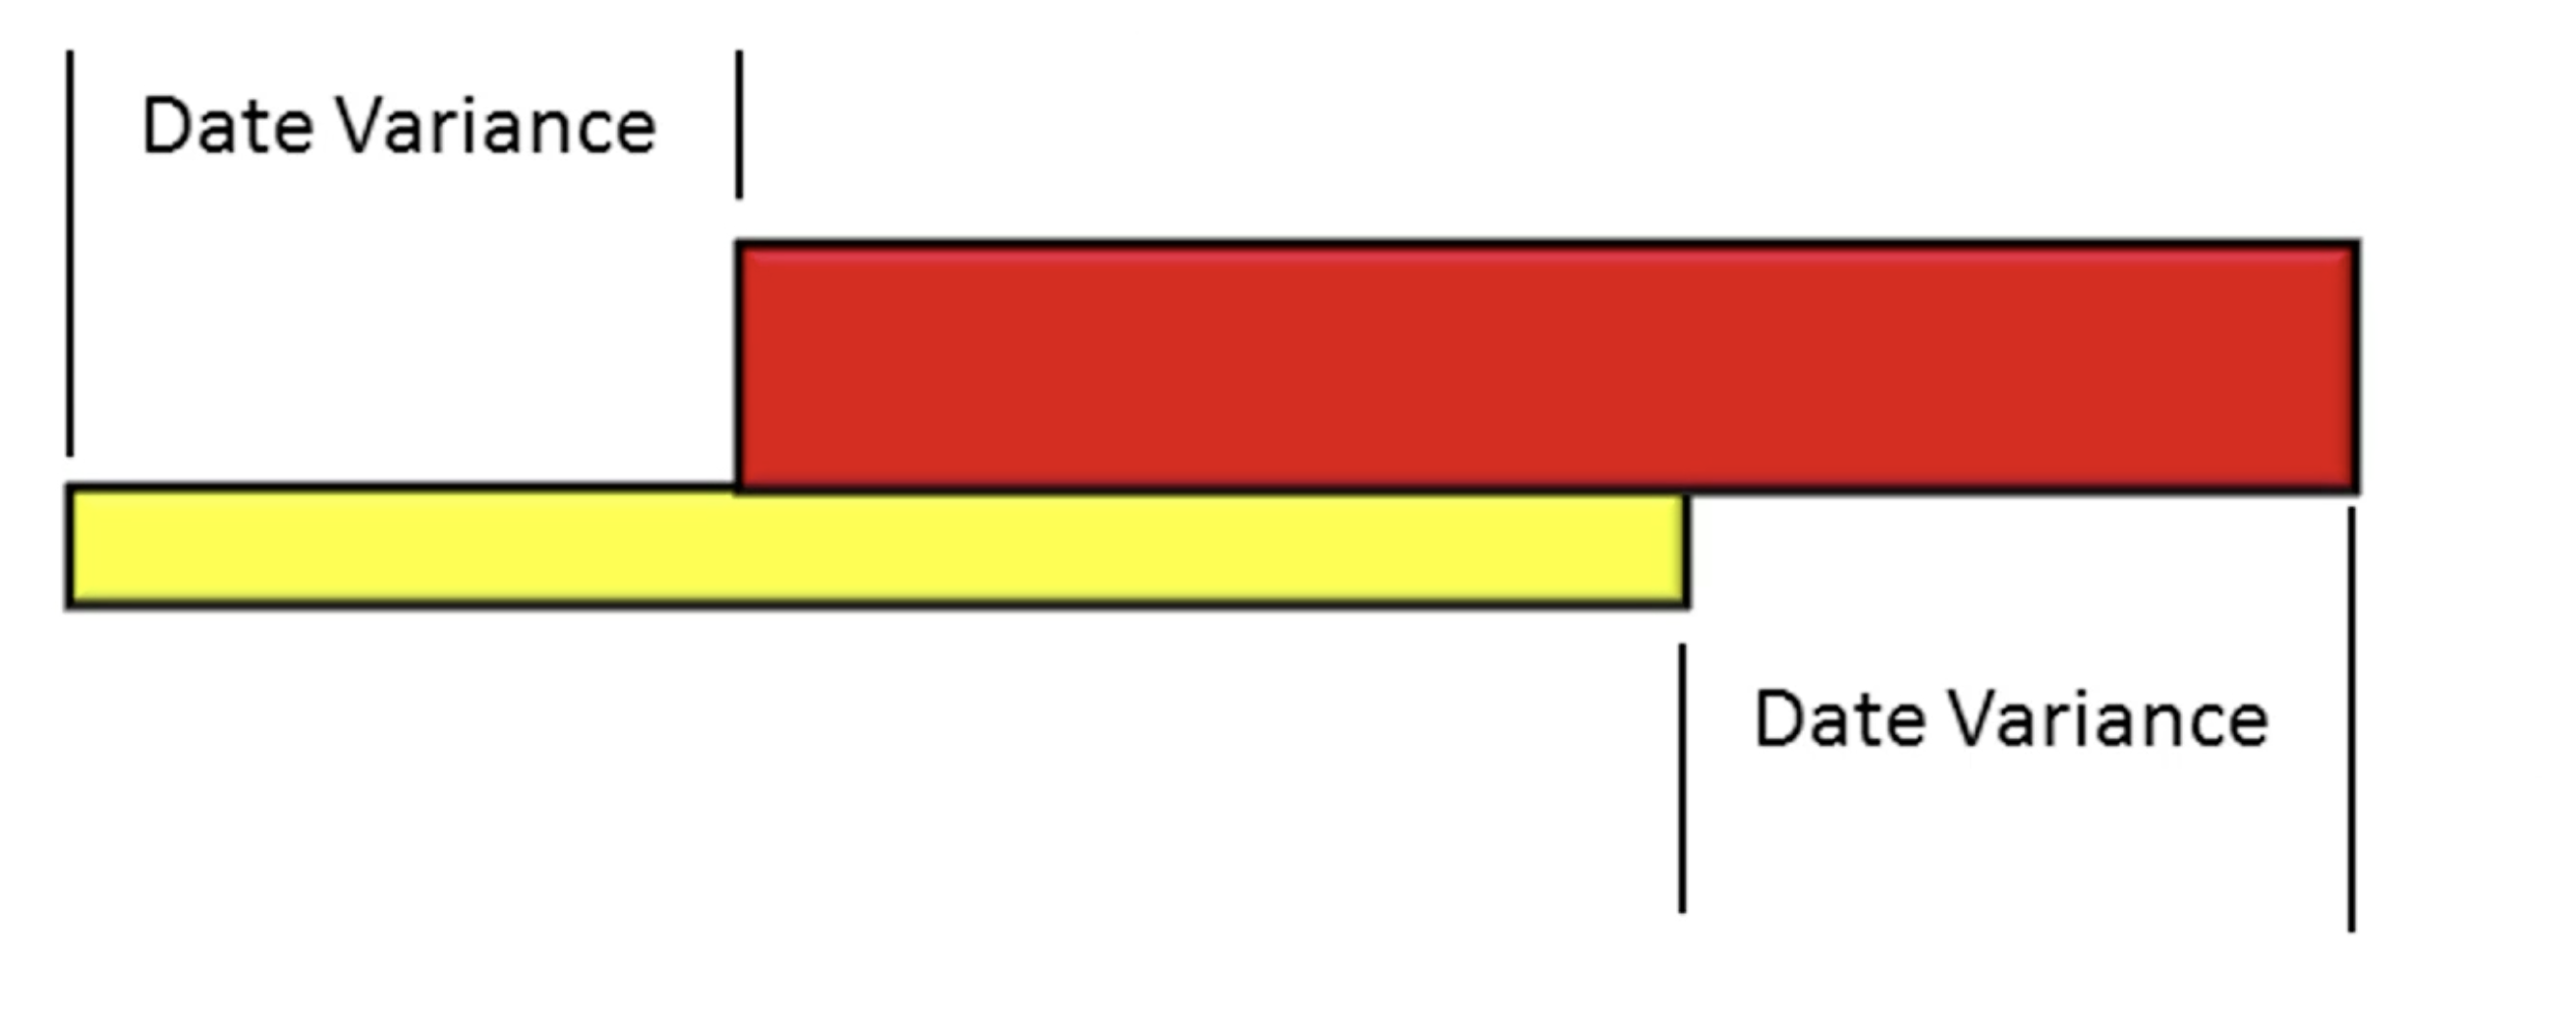 Figure 1
Why is a Project Baseline so important?
If there are changes in the actual execution of the work, these will alter the forecast dates throughout the remaining schedule. Without a baseline to measure this variance against, it is easy to lose sight of the original plan. And this can result in cost implications as well as credibility being lost within the company or with stakeholders and customers, to name a few.
Without a project baseline, there isn’t a way to track variance, and without variance tracking, there will be no early warnings of potential issues. These can quickly evolve into major problems that can result in the project team firefighting to regain control of the schedule and project.
Therefore, a project baseline is a vital tool that is useful in supporting effective scheduling.
Types of Baselines
Although the project baseline acts as the control schedule at the start of the project, Primavera P6 allows schedulers to use up to three different baselines throughout a projects’ life-cycle. These are ‘User Baselines’ and are called Primary, Secondary, and Tertiary, as shown below in Figure 2. They are used to display snapshots of the project as it progresses. When a ‘User Baseline’ becomes assigned to a project, it functions as a frozen copy of the schedule.
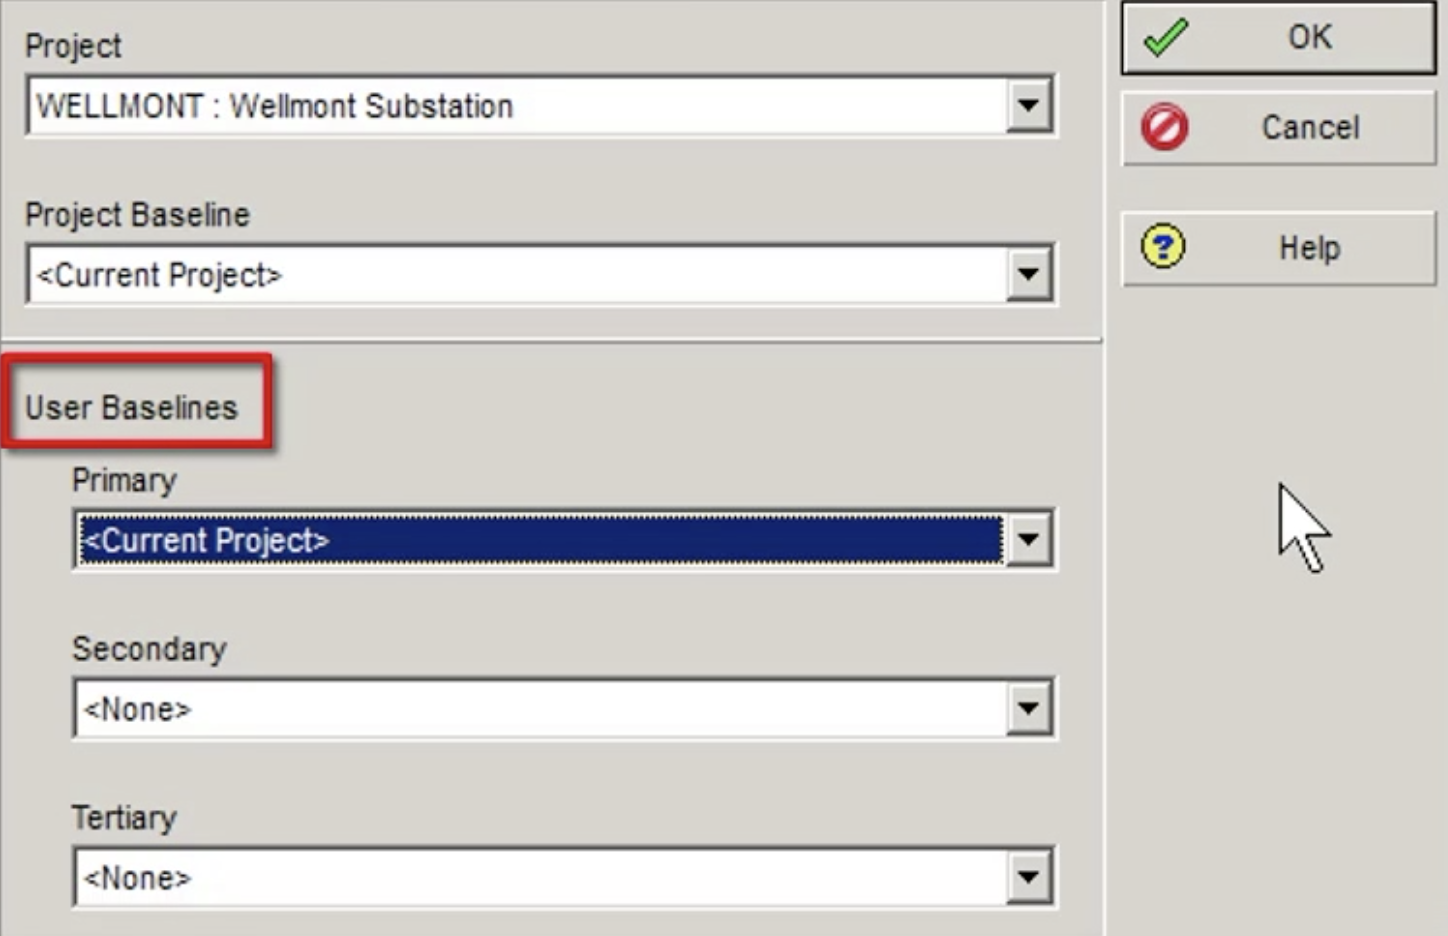 Figure 2
As the current schedule progresses, any changes can be compared with the baseline to see any variances in data. These variances may facilitate the extent of deviation from the original plan. Although schedulers can create multiple baselines, only two can be used at any given time to display and compare data. Any variance data will be displayed in the projects’ table, as shown below in Figure 3.
 Figure 3
Creating a baseline in Primavera P6
To create a baseline for our project ‘Wellmont Substation’, we enter the ‘Projects’ menu and select ‘projects’ from the top ribbon. From the options menu, we select ‘Maintain Baselines’, and inside the dialog box, we can see our ‘Wellmont Substation’ project.
We select the ‘Add’ button from the ‘Maintain Baselines’ dialog box, and select ‘Save a copy of the current project as a new baseline’ from the ‘Add New Baseline’, and ‘OK’ it, as shown below in Figure 4.
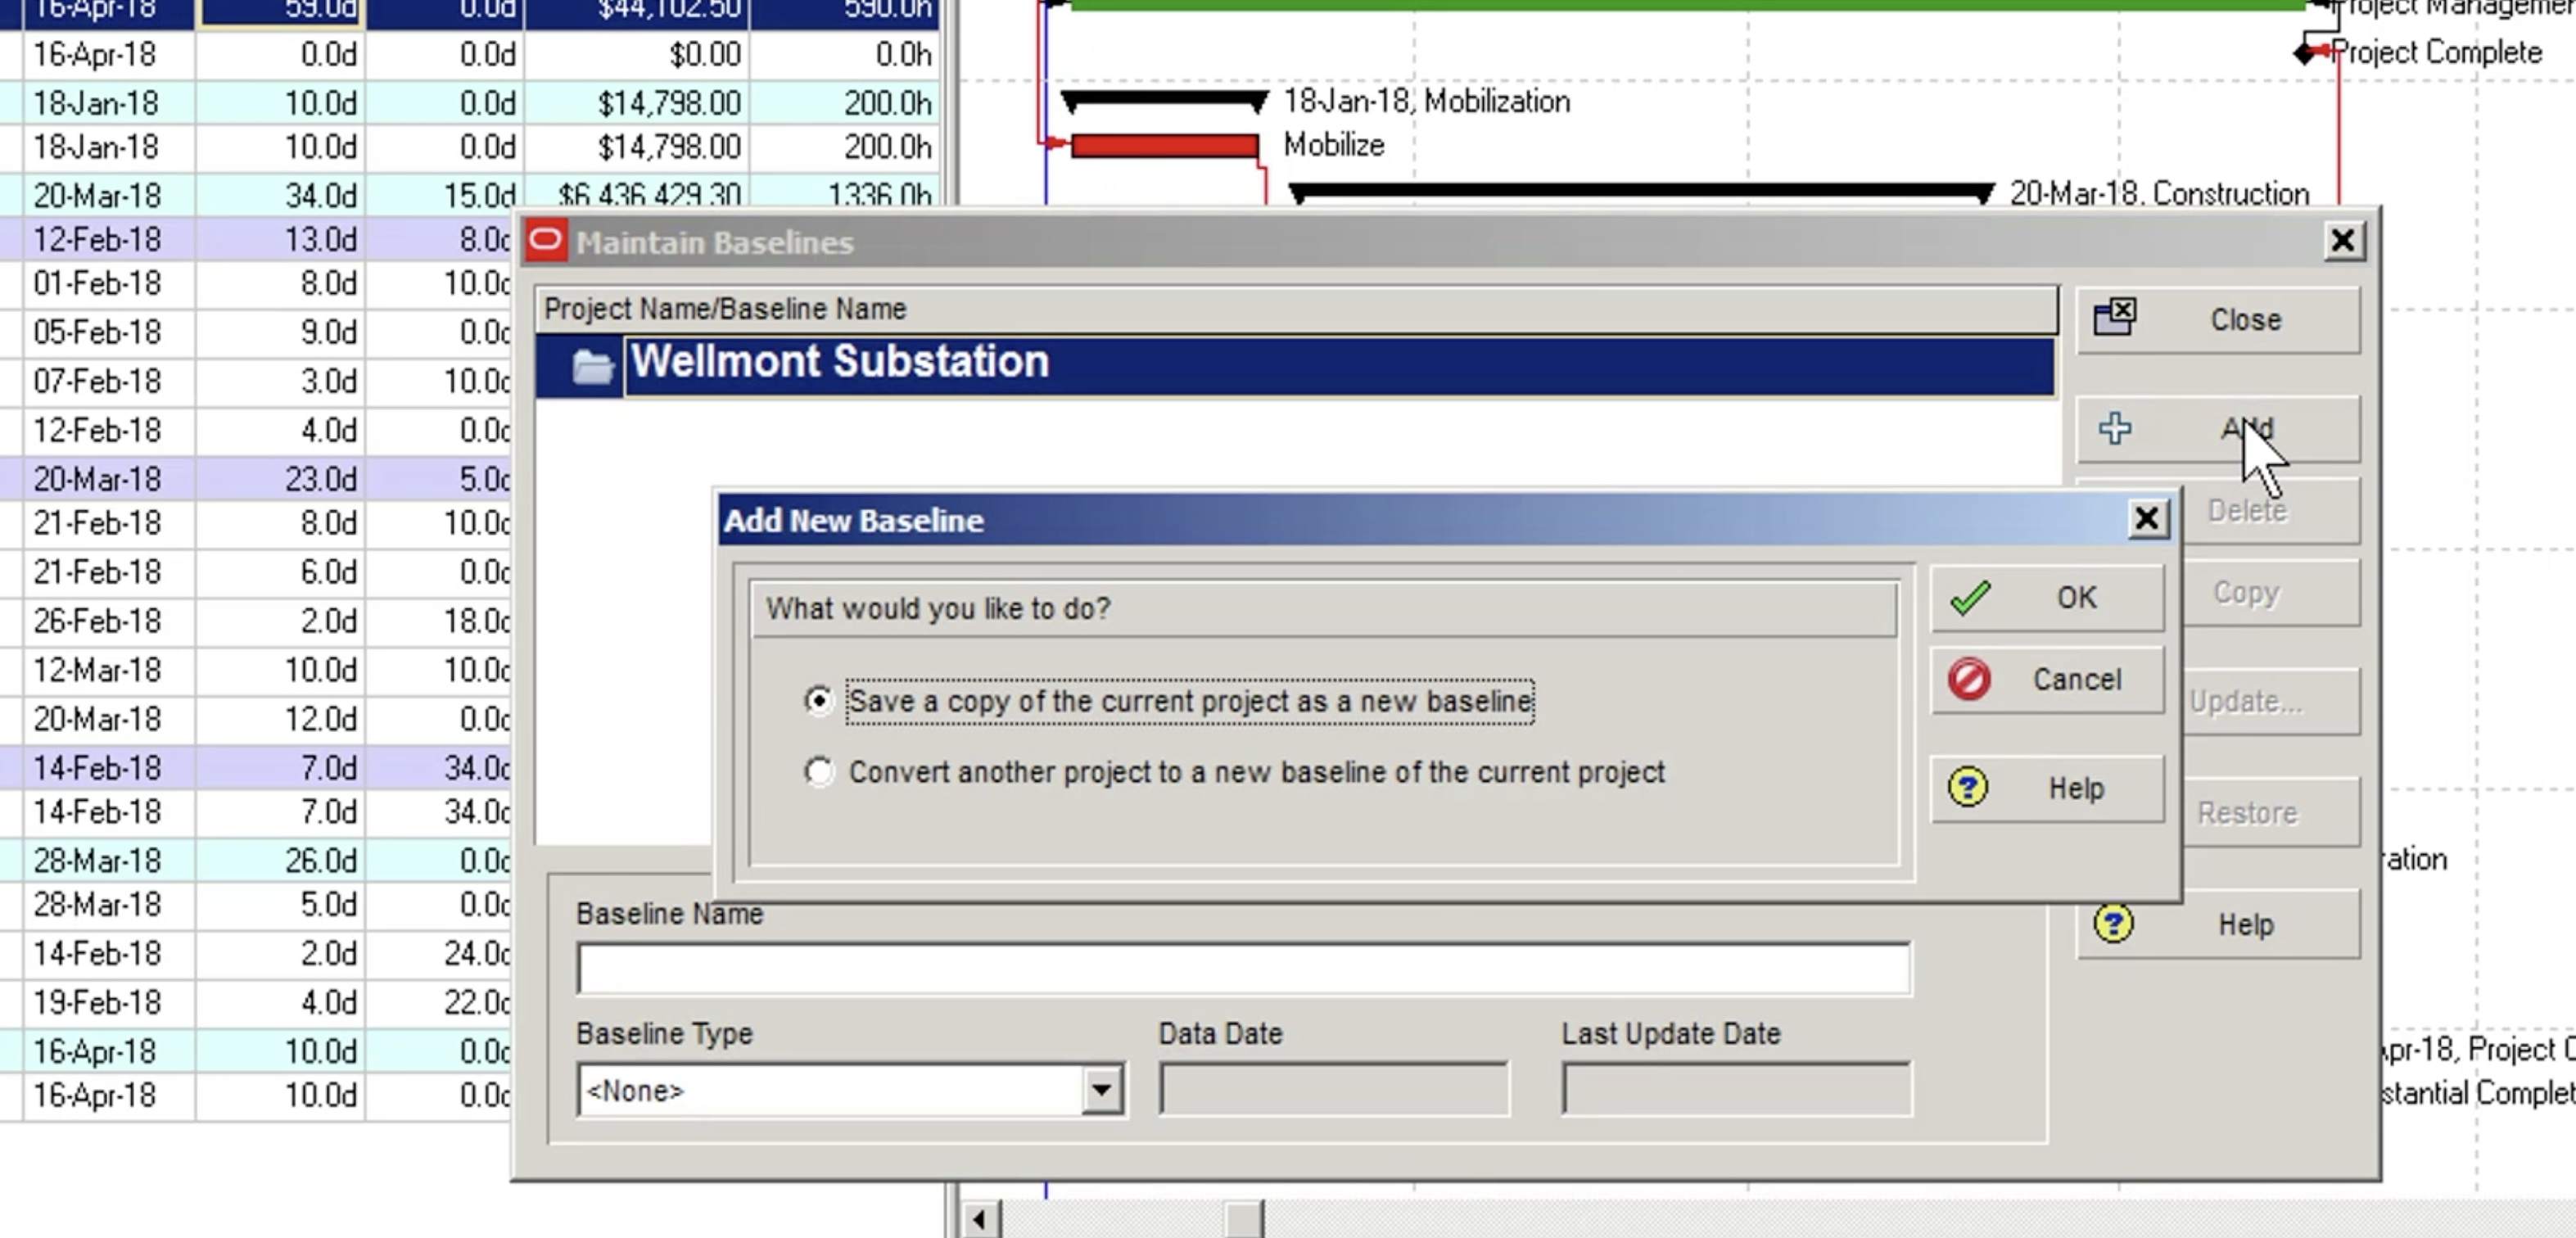 Figure 4
Our new baseline appears in the ‘Maintain Baselines’ dialog box below our ‘Wellmont Substation’ project, shown below in Figure 5. In the ‘Baseline Name’ we change the BI suffix by typing in ‘Baseline’ and from the ‘Baseline Type’ we select ‘Management Sign-off Baseline.’ The ‘Data Date field’ and ‘Last Update Date’ indicate when the selected baseline was created and the schedule updated.
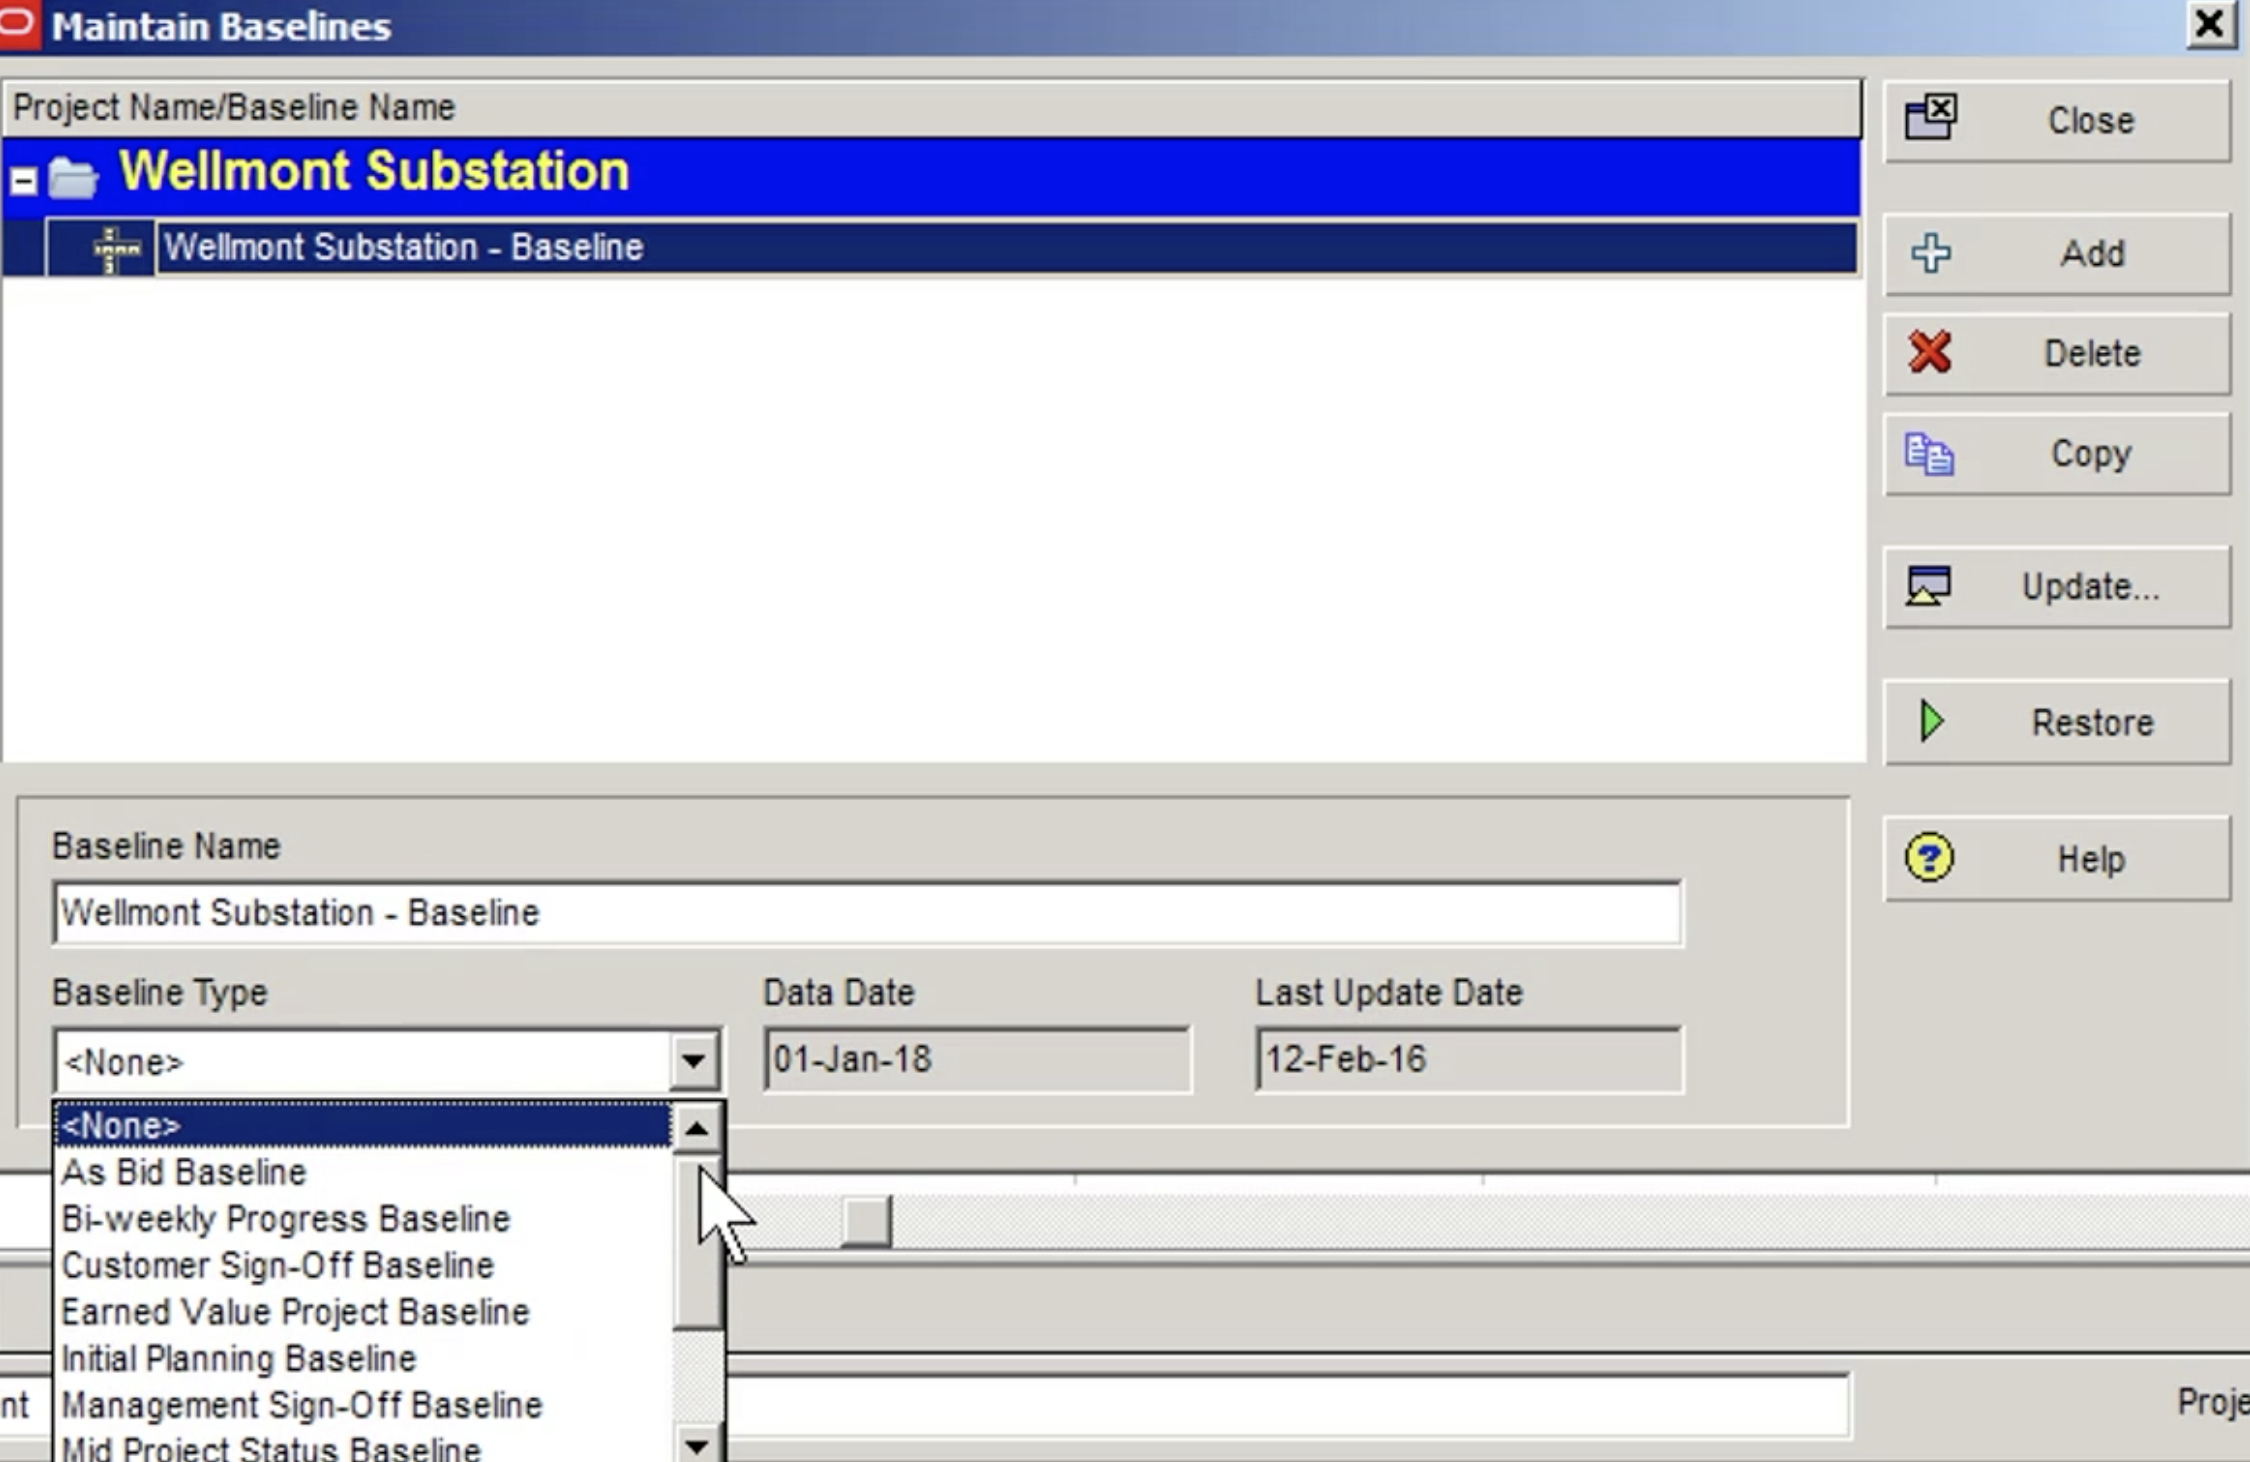 Figure 5
A complete copy of our project is saved to the database, but we can’t see it in our project view of Primavera P6 until we assign it. Any variance data will be able to be seen within the projects’ table when we assign it to the project baseline or one of the User baselines.
Assigning a Baseline
We return to the ‘Projects’ menu and select ‘projects’ from the top ribbon, and we select ‘Assign Baselines.’ In the resulting dialog box, we can see that the ‘Project Baseline’ field is set to ‘Current Project’ as shown below in Figure 6.
Until we assign our baseline, our current project (Wellmont) is displaying values in the baseline field and is doubling as a baseline. If there are baseline costs, durations, or dates displayed in the project’s table, these fields will simply match the current values of our ‘Wellmont’ project.
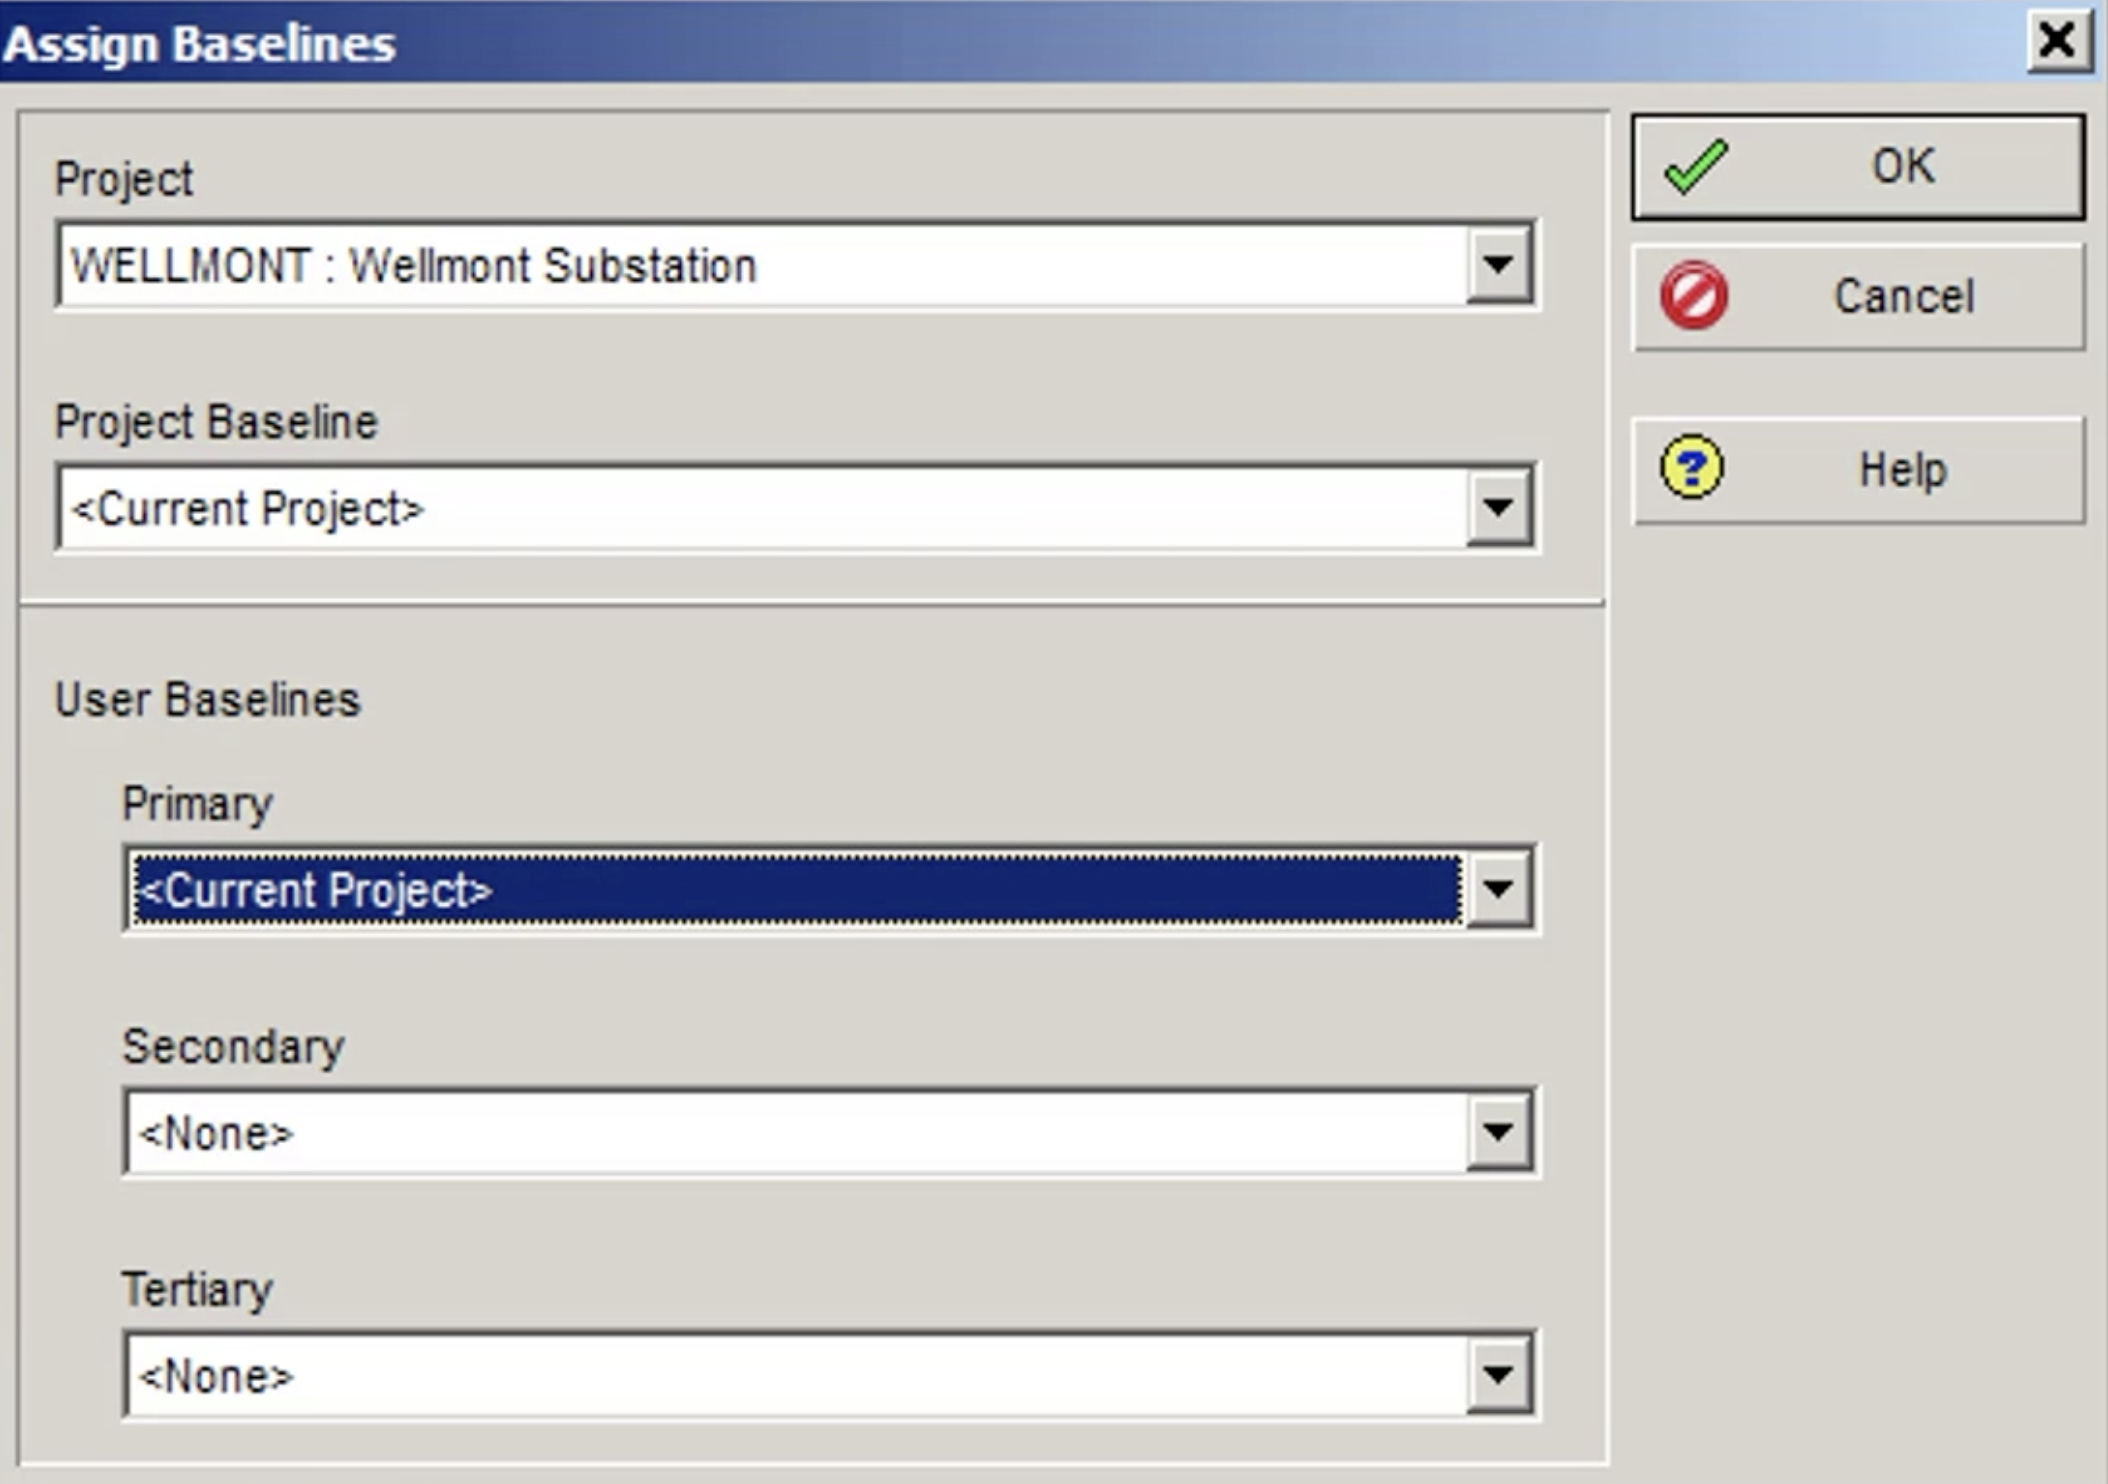 Figure 6
We select our ‘Wellmont Substation- Baseline’ in the ‘Project Baseline’ field and when we ‘OK’ it, our baseline is assigned to our project as shown in Figure 7.
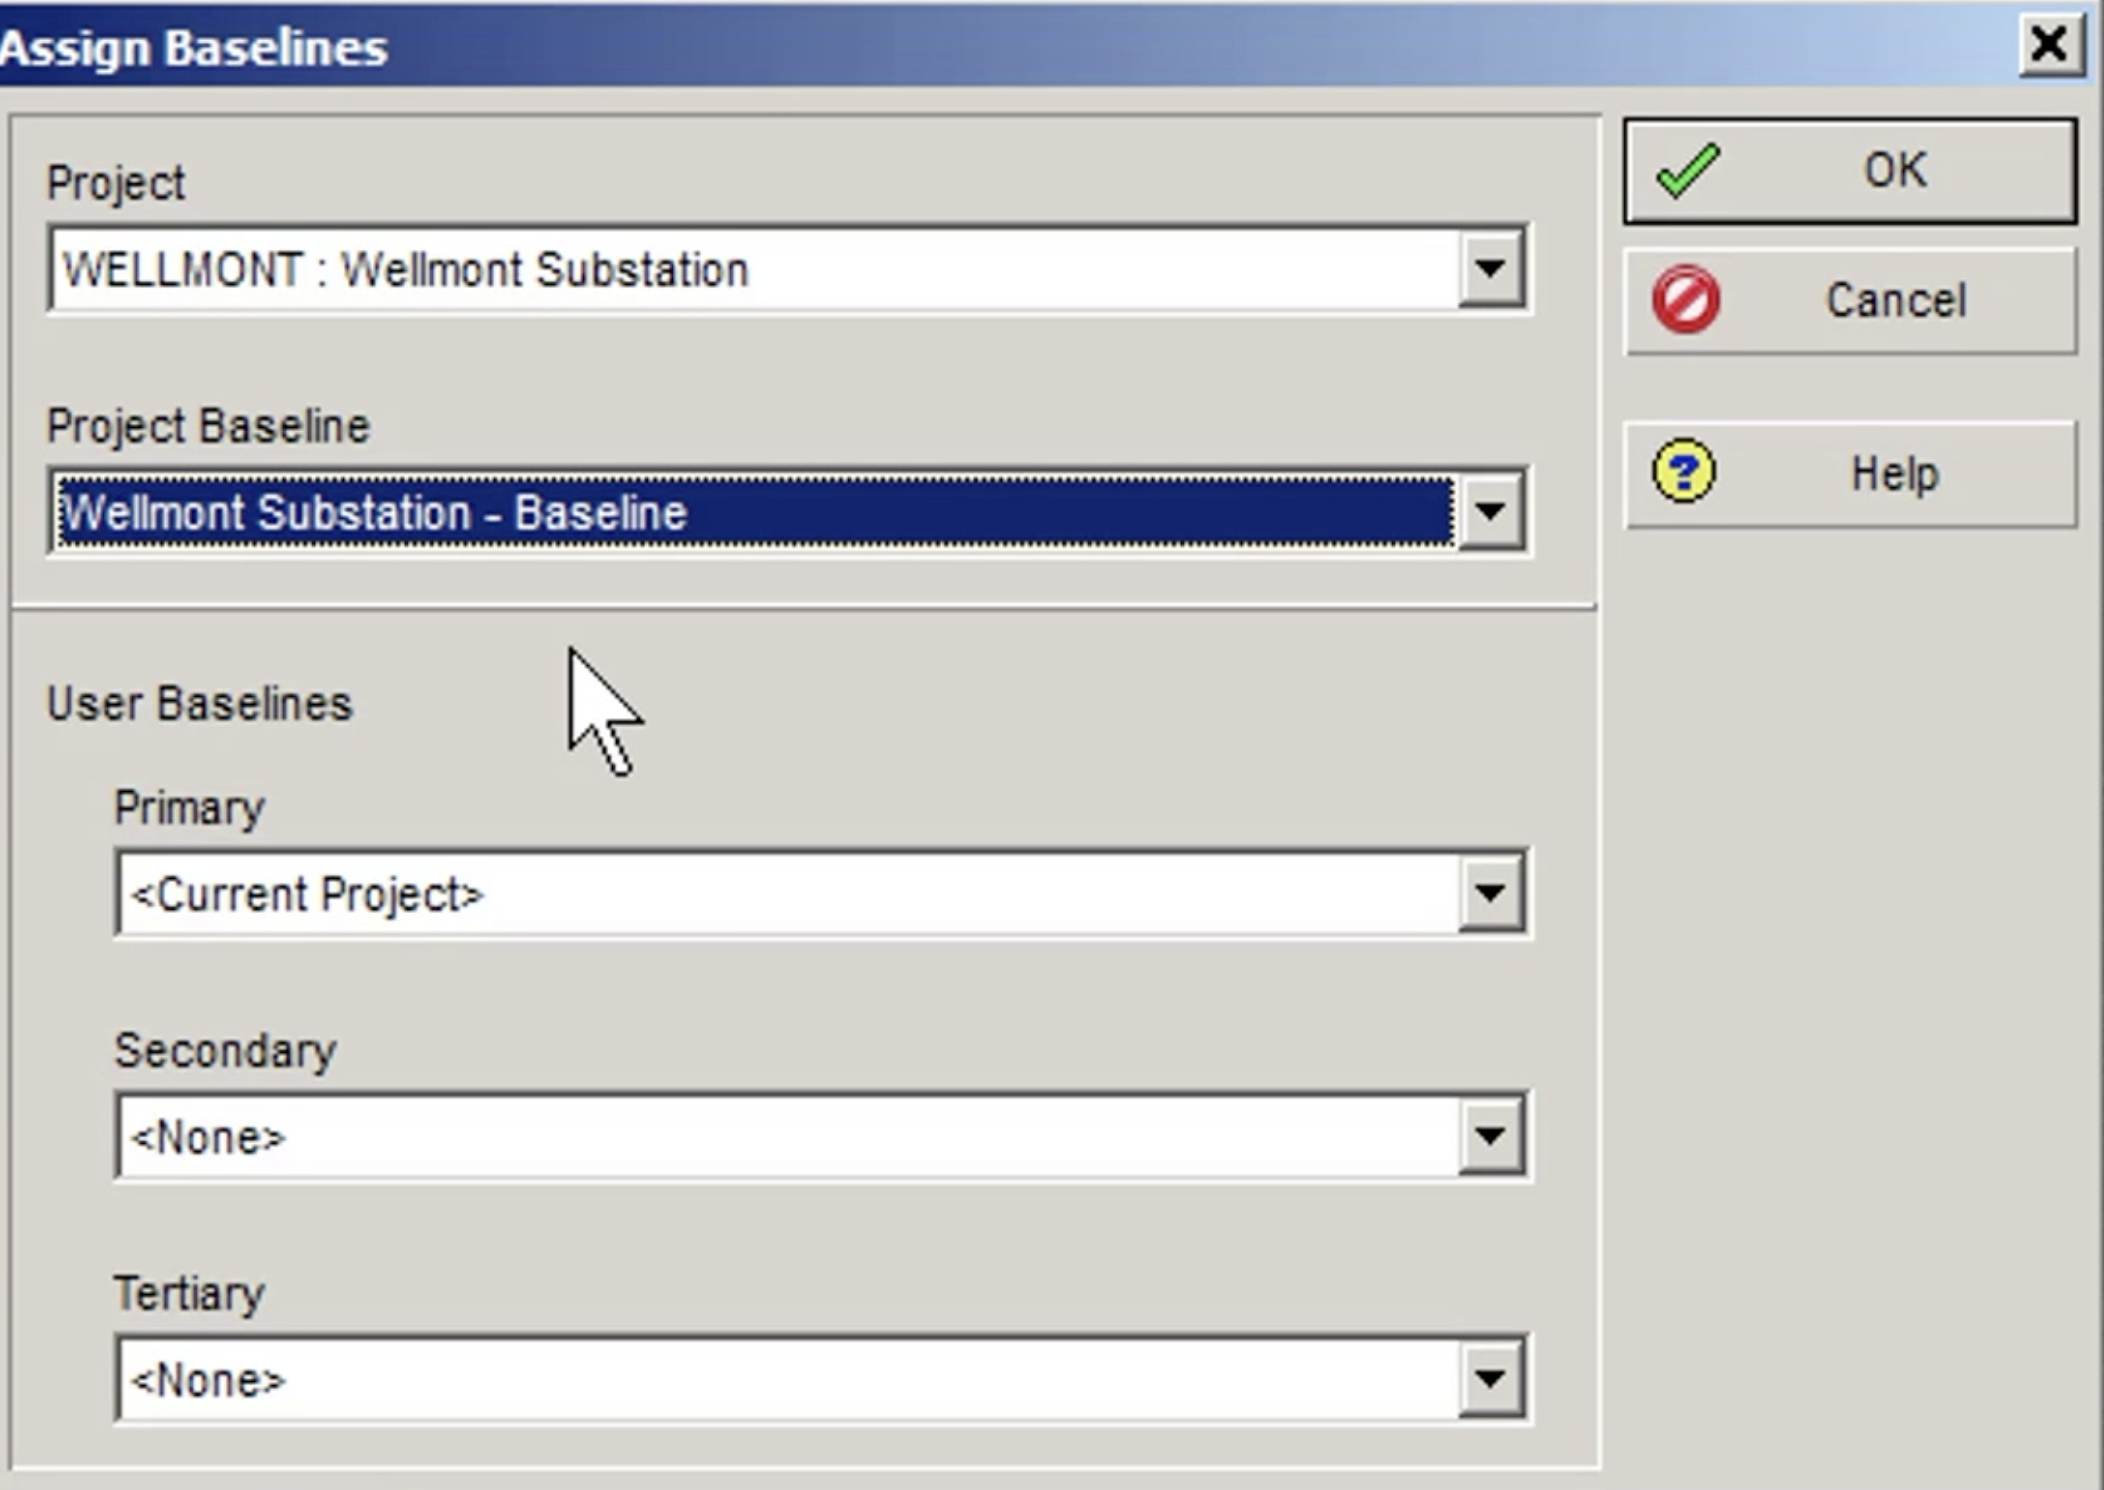 Figure 7
Now we can be assured that if our ‘Wellmont’ project starts to change the ‘Project Baseline’ fields in Primavera P6 will reflect the baseline values and not the projects’ values, tracking any variance in the schedule.
Summary
When creating a baseline, it is important to assign it to the respective project otherwise the project will only display its’ own data and not the baseline data. The project baseline acts as a master baseline and should be created before the start of the project. User Baselines are snapshots taken throughout the project as it progresses, monitoring changes to the schedule if and when they occur.
For more Primavera P6 articles click here.