 Primavera P6 Project codes can be customized to filter projects in an Enterprise Project Structure (EPS) portfolio. These work just like the activity codes in P6 which are regularly used to filter activities within a project. The advantages of creating P6 project codes and project filters are to limit the EPS size, reduce clutter, and to be able to select projects using a defined criterion for reporting.
Creating P6 Project Codes
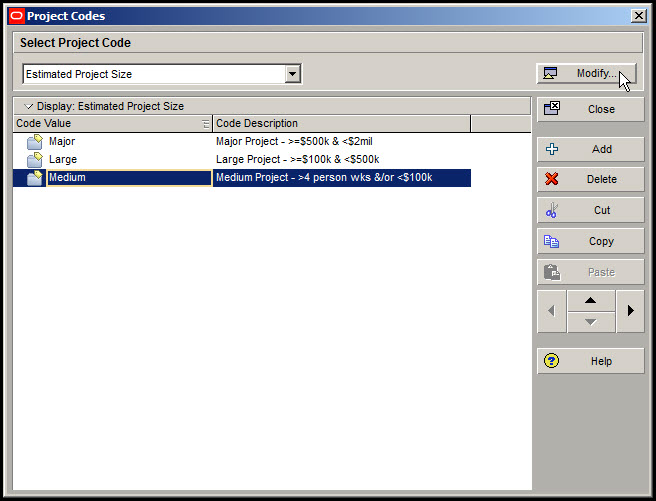
Firstly, in Enterprise we select ‘Project Codes’ from the top drop-down menu. In the ‘Project Codes’ dialog box, we select ‘Modify’ as shown in Figure 1.
 Figure 1
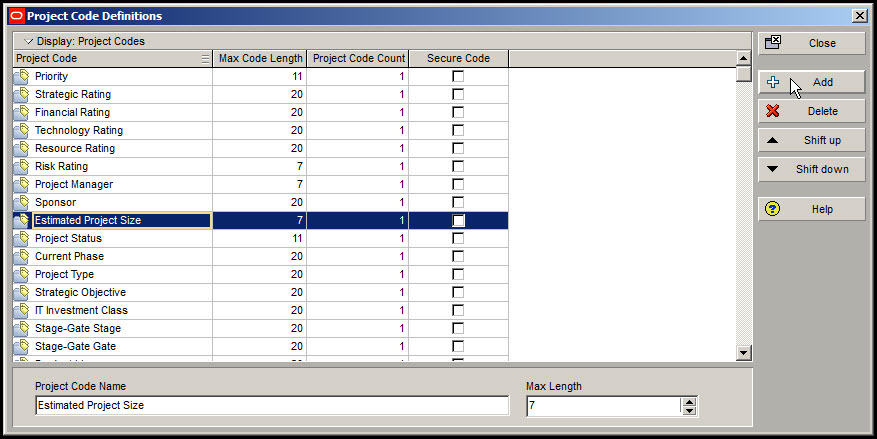
In the ‘Project Code Definitions’ dialog box we select the ‘+ Add’ button on the far right of the screen as in Figure 2.
Figure 2
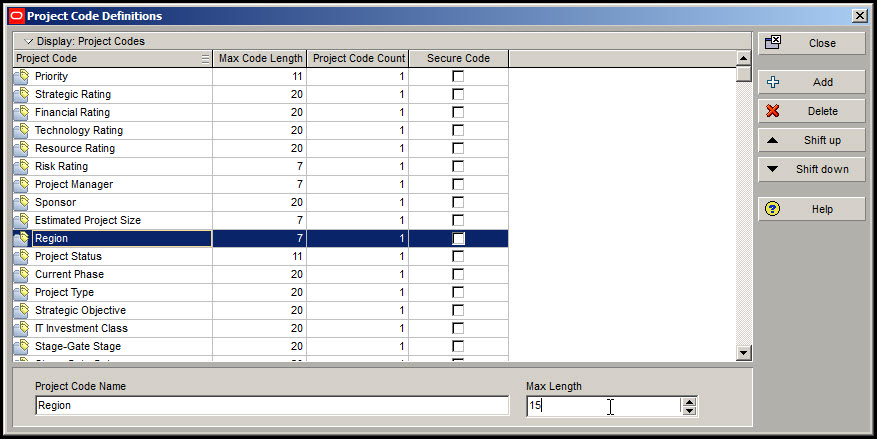
We enter ‘Region’ as our project code and for ‘Max Length’ we select 15 characters. We then select the ‘+ Add button’ on the far right of the screen as in Figure 3.
Figure 3
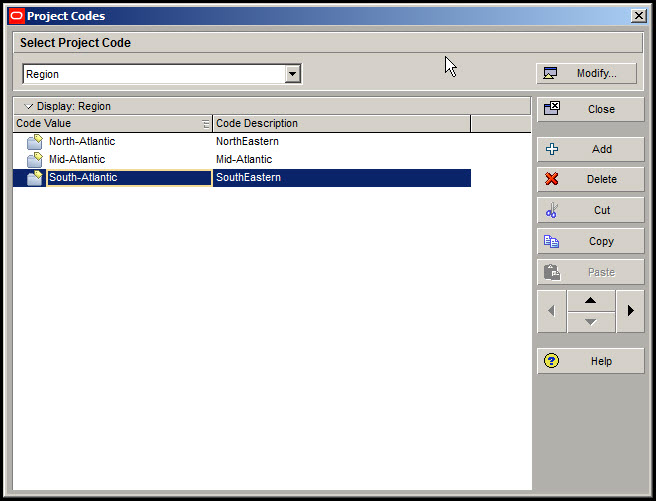
We enter the code values for our project code, ‘Region’ to allocate our project locations, as shown in Figure 4.
Figure 4
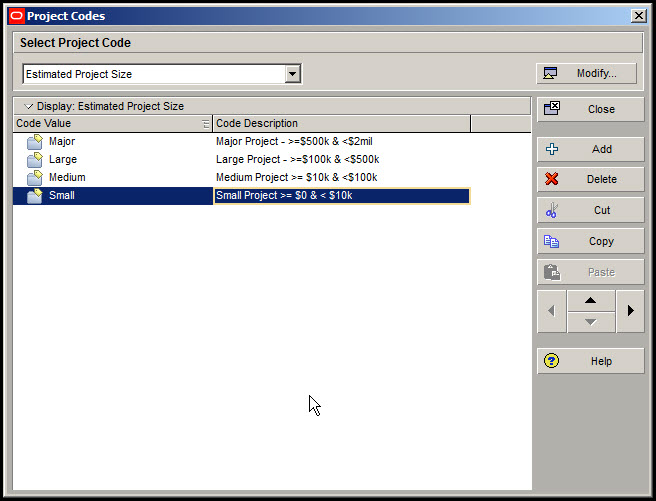
We continue by editing the ‘Estimated Project Size’ project code by adjusting the ‘Code Description’ for the Medium Code value and adding a Small Code value for all projects between zero and $ 10k as shown in Figure 5.
Figure 5
Assigning P6 Project codes
We review our projects and assign a ‘Region’ project code and an Estimated Project Size, project code to the projects that fit our criteria, as shown in Figures 6 and 7.
Figure 6
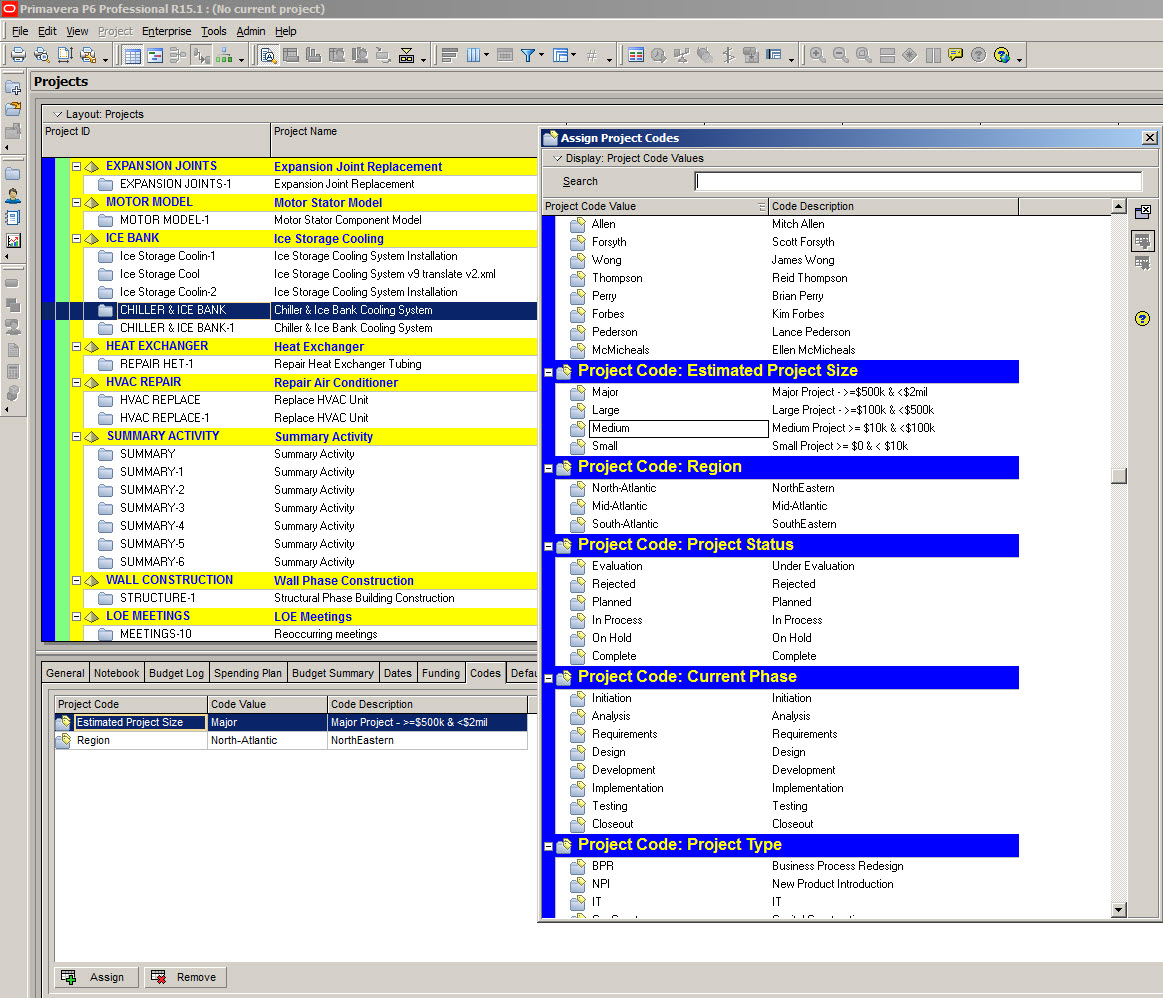
Figure 7

Creating a Project Filter
In the Filter dialog box, we type ‘Size and Location’ as the filter name. A project filter by ‘Estimated Project size’ and ‘Region’ is created when we select ‘OK’ as shown in Figure 8.
Figure 8

Applying the Project Filter
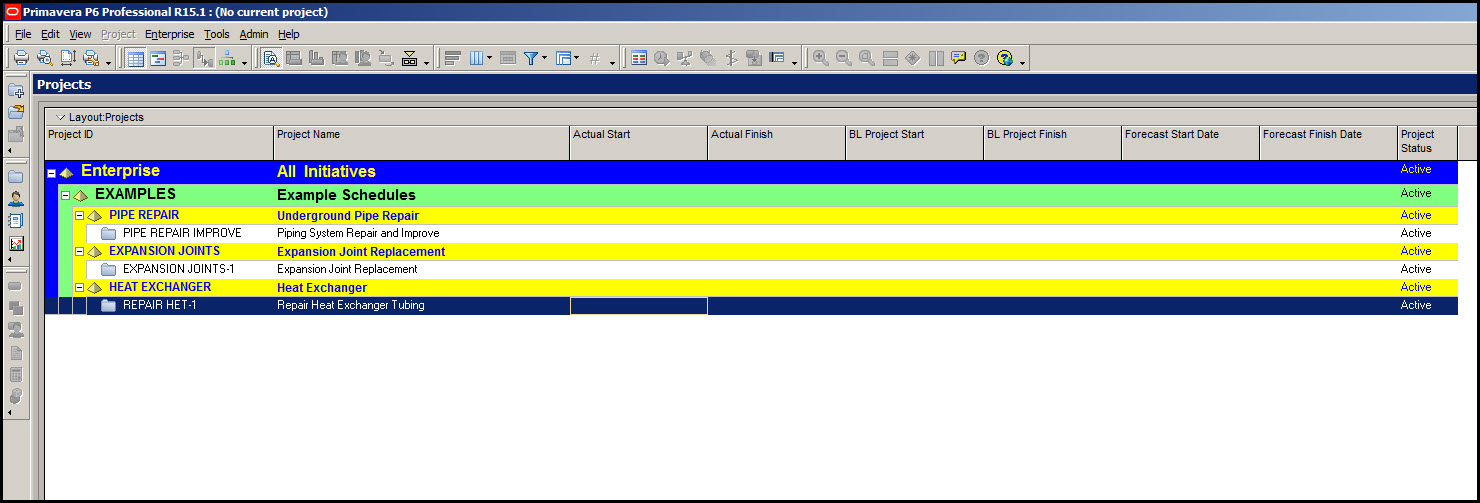
If we apply our ‘Size and Location’ filter to our projects, only the projects in the Mid-Atlantic region of a Medium size will be displayed, in keeping with our criteria as shown in Figure 9.
Figure 9
Summary
Primavera P6 project codes allow you to select only those projects that meet your filter requirements. Organizing or filtering your projects by code is a four-step process; creating
the project codes, assigning the project codes, creating a project code filter, and applying the filter. You can customize any number of project codes using a criterion that suits you whether that is location, project size or location, or any specific area that suits your organization.
Creating project codes and filters provides you with the ability to quickly develop your project reporting details.
These techniques enhance your ability to provide decision-makers with great visual information on changes that occur in a schedule.