It doesn’t sound like a big deal, but being sure the time and date settings for the Project Start date, Data Date, and actual activity dates are set in Primavera P6, can make the schedule report a scheduled finish date with date variance of +- a day. This can also force fractional durations and Total Float values. These can also confuse schedule dates.
It is easy to keep this from happening and shows you have a deeper understanding of scheduling and Primavera P6.
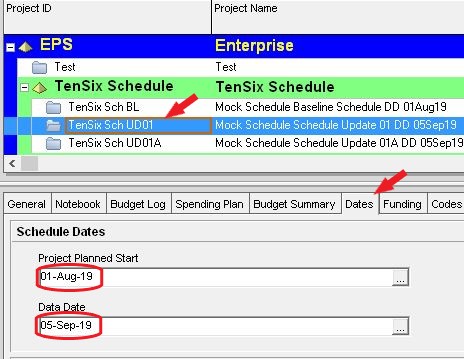
First, select your project from the Projects area. Then select the Dates tab at the bottom of the page.
 Figure 1 – Select the project and the “Date” tab
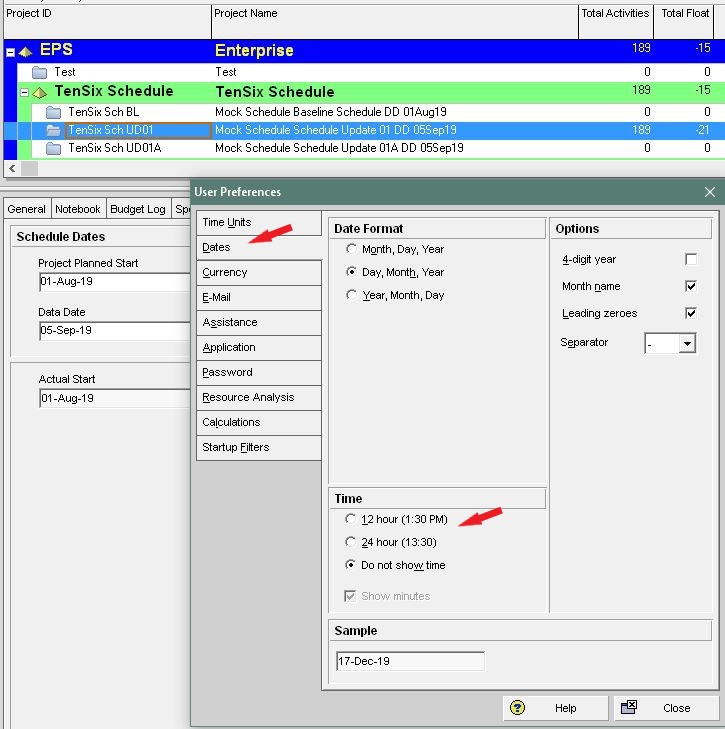
Then go up to the Edit drop down at the top of the page. Scroll down to “User Preferences”. Then select the Dates tab and then select either 12 Hour or 24 Hour depending on how you like to see time displayed.
Figure 2 – Select the “Date” tab and the Time Format you like to use
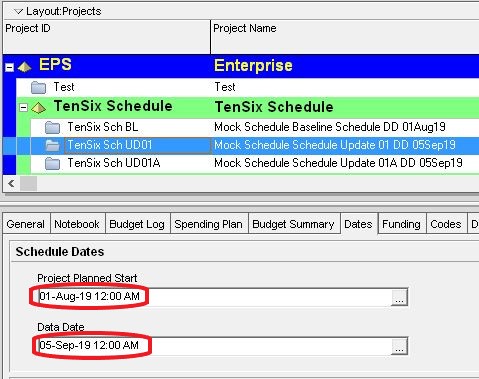
Notice the time is now displayed with the date areas in the Project level “Dates” tab.
Figure 3 – Dates are now Displayed in the Project Level “Dates” tab
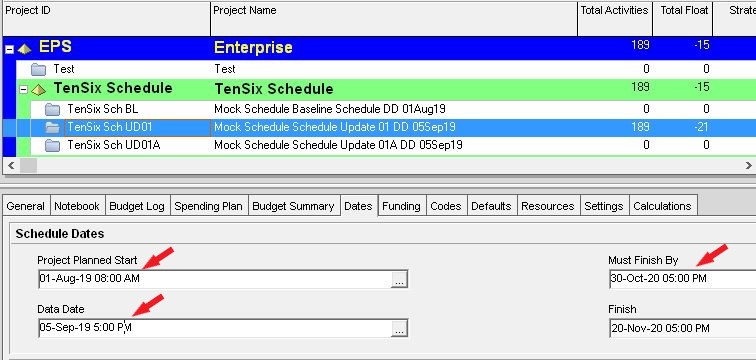
Depending on the hours you have set up for your calendars, you should set the time for the “Planned Project Start” as the start of the calendar workday time, most likely this is 8:00 AM. IF the schedule is a baseline schedule, the Data Date should also be set as the start of the calendar workday. If the schedule is an update, the Data Date should be set to the end of the calendar workday. If you’re applying a “Must Finish By” date constraint, I would set the time as the end of the calendar workday.
Figure 4 – Project Level Date tab time settings
Now go to the Activities area. The date columns now have the time displayed with the activity dates. The start dates should have the start time for the assigned calendar workday and the finish dates should have the finish times for the assigned calendar workday.
Figure 5 – Activity dates with Time Shown

Sometimes, when updating progress, Primavera P6 will assign a start date time of 12:00 AM. You need to be sure to correct this to the start time of the calendar workday, typically 8:00 AM. Usually, this will happen with the first activity assigned an actual start date. If this is not corrected, the original duration and remaining duration can be fractional. Without the time shown, this is not apparent. But this can allow the duration and float values to round up or down. This can push scheduled dates out or pull them in depending on how the durations round.
Figure 6 – Fractional Remaining Duration and Total Float Values

(I also selected decimals for the User Preferences “Time Units” Unit Format and Durations Format areas to show the fractional values for this figure).
Figure 7 – Same Remaining Duration and Total Float Values Rounded

Figure 8 – Times for Start Dates Corrected to Remove Fractional Duration and Total Float Values

For creating the layouts for general use, you can go back and select “Do not show time” from the User Preferences “Date” tab.
Understanding how to use the time, as well as the date to set some of the process dates/times and ensuring the activity dates/times are correct, will help you manage a more accurate schedule.
Plan your schedule…

Paul Epperson CCM, PMP, PSP, PMI-SP
Paul has extensive experience as a Construction Manager. Over time, he became convinced that there is a critical shortage of skilled planning and scheduling professionals in our industry. In 2009, he backed away from his work as a Construction Manager and began focusing on planning and scheduling. He now serves our industry as a subject matter expert in this area.
You can visit Paul’s LinkedIn account to learn more about him and his website is http://www.conschmanservices.com