 Primavera P6 EPPM physical percent complete type reflects the actual progress made on activities in a project. If you are using Activity Steps, then physical percent complete is required to measure the status of activities based on the completion of assigned steps.
To use the physical percent complete type, we have to progress our schedule through three simple steps; we need to enter our activity status, move our data date forward, and then recalculate our schedule.
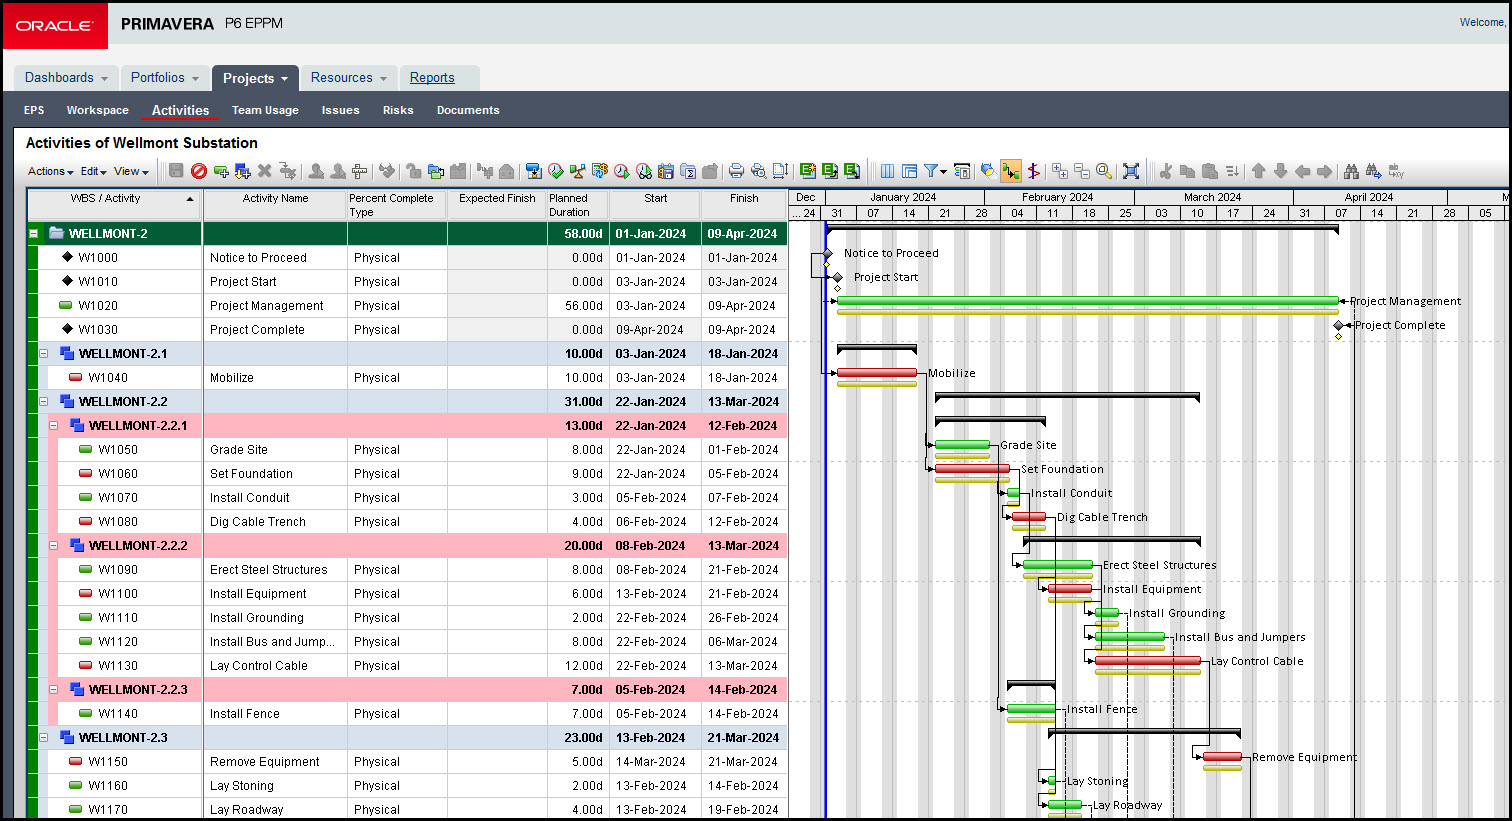
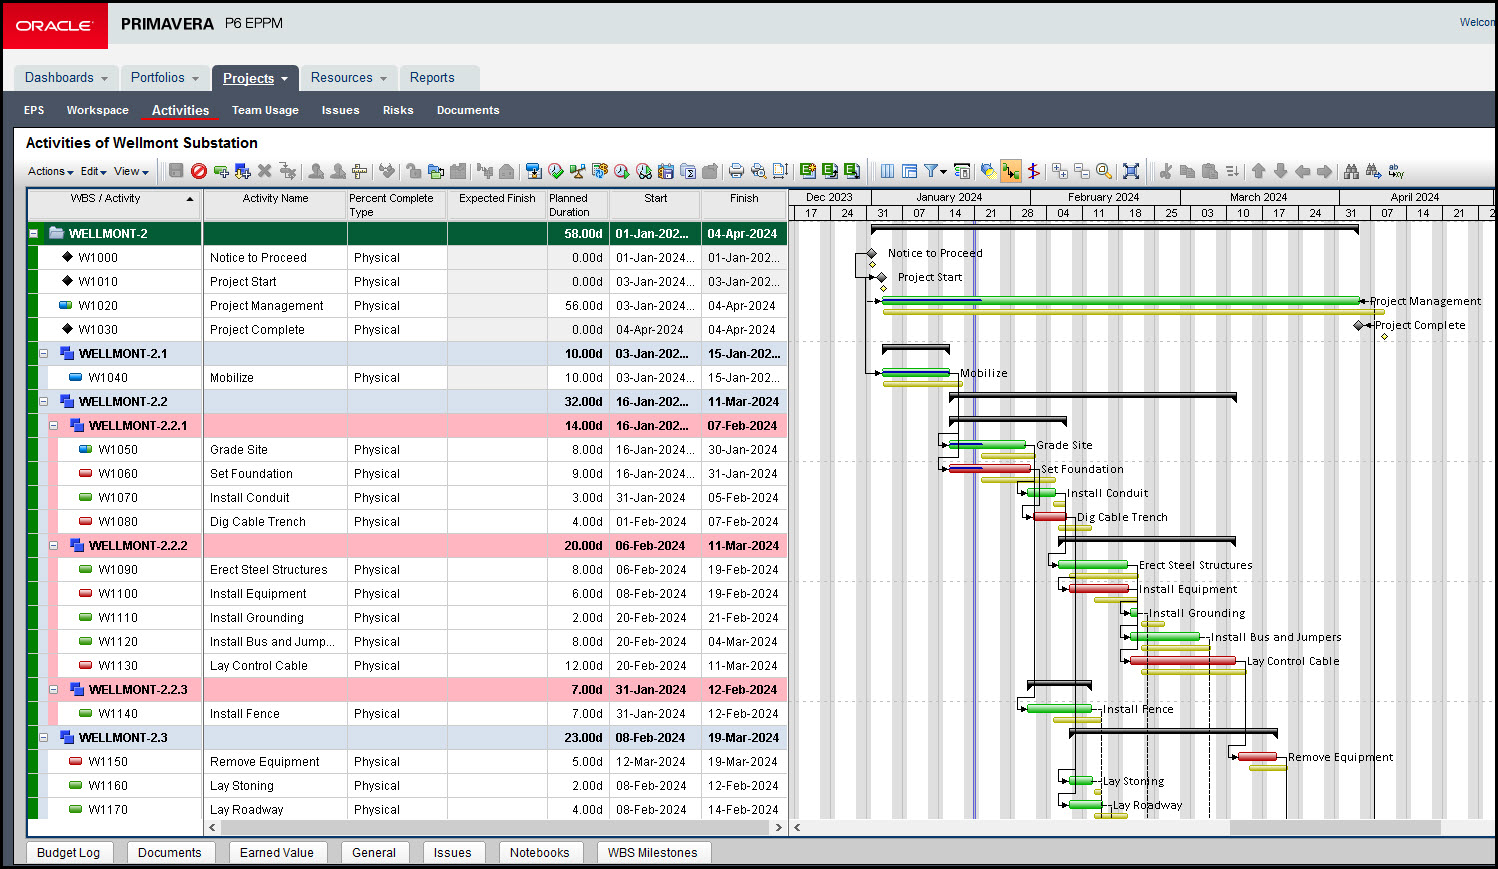
Our demonstration ‘Wellmont Substation’ has a baseline, and all of our activities are physical, as shown in Figure 1.
 Figure 1
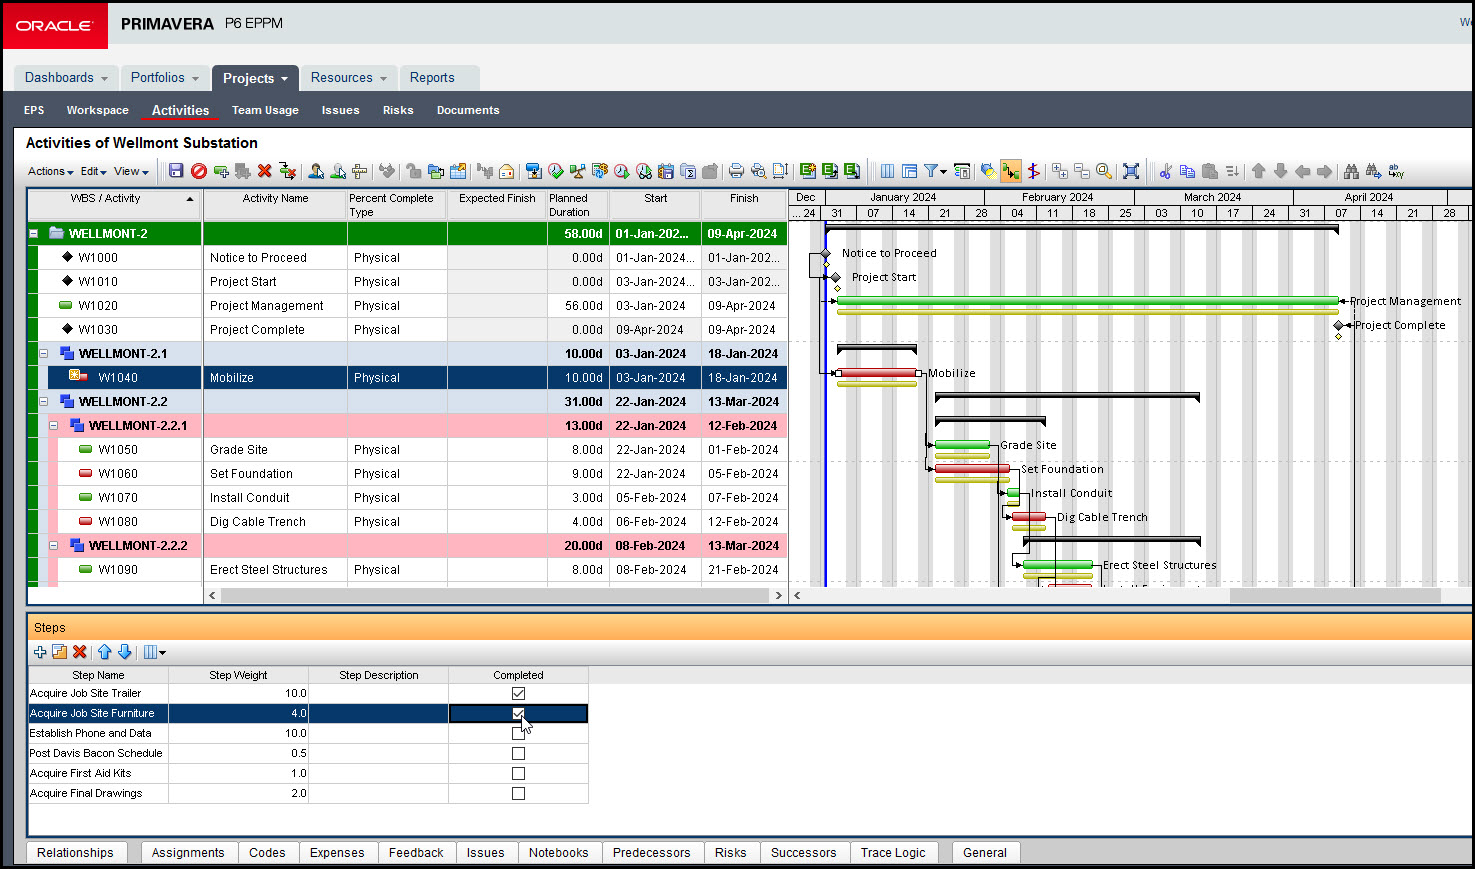
We start by entering the status for week one. Our ‘Notice to Proceed’ and ‘Project Start’ are complete. We enter the status for the ‘Mobilize’ activity. We select the ‘Mobilize’ activity with its’ defined steps, and in the bottom details, we select the ‘Steps’ tab. We check two of the steps as completed, ‘Acquire Job Site Trailer’ and ‘Acquire Job Site Furniture’ as shown in Figure 2.
Figure 2
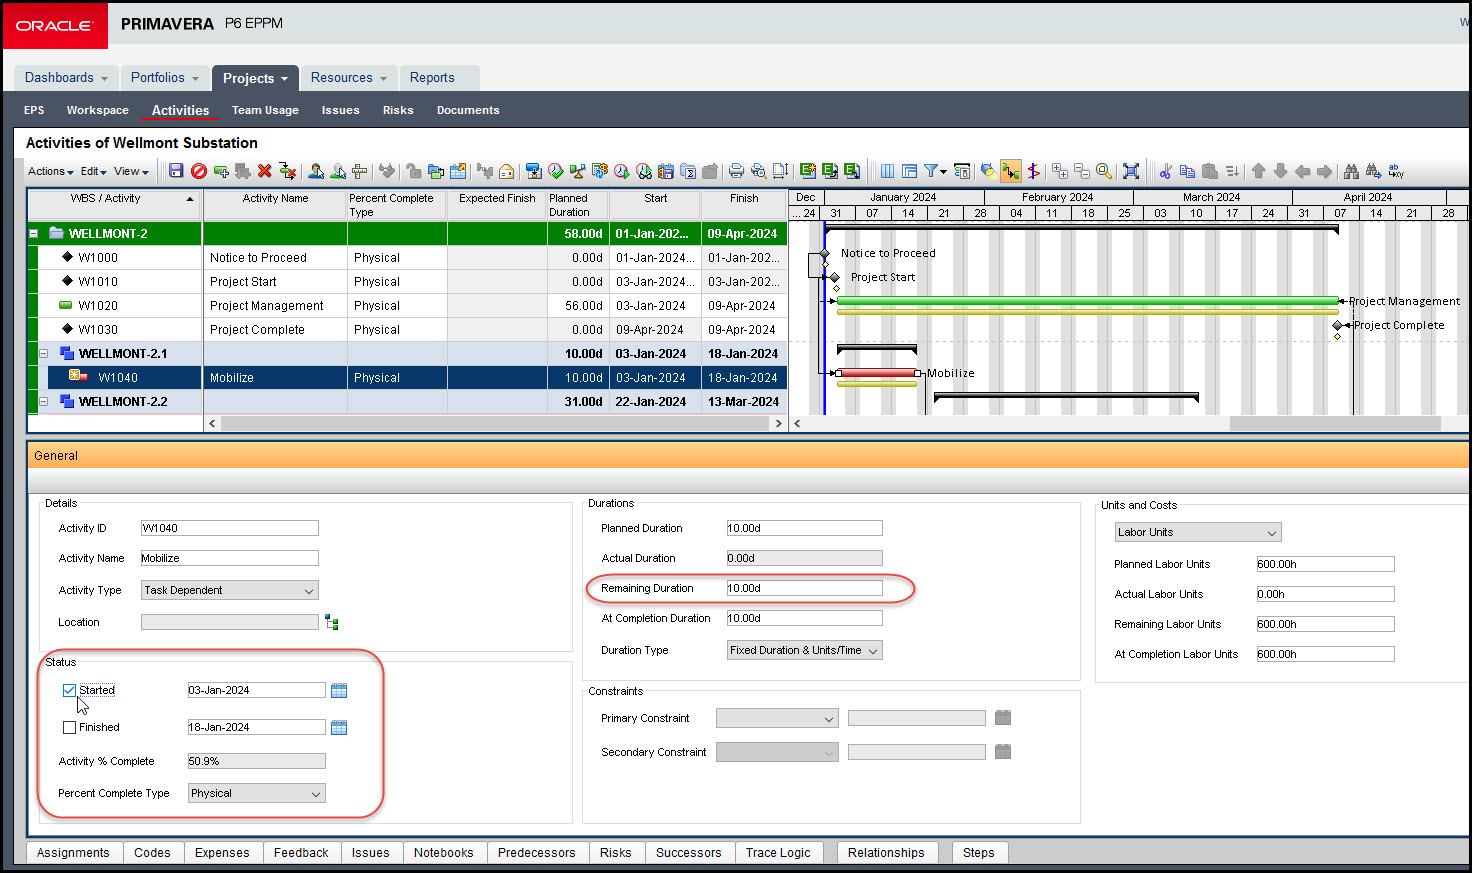
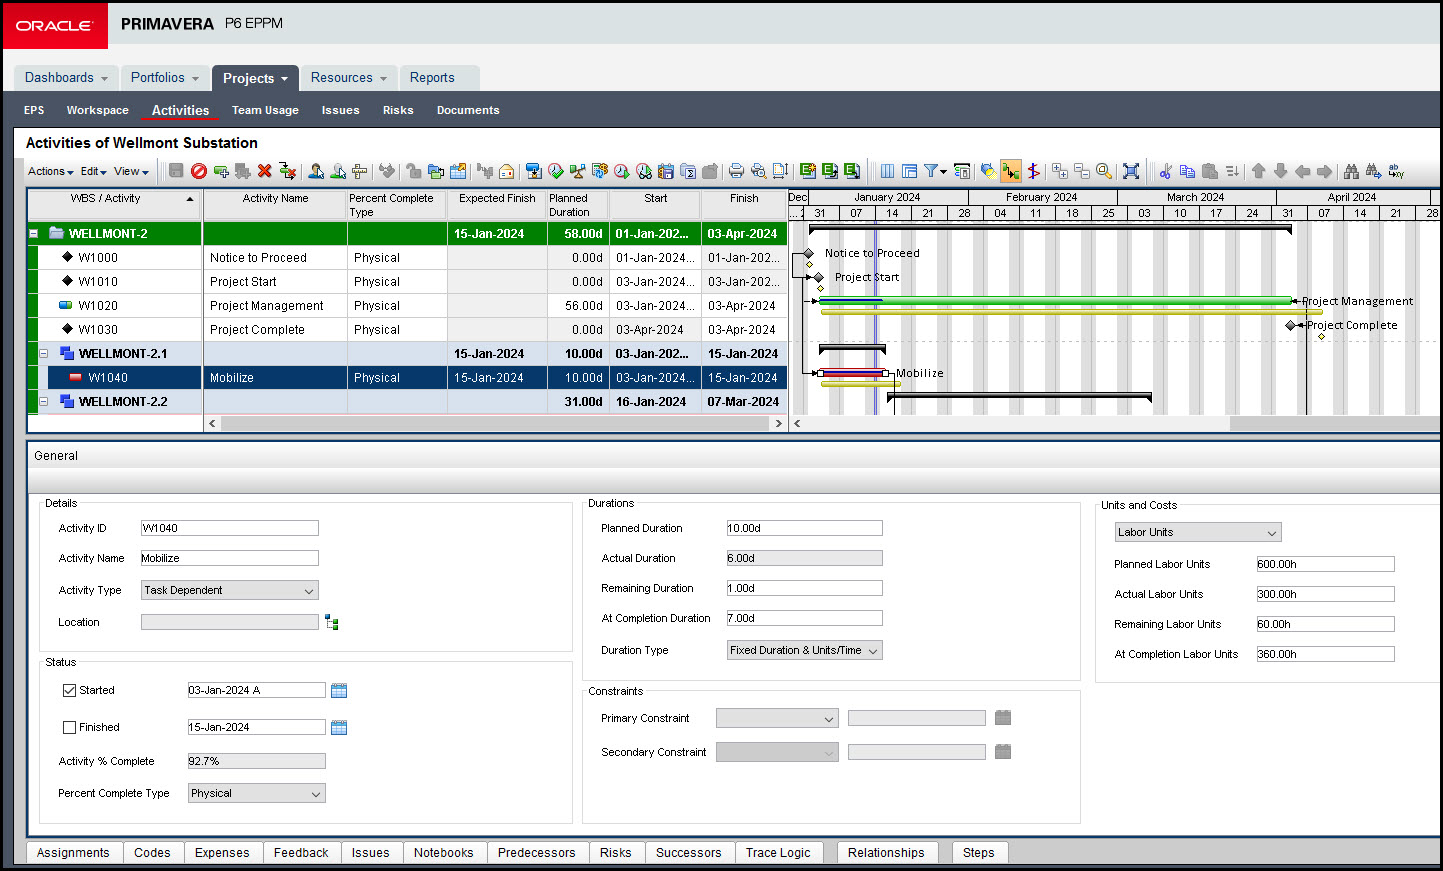
We proceed and select the ‘General’ tab in the bottom details section, and we check our ‘Mobilize’ activity as started. Our ‘Activity % Complete’ is 50.9% which appears to be logical, however, our ‘Remaining Duration’ equates to 10 days which is nonsensical, as shown in Figure 3.
Figure 3
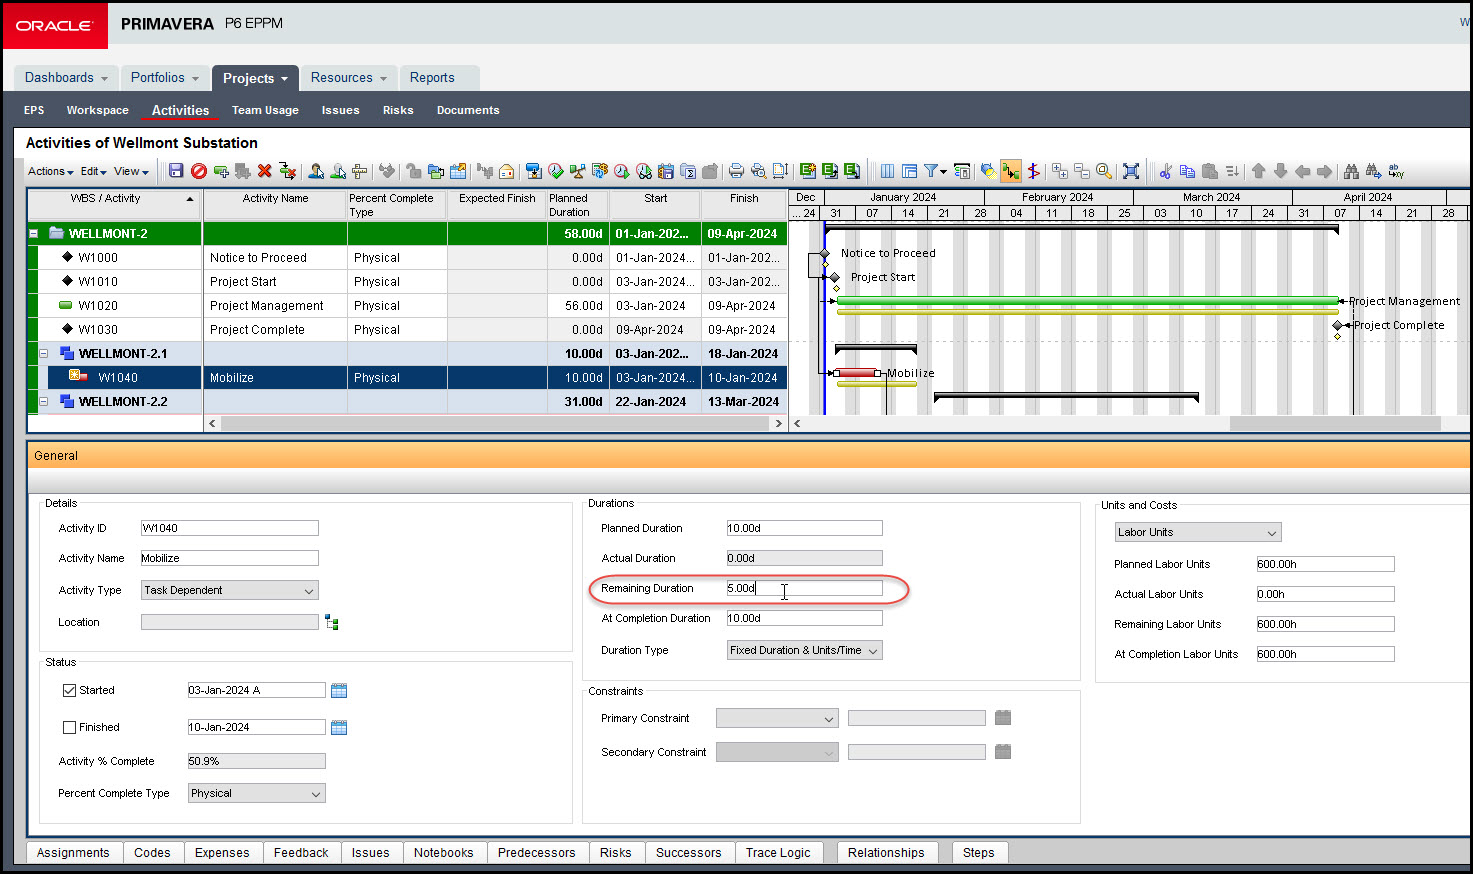
Using Primavera P6 EPPM’s ‘Physical Percent Complete Type’, we can’t just enter the ‘Activity % Complete’ we must enter a ‘Remaining Duration’ manually or enter an expected finish date. We enter 5 days as a ‘Remaining Duration’, as shown in Figure 4.
Figure 4
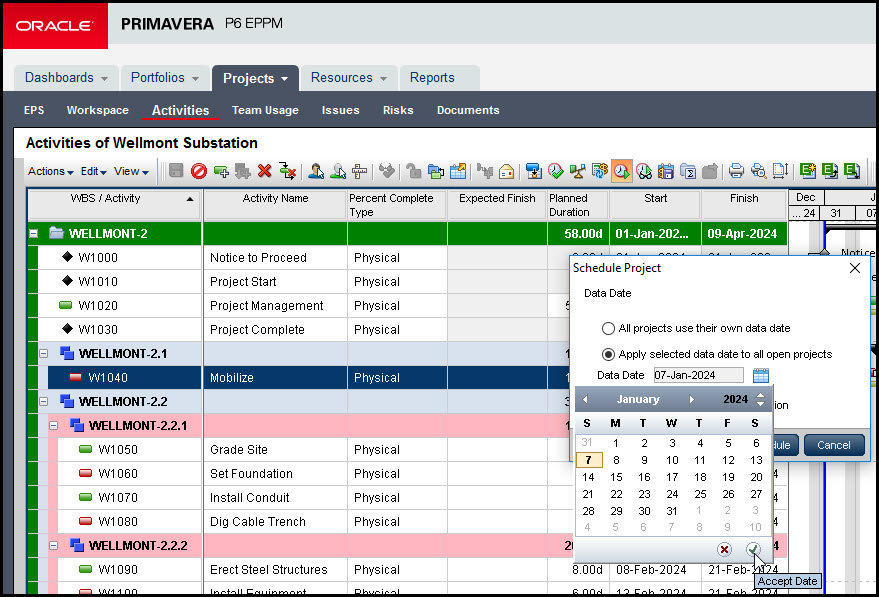
With our first week completed, we move our data date forward a week to January 7th as shown in Figure 5.
Figure 5
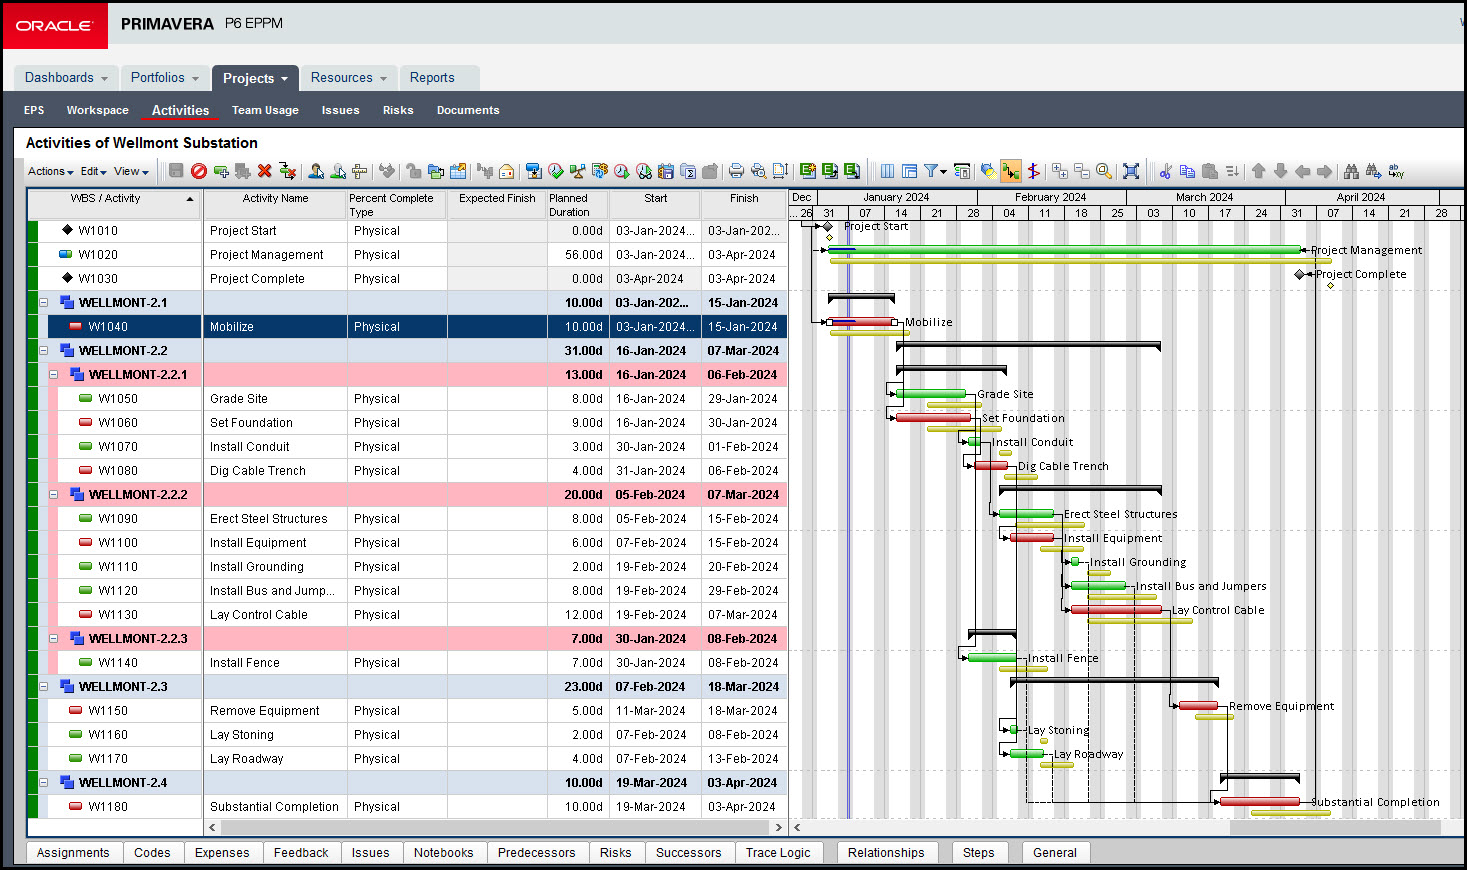
After we recalculate our schedule, we update it and our schedule is displayed in Figure 6.
Figure 6
Using the bottom details section, we select the ‘Steps’ tab and enter our status for week two. We check ‘Establish Phone and Data’, ‘Post Davis Bacon Schedule’, ‘Acquire First Aid Kits’ as complete, shown below in Figure 7.
Figure 7

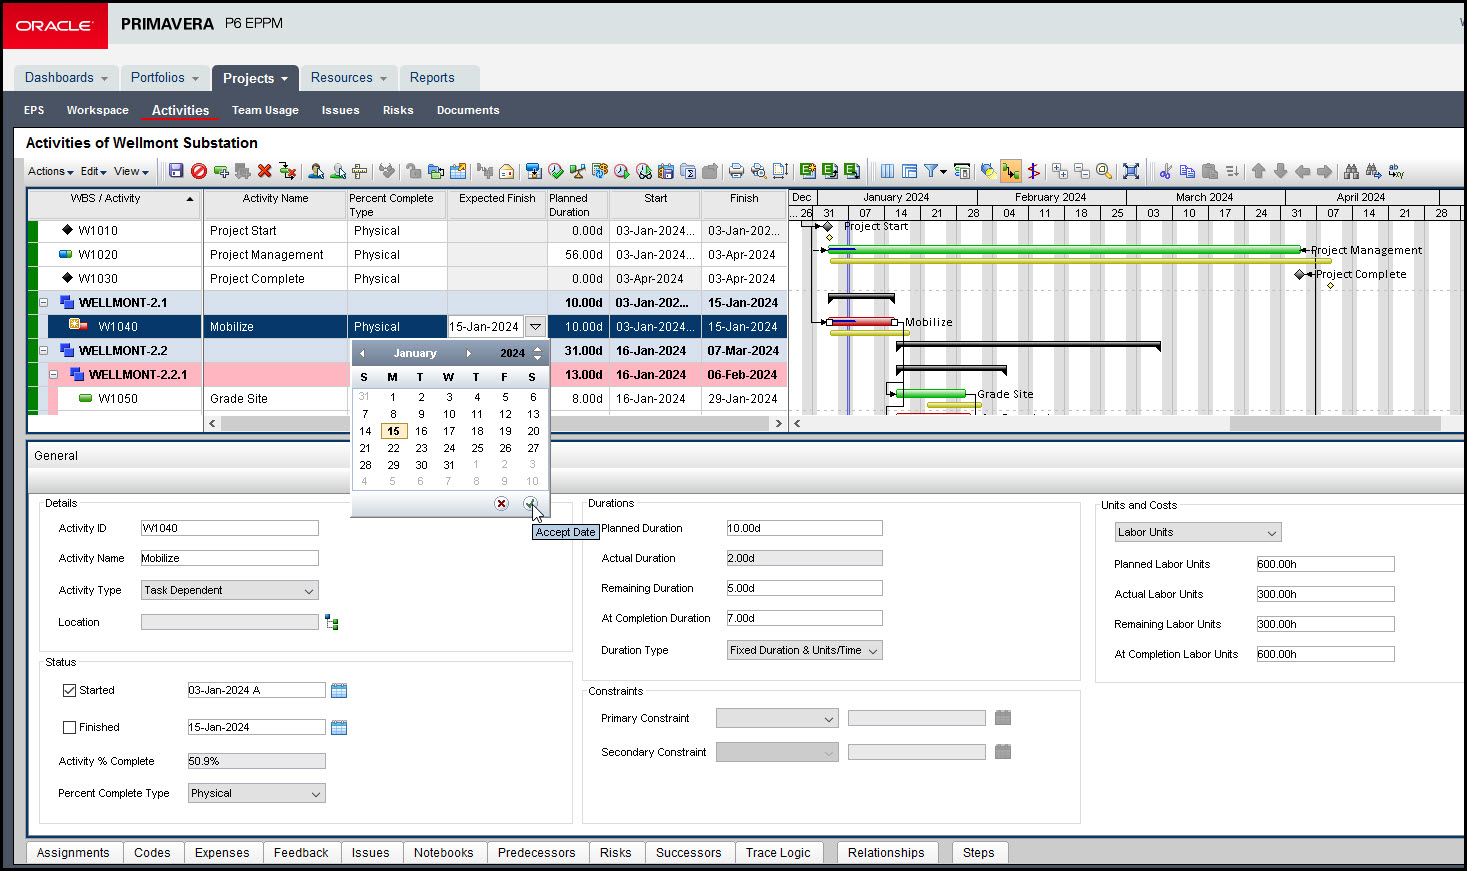
Again, we need to enter a remaining duration or an expected finish date. We opt to enter an expected finish date. We enter Monday of January 15th, and this finish date is displayed where we have assigned ‘Mobilize’ as shown in Figure 8.
Figure 8
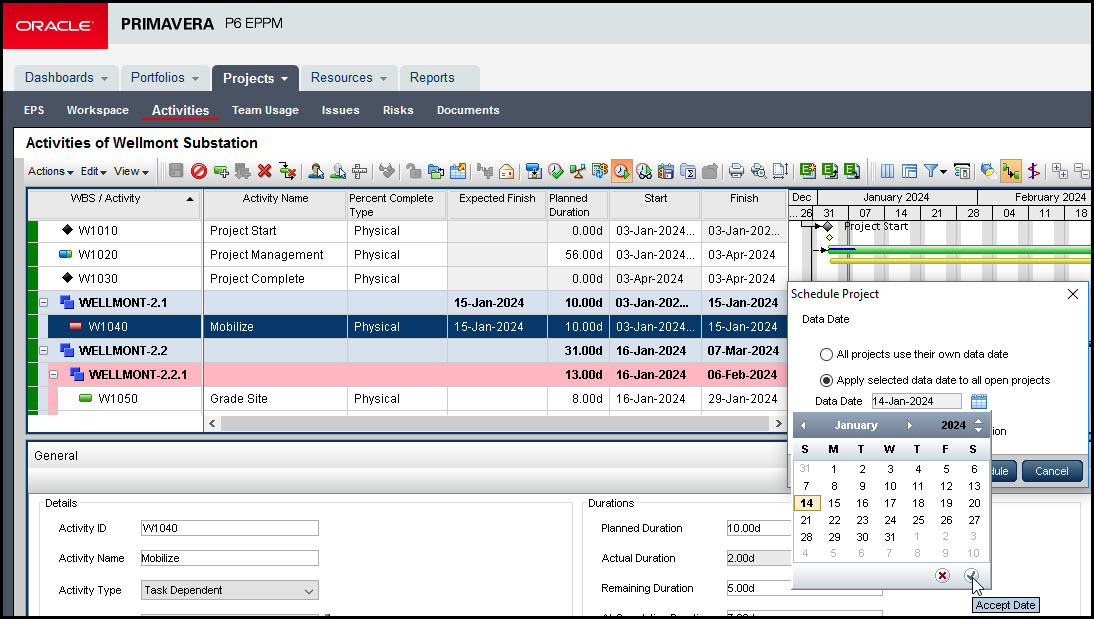
We progress the data date forward again to January 14th as shown in Figure 9.
Figure 9
By recalculating our schedule, and updating our project the resulting project schedule is shown below in Fig 10.
Figure 10
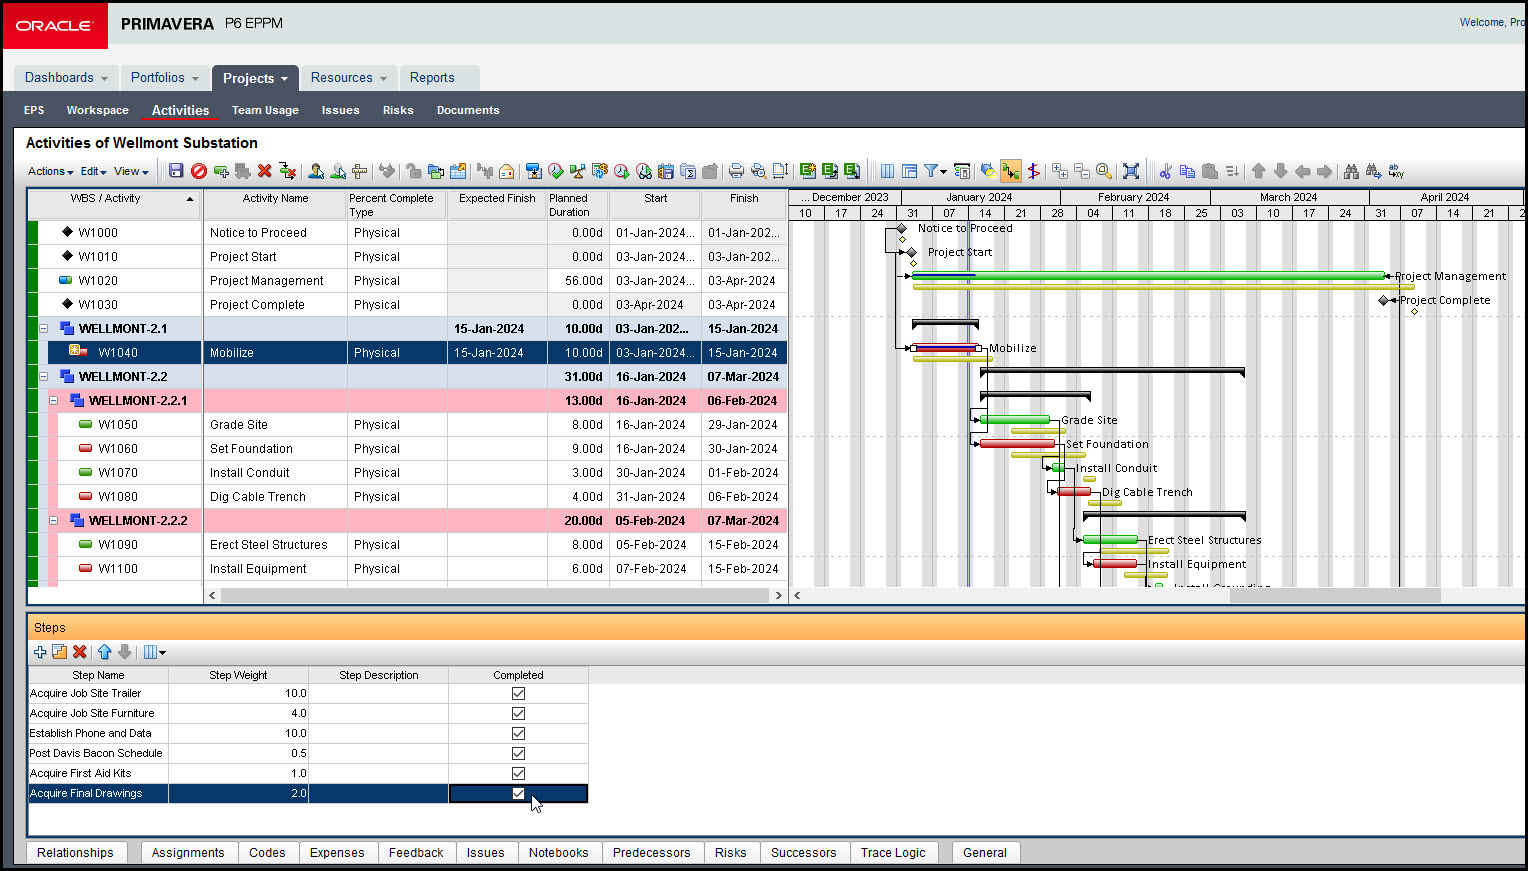
We enter our status for week 3. Again, using the bottom details section, we select the ‘Steps’ tab and check ‘Acquire Final Drawings’ as complete, as shown in Figure 11.
Figure 11
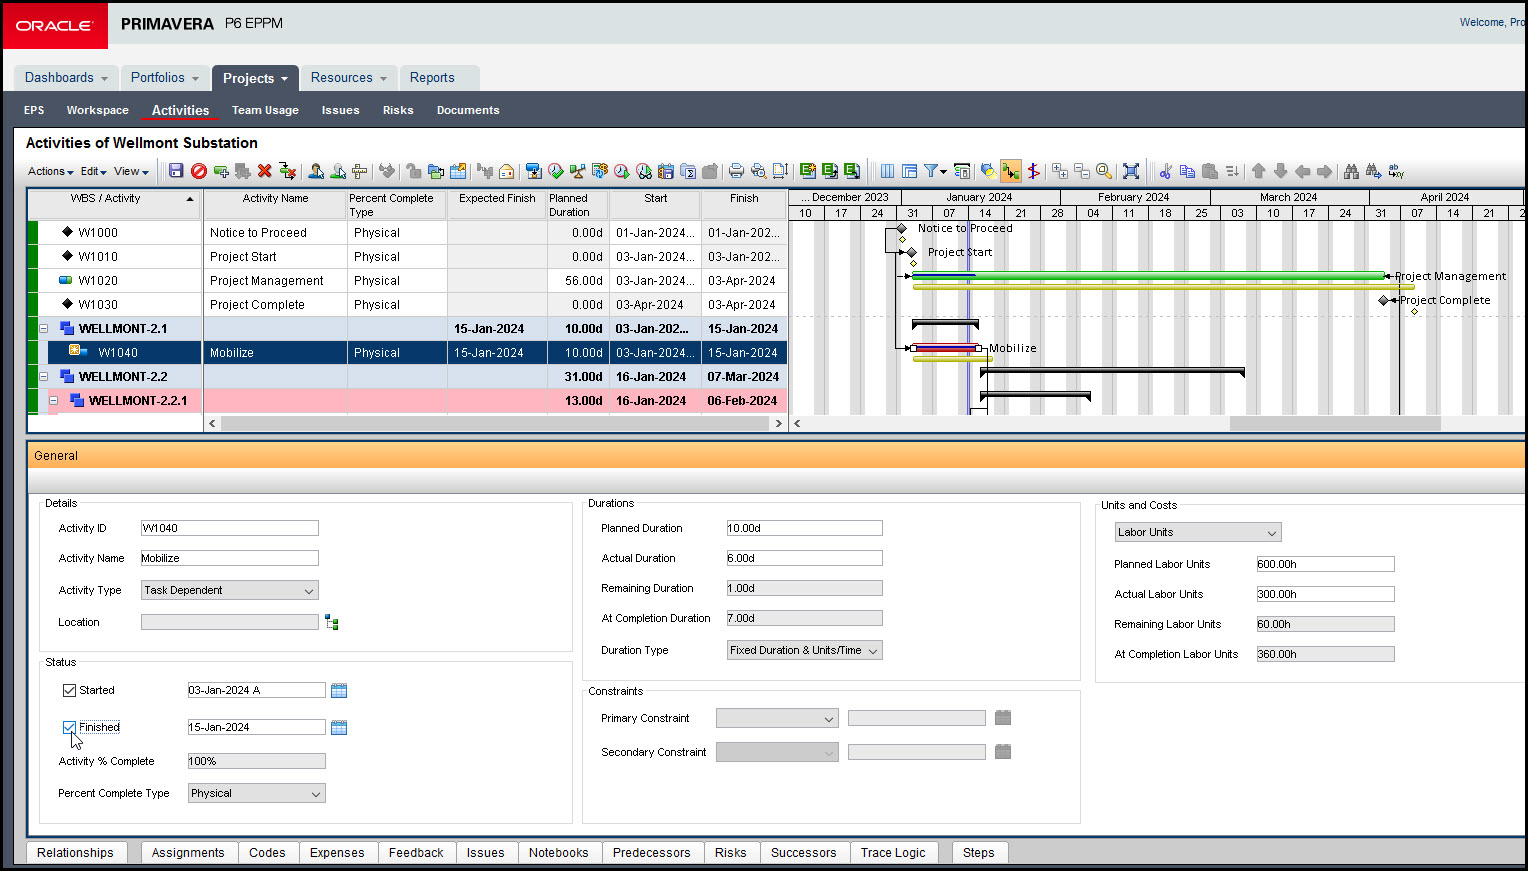
In the ‘General’ details screen we check the activity ‘Mobilize’ as ‘finished’ as shown in Figure 12.
Figure 12
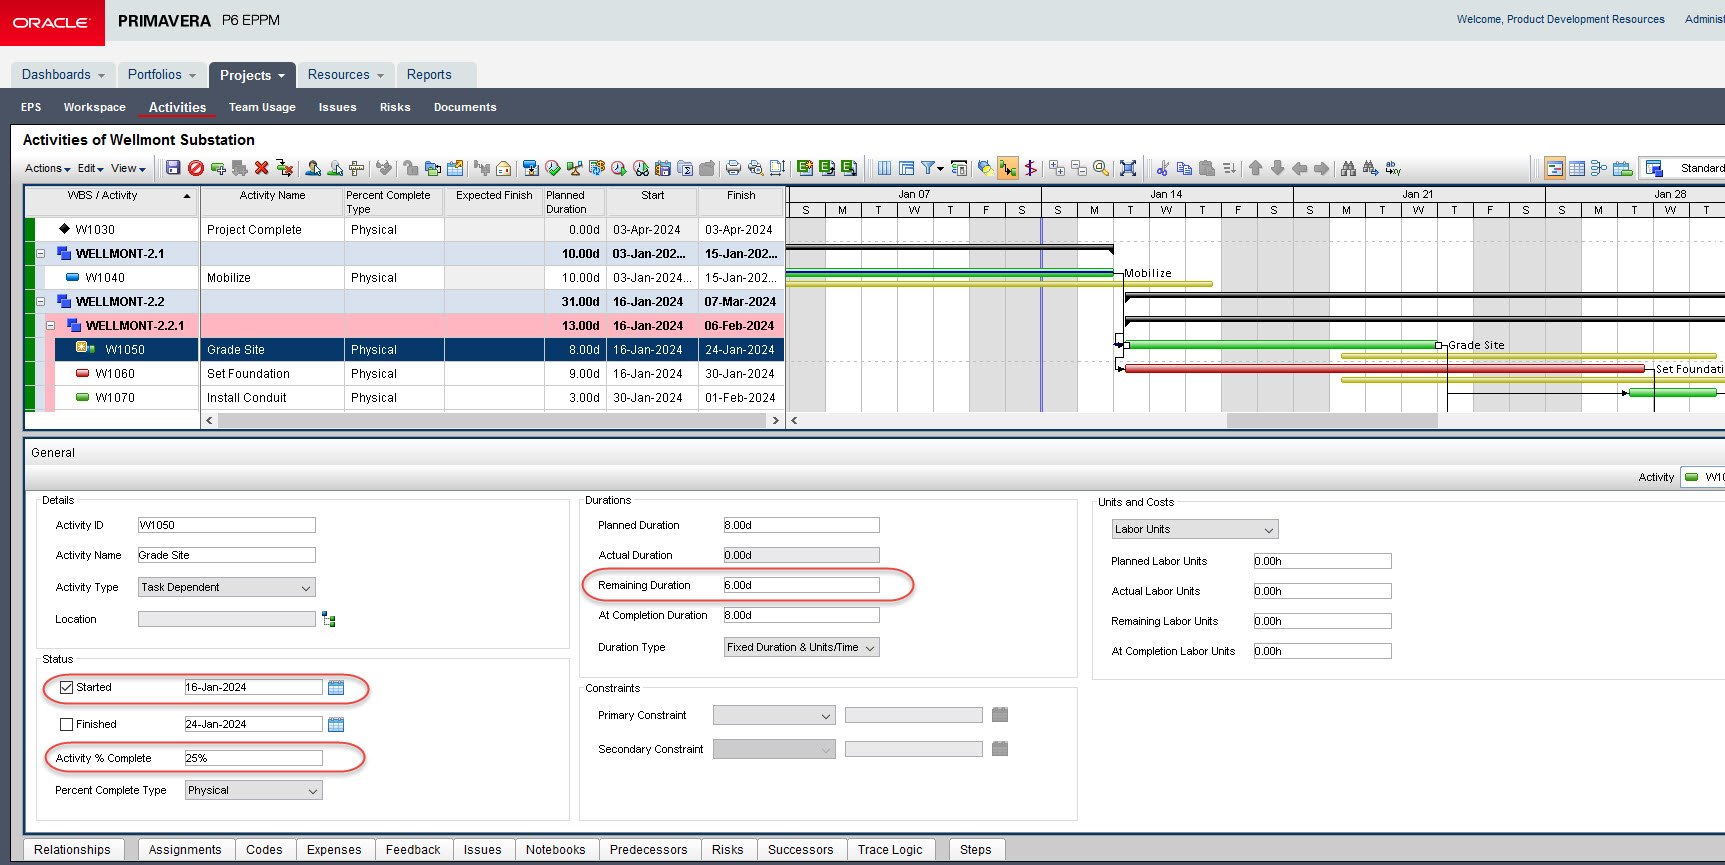
Now we have two more activities that require a status, ‘Grade Site’ and ‘Set Foundation’. Firstly, we check the ‘Grade Site’ as started, enter an ‘Activity % Complete’ of 25%. We must manually enter a ‘Remaining Duration’ of days or an expected finish date so we enter 6-days as shown in Figure 13.
Figure 13
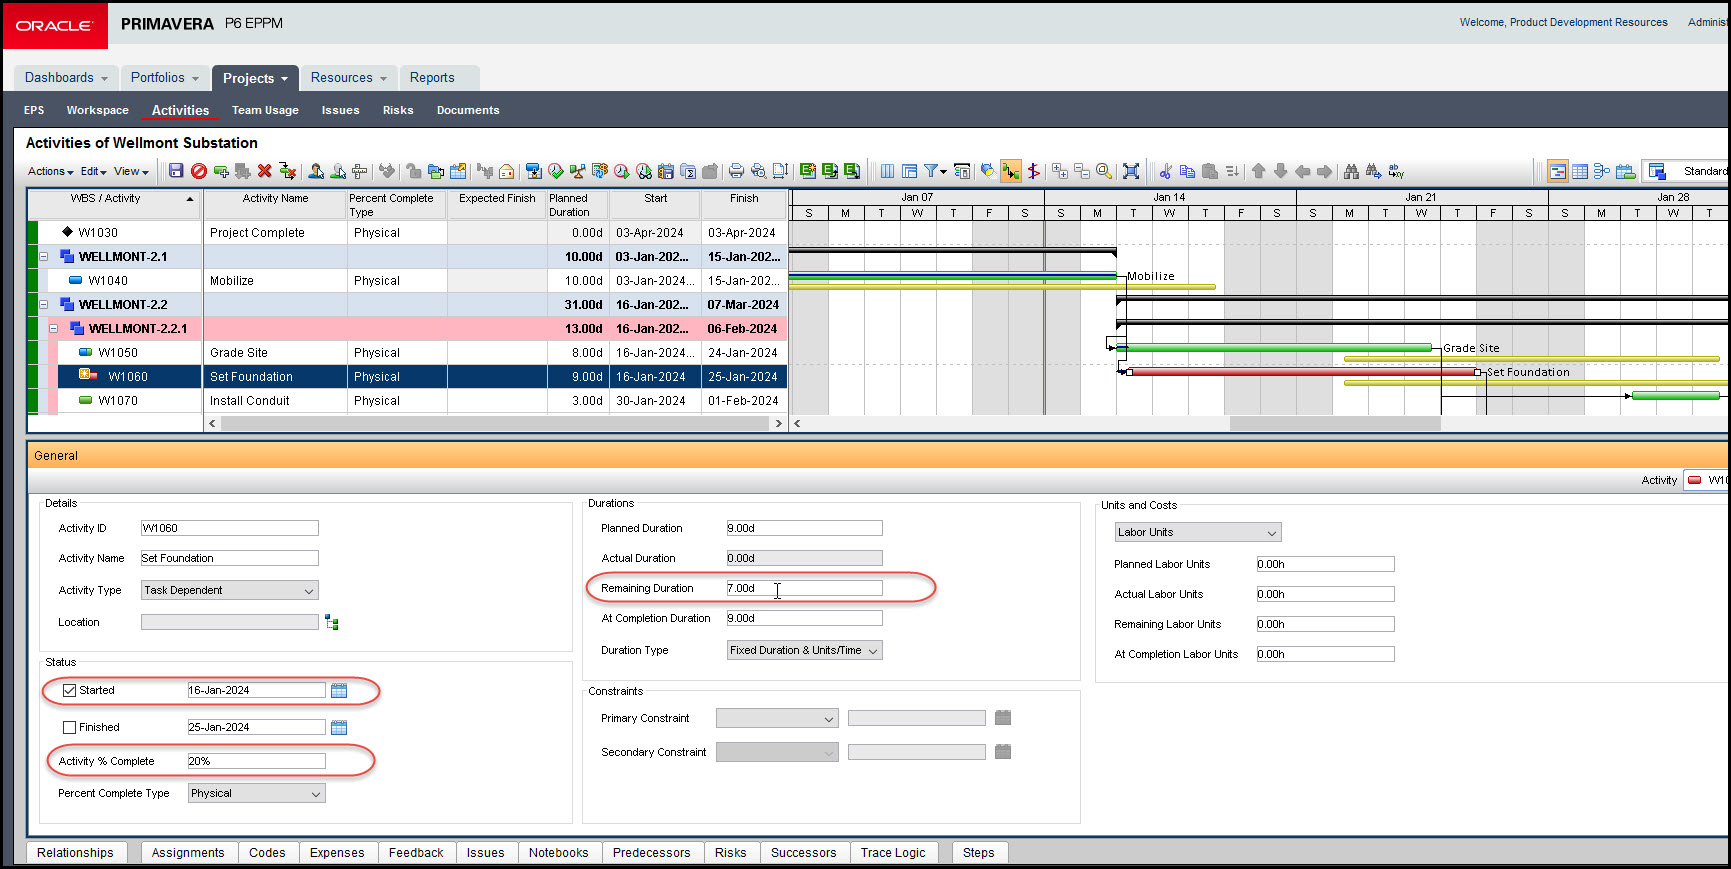
Next, we check ‘Set Foundation’ as started. We enter an ‘Activity % Complete’ of 20% and manually assign the ‘Remaining Duration’ of 7-days, as shown in Figure 14.
Figure 14
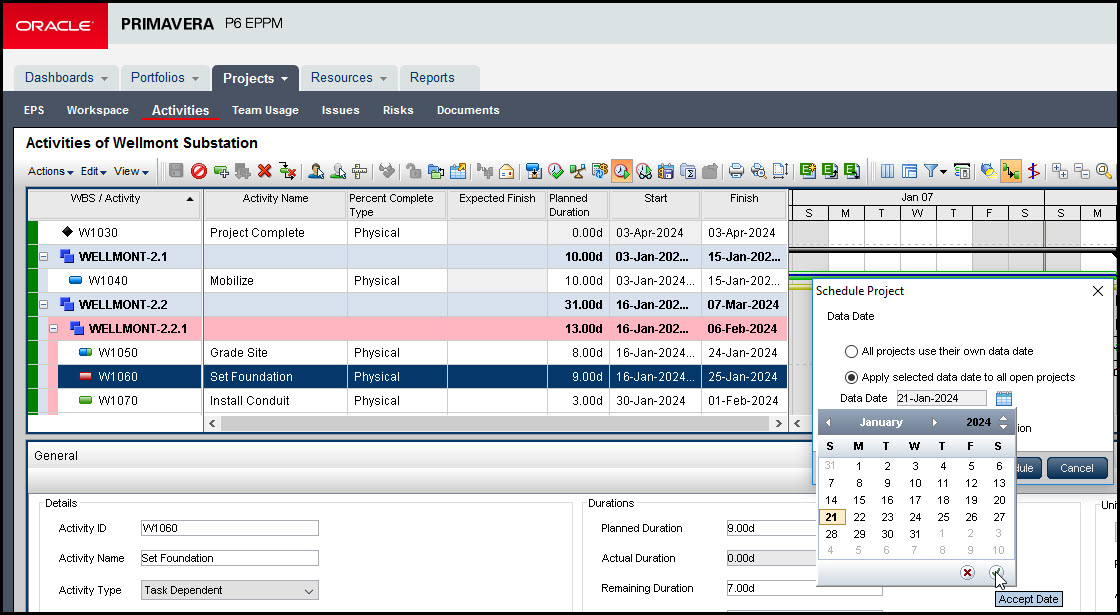
With our status for week three complete, we move our data date forward one week as shown in Figure 15.
Figure 15
We update our schedule and our final resulting project schedule is displayed in Fig 16.
Figure 16
Summary
When you use the Primavera P6 EPPM physical percent complete type, you must manually enter a remaining duration or an expected finish date. If you choose to enter an expected finish date, Primavera P6 EPPM will calculate the remaining duration, during the recalculation of the schedule.
Also, when using the Primavera P6 EPPM physical percent complete type, you must make sure that physical activities have an activity percent complete value.
Although the physical percent complete type requires time whilst imputing detailed data it is rewarding as it displays the actual physical progress of the project, which can be very beneficial.