After schedule creation it’s very common to want to filter all tasks occurring in the near future. This near term view can be created as a Microsoft Project look ahead filter.
A key concept in David Allen’s acclaimed organizational book “Getting Things Done” is to focus on your project’s next step tasks. This process helps the project manager keep the project forward focused. So whether you want to filter near term tasks to focus on these next step items or to simply track schedule progress Microsoft Project is capable of supporting your look ahead filter efforts.
This article demonstrates how to create a look-ahead filter in Microsoft Project 2013.
How to Create a Microsoft Project Look Ahead Filter
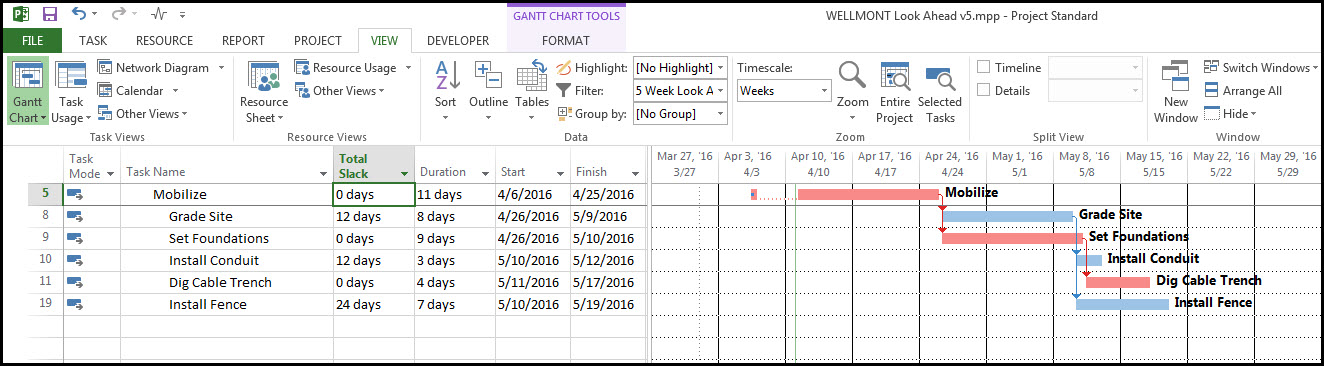
In Figure 1 we have our demonstration schedule.
 Figure 1
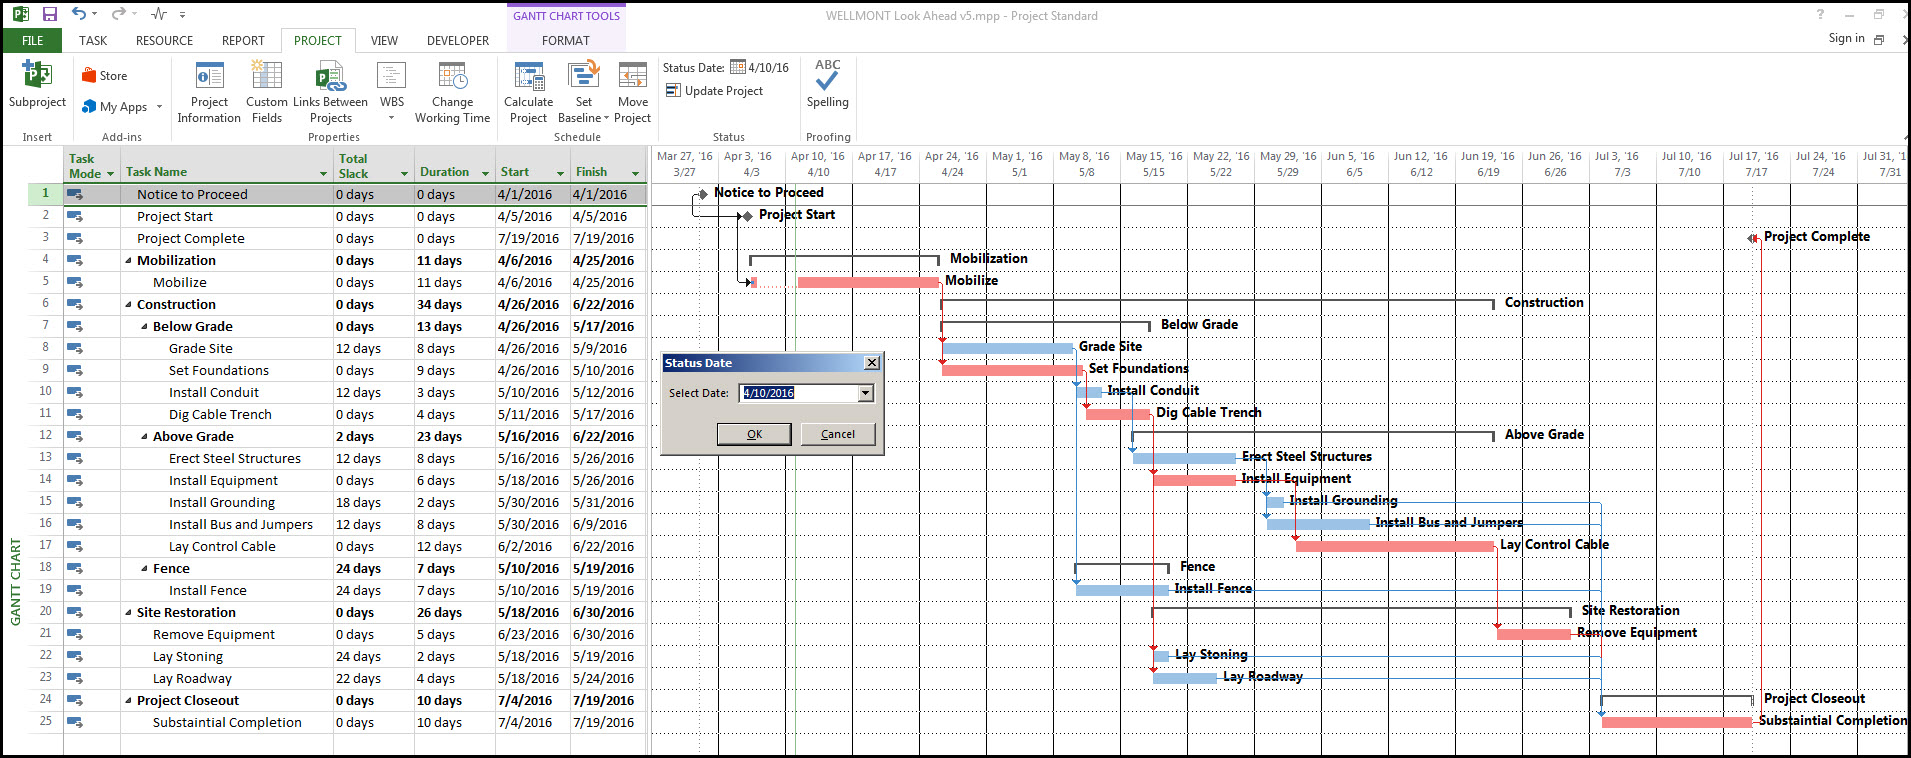
Note, in particular, the April 10th status date. This is the date our current progress has been captured up through. Displaying near term tasks in Microsoft Project requires a two-step process. Step 1: define a custom field flag formula to capture all tasks occurring in the five weeks succeeding the status date of the project. Step 2: create and apply a filter to display all tasks for which the flag is true or yes.
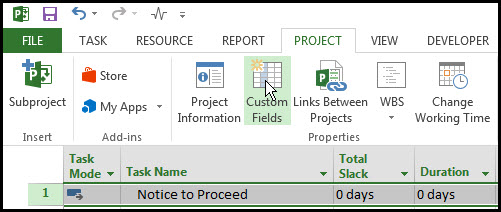
Let’s proceed by creating the custom field flag. Select the project tab, properties ribbon group, and custom fields, Figure 2.
Figure 2
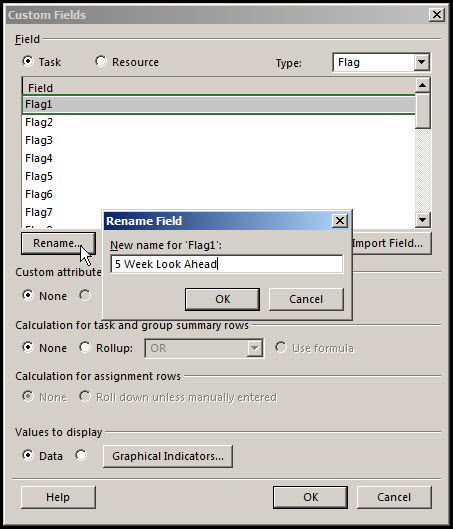
In the custom fields dialog, Figure 3, select the type Flag from the drop down menu. Rename Flag1 “5 Week Look Ahead”.
Figure 3
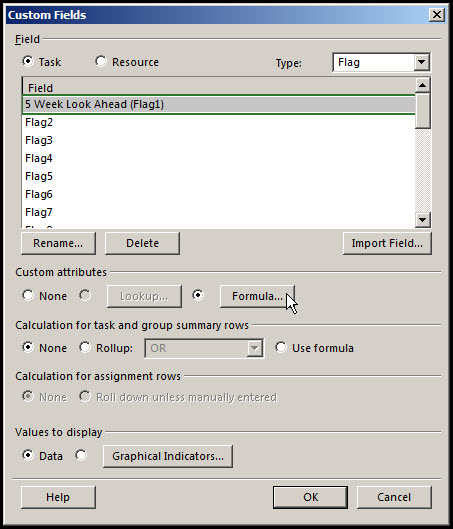
Toggle Formula in the custom attributes, Figure 4.
Figure 4
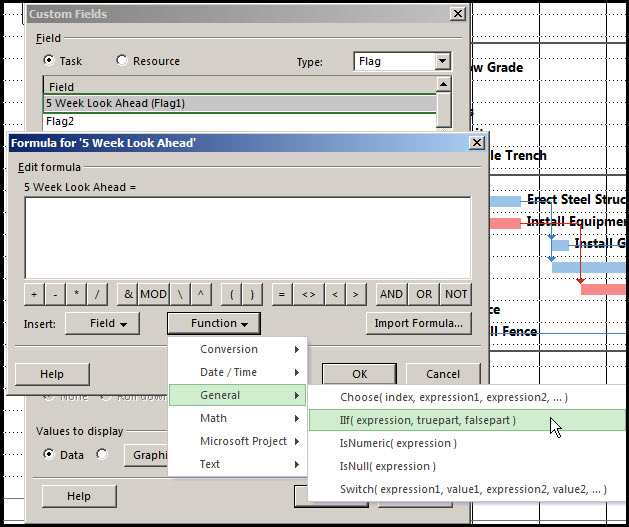
Click the formula button. Select the Function General and IIf(expression, truepart, falsepart), Figure 5.
Figure 5
Set the truepart to “Yes” and the falsepart to “No”, Figure 6.
Figure 6

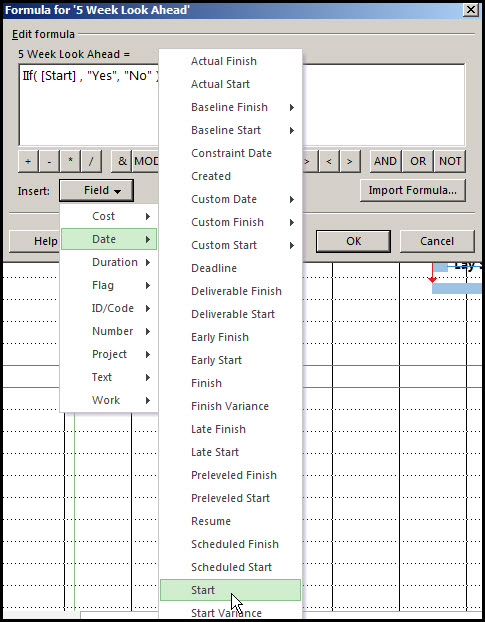
In Figure 7 we enter the Start Date field into the formula.
Figure 7
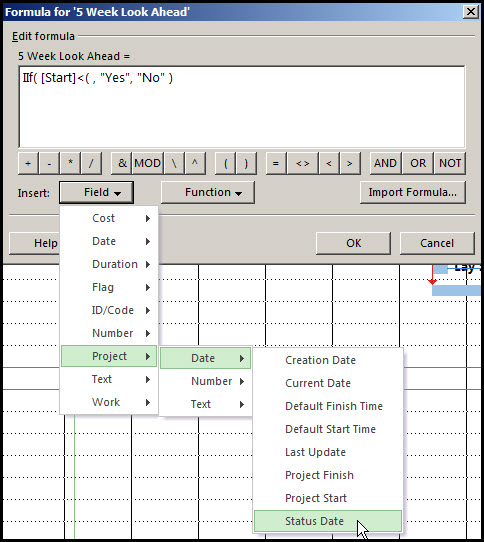
Next we enter “Status Date” into the formula, Figure 8.
Figure 8
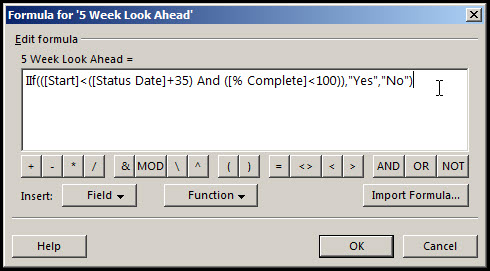
Here we want to capture all tasks that have a start date less than the status date plus 35-days, Figure 9.
Figure 9
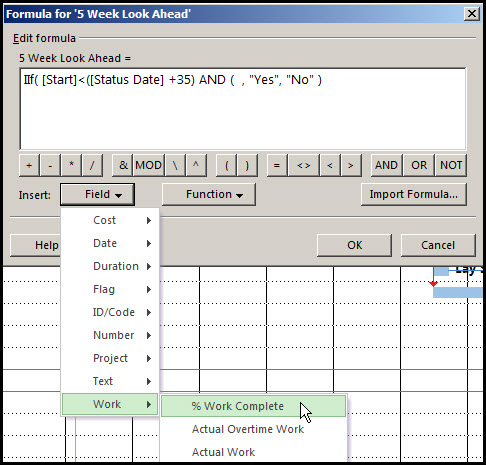
Also, in Figure 9, we insert the % Work Complete field into the formula. Only tasks that have a % complete less than 100, i.e. incomplete tasks, are captured. Completed tasks are filtered out. The final formula is in Figure 10, which will capture all tasks starting within 35-days of the status date and all non-complete, i.e. in-progress tasks within this time period.
Figure 10
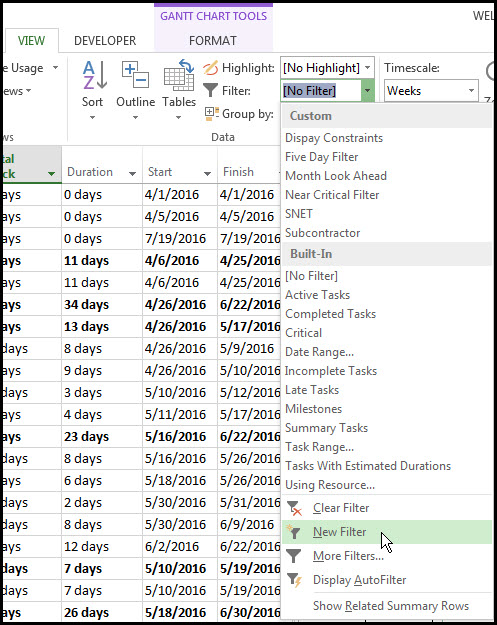
We continue by creating our flag filter. Select ‘New Filter’ in the View tab, Data ribbon, and Filter drop down menu, Figure 11.
Figure 11
Name the filter ‘5 Week Look Ahead’, Figure 12.
Figure 12
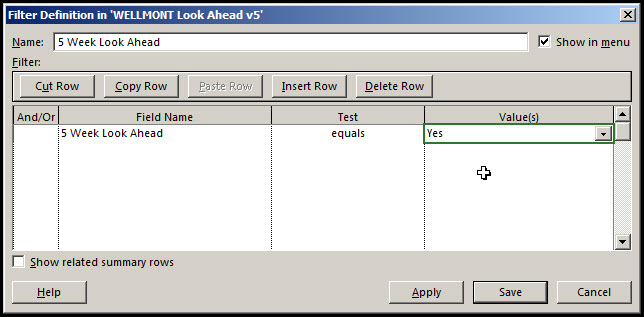
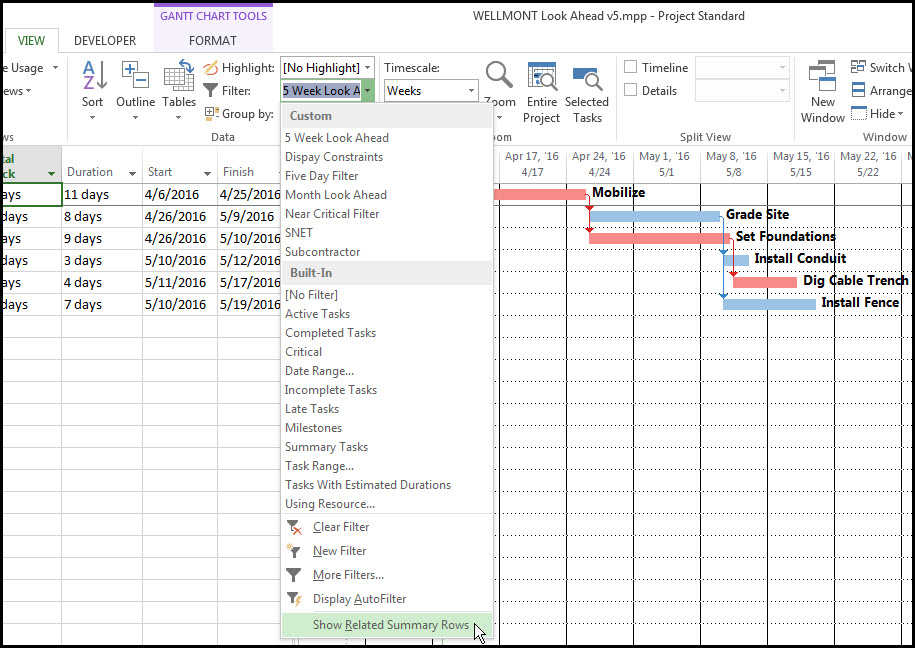
The task displays whenever the flag is ‘Yes’, Figure 12. In Figure 13 we select the ‘5 Week Look Ahead’ filter from the list of available filters.
Figure 13
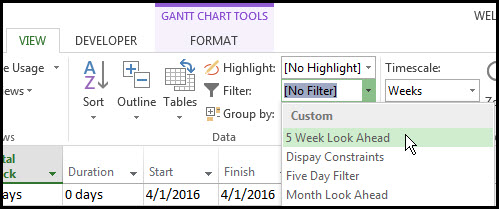
Figure 14 displays all the upcoming tasks.
Figure 14
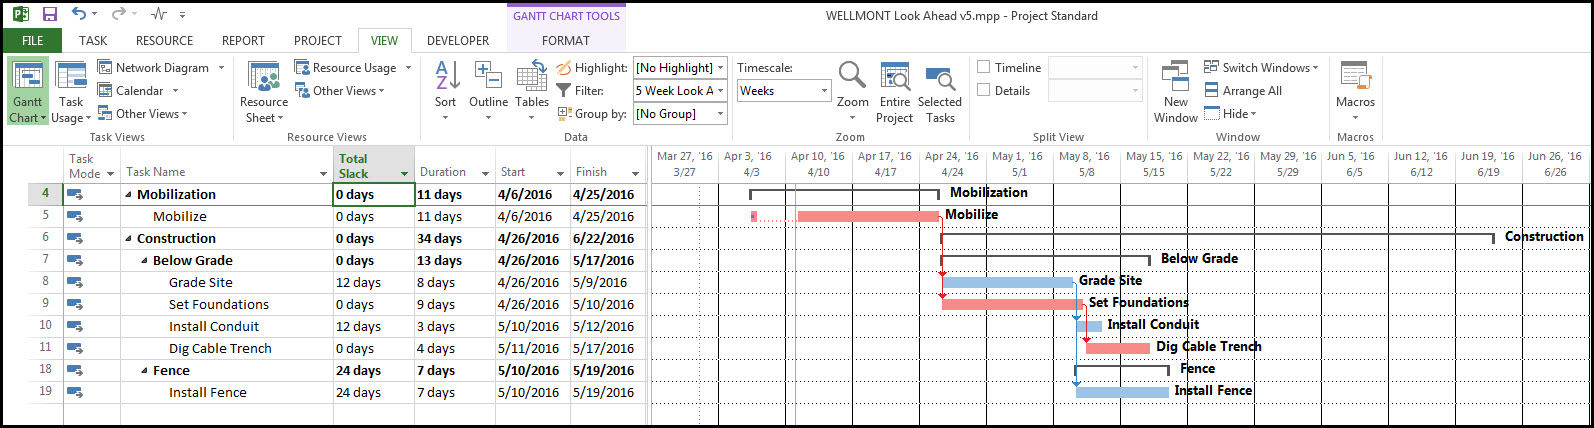
We select to display summary rows in Figure 15.
Figure 15
The final near term tasks and summary tasks are displayed in Figure 16.
Figure 16
Summary
Creating a look-ahead filter is possible in Microsoft Project 2013. You may first look to the filter dialog for the formula behind the filter, but you must use the features in custom fields to create the kind of complex formula required for looking ahead in your schedule.
A simple flag filter in combination with our custom fields formula provides the approach required for our look-ahead filter. Our formula filters out everything from the status date up to 35-days after. By slightly varying our formula you can filter out from the current date onwards to 35 days out.
You also can define a custom field date for the beginning of the next month. And define a formula that filters every in-progress or starting tasks from the status date through the end of the month.
Sample File: To try this for yourself, you can download the Microsoft Project file used in this article by clicking here.