You can share a calendar between schedules by using the Organizer in Microsoft Project. The Organizer serves as the central control center for custom items, including calendars. Using the Organizer it is possible to copy a custom calendar from one project into another. In this way the scheduler leverages a custom made calendar for use on other projects.
This article shows a quick tip on how to share a calendar between schedules in Microsoft Project.
Below in Figure 1 is a project file that has several calendars, including a ‘4×10 Work Week’ calendar.
 Figure 1

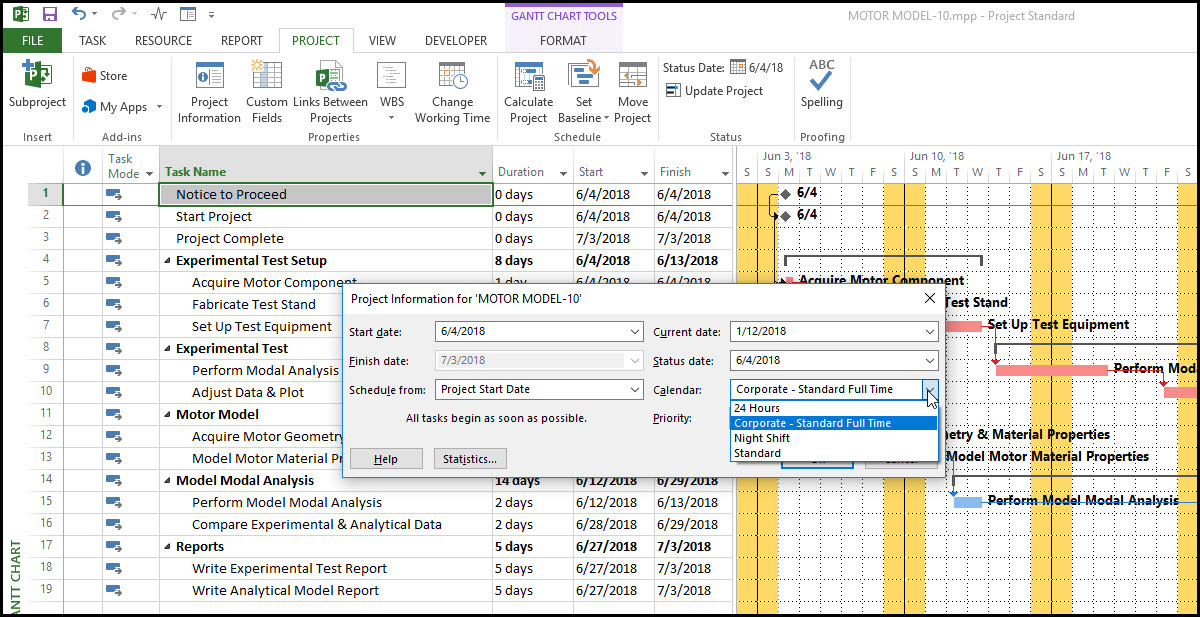
This ‘4×10 Work Week’ calendar is not currently available in our target project schedule, Figure 2.
Figure 2
To copy the ‘4×10 Work Week’ calendar from the Pipe Repair-18.mpp to the Motor Model-10.mpp we activate the Organizer feature.
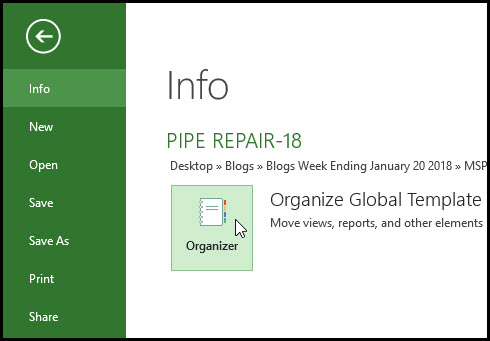
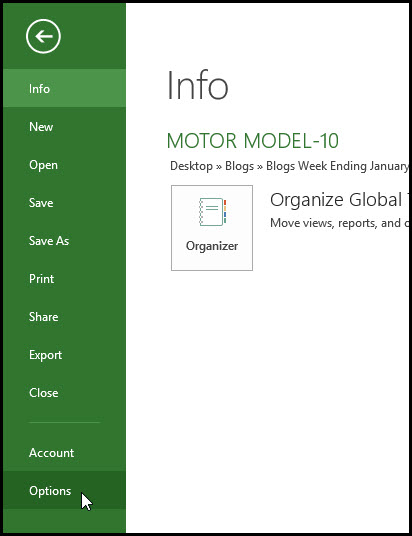
Select File | Info and Organizer, Figure 3.
Figure 3
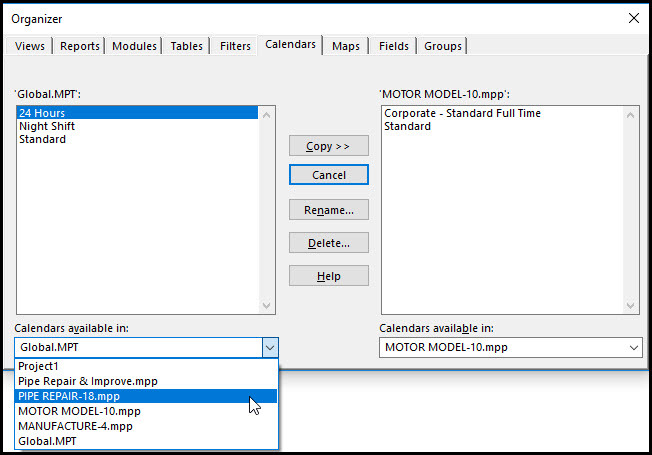
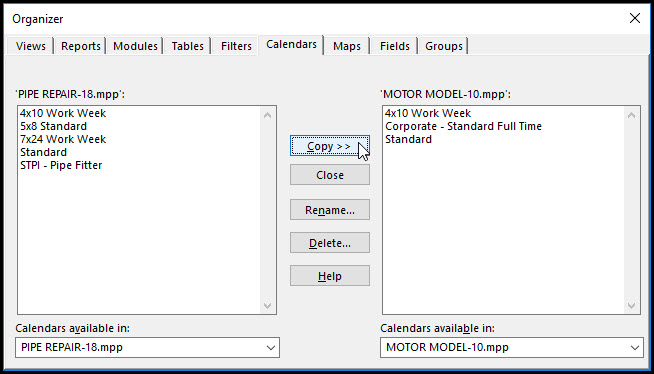
In the Organizer select the calendars tab. Set the source project to Pipe Repair-18.mpp, Figure 4.
Figure 4
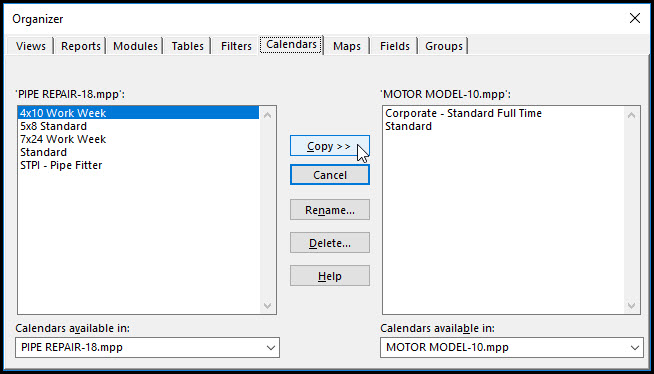
The target project is Motor Model-10.mpp. Copy the ‘4×10 Work Week’ calendar from the source to target project, Figure 5.
Figure 5
The copied calendar appears, as per Figure 6, in the list of available calendars for Motor Model-10.mpp.
Figure 6
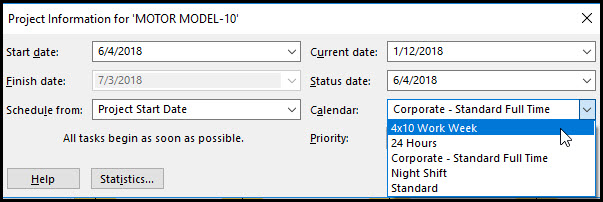
Great! Now as displayed in the project information dialog for Motor Model-10, Figure 7, the ‘4×10 Work Week’ calendar is now available for the Motor Model-10 project.
Figure 7
The ‘4×10 Work Week’ is now available in both projects. And we continue and set the project calendar of Motor Model-10.mpp to ‘4×10 Work Week’. Well, our objective for this blog is done, but we have to make a few more adjustments in our demonstration when changing our schedule calendar from an eight hour a day 5-day work week calendar to a ten hour a day 4-day work week calendar.
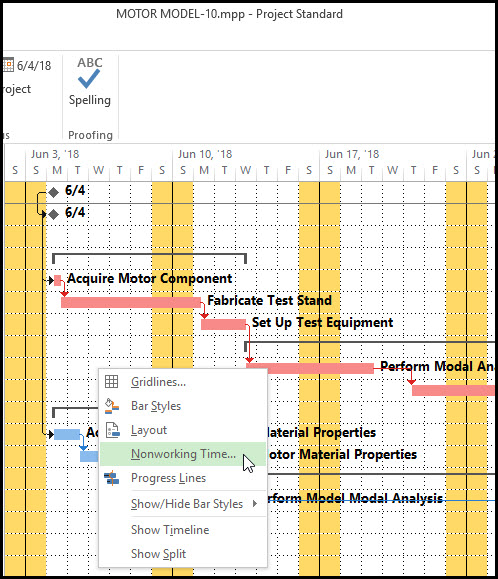
First, we reset the nonworking time calendar. Right click on the Gantt chart and select nonworking time from the popup menu, Figure 8.
Figure 8
In the Timescale dialog, Figure 9, we see that the current Timescale calendar is ‘Corporate – Standard Full Time (Project Calendar), which is a 5×8 work week calendar.
Figure 9
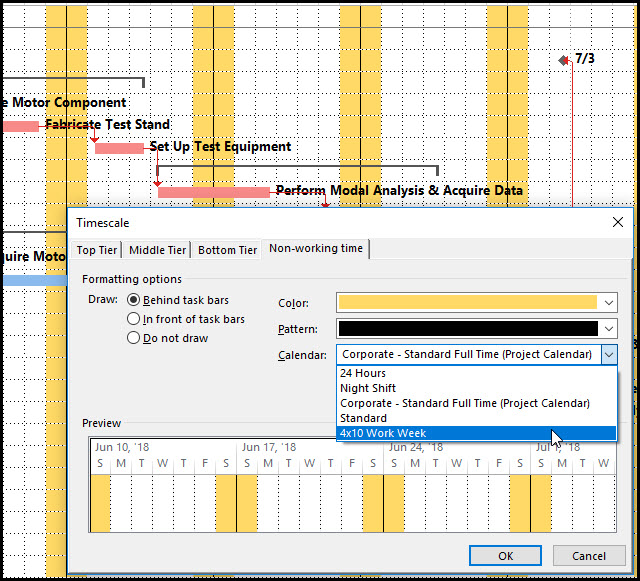
In Figure 10 we set the nonworking time calendar to ‘4×10 Work Week’.
Figure 10
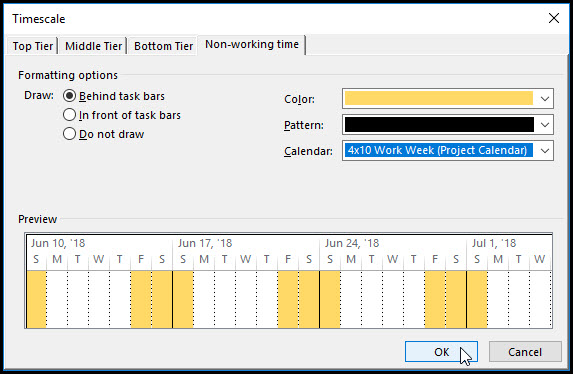
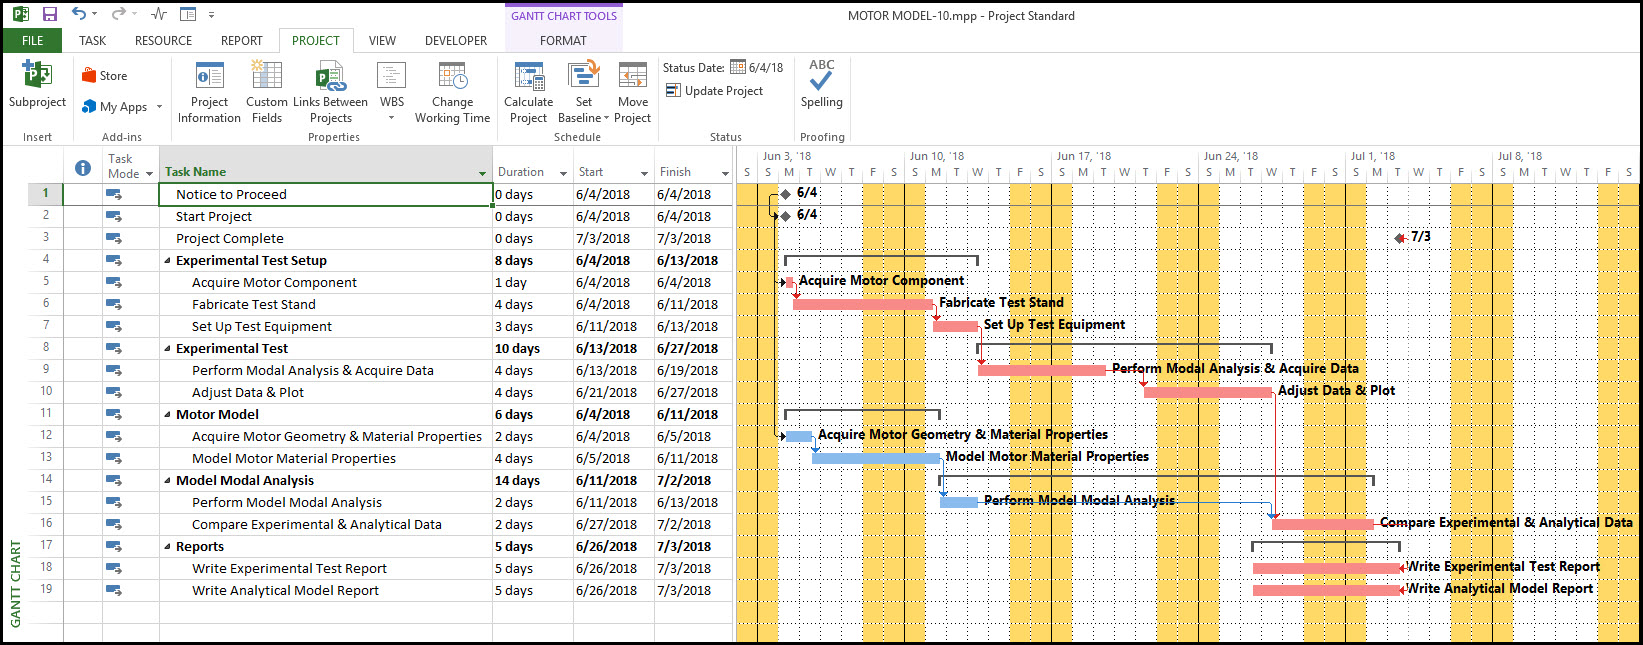
Click OK. The resulting schedule is displayed in Figure 11.
Figure 11
We continue and select File | Options, Figure 12.
Figure 12
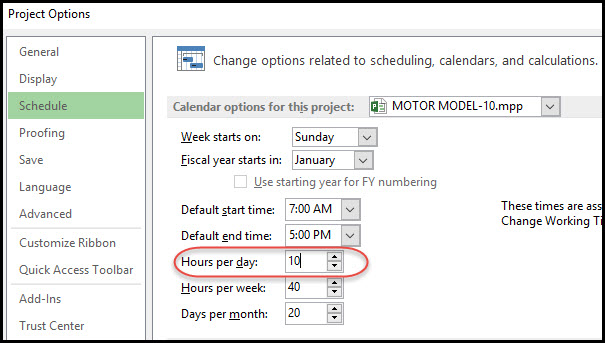
In the project options dialog, we select schedule and change the hours per day from 8 to 10, Figure 13.
Figure 13
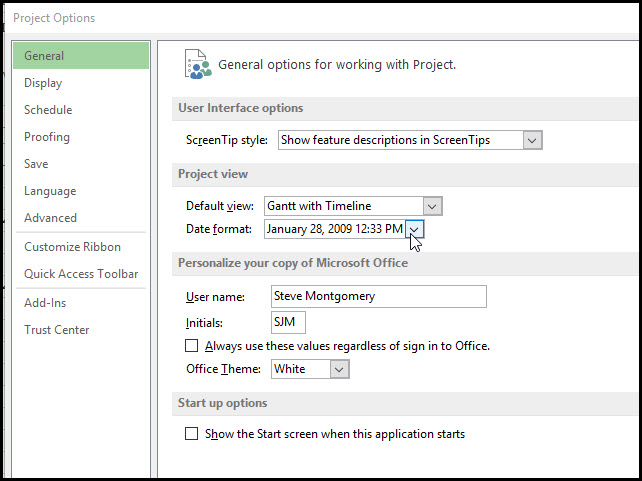
We also display a timestamp by selecting a respective date format in the general section of the project options dialog, Figure 14.
Figure 14
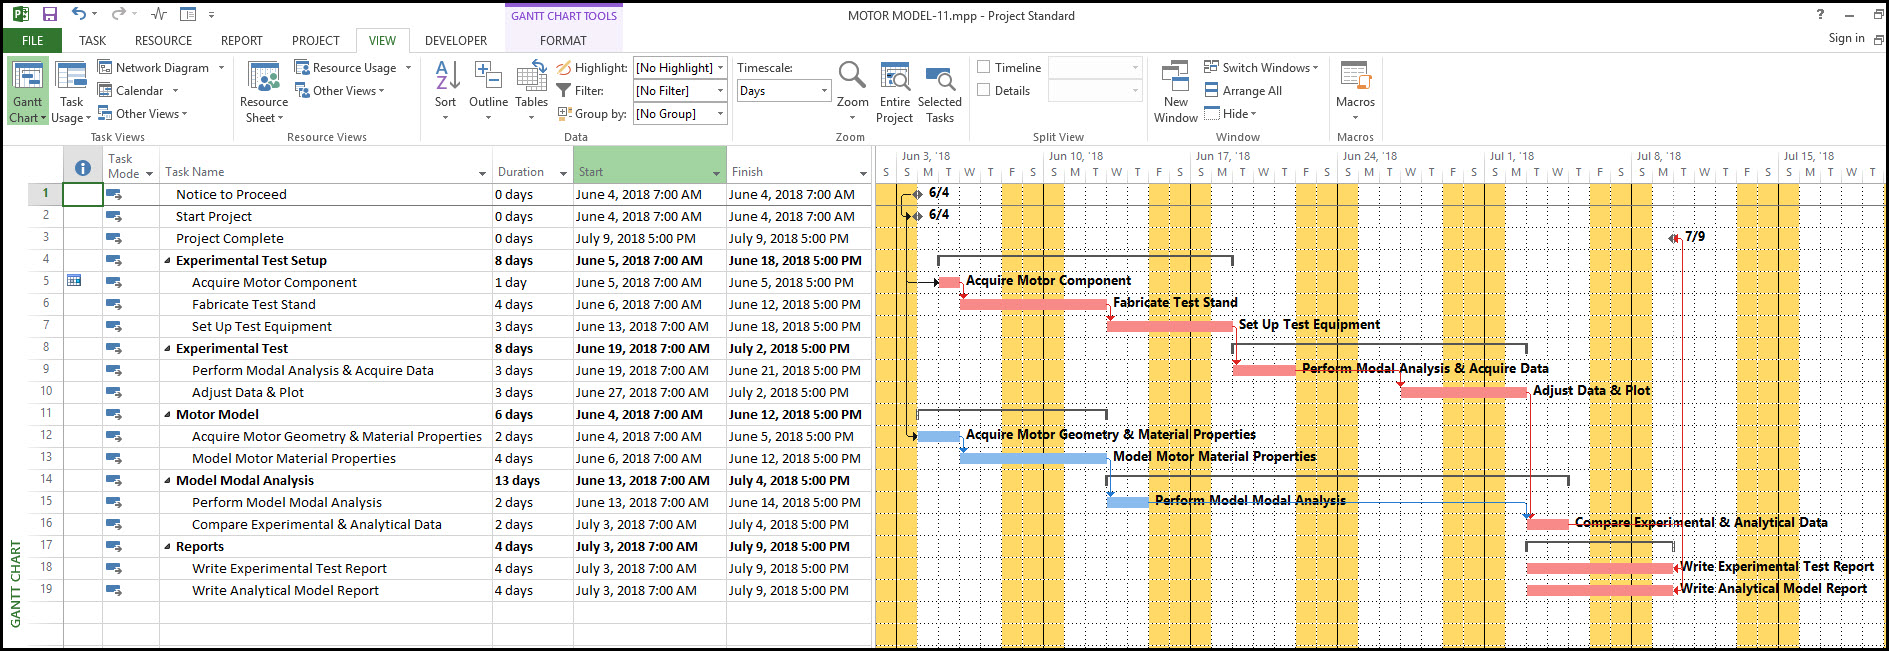
With a few more additional adjustments to task durations and lag durations to make sure all activities start at 7:00 AM and conclude at 5:00 PM, our final schedule with updated ‘4×10 Work Week’ calendar is in Figure 15.
Figure 15
Summary
Using the Microsoft Project Organizer feature it is possible to share a calendar between schedules. The Organizer is a robust feature that additionally supports sharing views, tables, and filters among project schedules.
After copying the source project calendar to the target project, we may not be done depending the differences between the schedule’s old and new calendars. We may also have to update the nonworking time calendar, hours per day, and adjust task and lag durations.
It is helpful to display the timestamp to make sure task and lag durations match the work day time period. So, you can share a calendar between schedules that may require a few adjustments. The key is using the Microsoft Project Organizer feature.