 Here we show you a couple of ways you can add activities in Primavera P6. Activities are typically added to a project using the Activities view in Primavera P6. The activities view is used most frequently during the planning and execution phases of the project.
Upon clicking on the Activities button, as shown below in Figure 1, you are presented with a layout consisting of three separate areas; on the far left is the activities layout, adjacent to this is the Gantt chart and below both of these at the bottom is the Activities Detail area.
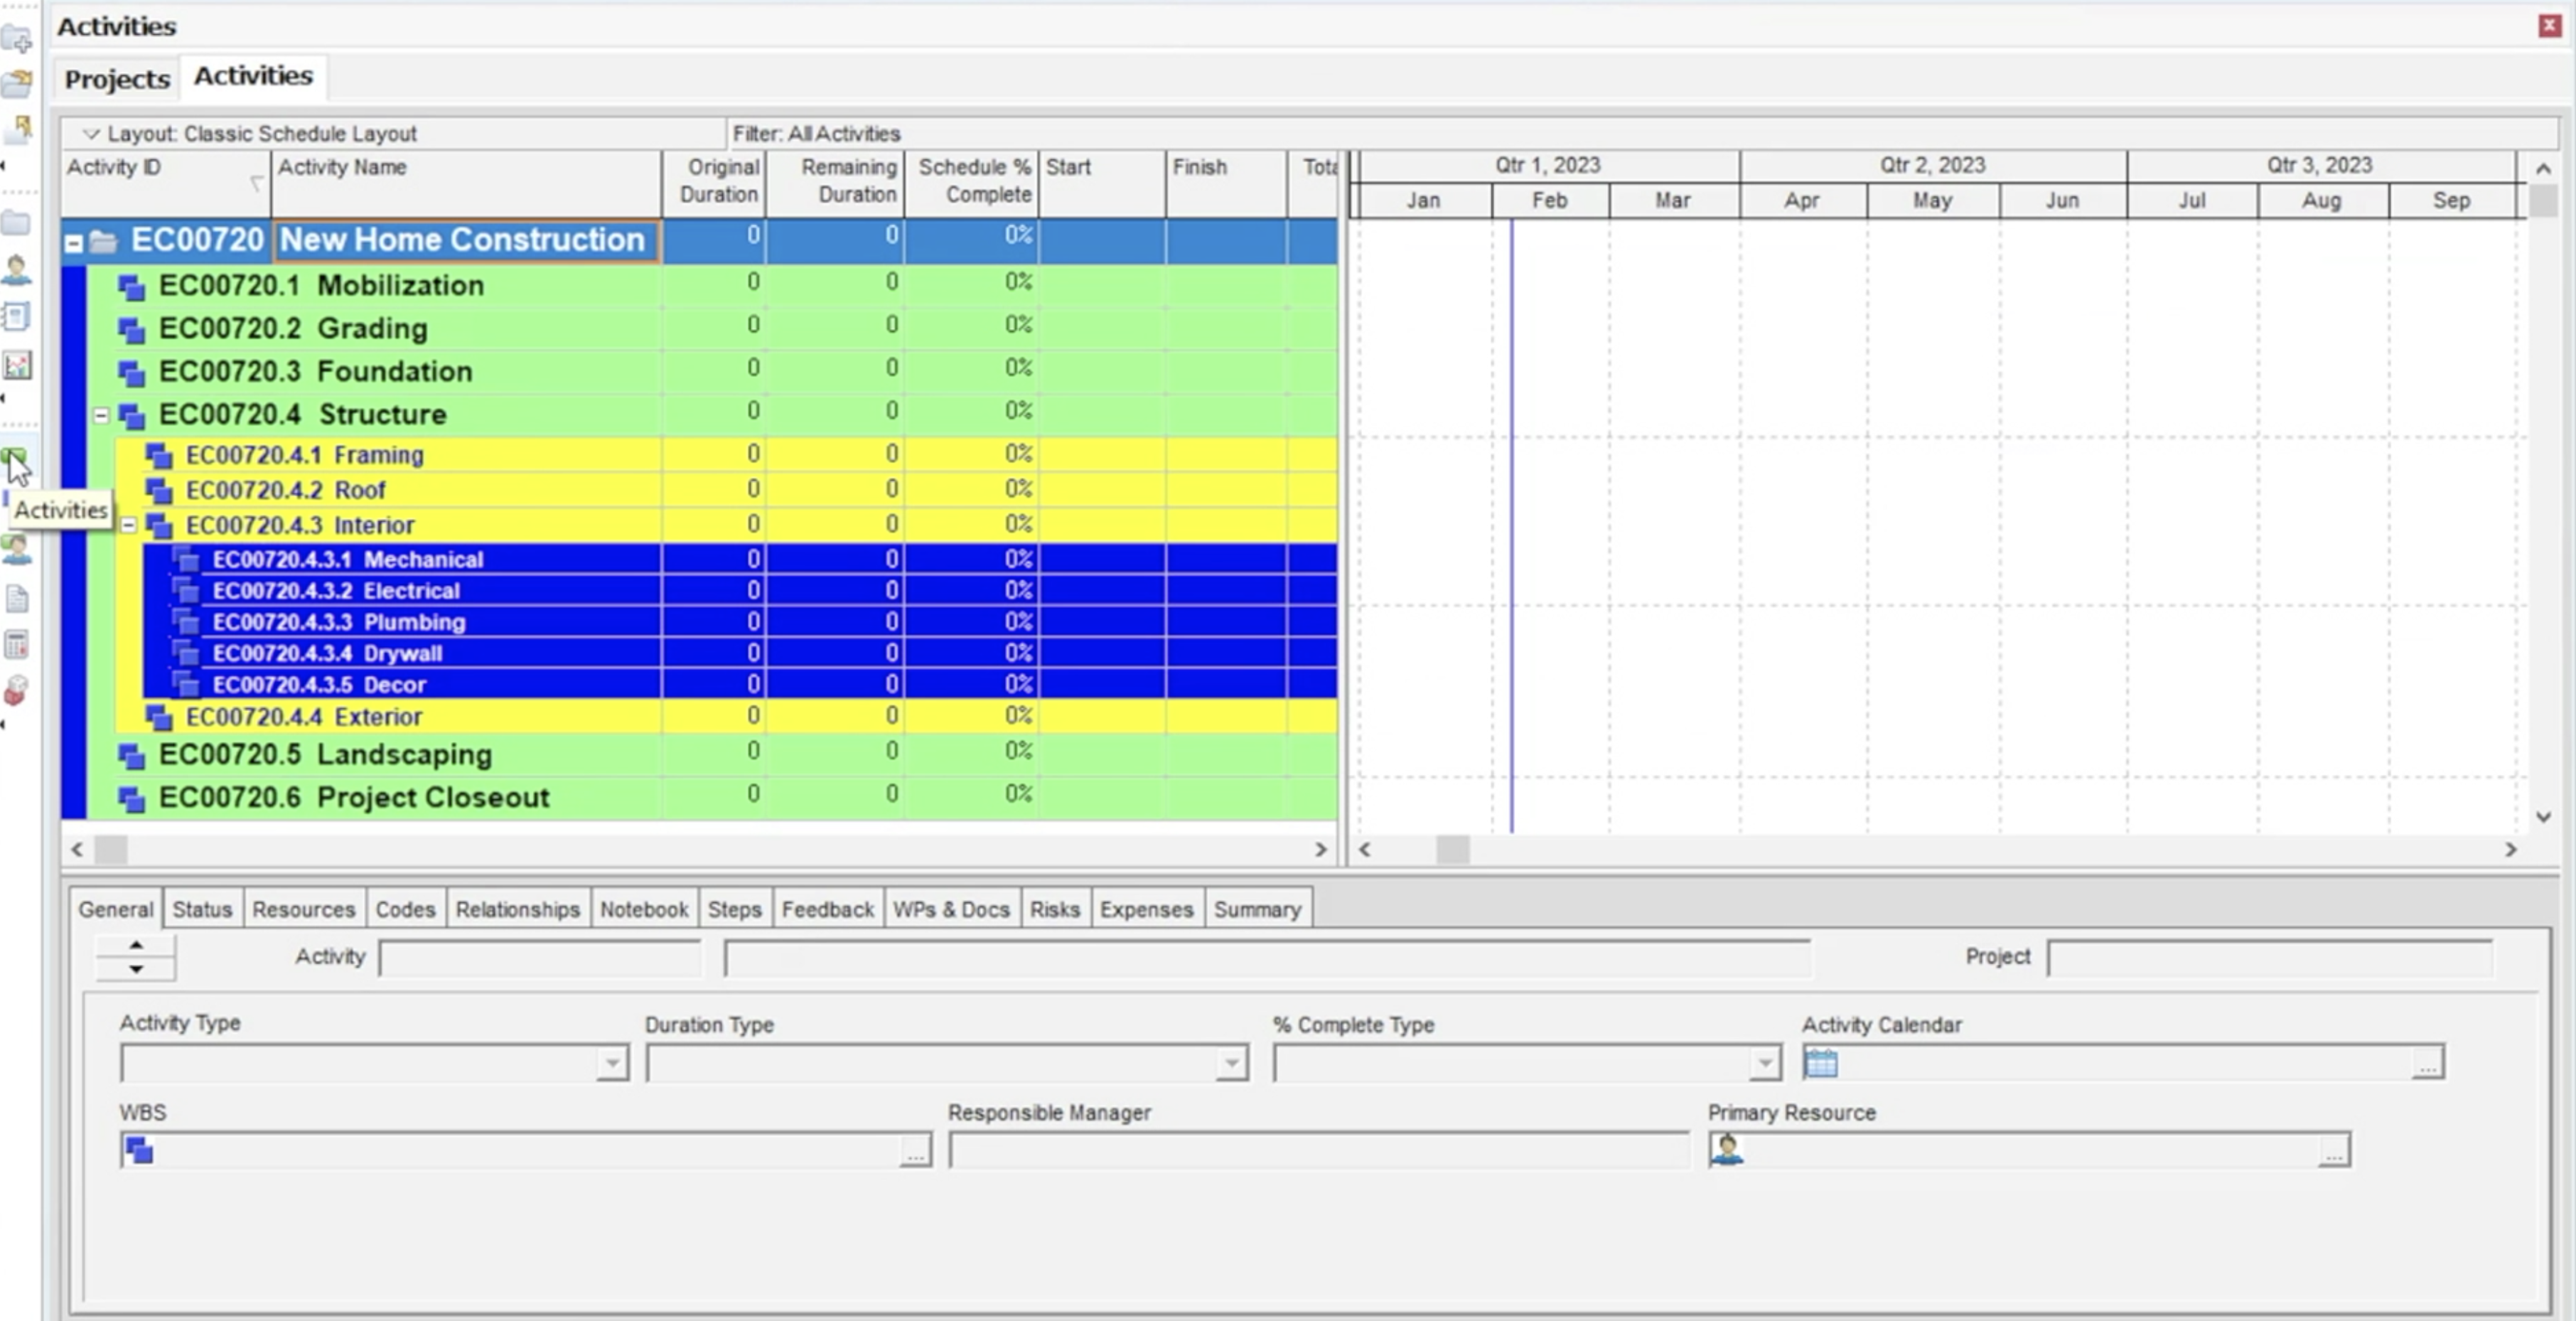 Figure 1
In the Activity table, the Work Breakdown Structure (WBS) elements are displayed as color- coded rows, with each color representing a different level of the WBS, as shown in Figure 2.
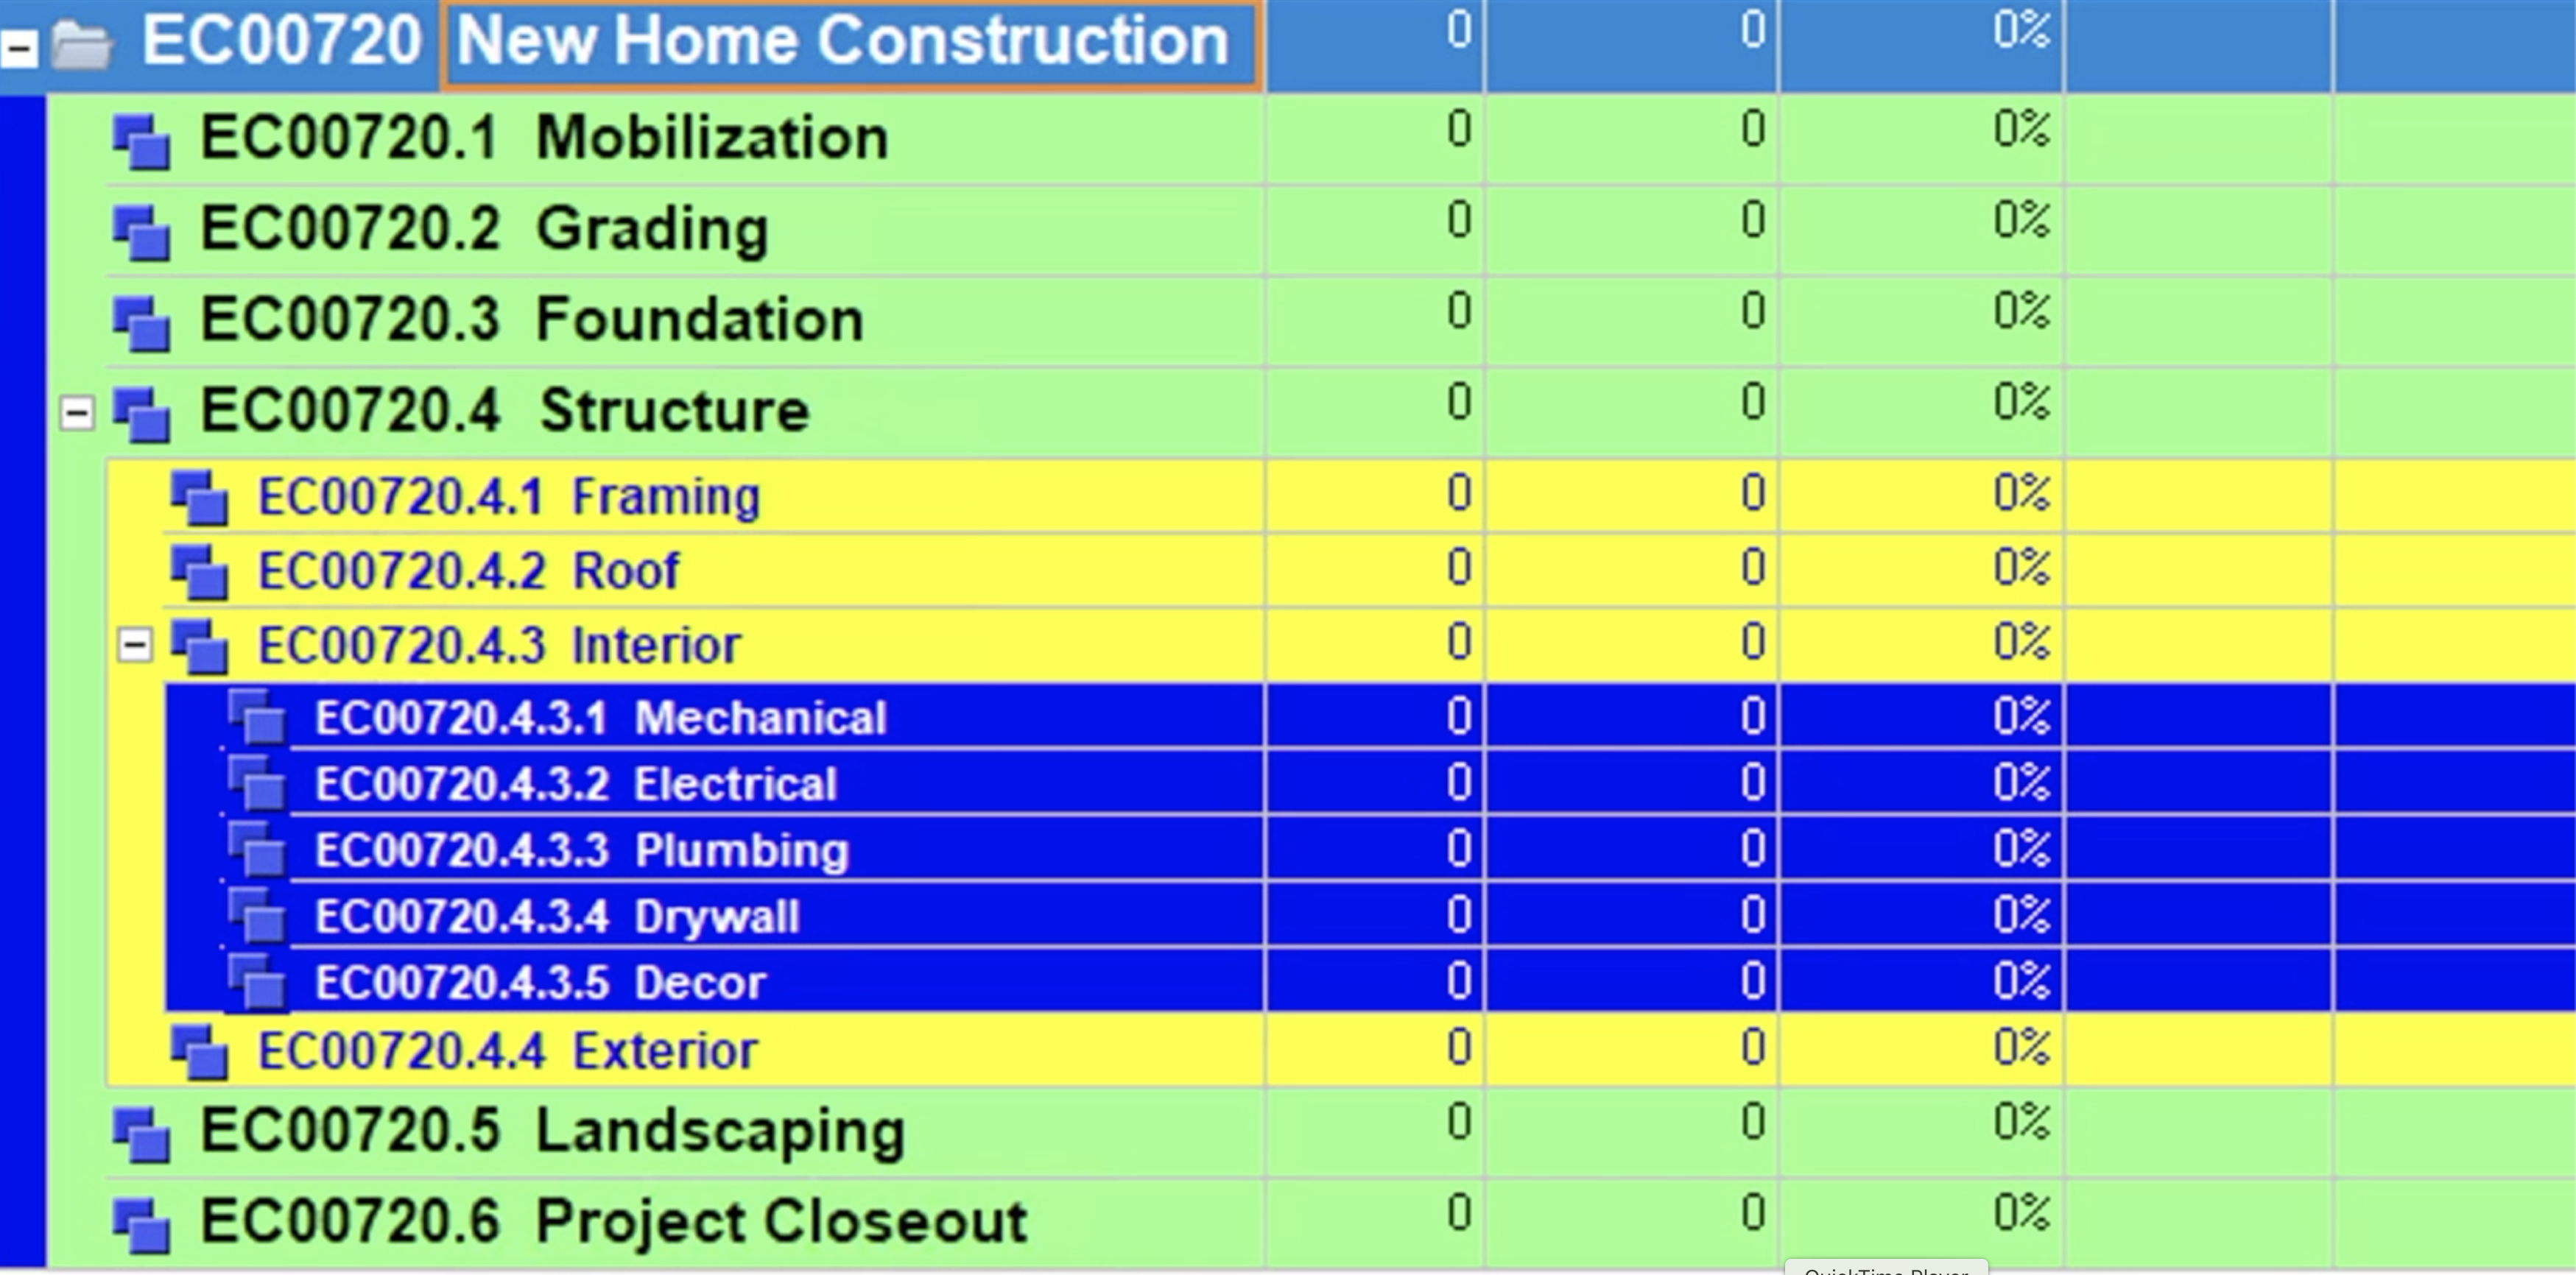 Figure 2
To create a schedule, activities need to be added below each element of the WBS. Firstly, you need to select the WBS under which you wish to create your activities. For this project, the first activity will be a start milestone that is located directly below the top level WBS element, ‘New Home Construction.’
There are two options to choose from when adding activities to a schedule in Primavera P6.
Option 1
With option 1, we click on the WBS element ‘New home Construction’ and select the ‘Activities’ button to the right of the Gantt table as shown below in Figure 3.
 Figure 3
We enter a ‘New Activity’ wizard dialog box, where Primavera P6 automatically offers an Activity ID, which is appropriate for a new project schedule. We change the ‘Activity Name’ by typing in ‘Notice to Proceed’ as shown in Figure 4.
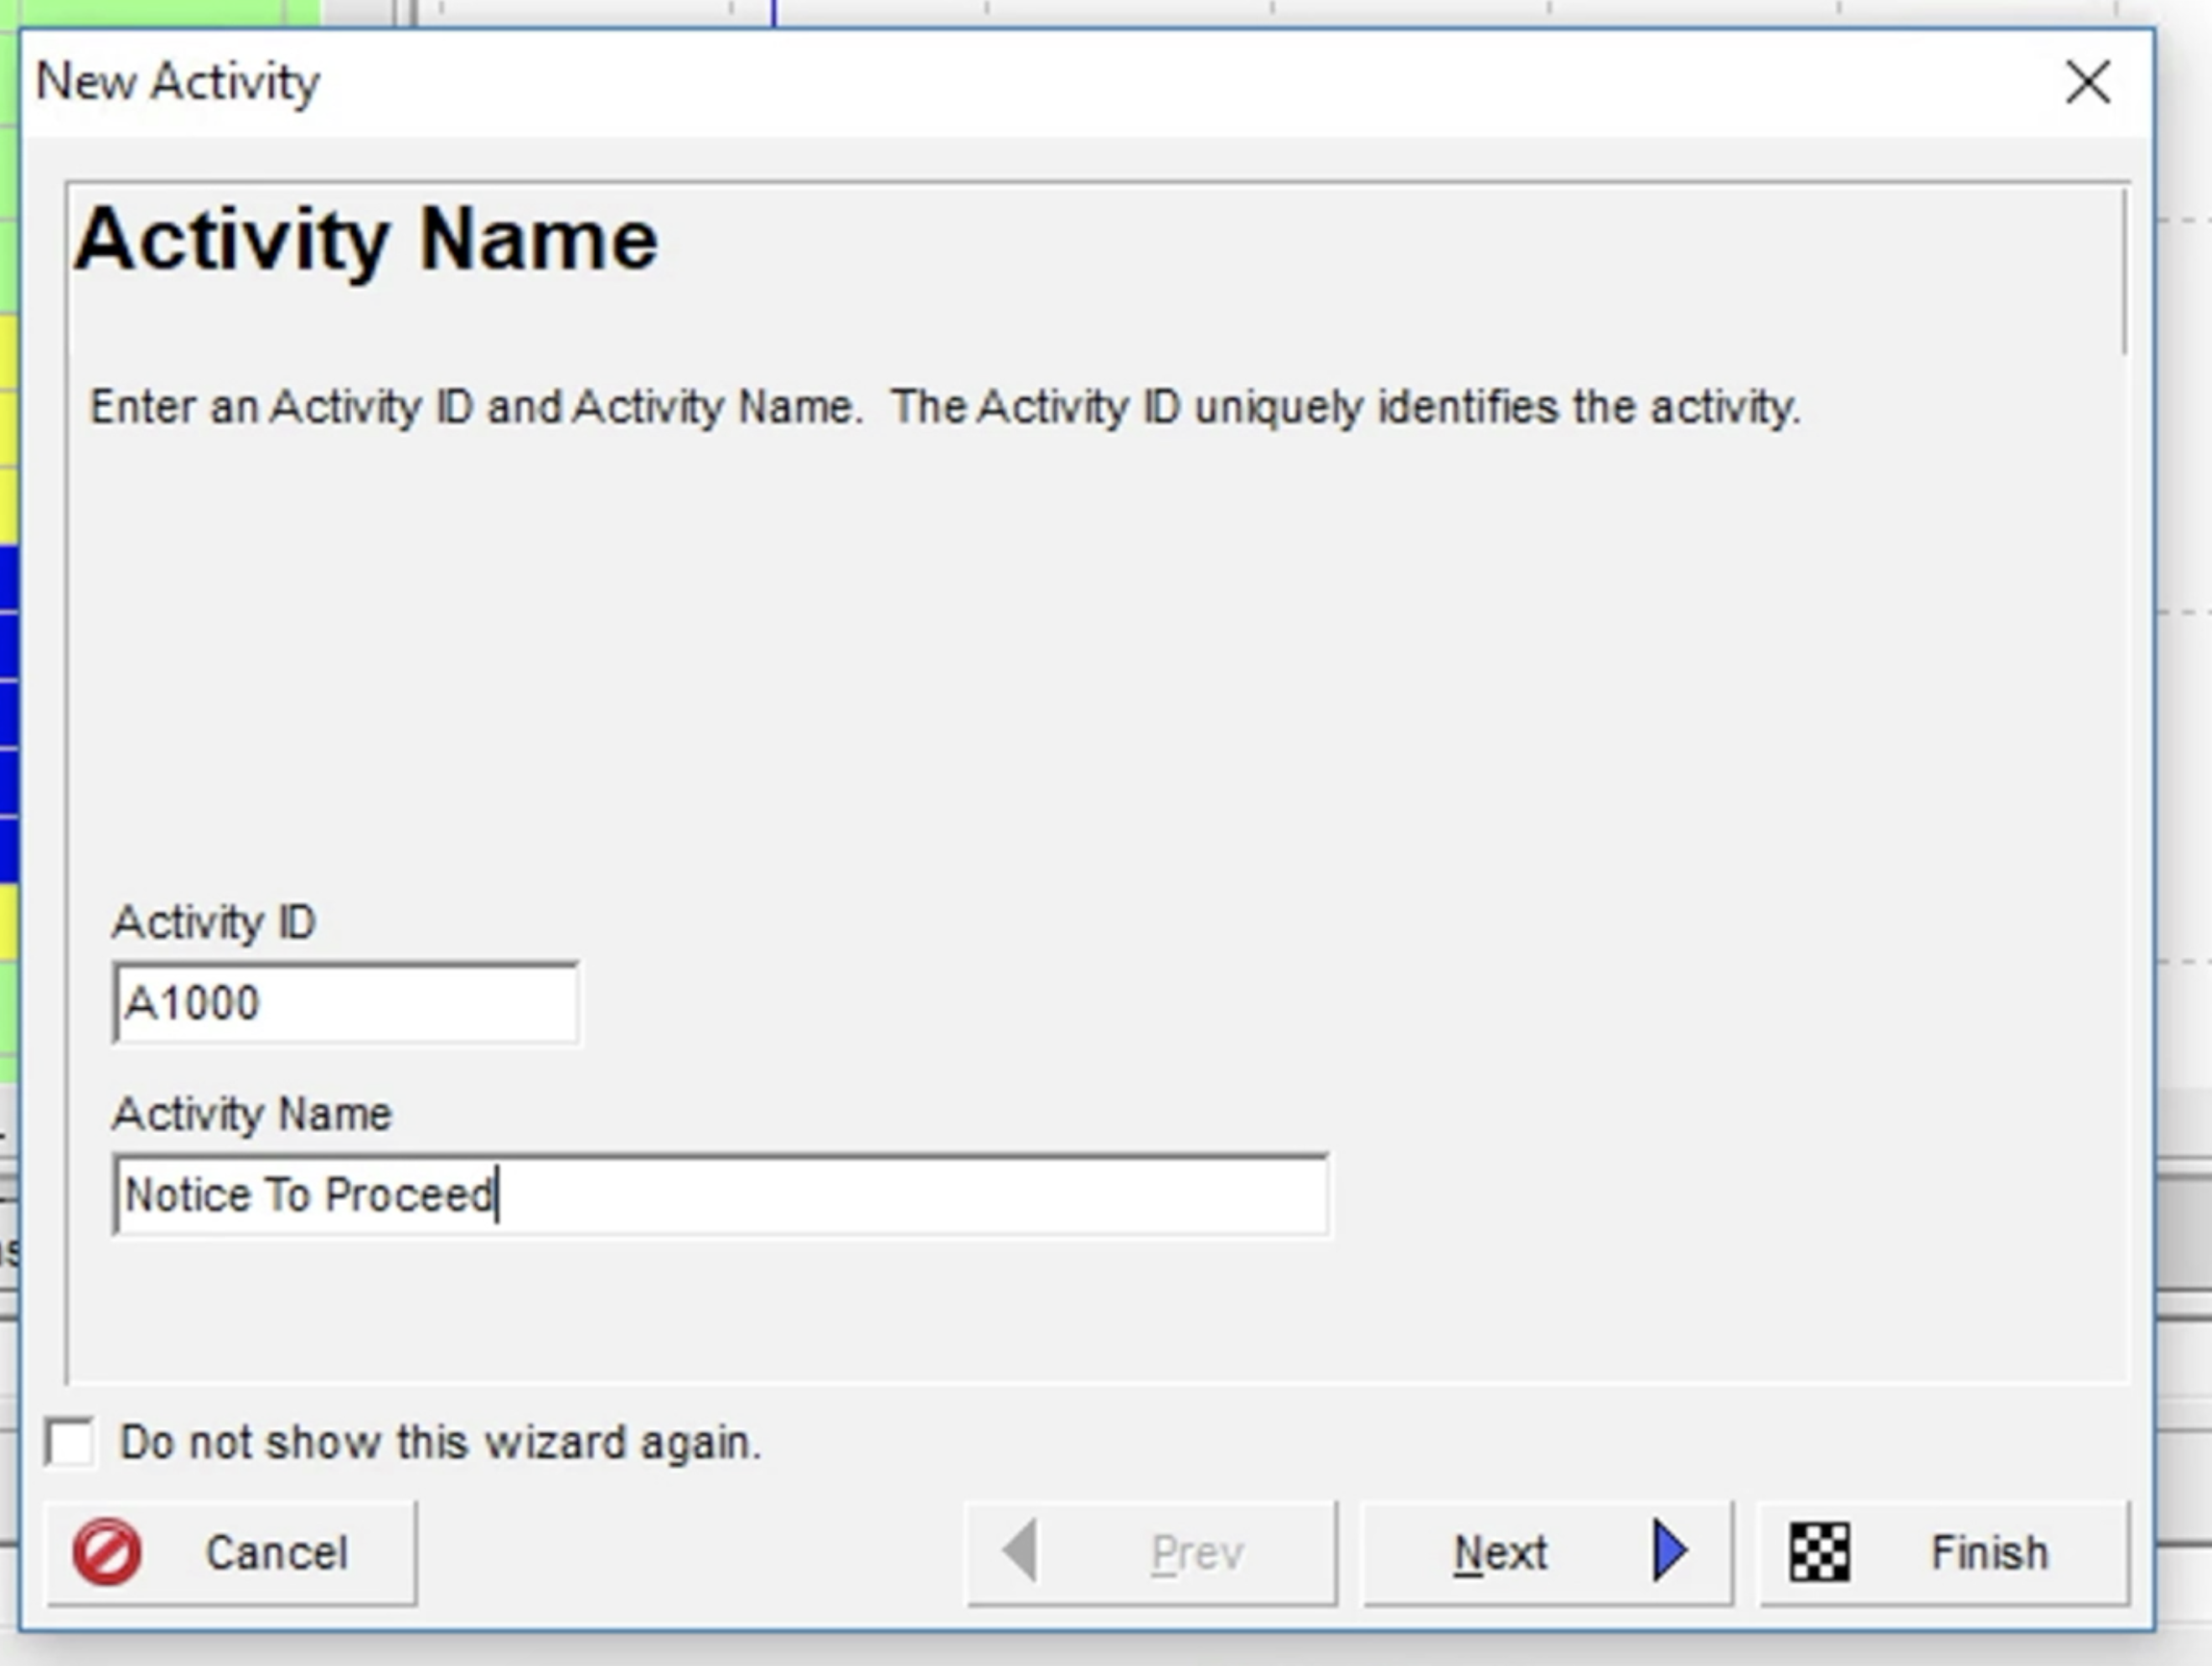 Figure 4
By clicking ‘Next’ we enter the ‘Work Breakdown Structure’ dialog box. As we have already selected the required WBS before we opened the wizard, it is correctly displaying ‘New Home Construction’ as the WBS element, as shown below in Figure 5. There is an option to select a different level of the WBS by clicking on the ellipse button but as it is correct, we click ‘Next’.
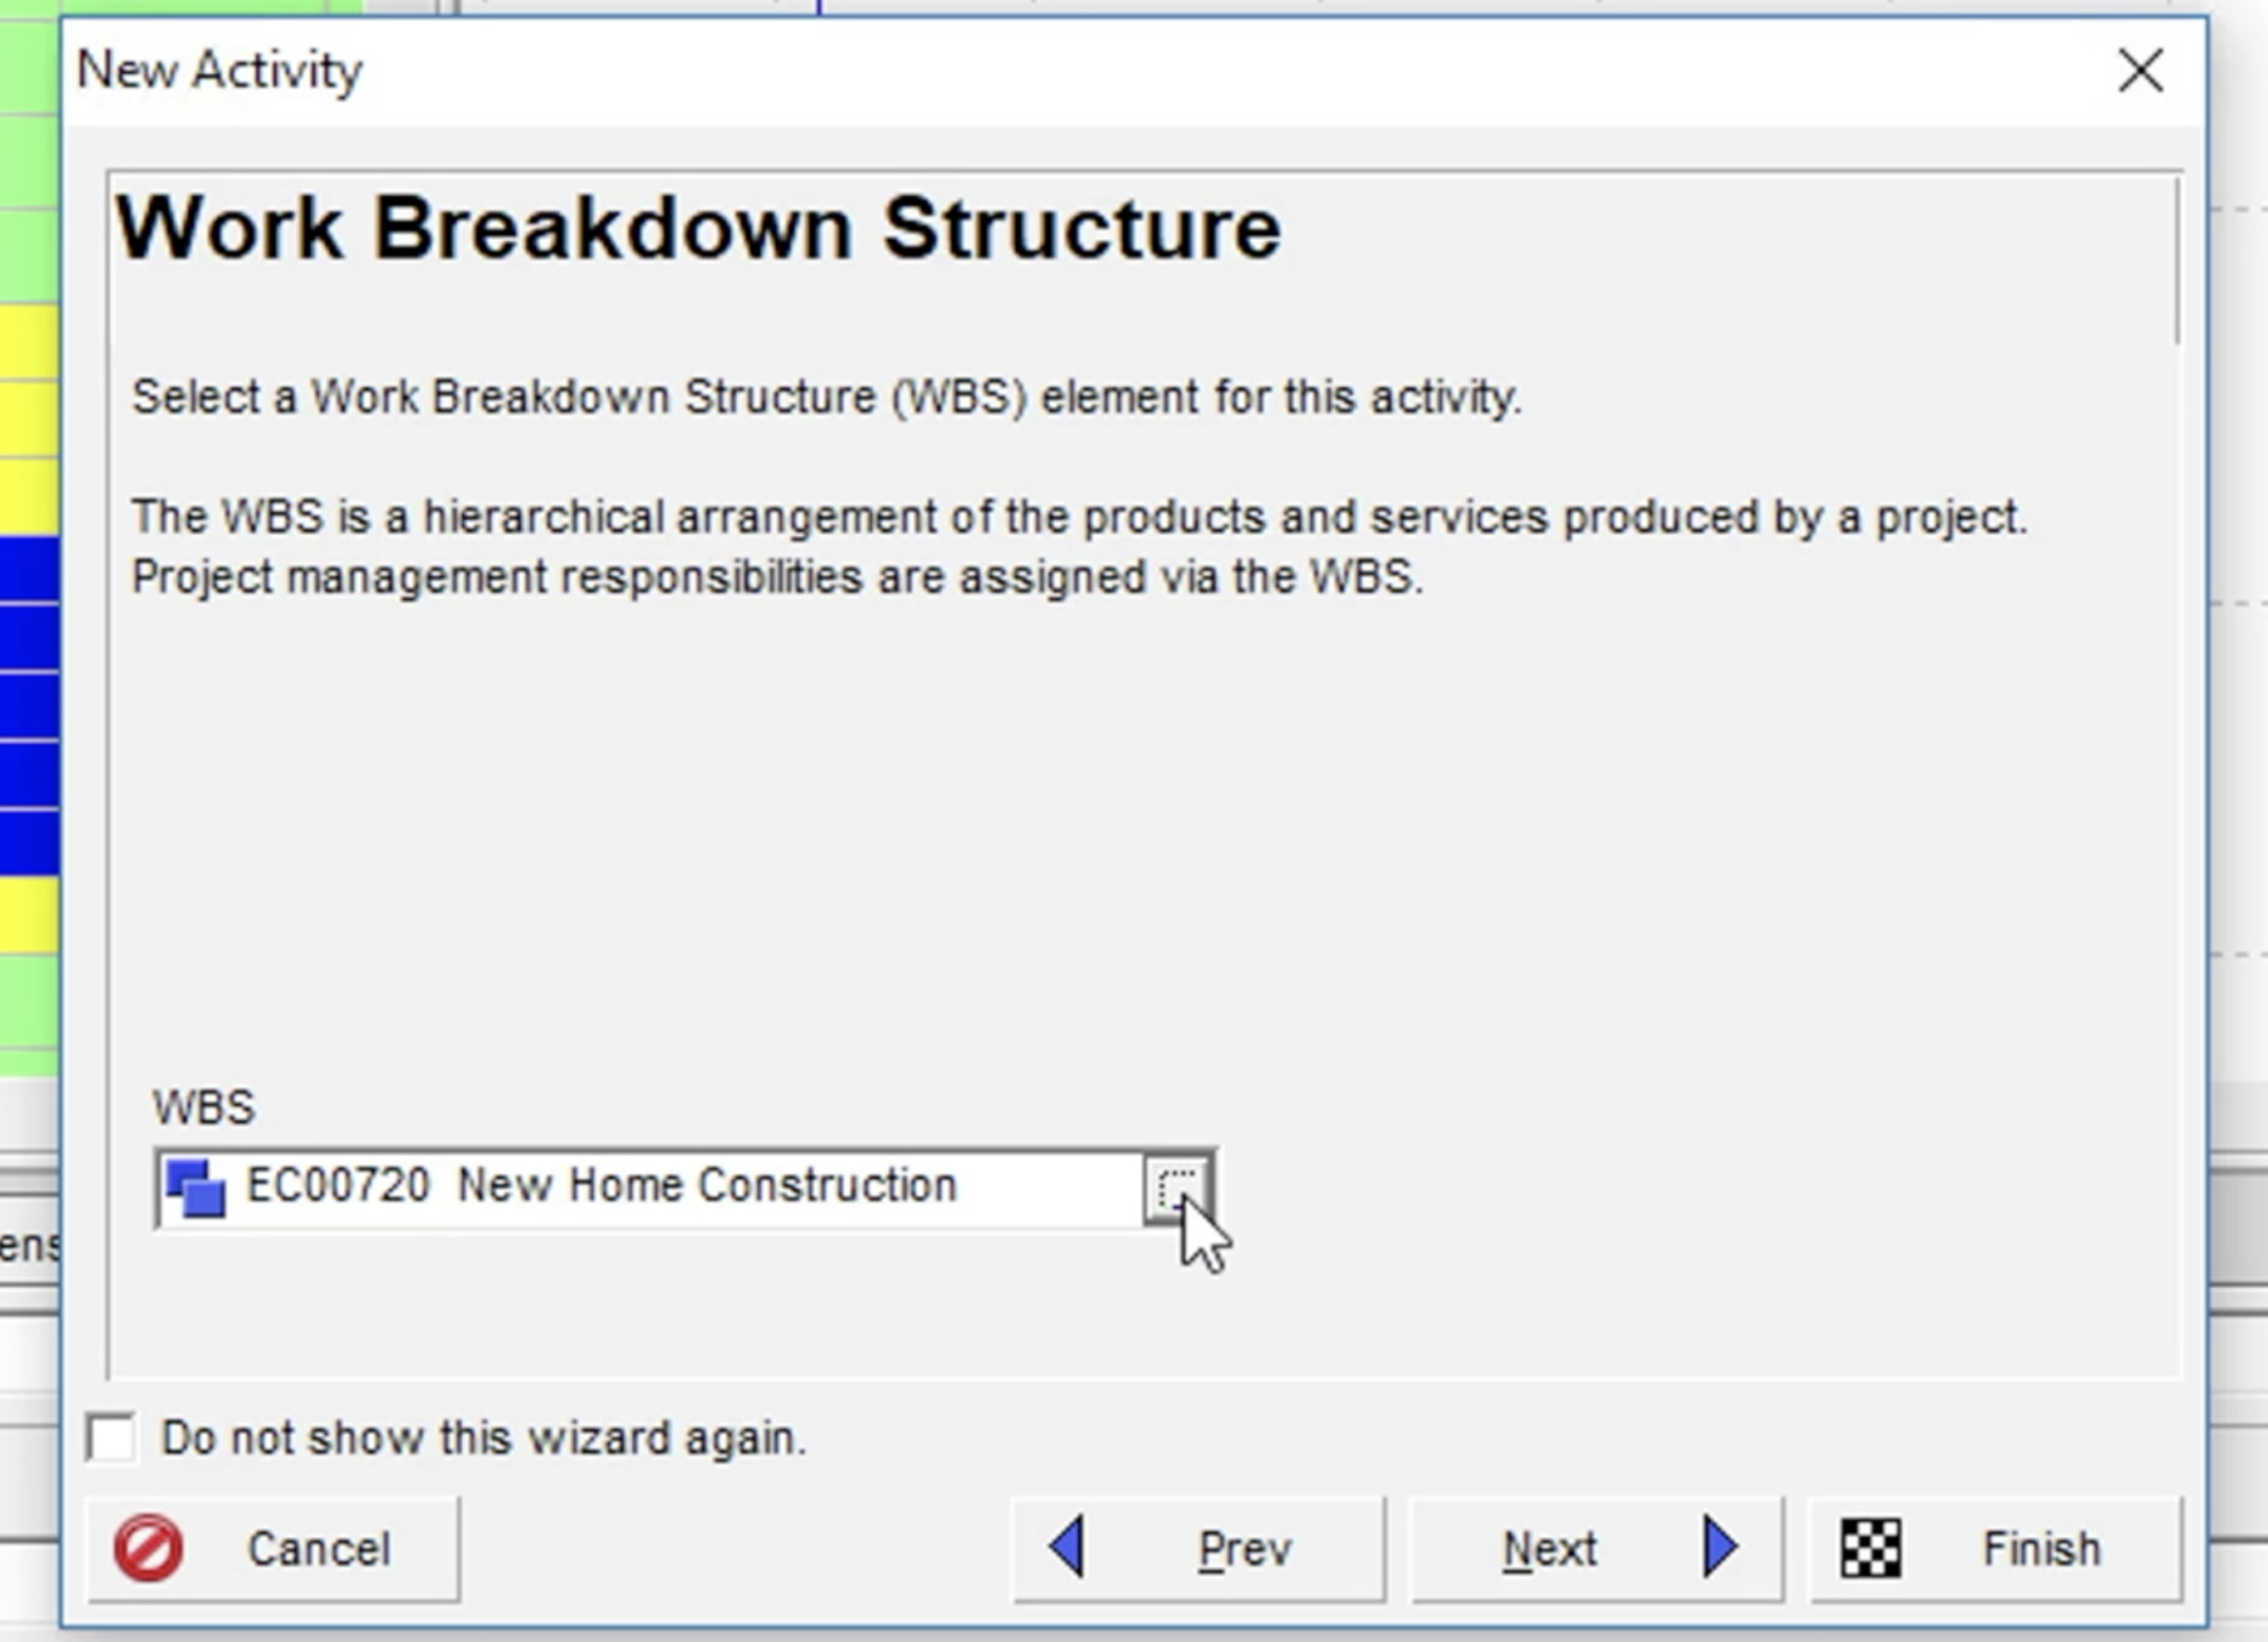 Figure 5
We enter the ‘Activity Type’ dialog box. The Primavera P6 default for ‘Activity Type’ is ‘Task Dependent’, so from the drop-down menu, we select ‘Start Milestone’ and click ‘Next’ as shown in Figure 6.
 Figure 6
In the ‘Dependent Activities’ dialog box, we have the option to define the activity’s relationship to other activities within our project. However, as this is our first activity in the schedule we click ‘Next’, as shown in Figure 7.
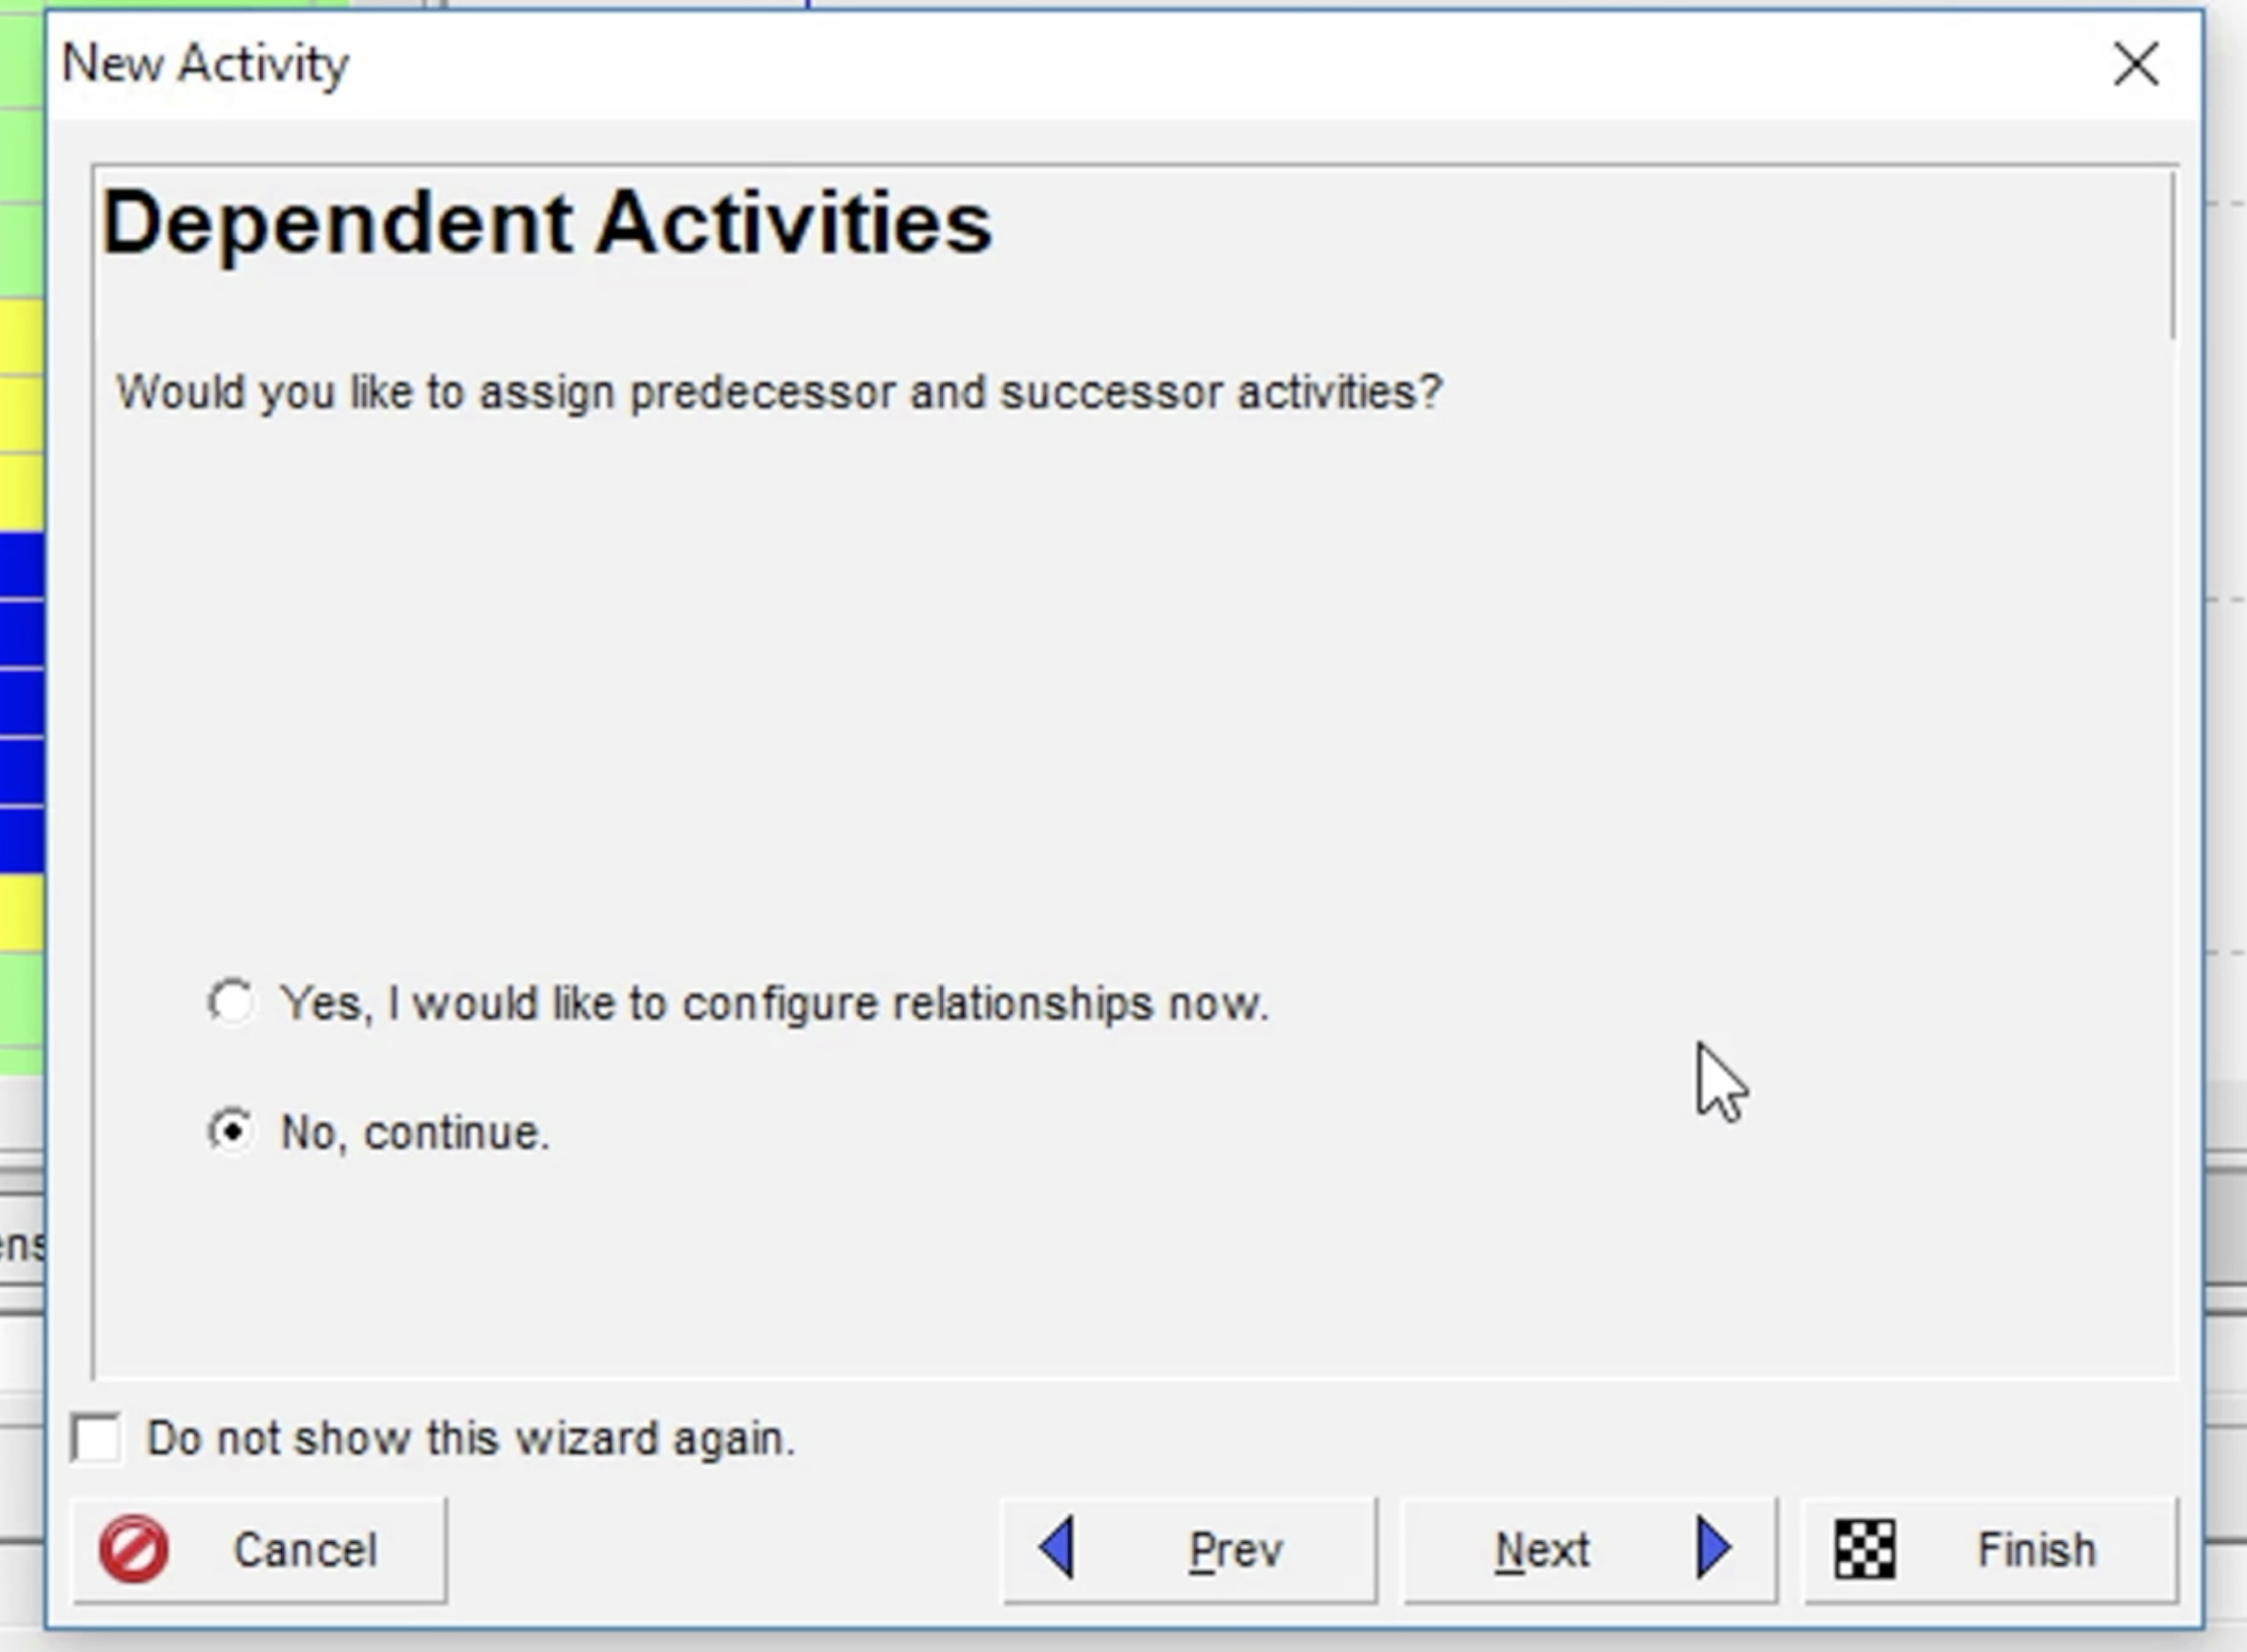 Figure 7
We enter the ‘More Details’ dialog box where we could begin to add Project Expenses, Activity Codes, or Work Product and Documents associated with our activity. Again, as our activity is a Start Milestone it is not appropriate to add these items to it so we click ‘Next’, as shown in Figure 8.
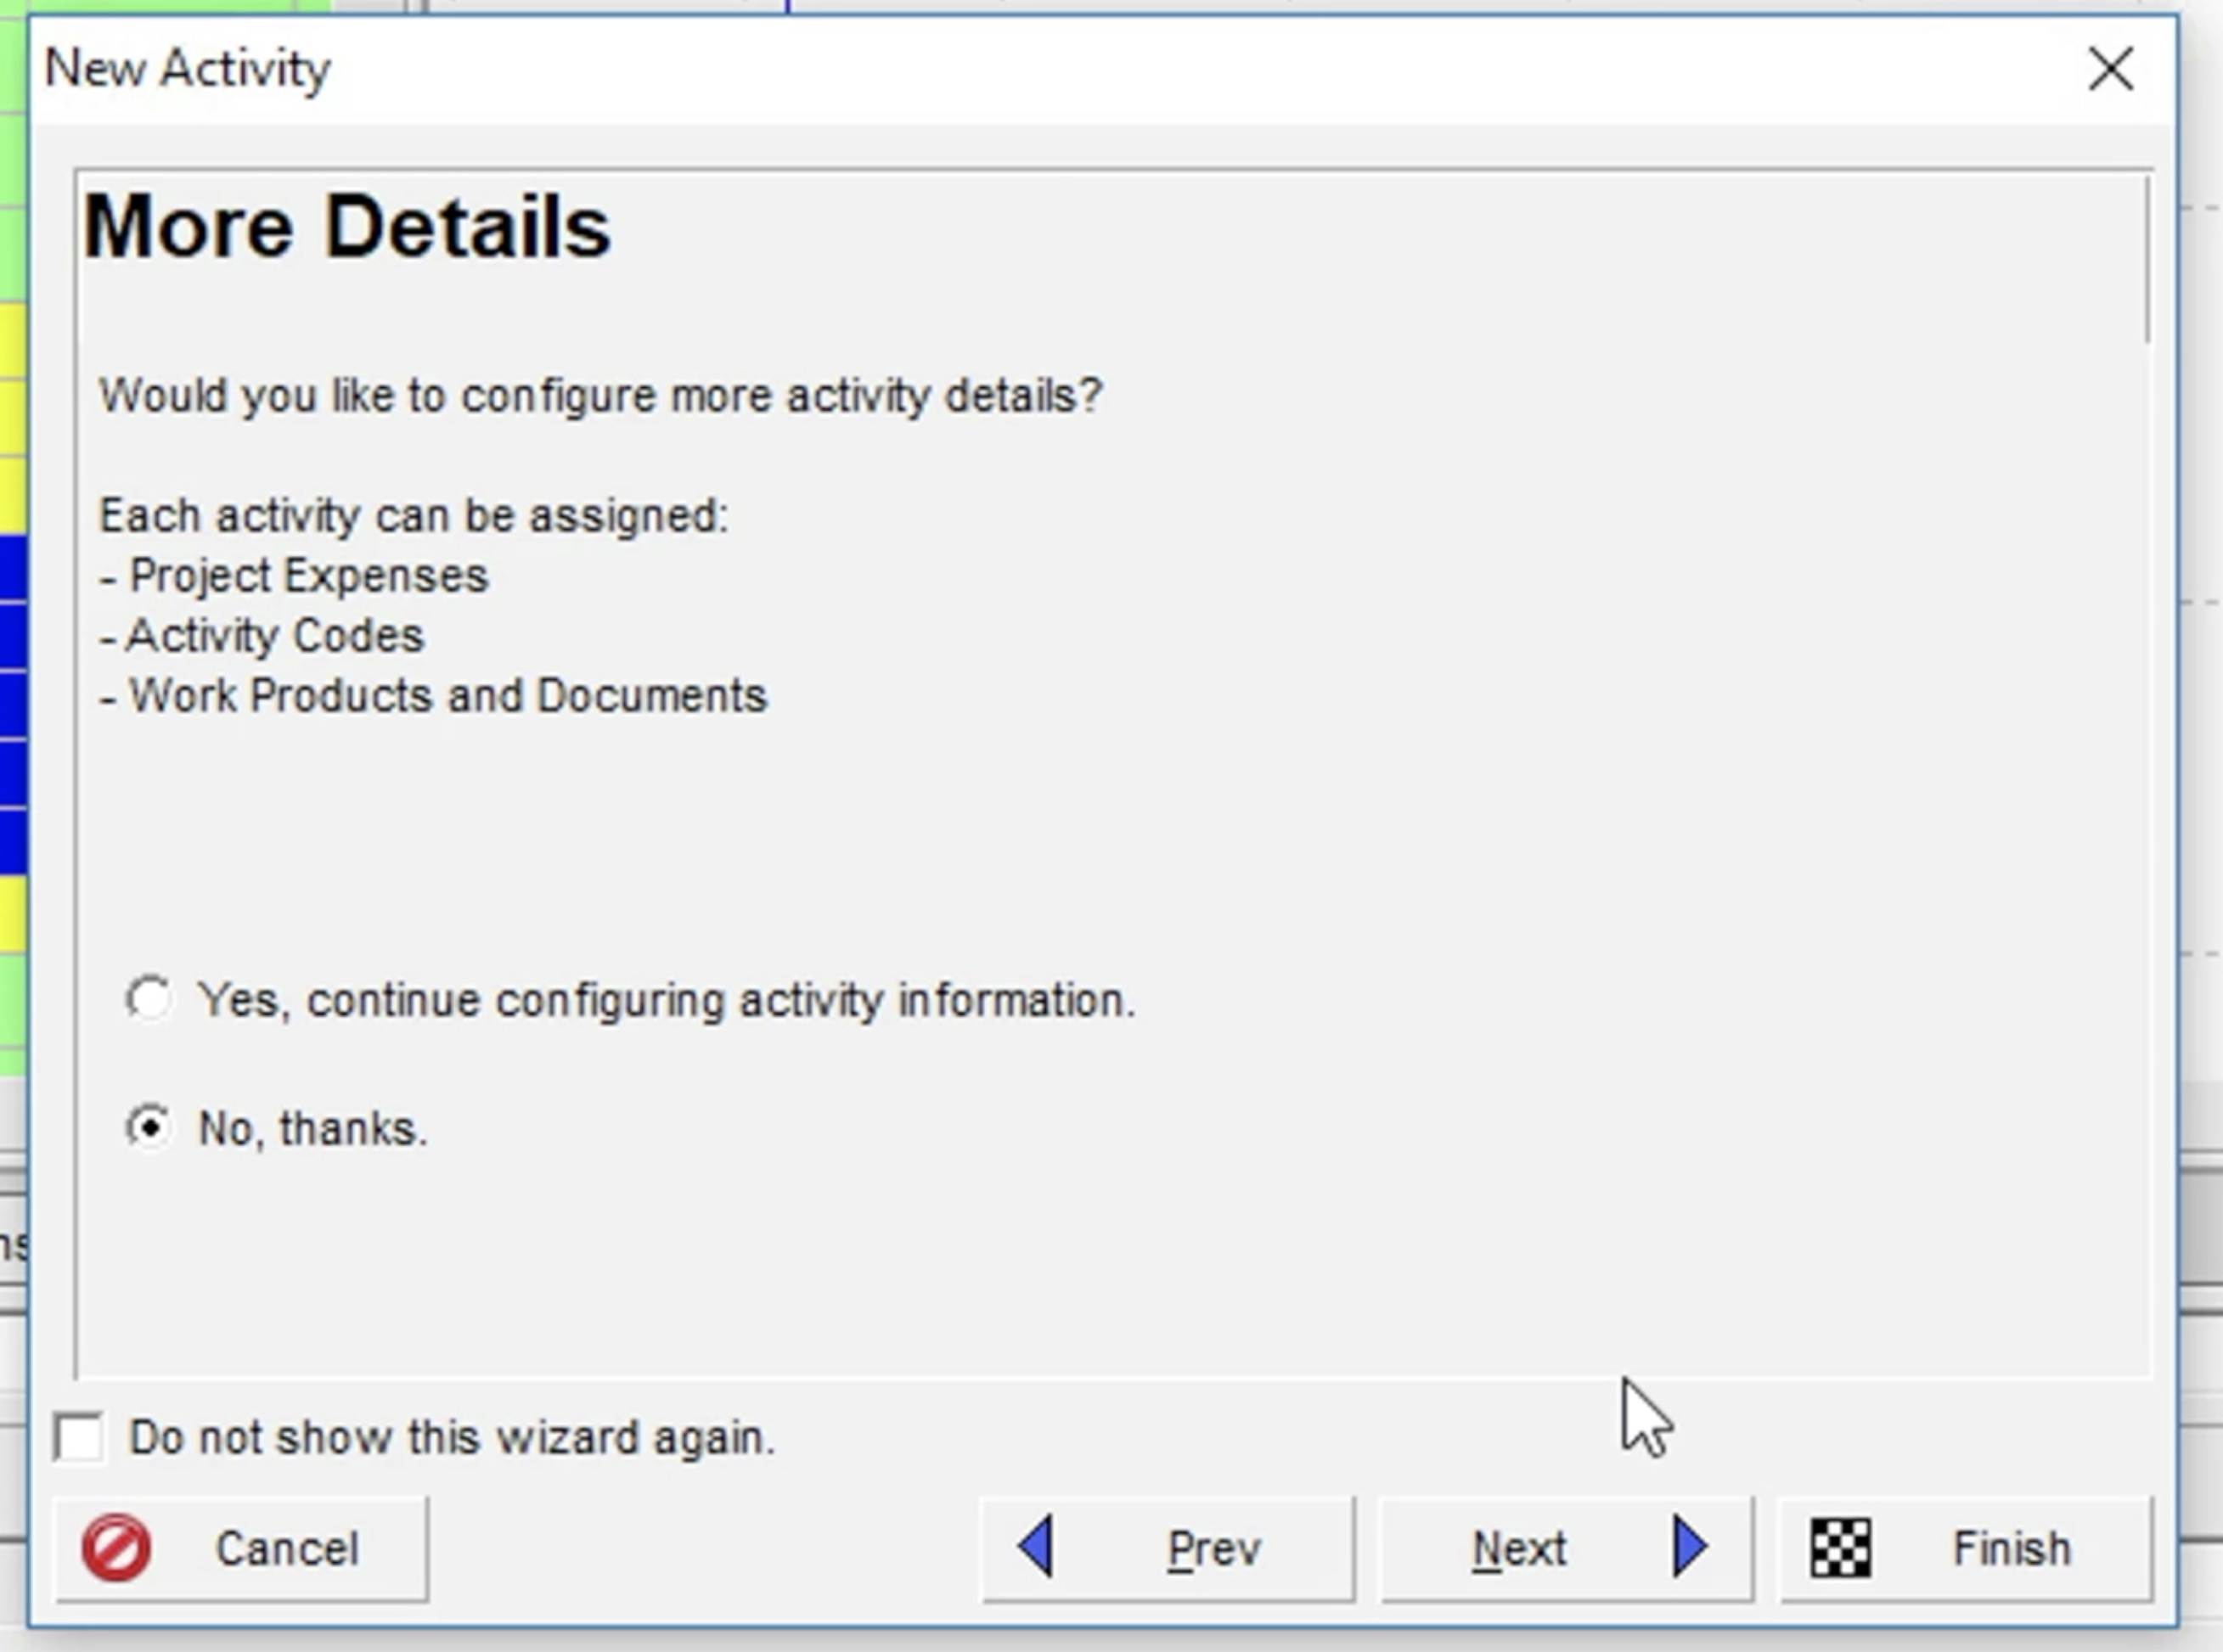 Figure 8
Finally, we come to the end of the wizard (displayed by Congratulations) and when we click ‘Finish’ our ‘Start Milestone’ appears in the Activity table and on the Gantt chart as shown below in Figure 9.
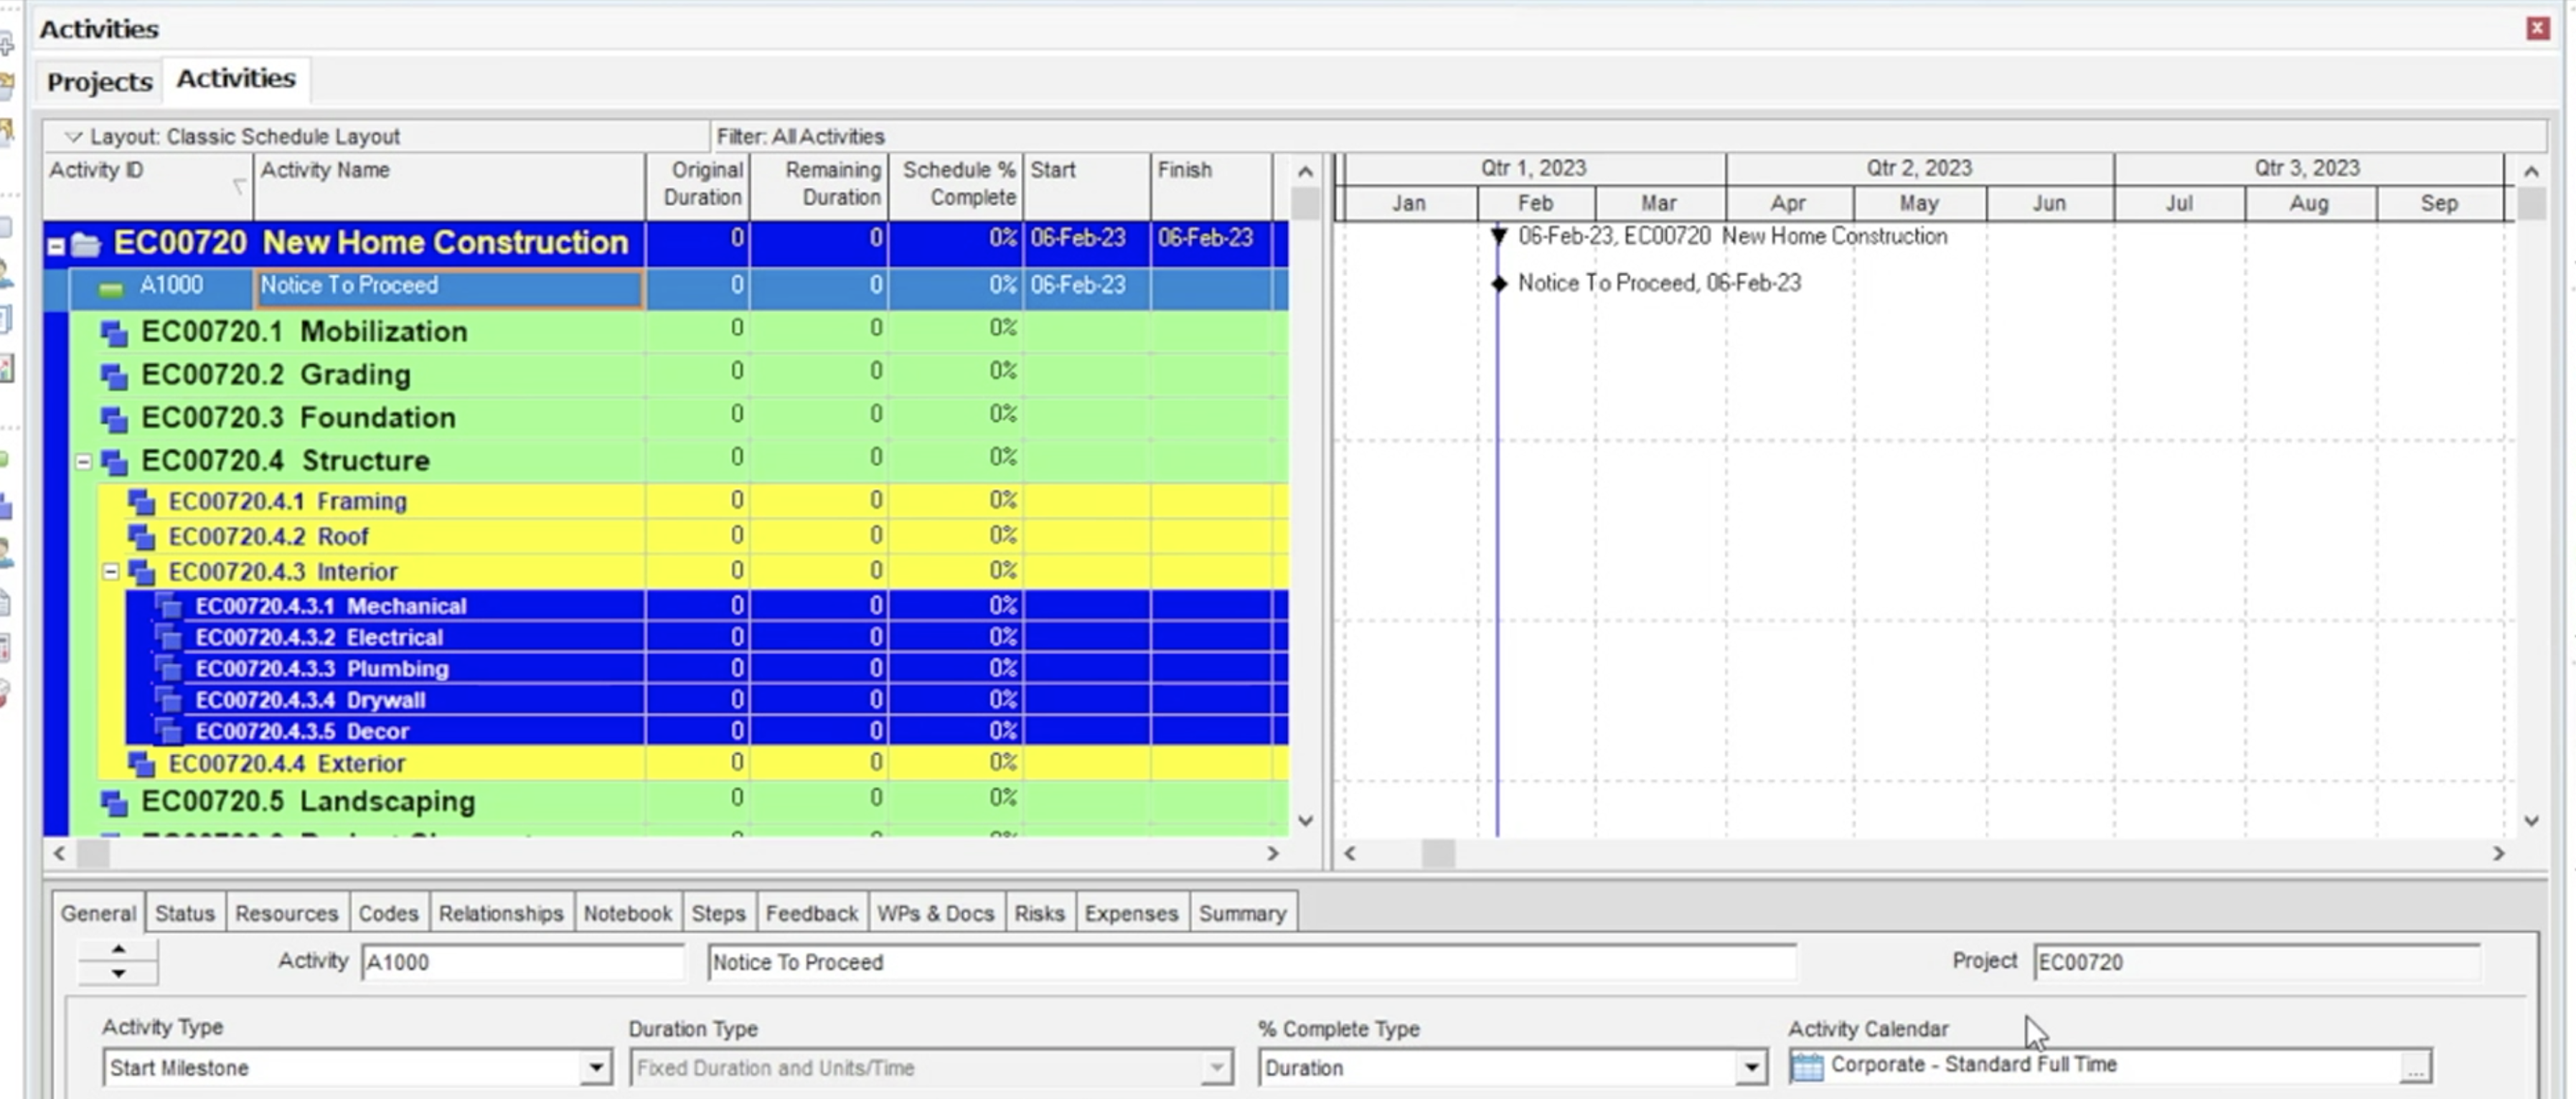 Figure 9
Option 2
Using Option 2, activities can be added to the schedule directly in the Activity table. Returning to our example we right-click on our ‘Notice to Proceed’. In the ‘Activity Details’ pop-up box we scroll down and select ‘Add’ as shown below in Figure 10.
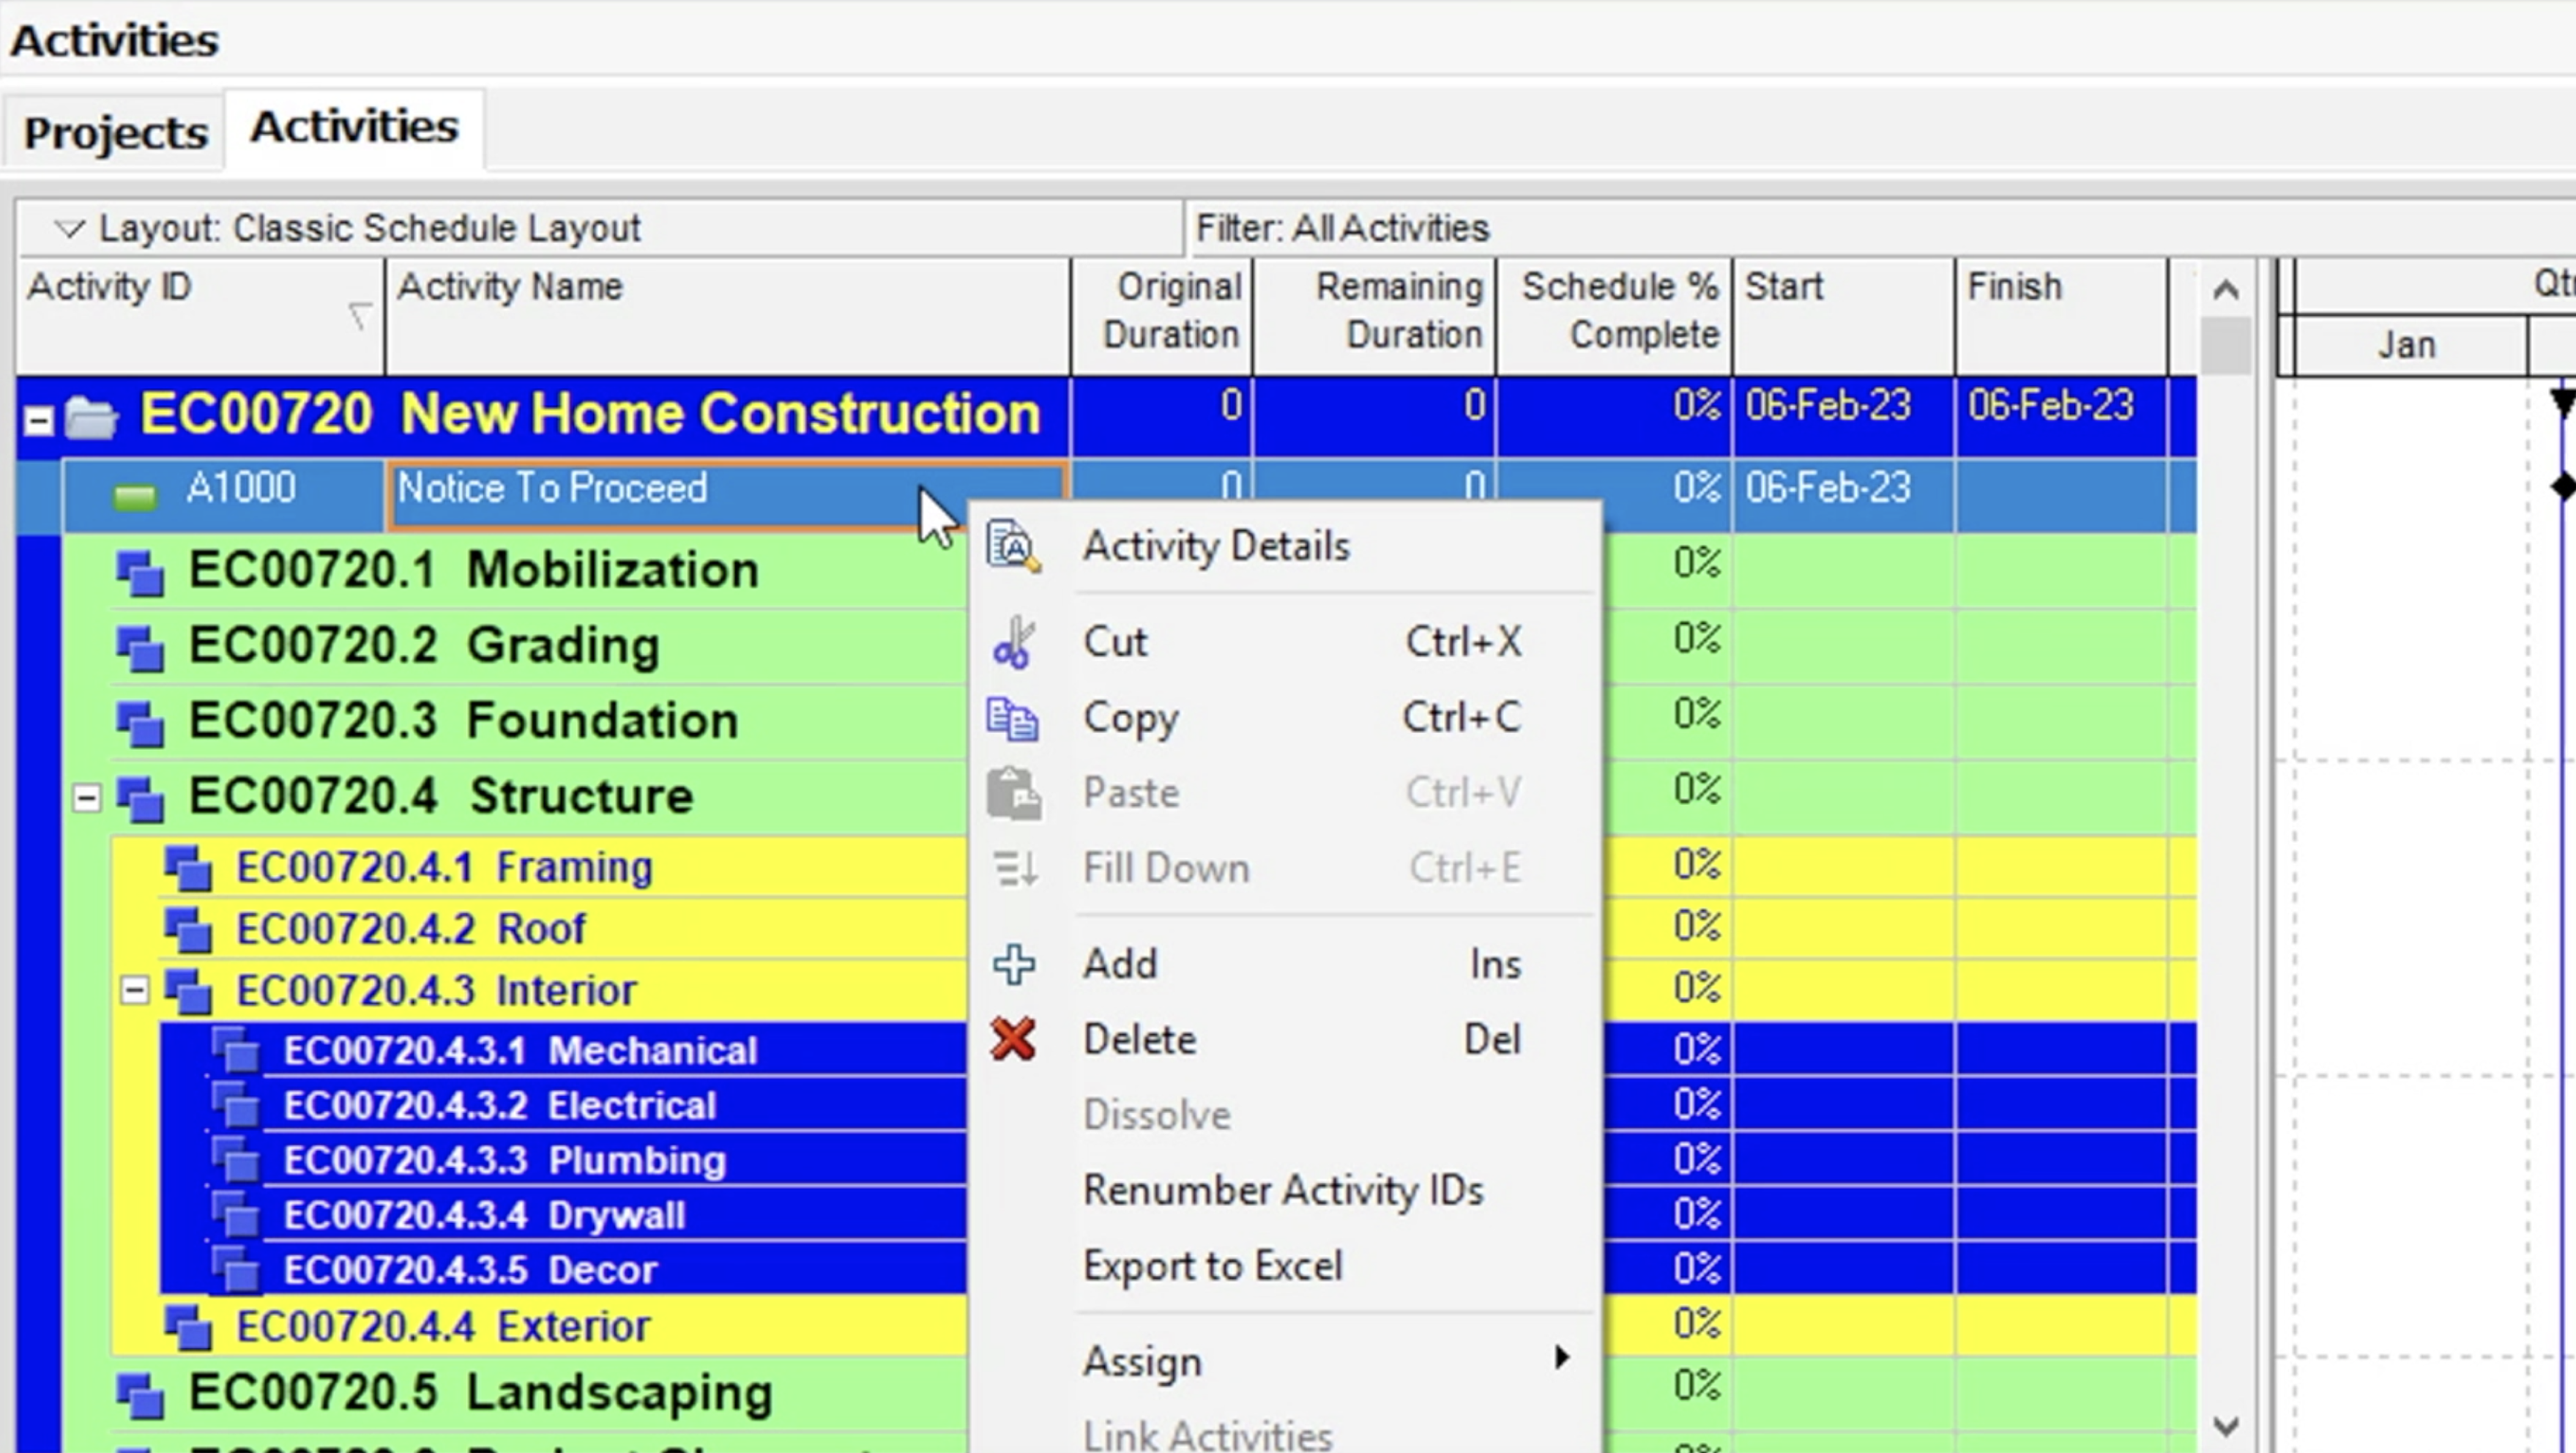 Figure 10
A new activity appears in the table below ‘Notice to Proceed.’ Primavera P6 creates an Activity ID. All we need to do is enter a name, so we type in ‘Project Start’ as shown in Figure 11.
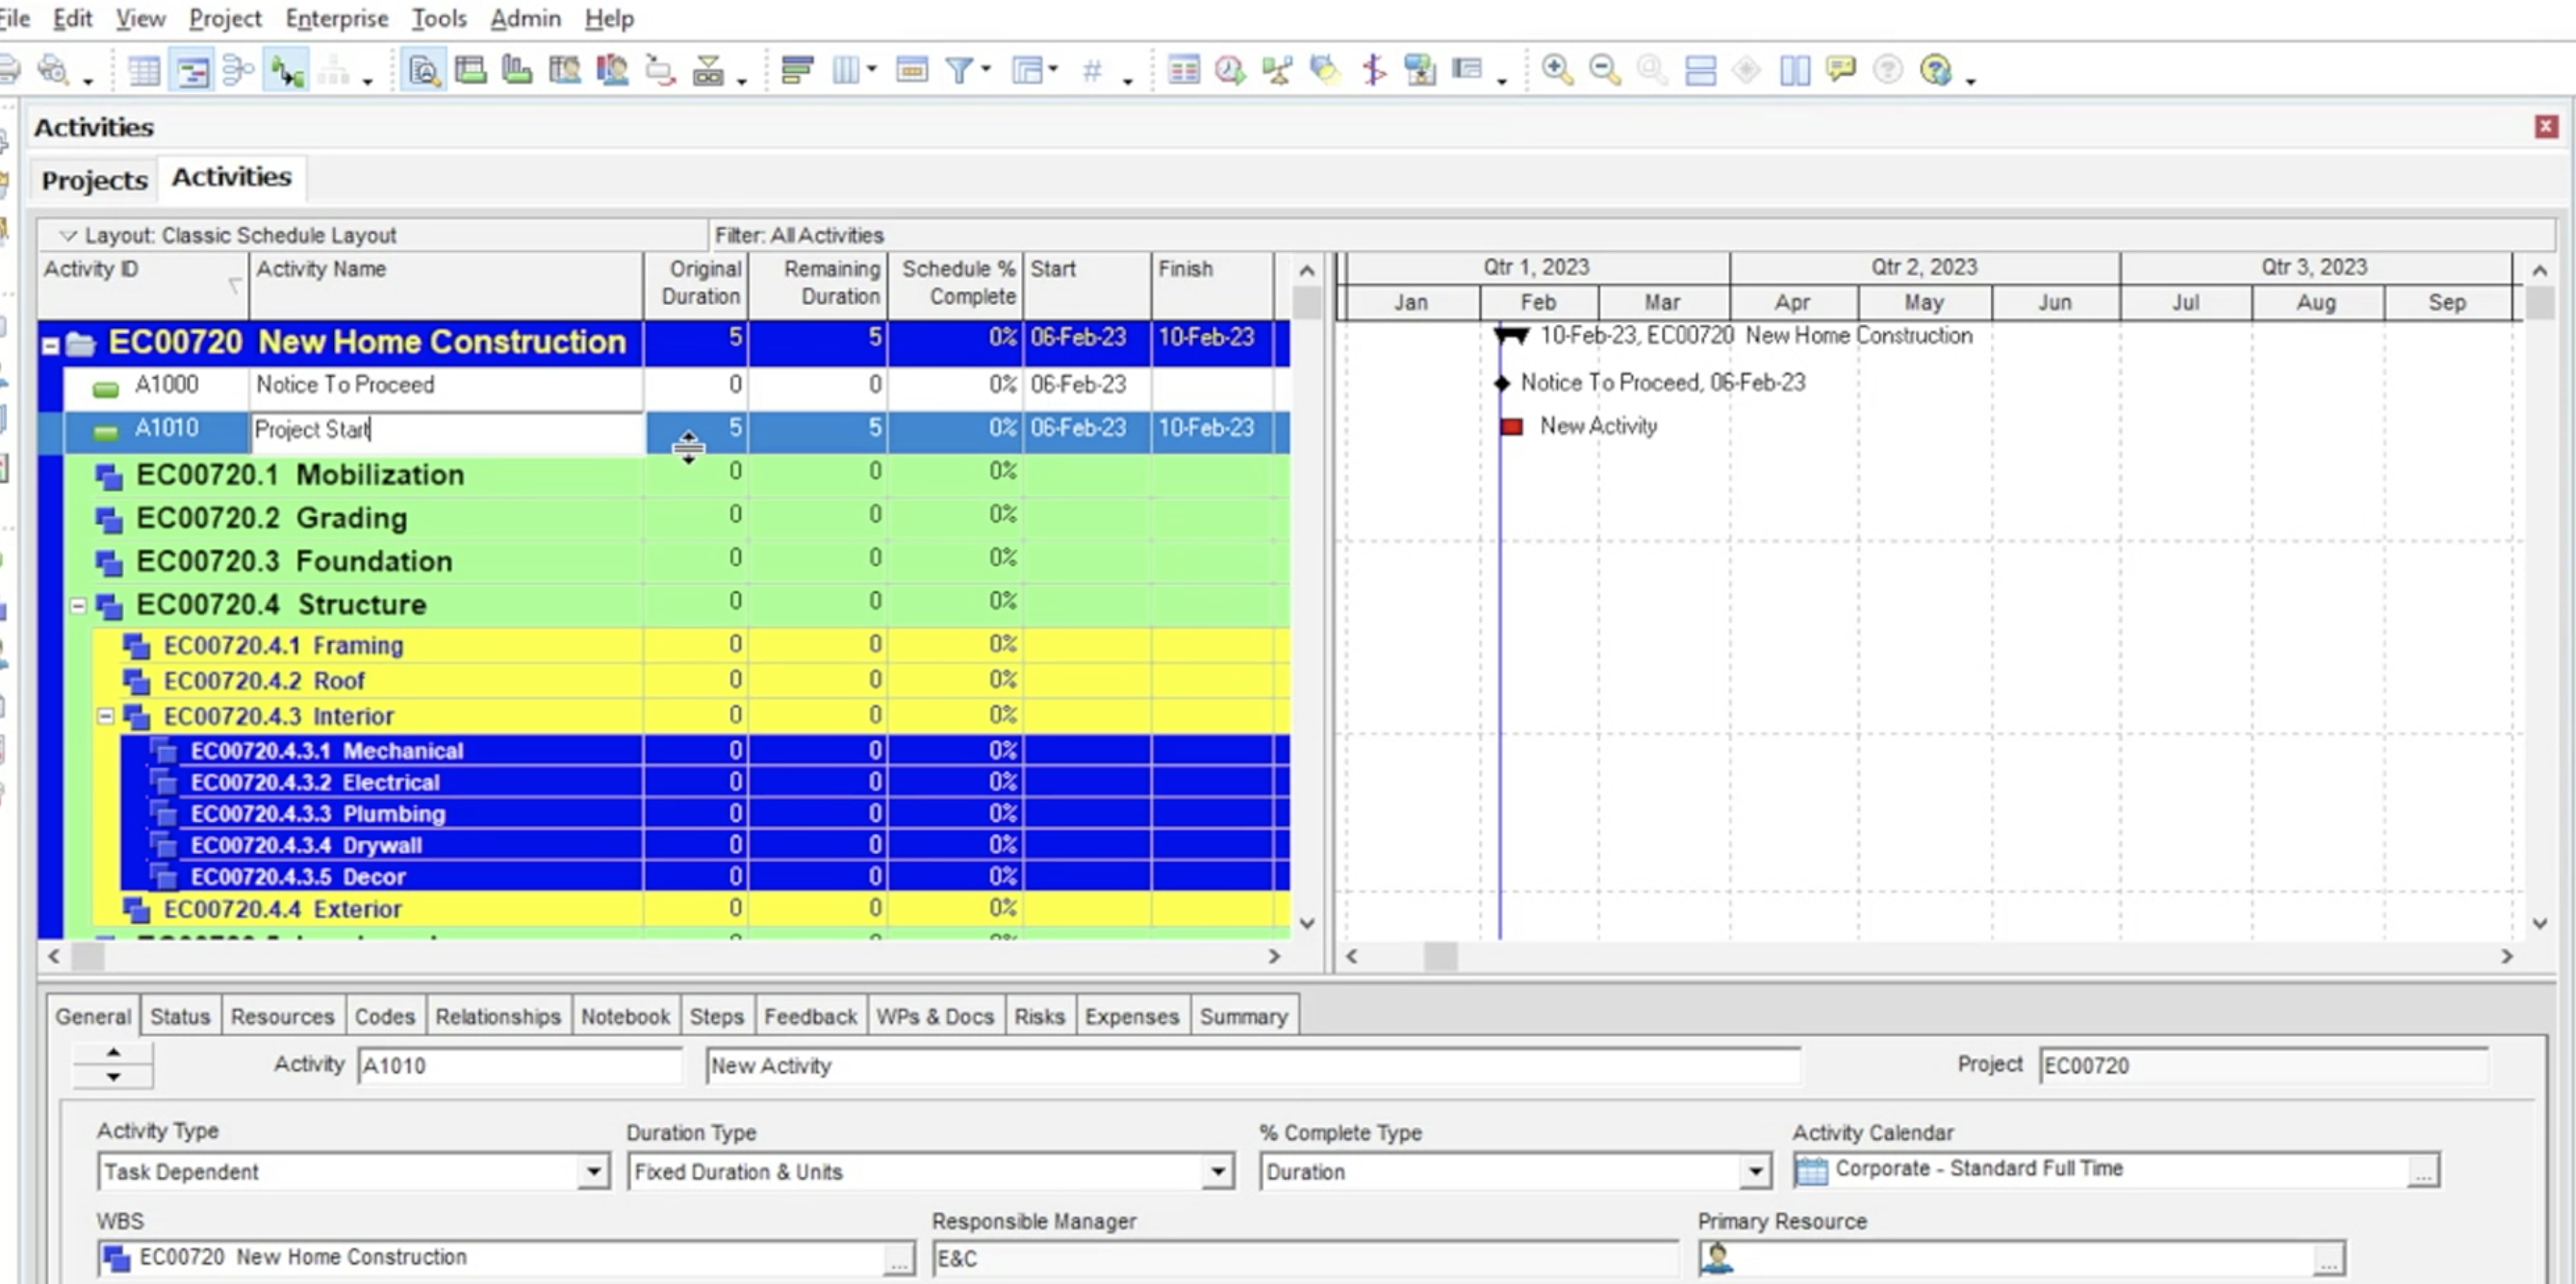 Figure 11
‘Project Start’ is another Start Milestone, therefore we enter the ‘General’ tab in the bottom layout area and change the ‘Activity Type’ from Task Dependent (the Primavera P6 default option) to ‘Start Milestone’ as shown in Figure 12.
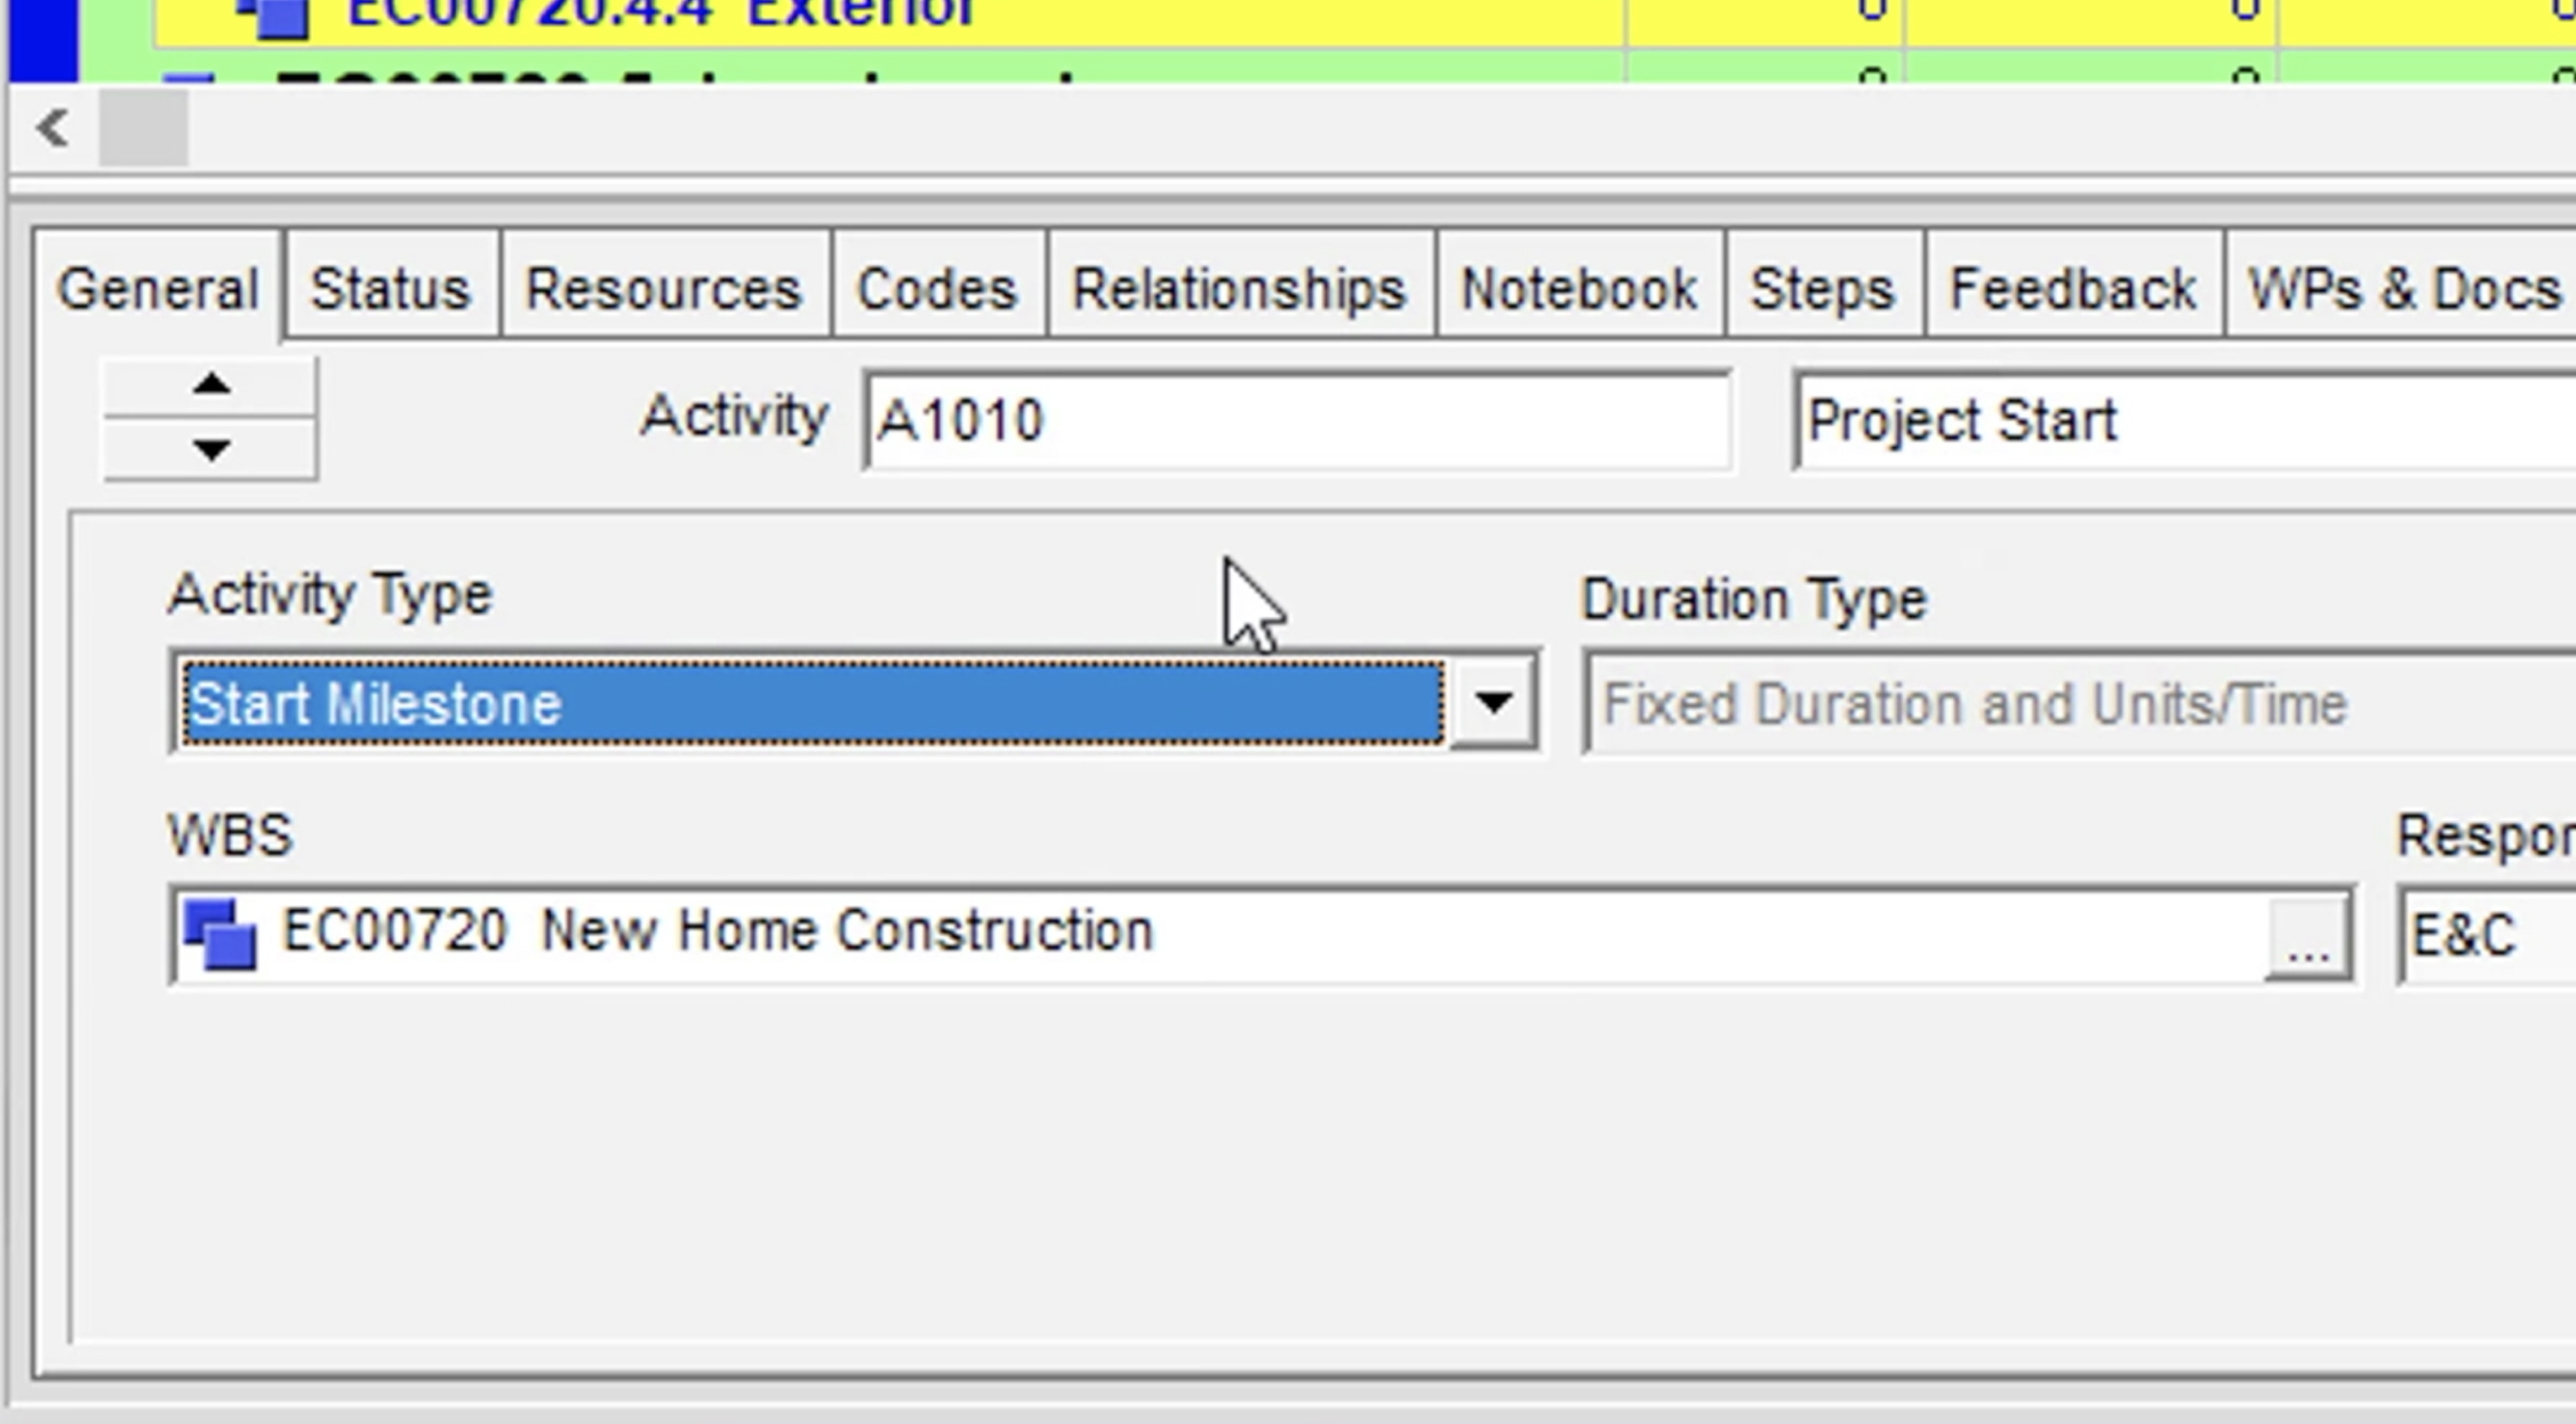 Figure 12
Summary
Both options are a good way to add activities in Primavera P6. The wizard is excellent for guiding novice schedulers through the process, whereas the right-click option in the Activity table is used more frequently by more experienced schedulers.