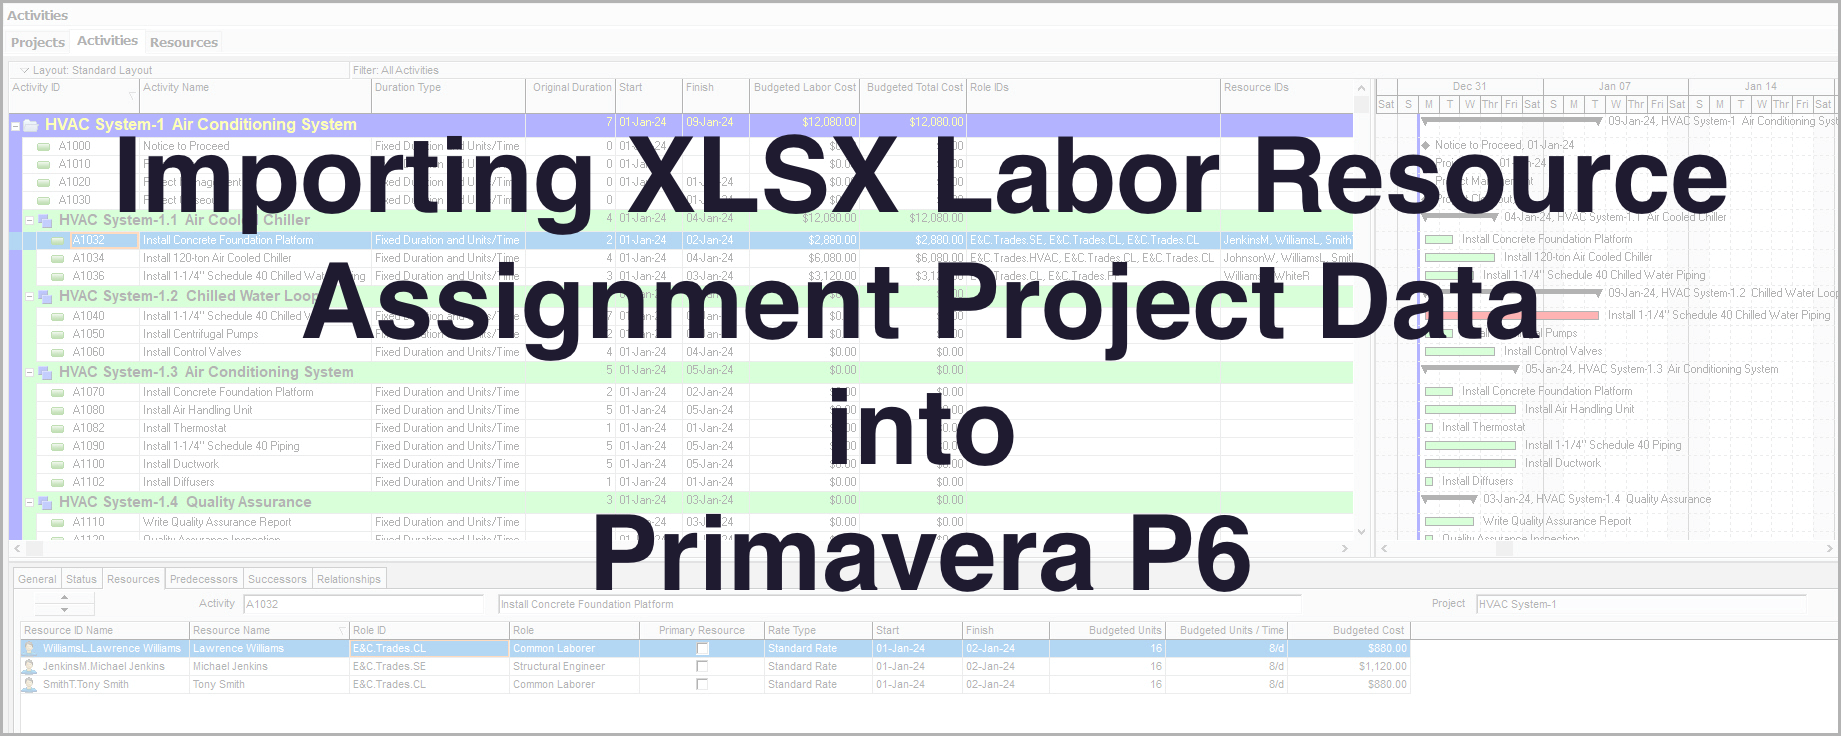
 Importing XLSX Labor Resource Assignment Project Data into Primavera P6
Microsoft Excel has enjoyed widespread adoption for decades. This makes it a preferred medium for the gathering and/or tabulation of project data for importing into Primavera P6 Professional.
On most projects only a few are well versed in Primavera P6 Professional scheduling. This limits the collecting and inputting of project data to a select few personnel. The good news is that Primavera P6 Professional allows the importing XLSX labor resource assignment project data. This means that project data gathering efforts can include XLSX spreadsheet submittals from P6 illiterate team members. These submissions may have labor resource assignment project data, which helps expedite the sometimes-laborious process of defining schedule resource assignments in Primavera P6 Professional.
This article demonstrates importing XLSX labor resource assignment project data into Primavera P6 Professional.
We have in Figure 1 our demonstration project schedule.
 Figure 1
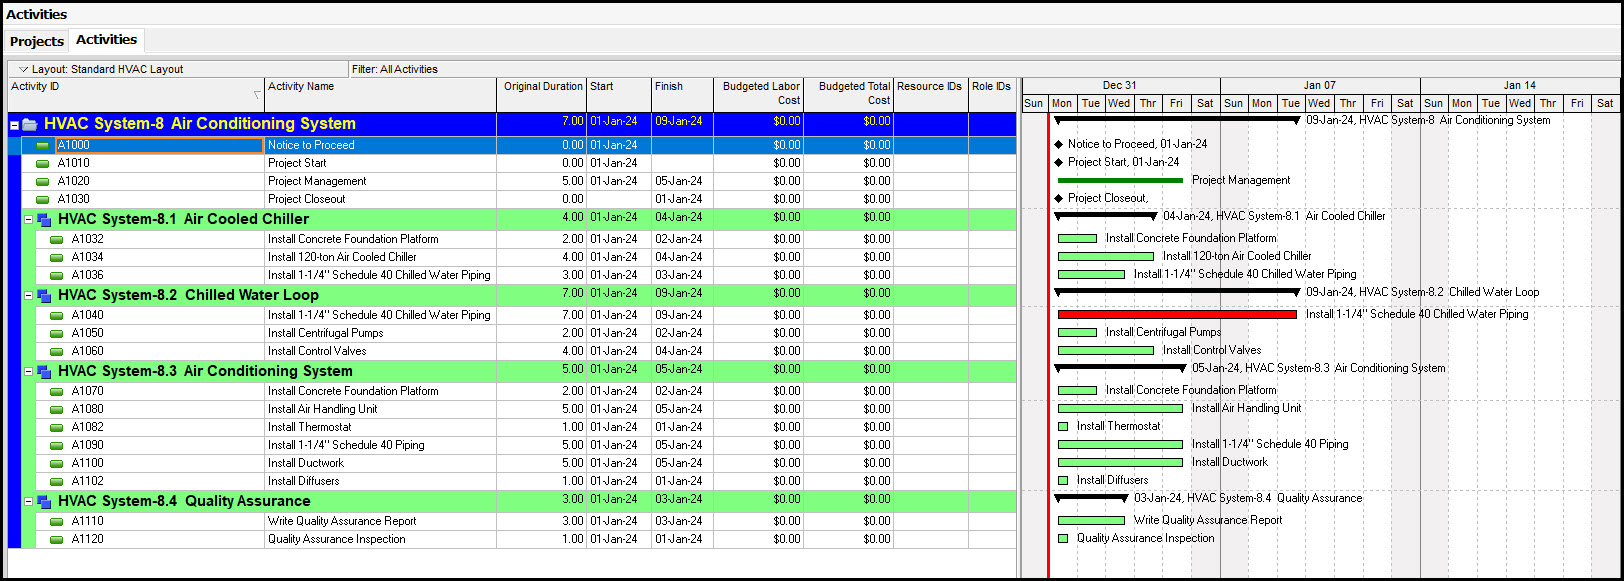
This schedule is in the planning stages of an HVAC project. At this phase in the process the schedule has Work Breakdown Structure (WBS) elements and activities, but no relationships. But, having a list of activities, we can assign roles (or trade skills) and/or resources to various activities. Our goal is to specify the labor cost of respective activities in our schedule.
We proceed and demonstrate the process of tabulating labor trade skills and/or resource data in an XLSX spreadsheet, and then importing this labor data into a Primavera P6 Professional schedule. The process begins by exporting project data to an XLSX file. This was done to provide the proper layout P6 requires for the import part of the process.
In Figure 2 we begin the process by first exporting project data to an Excel spreadsheet, Figure 2.
Figure 2
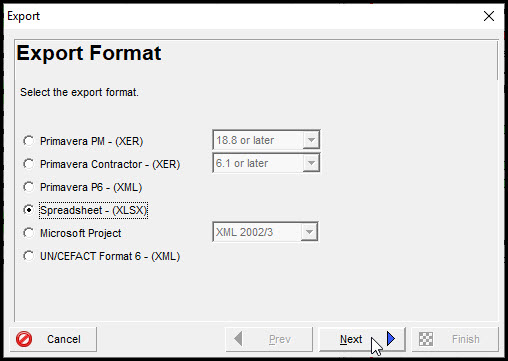
Select ‘Spreadsheet – (XLSX) in the export dialog, Figure 3, and click next.
Figure 3
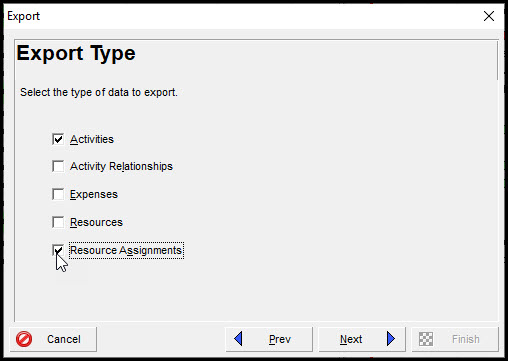
In the Export Type dialog, we toggle to export activities and resource assignments, Figure 4.
Figure 4
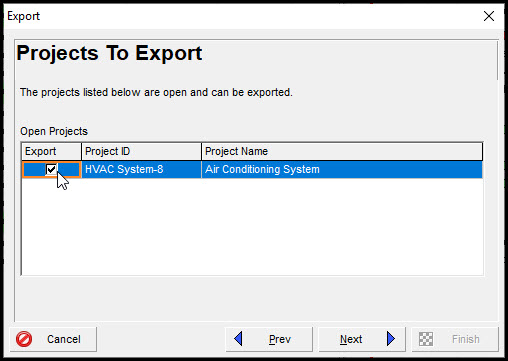
Our assumption at this juncture is that the resource database includes all the trade skills and resources required for our schedule. We continue and choose to export our Air Conditioning System schedule, Figure 5.
Figure 5
Proceeding onward we click next, which brings us to the Select Template dialog, Figure 6.
Figure 6
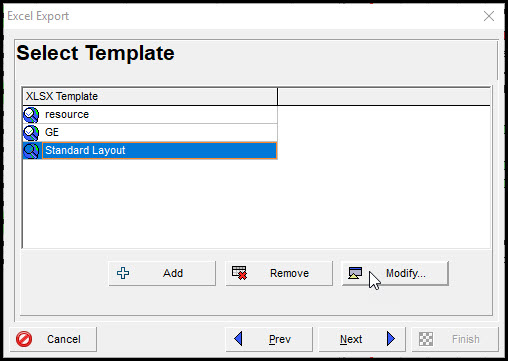
We opt to modify an existing layout. You may have to begin by adding a new template. We first update the Activities subject area and choose the selected options in Figure 7.
Figure 7
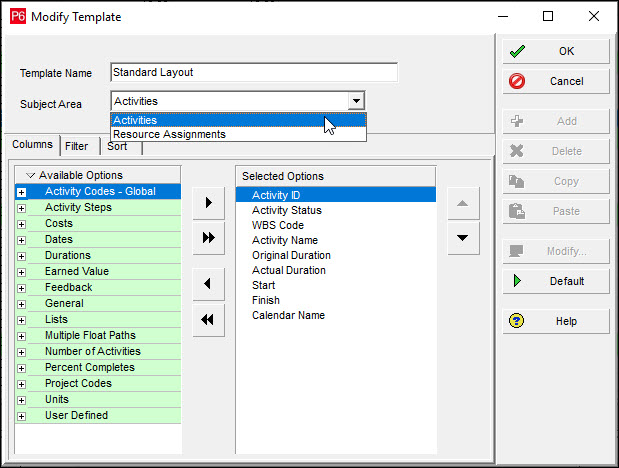
Again, in the Modify Template, Figure 8, we select the Resource Assignments subject area.
Figure 8
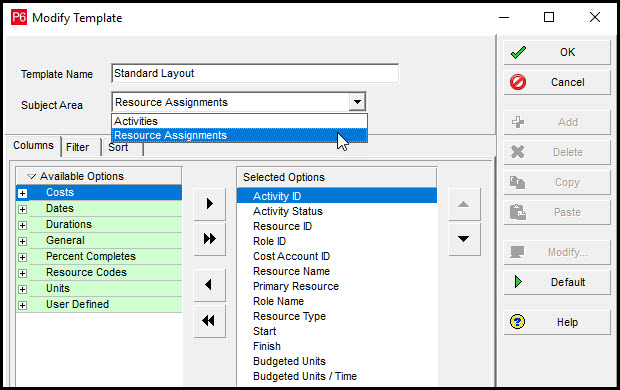
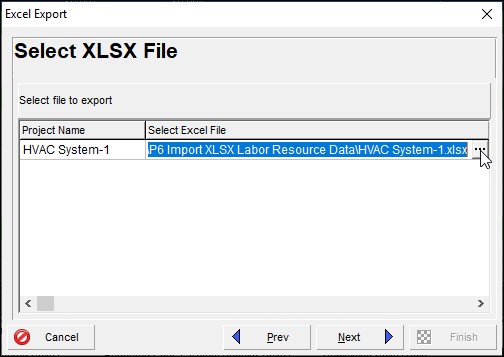
We choose the options listed in Figure 8. Note the two columns Resource ID and Role ID. We want both columns for our labor resource assignments. We proceed and click next and choose the excel file to copy the project data into, Figure 9.
Figure 9
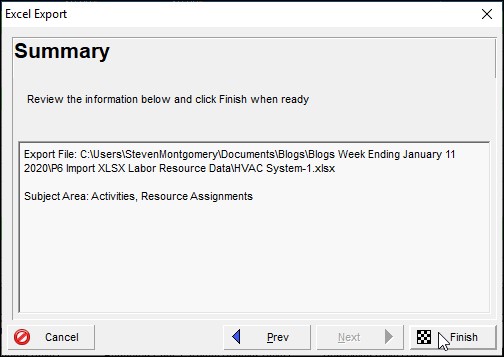
Click next, and to complete the export, click Finish, Figure 10.
Figure 10
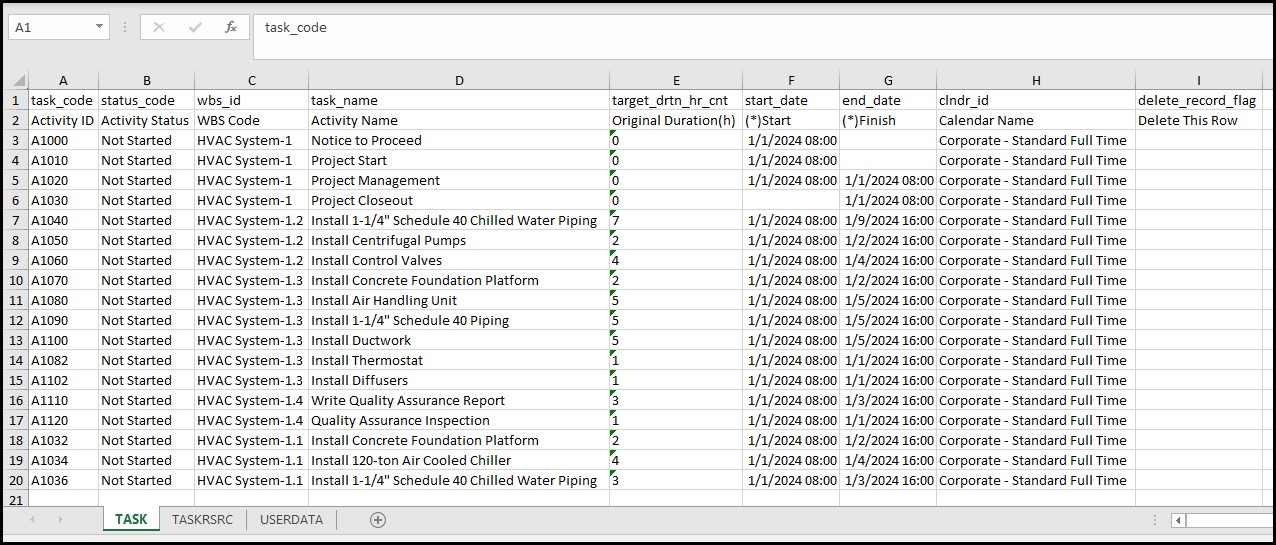
After a successful export we open the XLSX file and view the TASK tab, Figure 11.
Figure 11
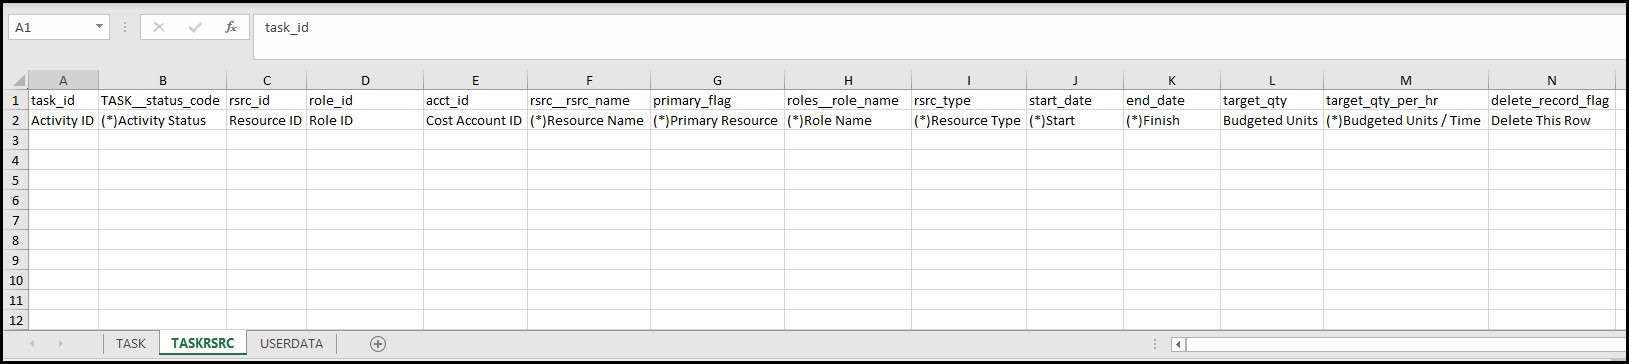
Okay, now our TASKRSRC worksheet is ready to populate, Figure 12, where our team member inputs labor resource assignments.
Figure 12
Your team member needs to at least populate the following yellow columns: Activity ID, Resource ID, Role ID, and Budgeted Units. In Figure 13 we have our TASKRSRC worksheet with labor resource assignments on activities A1032, A1034, and A1036.
Figure 13
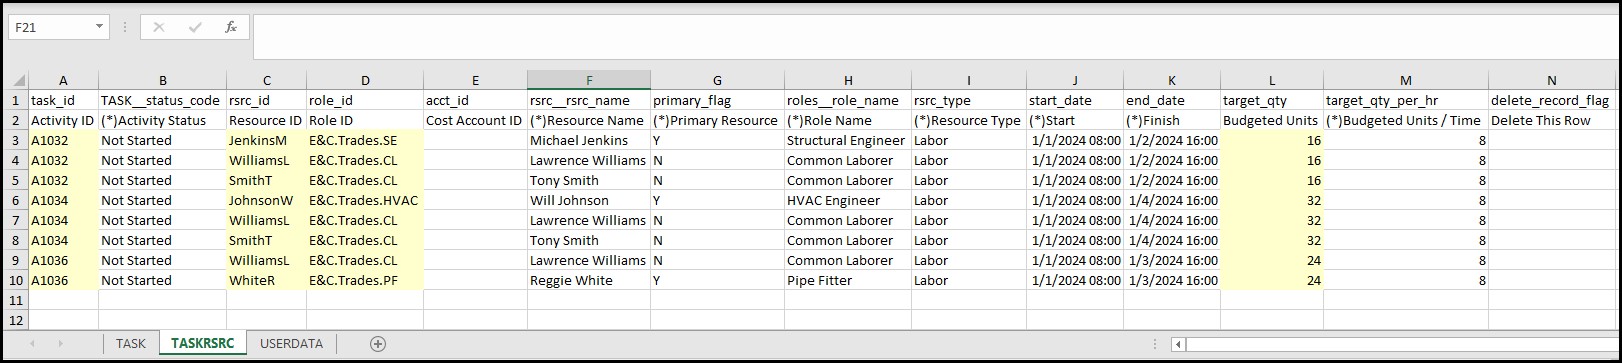
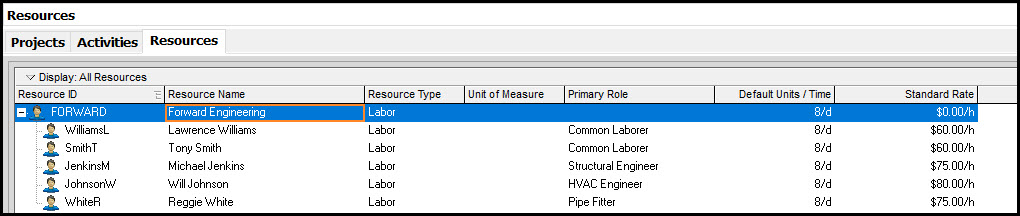
Note that P6 does not read project data from columns that have an (*) in their column heading (row 2). So, P6 reads the Resource ID, but not Resource Name. It reads the Role ID, but not the Role Name. It is also interesting to note that P6 does not read Resource Type. The Resource Type identification is in the Resource database, which we confirm is populated for both our resources, Figure 14.
Figure 14
The two columns to note in Figure 13 are the Resource ID and Role ID columns. For these columns make sure to use the same identification scheme as the P6 resource database. Also, you will find that when you have both a Role ID column and a Resource ID column the payrate assigned to activities becomes the payrate of the Role ID.
If you want the payrate to be that specified for the Resource ID, you must remove the Role ID column. Let us proceed and import our XLSX spreadsheet including both the Resource ID and Role ID columns, Figure 15.
Figure 15
In the Import Format dialog, Figure 16, we choose to import Spreadsheet – (XLSX).
Figure 16

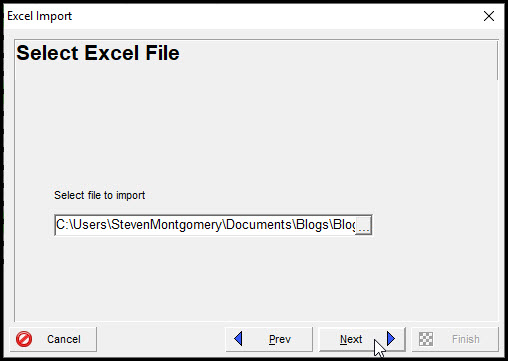
We choose our updated Excel spreadsheet and click next, Figure 17.
Figure 17
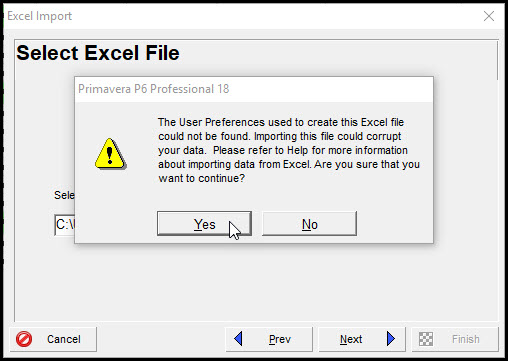
At this time, you may have a warning that the user preferences used to create the Excel file cannot be located. The import still works with this warning message, so we choose Yes and proceed with the import, Figure 18.
Figure 18
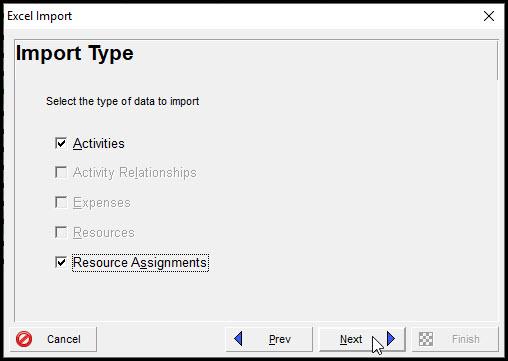
In the Import Type dialog, we have two types to import, activities and resource assignments. We choose both in Figure 19.
Figure 19
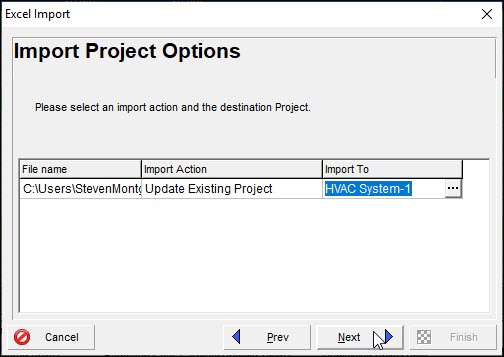
Moving along, we choose to update an existing project, and import to our currently open schedule, Figure 20.
Figure 20
Finally, click Finish, Figure 21.
Figure 21

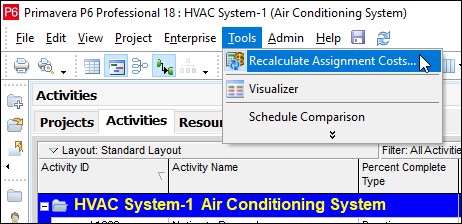
After the import choose Tools | Recalculate Assignment Costs, Figure 22.
Figure 22
You may also have to depress (F5) refresh data. The resulting schedule with imported labor project data is displayed in Figure 23.
Figure 23
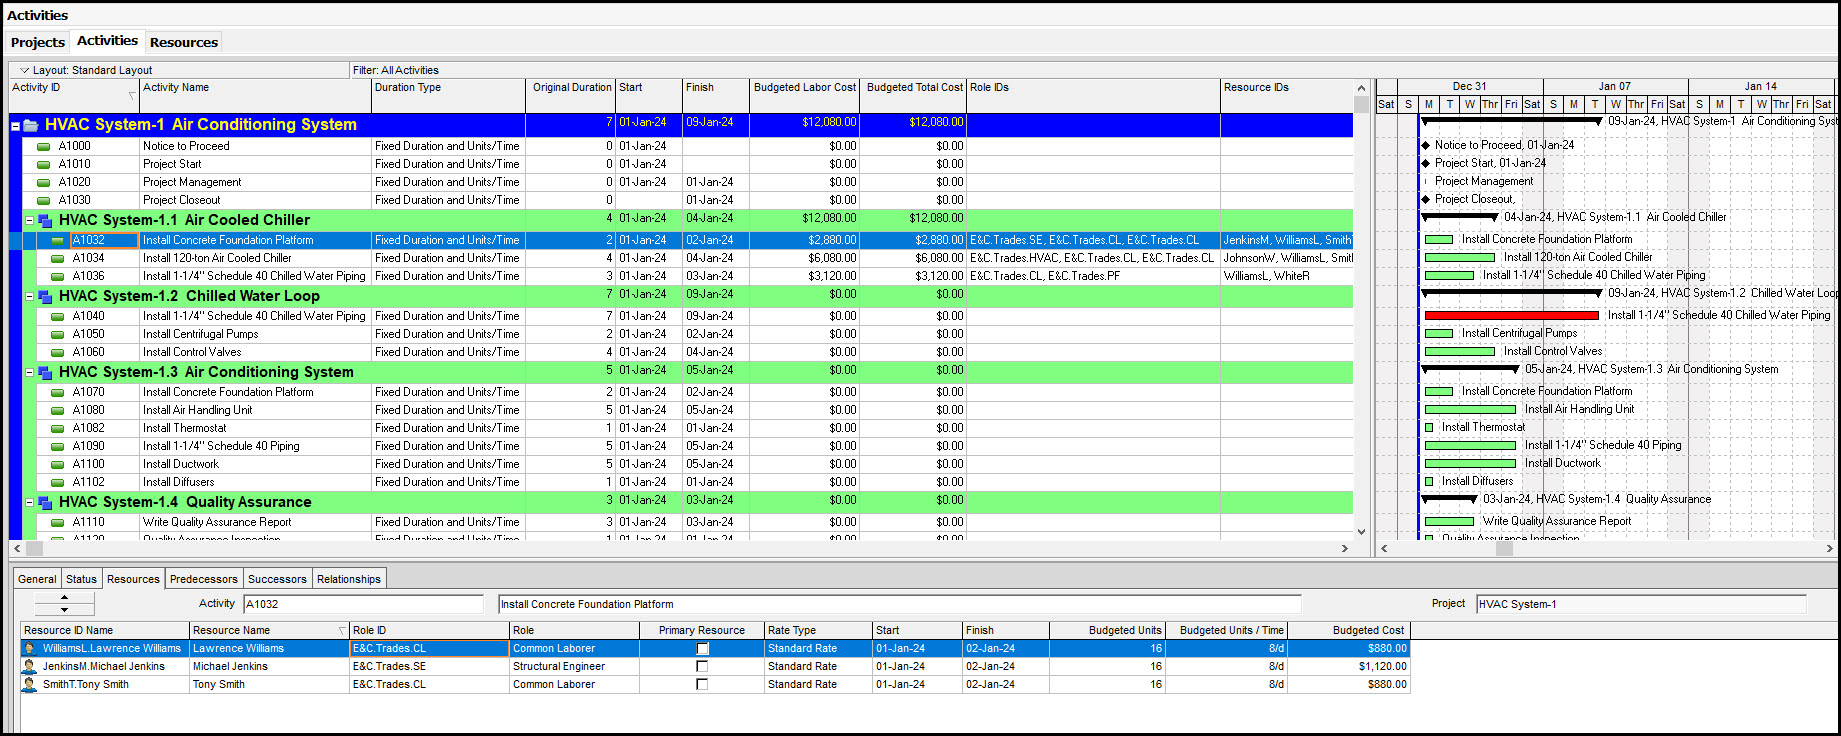
Note that it was important to set the duration type of activities to fixed duration and units/time. This makes the schedule time constrained and resource constrained. Not setting the activities to this duration type results in erroneous resource assignment budgeted units/time values and resulting budgeted cost values.
Again, we imported both Role IDs and Resource IDs. Our activity labor resource assignments were therefore set to the Role ID payrate, which appears to take precedence when both Role IDs and Resource IDs are imported.
The labor resource assignments for each activity are viewable in the bottom detail’s resources tab, Figure 23. Observe in the activity table the budgeted labor cost column, which sums into the column for the budgeted total cost of the schedule.
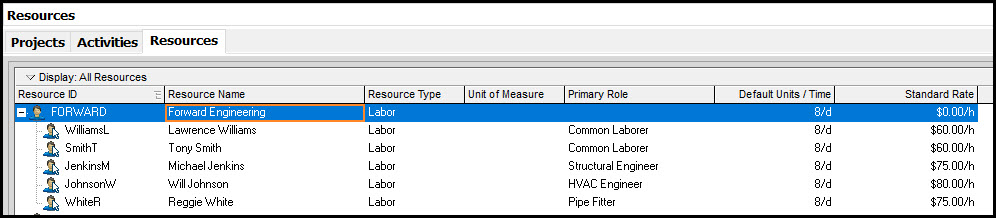
Also, only roles and/or resources that are defined in the resource database are read-in during the import. All the resources that were read-in appear as assigned resources in the resource database under Forward Engineering, Figure 24. (Note the arrows on each resource icon, Figure 24.)
Figure 24
Summary
Schedulers may export their schedule to an XLSX file with a layout that is then compatible for importing the schedule back into P6. This XLSX spreadsheet may then be updated with relevant labor resource assignment project data. In this way, team members that are less proficient with Primavera P6 Professional, or may not have P6 access privileges, provide schedulers a way of importing XLSX labor resource assignment project data.