 How to Add Columns to the EPS in Primavera P6 EPPM
Primavera P6 EPPM offers users the capability select data as well as add columns to their Activity Table in the Enterprise Project Structure. Hence, structuring the activity table can become personalized to the project that the organization or user is adhering to.
How to Add Columns to the EPS in Primavera P6 EPPM
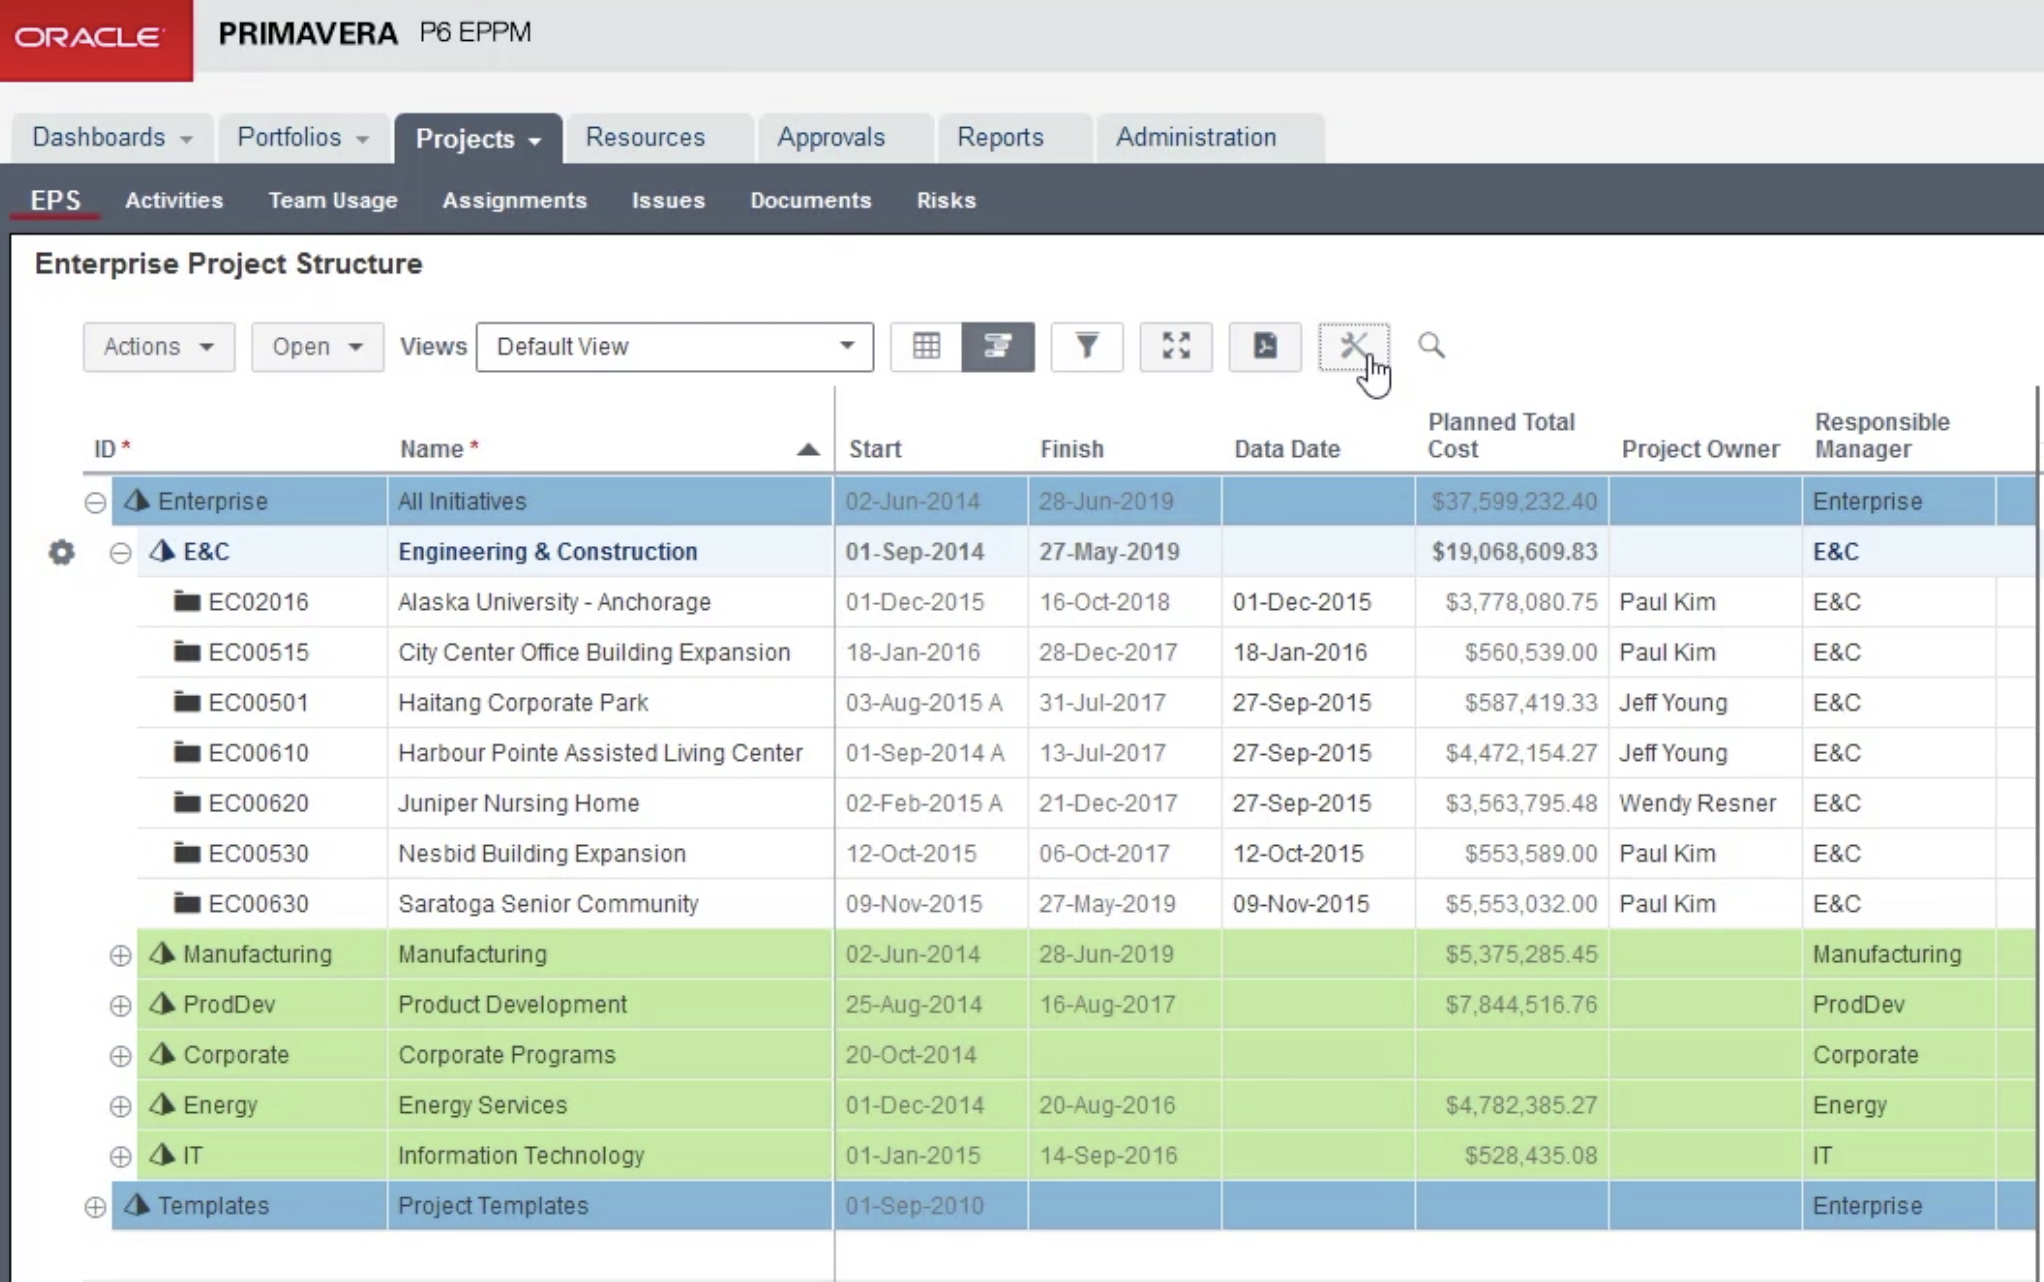
To add columns to the EPS in Primavera P6 EPPM, we first, select the customize view icon, located at the top of the screen adjacent to the search icon, as shown below in Figure 1.
 Figure 1
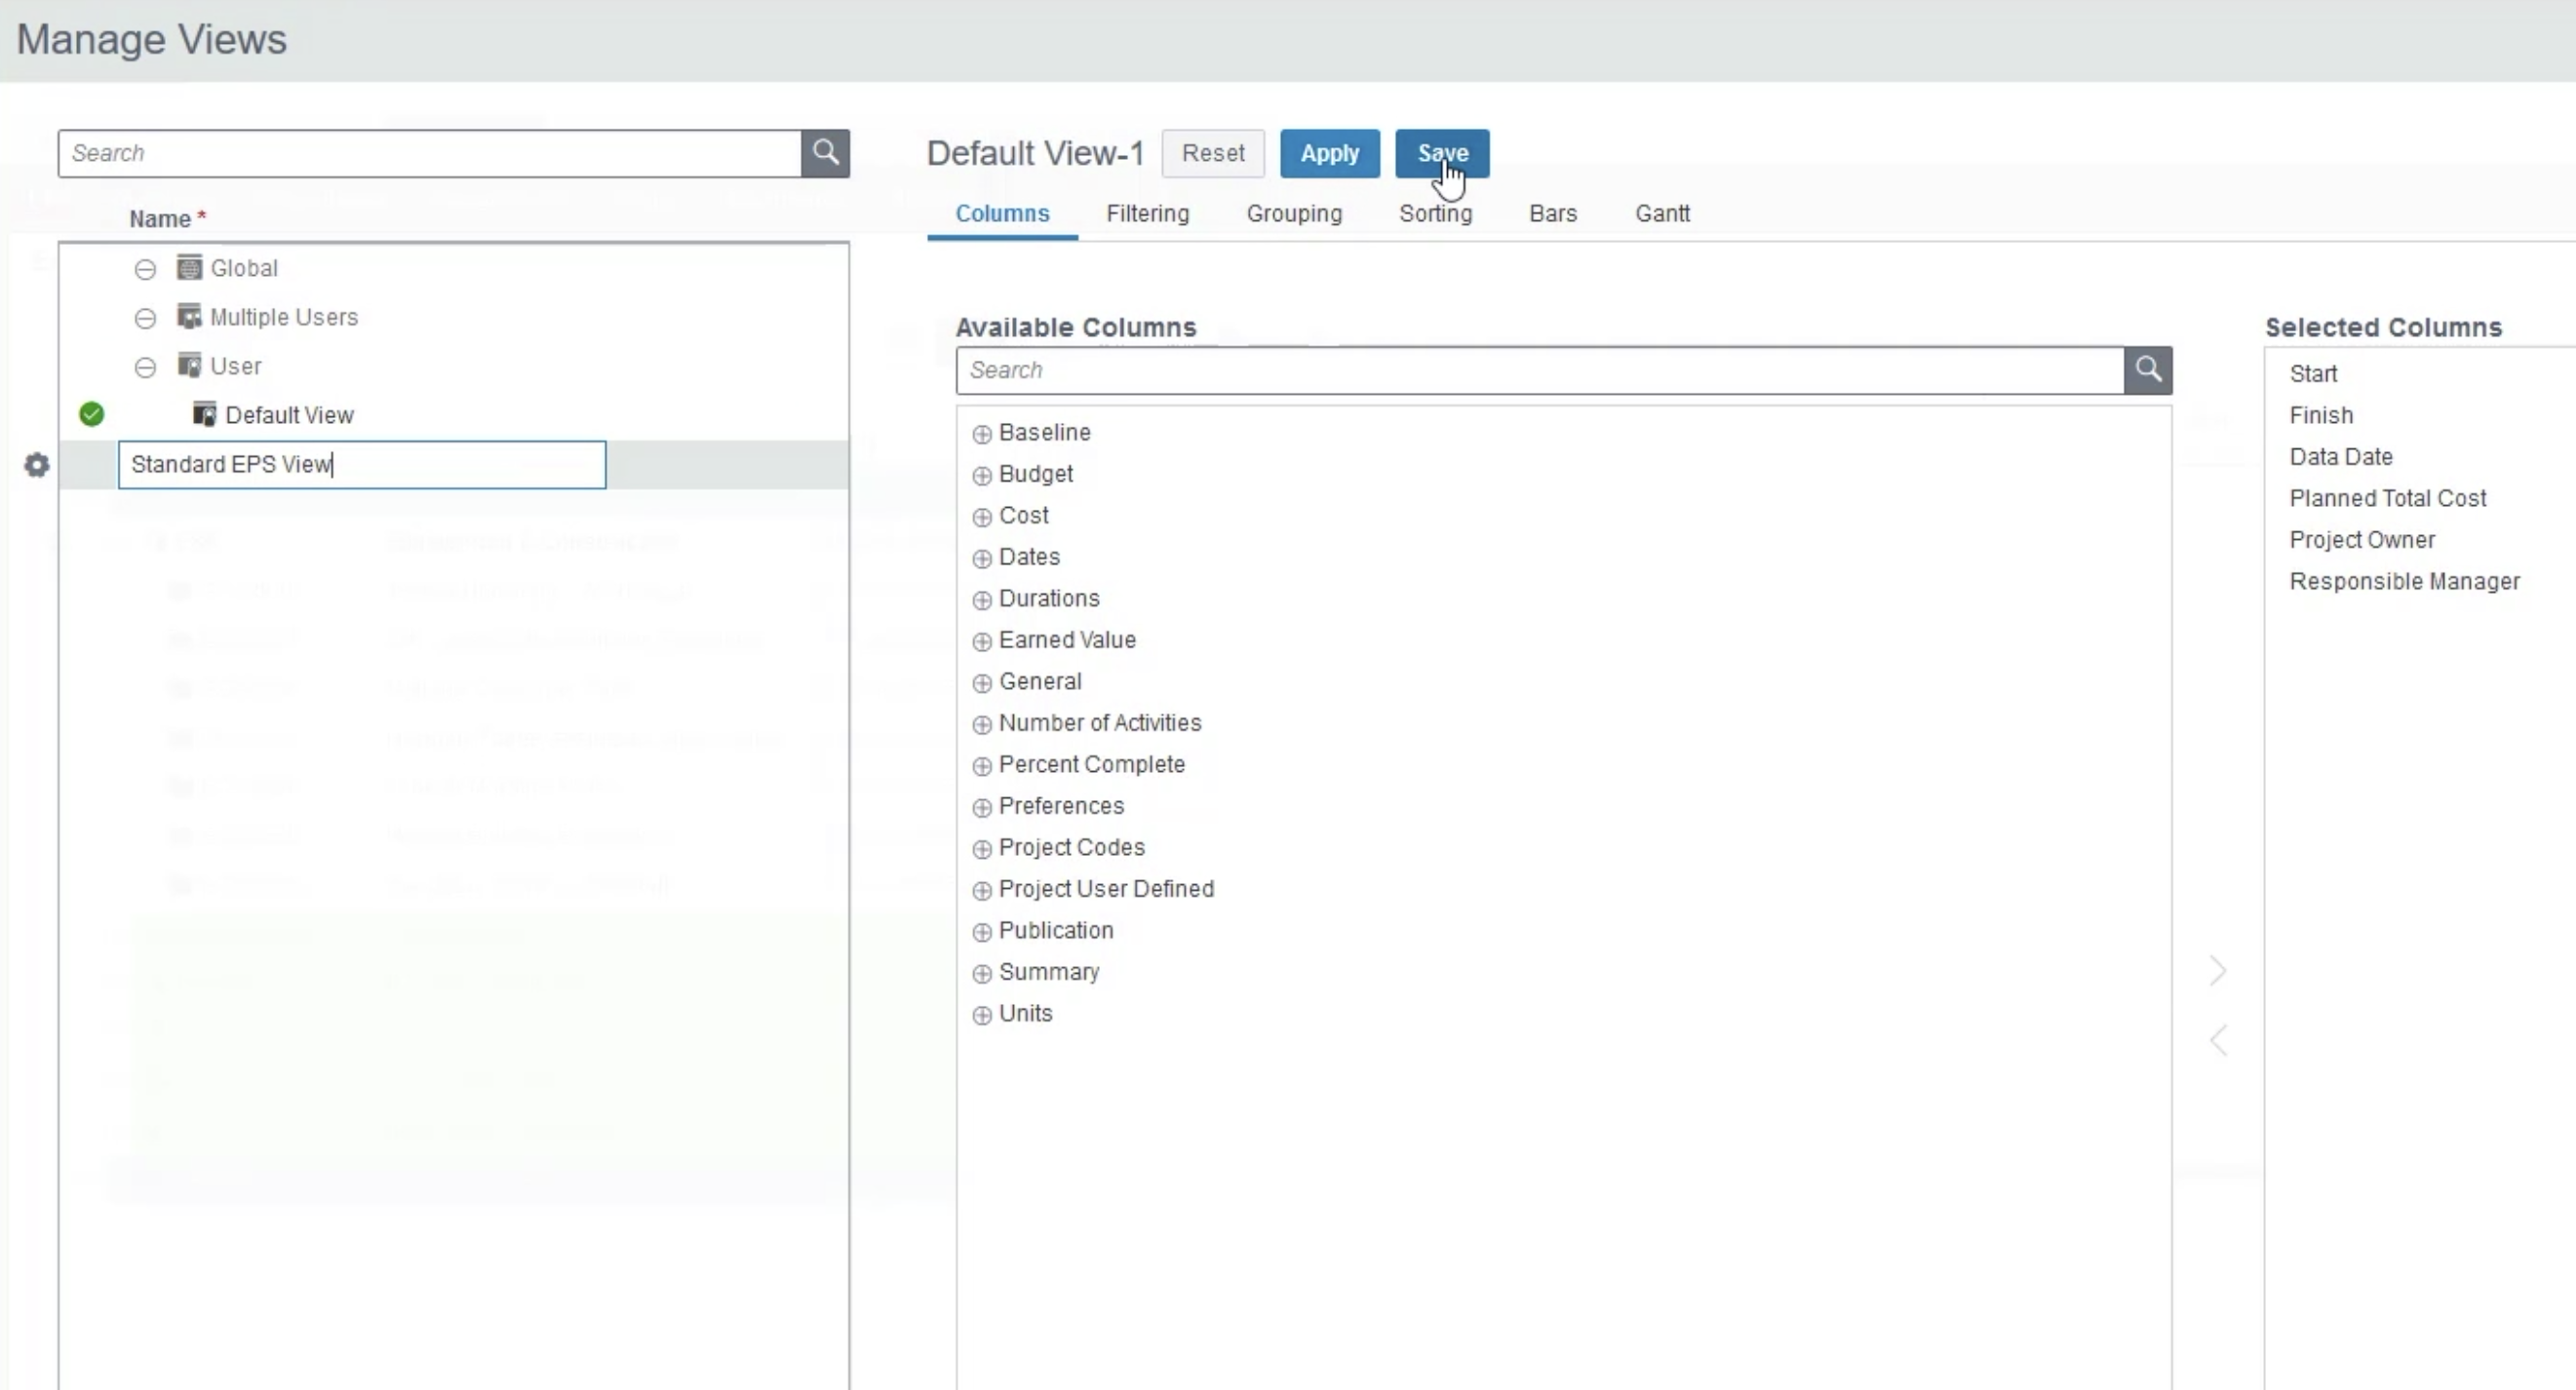
In the customized view, we click on the gear icon, located by the default view. We left-click to copy and left-click again to paste; resulting in a new view that we name ‘Standard EPS View’ and then save, as shown below in Figure 2.
Figure 2
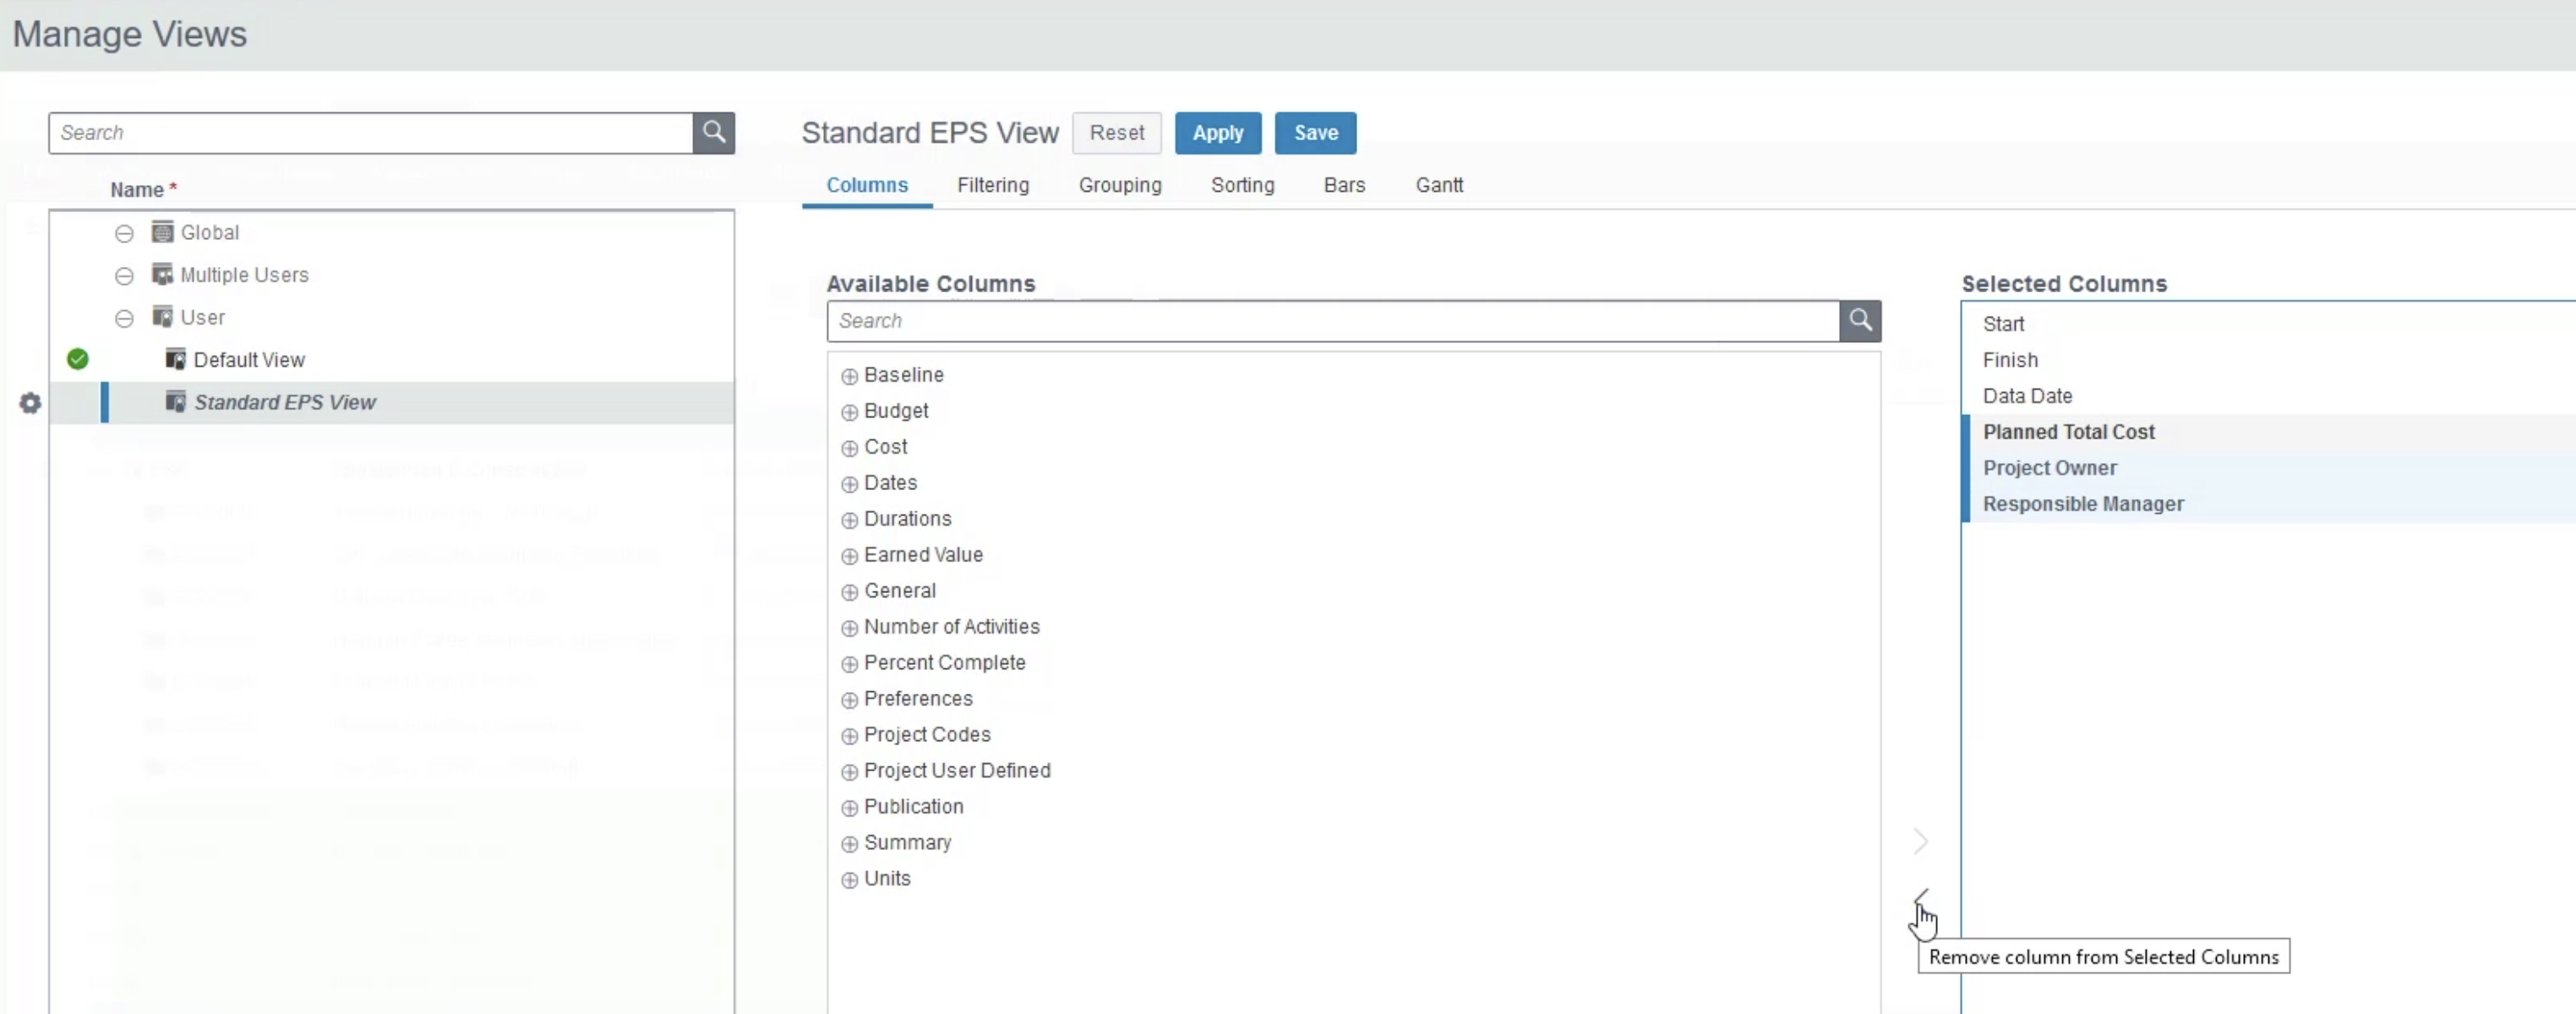
Under the ‘Available Columns’, is an alphabetical list of categories that we can select to view on the EPS. First, we look at the ‘Selected Columns’ and realize that there are three columns that we don’t need; ‘Planned total Cost’, ‘Project Owner’ and ‘Responsible Manager’.
We highlight ‘Planned Total Cost’ and by holding down the shift key we move to the last item in the list (‘Responsible Manager’). With all three items highlighted we select the bottom arrow in the middle of the screen and ‘Remove column from Selected Columns’, as shown in Figure 3.
Figure 3
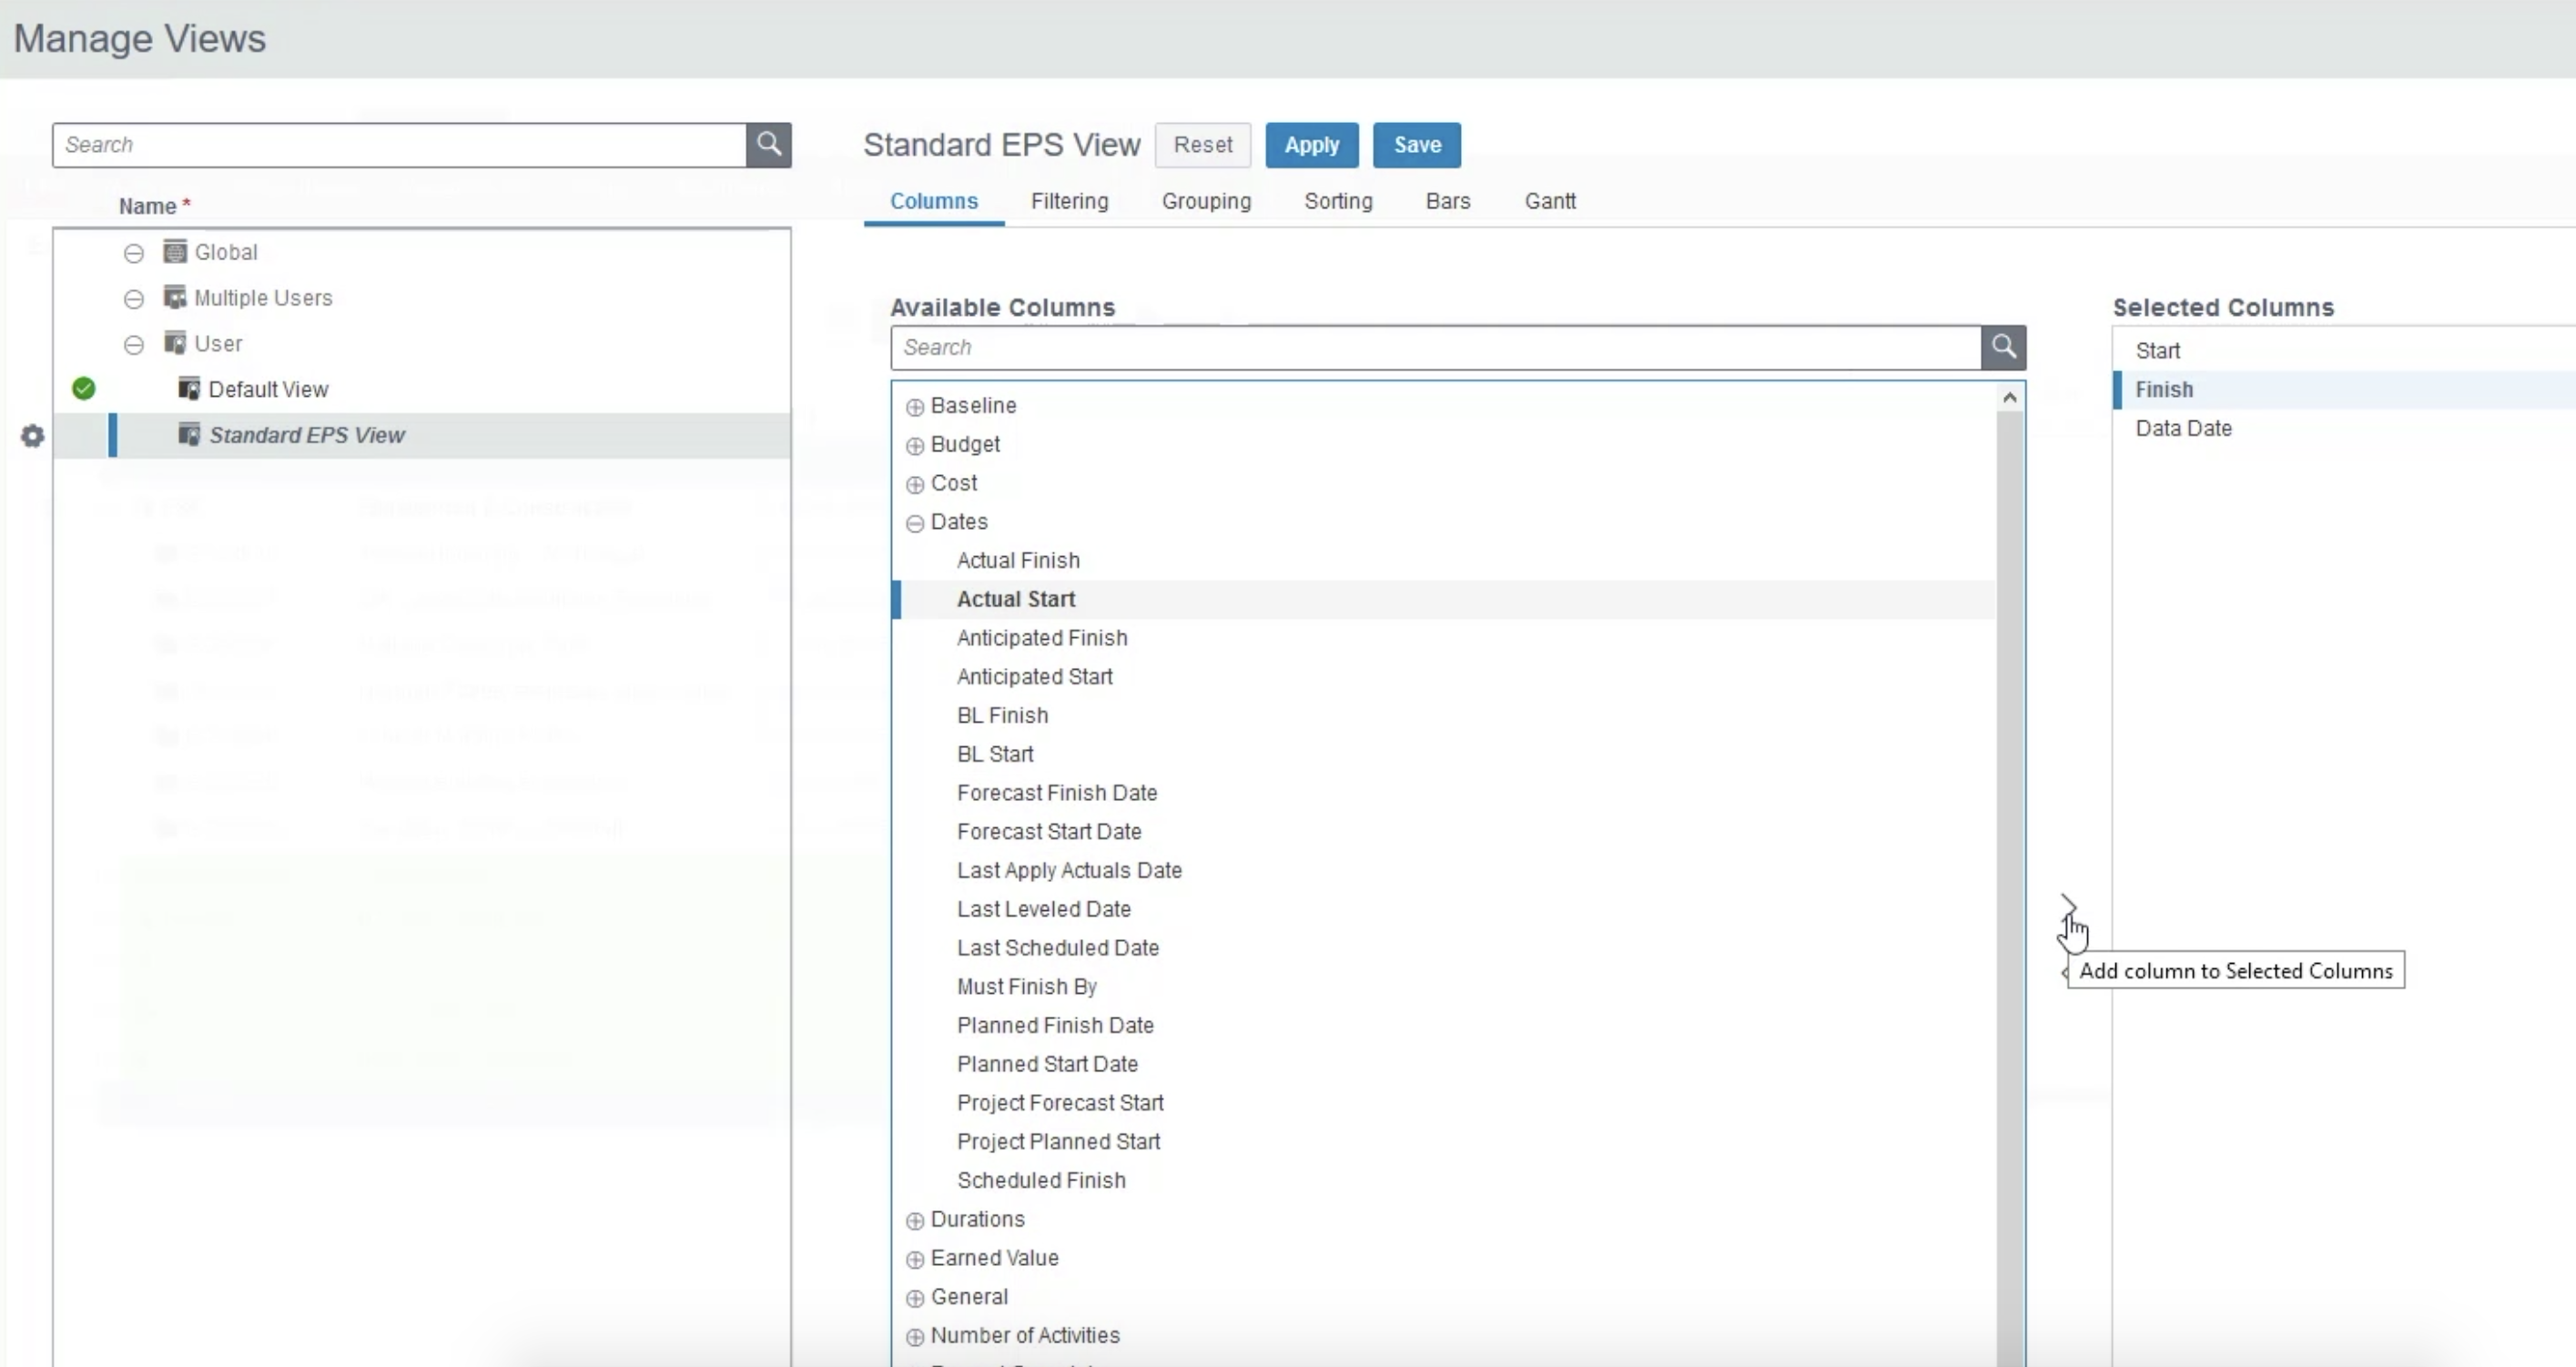
Now we begin to add columns from the “Available Columns’ list. We Click on Finish in the selected Columns because we want to add Actual Start. We open the ‘Dates’ category in ‘Available Columns and scroll down to find ‘Actual Start’. By selecting the top arrow in the middle of the screen, ‘Add column to Selected Columns’, we have our ‘Actual Start’ as shown below in Figure 4.
Figure 4
We continue, by adding ‘Must Finish By’ to our ‘Selected Columns’ list. Now we want to add some unit columns and these are found in the Units category. Instead of opening up the ‘Units’ category and scrolling through the items, we can use the search bar at the top, where we type ‘Planned Labor Units’ and instead of using the top arrow in the middle of the ‘Add column to Selected Columns’ we can double click on it and ‘Planned Labor Units’ appears in the ‘Selected Columns’ list.
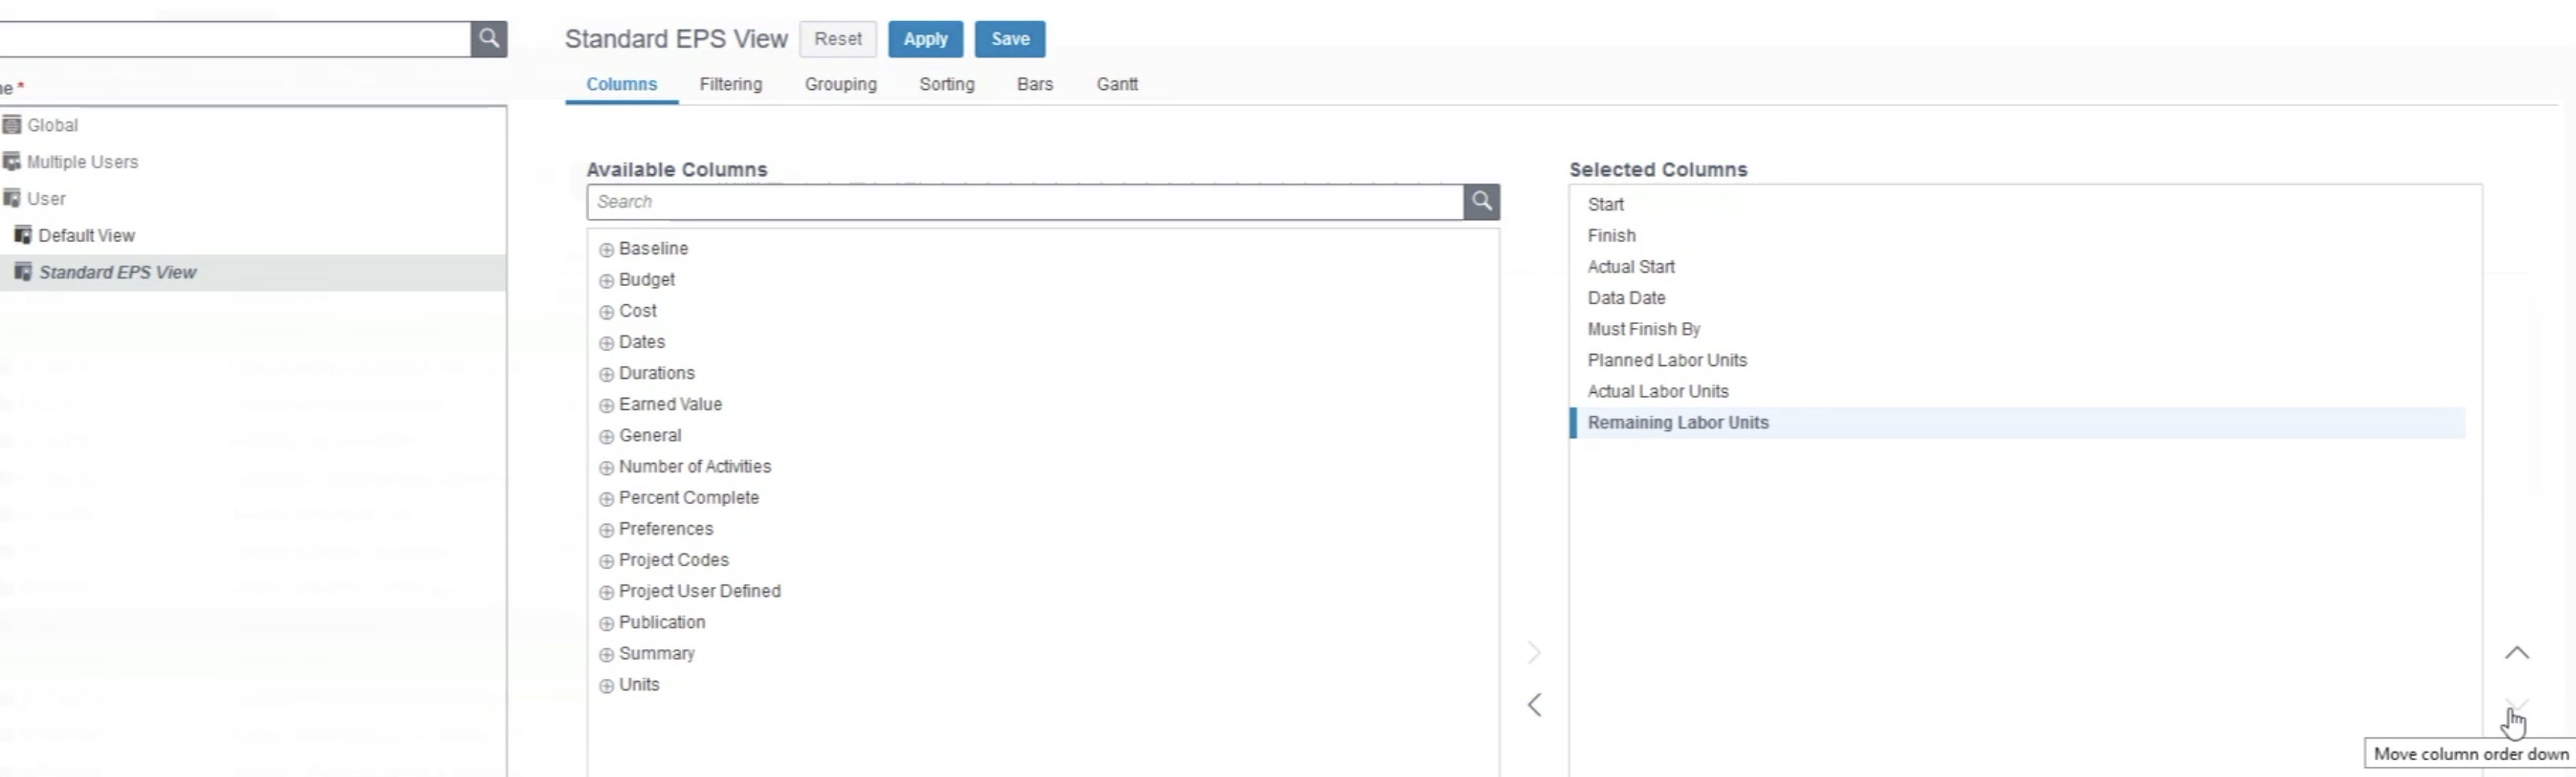
By making use of the search bar, we add ‘Actual labor’ units and ‘Remaining Labor units.’ Using the arrow keys on the far left of the screen we can position our columns, customizing our Activity table to suit our needs. The column that appears at the top of our list of ‘Selected Columns List’ will appear on the far left of our Activity Table and the column that appears at the bottom of the list will appear on the far right of the Activity Table, as shown in Figure 5.
Figure 5
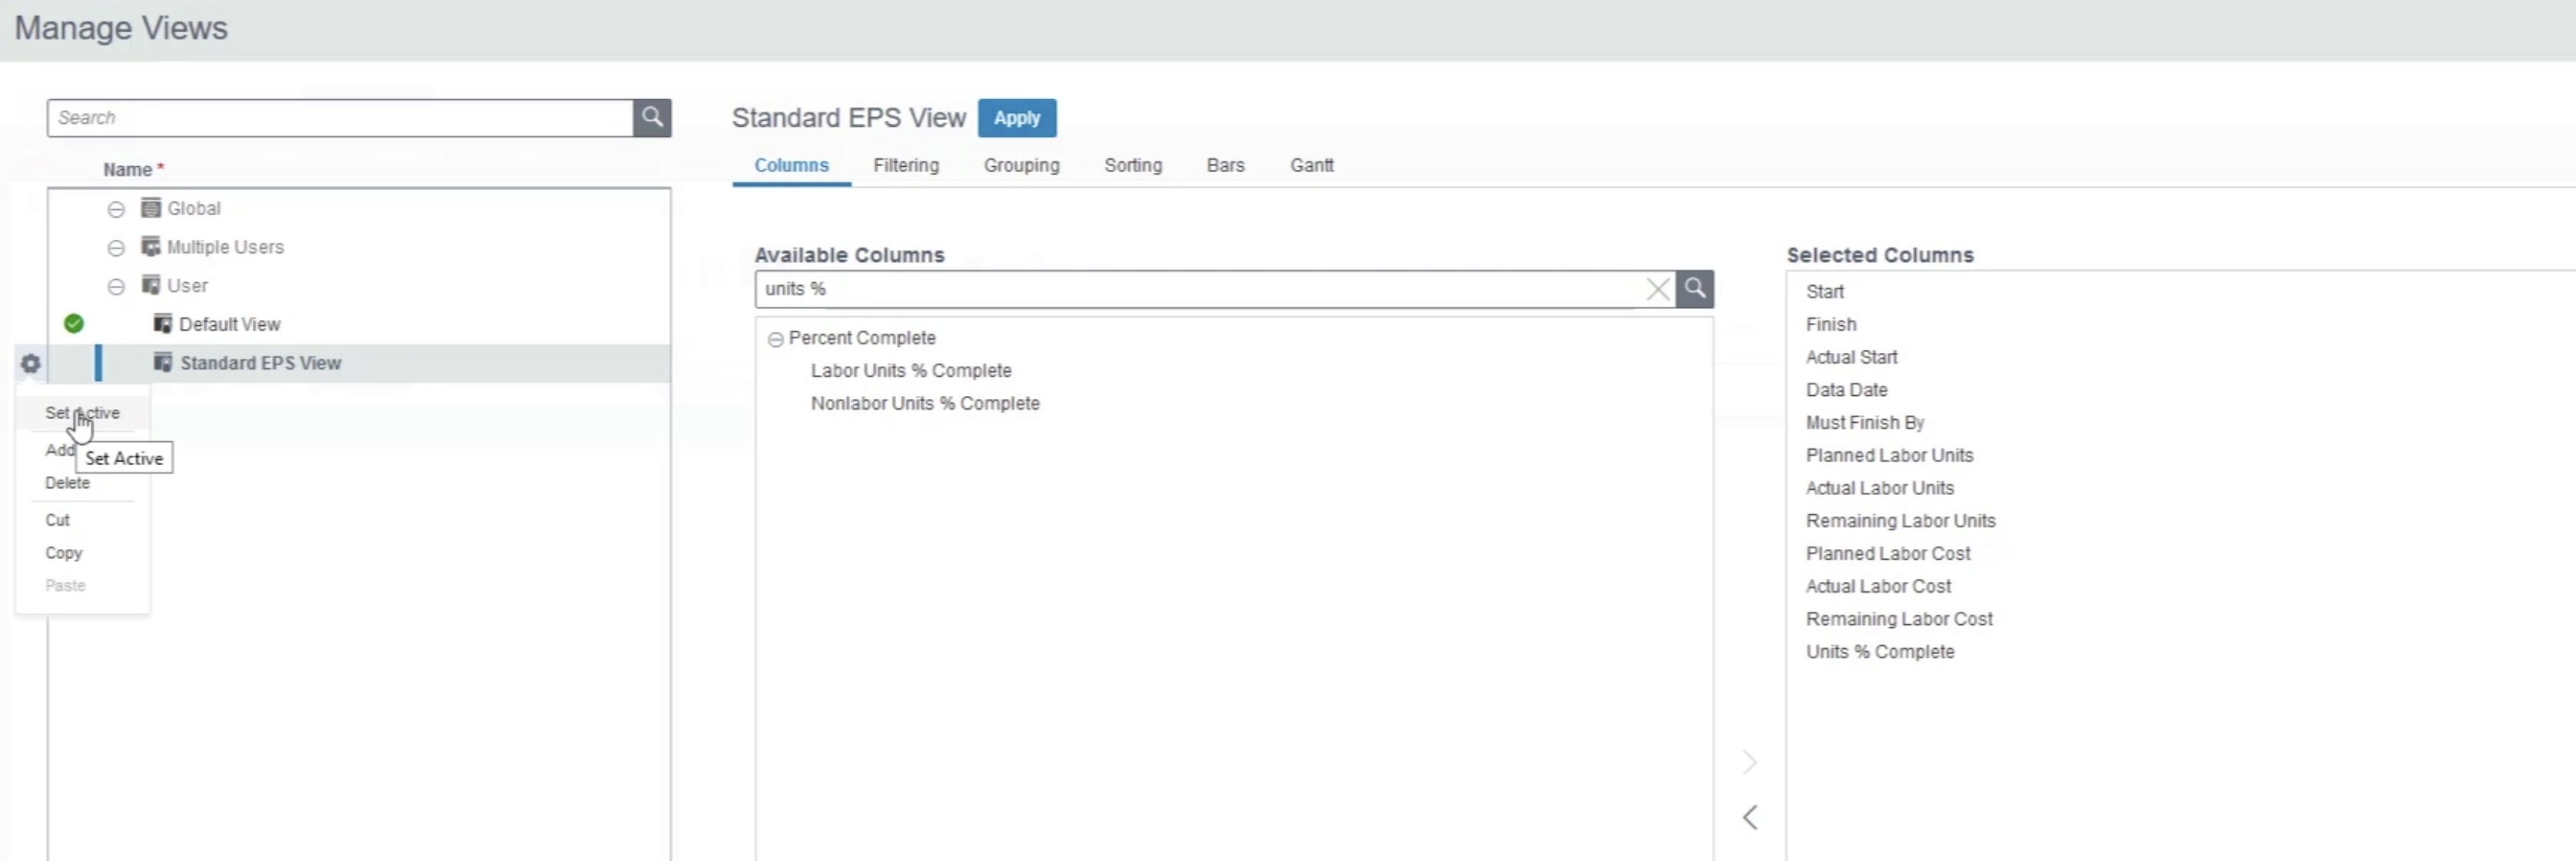
Finally, we add some cost columns. Again, we do this by using the search bar and double-clicking on the item to move it across to ‘Selected Columns’. We add ‘Planned Labor Cost’ ‘Actual Labor Cost’ ‘Remaining Labor Cost’ and ‘Units % Complete’. We then select save in the top bar of the screen. If we select Apply our ‘Standard EPS View’ will become our active view. If we click on the gear next to ‘Standard EPS View’ we can click on ‘Set Active’ as shown below in Figure 6.
Figure 6
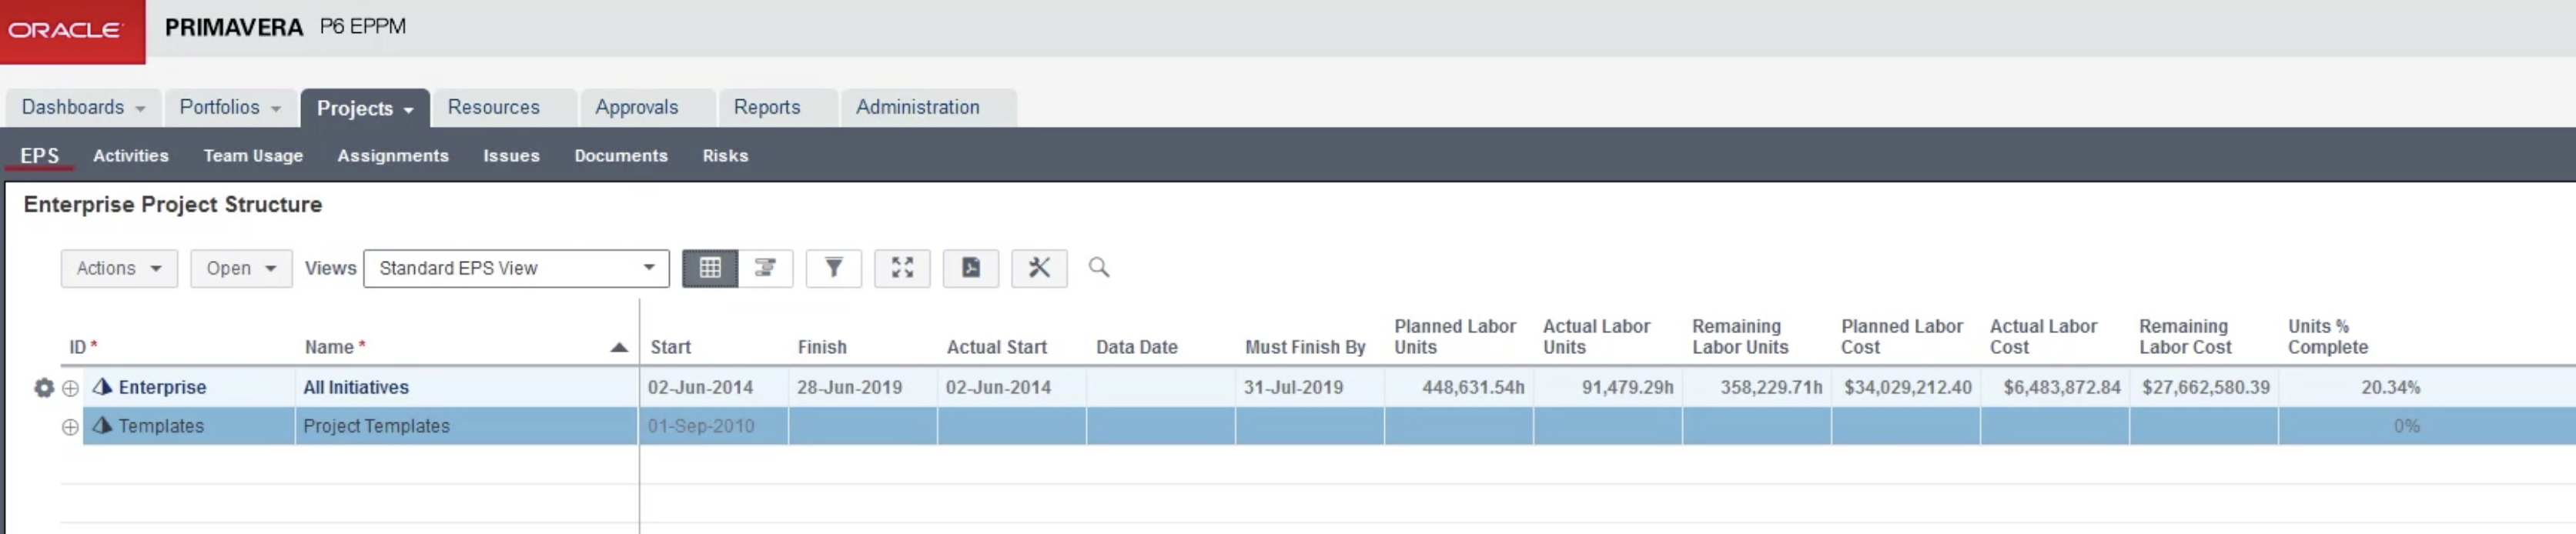
To view the entire Activity table in the EPS we click on the Grid view icon to remove the Gantt Chart and displayed is our full activity table with columns arranged in the order that we selected, as shown in Figure 7.
Figure 7
Summary
Adding columns to the EPS in Primavera P6 EPPM is a fairly simple process. It allows users to display the headings and information which is relevant to their project in the Activity Table. Columns can be added using a wide range of data in the ‘Adding Columns List’, which can be accessed by scrolling down the list or by searching using the search bar.
Using the arrow keys on the far left of the page, users can move their selected columns until they have the desired format for their activity table. To view additional columns that have been added to the EPS, remember to turn off the Gantt chart view using the grid view icon.