The Deltek Acumen Forensics feature can compare a base project with other snapshots or scenarios. This is great if you have two versions of the same schedule and you want to know the differences between the two or what changes were made.
The Deltek Acumen Forensics feature is a comparison tool for this very purpose. In fact, the Acumen Forensics feature is a comparison tool with a wide range of analytical capabilities that allows you to identify differences between selected versions of a project.
The range of Forensics options include the following groups:
- Forensic Checks which are project level analyses
- General that are components in all projects
- Inputs which are entered by the scheduler
- Outputs calculated by the scheduling tool based on the scheduler’s inputs
This article demonstrates the utility of the Deltek Acumen Forensics feature and comparison tool.
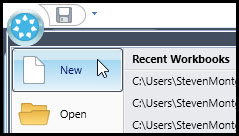
We begin by showing how to set up two Primavera P6 projects for comparison. We start by clicking on the Acumen start button and select New, Figure 1.
 Figure 1
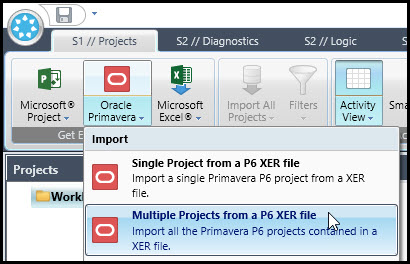
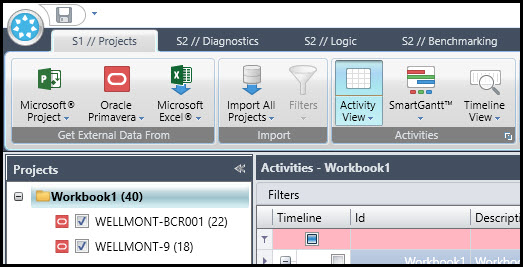
In S1 // Projects tab, click on the bottom of the Oracle Primavera button and choose to import multiple projects from a P6 XER file, Figure 2.
Figure 2
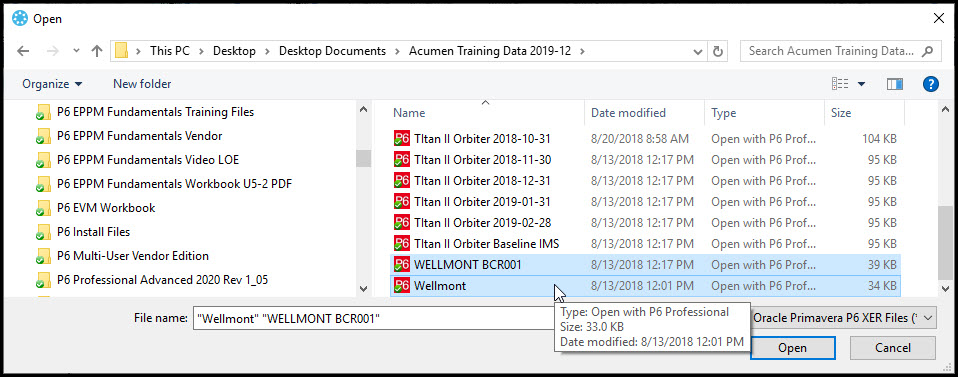
In Figure 3 we choose two XER files we want to compare and open them.
Figure 3
This will place the two versions of the project in a workbook, Workbook1, Figure 4.
Figure 4

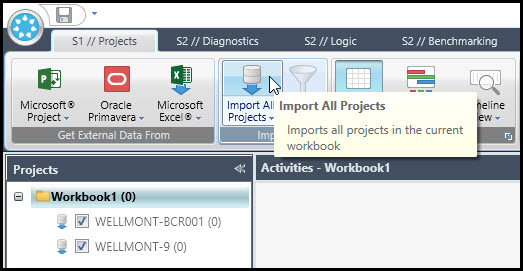
Then we click on the Import All Projects button, Figure 5.
Figure 5
As shown in Figure 6, this loads the projects into Workbook1.
Figure 6
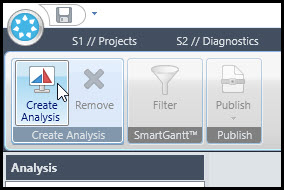
With the two target projects now loaded, we are ready to dive into the Forensics tab, Figure 7.
Figure 7

In Forensics we then choose to click on Create Analysis, Figure 8.
Figure 8
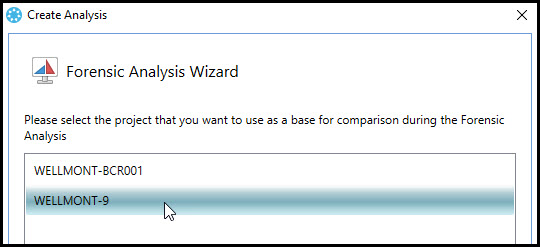
We then choose the project we want to use as a base for the comparison, Figure 9, and click next.
Figure 9
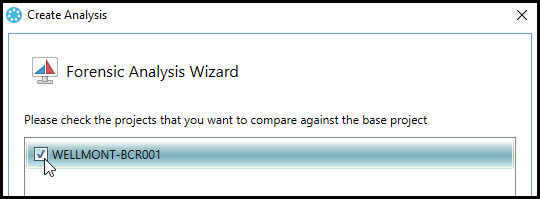
We then select the project to compare against the base project, Figure 10.
Figure 10
In the final dialog, you can select from a list of which fields to compare, Figure 11.
Figure 11
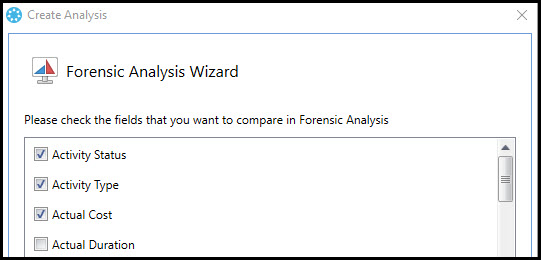
We go with the default fields.
The two projects we opened are a baseline project (WELLMONT) and a formally changed version of that baseline called WELLMONT-BCR001. The latter has been updated with modified scope and progress.
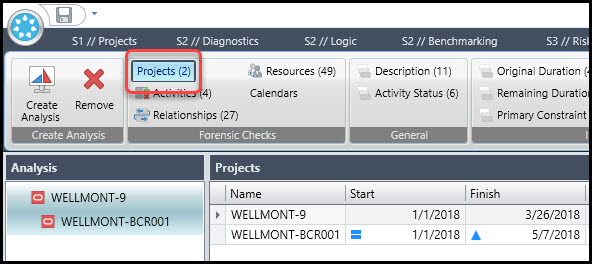
By default, the screen is showing the Projects option in the Forensics Checks ribbon area, Figure 12.
Figure 12
In Figure 13 we take a closer look at the results of the comparison.
Figure 13
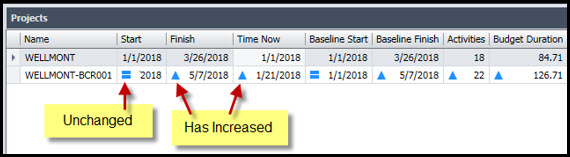
Figure 13 displays an ‘at a glance’ comparison of the two projects. Symbols used in the Forensics tab are as follows:
- The symbol indicates the values are unchanged from the baseline
- The symbol indicates an increased value from the baseline
- The symbol indicates a decreased value from the baseline
- The symbol indicates the item has not been found in this version of the project
With these indicators in mind, we elect to compare results for the remaining duration input, Figure 14.
Figure 14
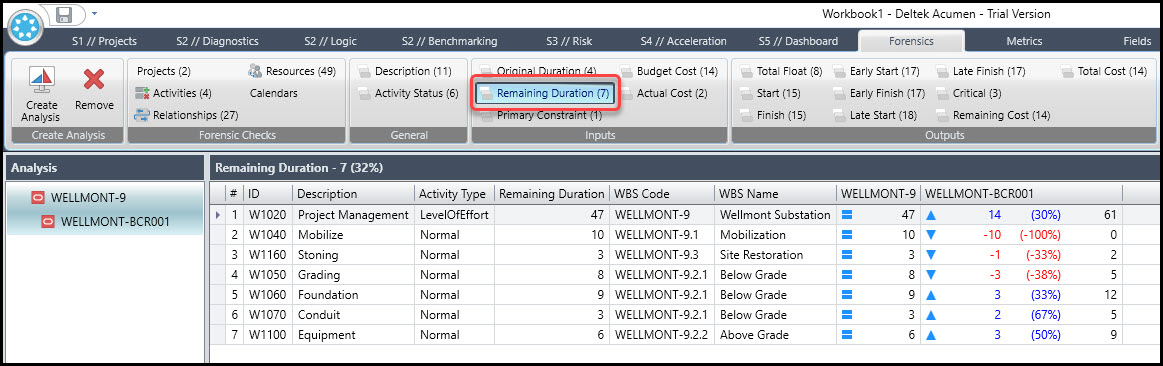
Note the changes to the remaining duration for various activities in each version of the schedule.
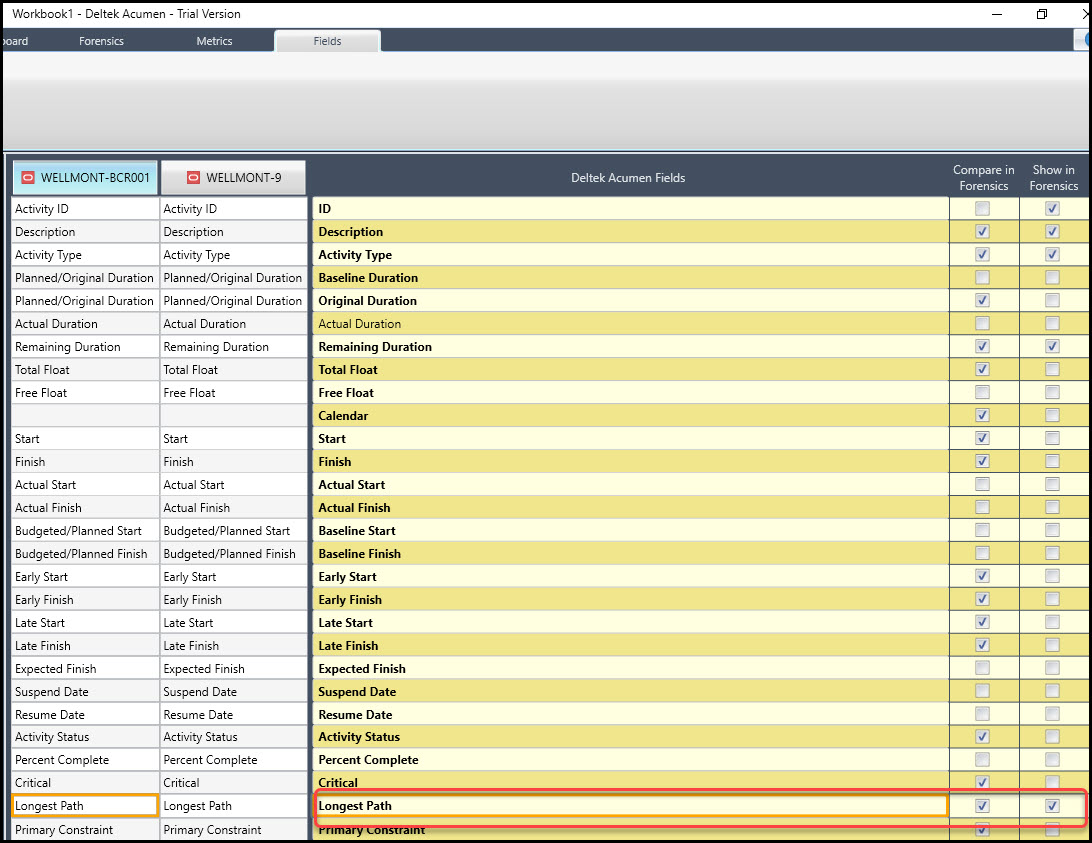
Now we want to look at Forensics outputs and, in particular, the longest path. One of the characteristics of a quality schedule is that the longest path does not change and is stable throughout the update process. So, we want to confirm that our longest path is not shifting. But if you look at the outputs ribbon group, Figure 14, longest path does not appear in the outputs ribbon group. We need to implement three steps for longest path to appear:
1. In the Fields tab, where we have a list of all the available fields to compare, toggle Longest Path to Compare in Forensics and Show in Forensics, Figure 15.
Figure 15
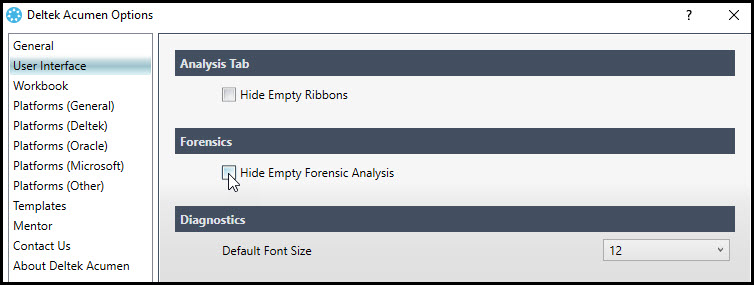
2. Next, in Deltek Acumen Options | User Interface, uncheck the ‘Hide Empty Forensics Analysis’ Forensics setting, Figure 16.
Figure 16
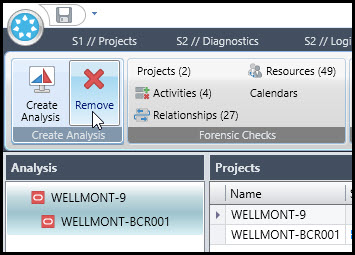
3. Remove the current comparison and create a new analysis which in the process will activate the new settings that were set in steps 1 and 2, Figure 17.
Figure 17
After you recreate the analysis comparison, using the previous steps above, Longest Path now appears in the Outputs, Figure 18.
Figure 18

Longest Path has no changes as indicated in the Outputs, ‘Longest Path (0)’. This confirms that our longest path is stable and does not vary though the scope changed, and updates were entered. You may wonder why then the Critical output has three changes, ‘Critical (3)’, Figure 19.
Figure 19
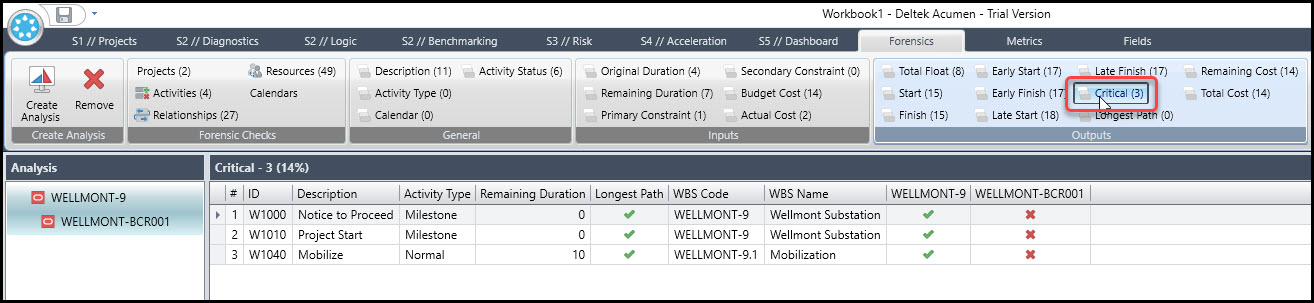
It appears to be a mystery as to why the longest path shows no change, but three critical activities have changed. However, investigation revealed that this is due to progressing the schedule. The three activities that were critical now have actuals and are 100% complete, and, therefore, no longer appear as critical. So, again, we have confidence from our forensics analysis that our longest path is stable.
Summary
So, if you have two versions of the same schedule, employ the Deltek Acumen Forensics to compare and find their differences. Be sure to uncheck the default ‘Hide Empty Forensics Analysis’, so that you can confirm when an input and/or output has no variations or discrepancies between the versions.
You will also find from the Fields tab that you have a wide range of analytical capabilities available for comparison in Forensics. Thus, Forensics is a robust Acumen feature that allows for a comprehensive comparison between schedule versions.