There is a way to make updating progress in Primavera P6 for a construction project schedule (that is used by the contractor to report progress to the owner), simple. But you need the Primavera P6 schedule developed in a way that allows this easy process for updating progress in Primavera P6.
The idea is to have a project schedule the contractor can use to show actual progress for each update period and communicate the plan to complete the remaining contract work. This is how the majority of projects I work with utilize the project schedule.
Develop the Baseline Project Schedule
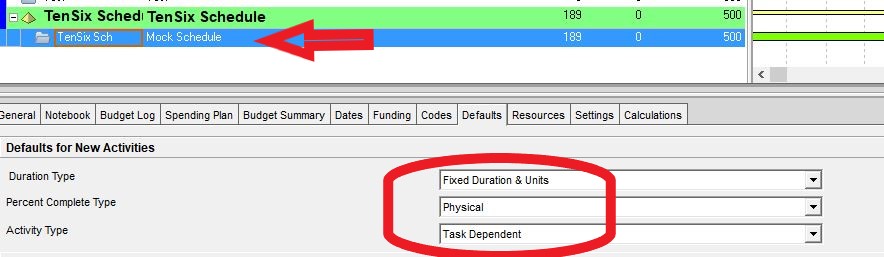
First, if the project does not have a requirement for Resource and Cost Loading / Reporting, I select the following project level settings in Primavera P6.
- “Duration Type” set to “Fixed Duration and Units”.
- “Percent Complete” type set to “Physical”.
- “Activity Type” is “Task Dependent” unless an individual activity is a “Milestone” or “Level -of-Effort, LOE”.
 Figure 1 – Default “Duration Type”, “Percent Complete Type”, and “Activity Type” Setting
I then fully develop the schedule.
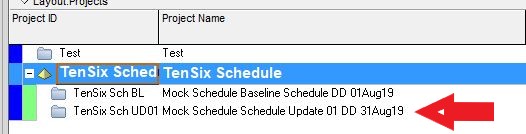
Once the baseline schedule is accepted, I copy / rename it and use it as my first update.
Figure 2 – Copy / paste baseline for use as 1st update
Updating Progress (No Resource or Cost Loaded)
Once I’ve received all the progress data from the project team or gathered information during a site walk, I’m ready to start entering this data into this schedule update.
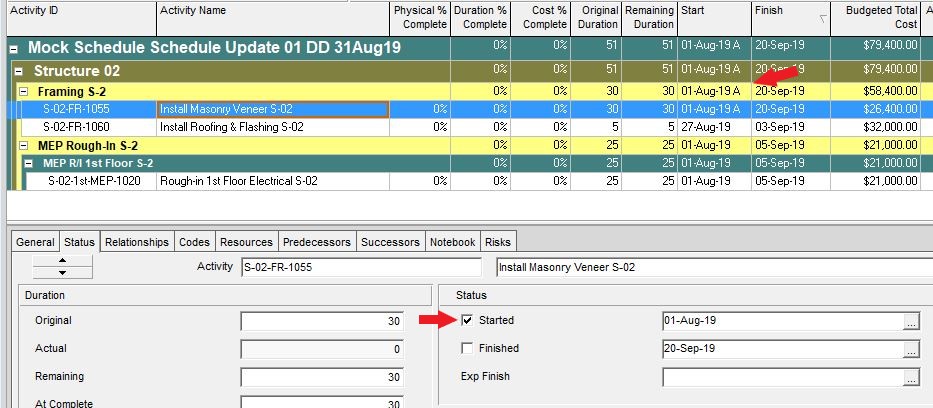
First, I like to enter all the actual dates.
Figure 3 – Entering actual dates at the “Details – Status” Area
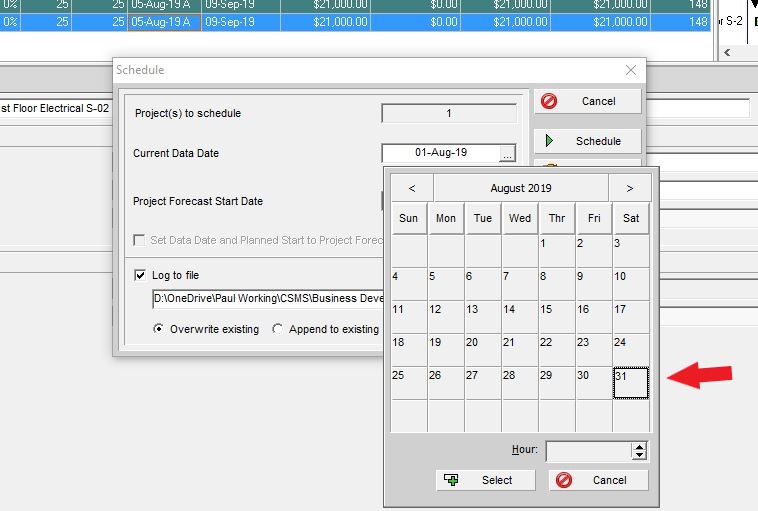
Then I set the Data Date for this update and schedule the program.
Figure 4 – Setting the Data Date to schedule the update
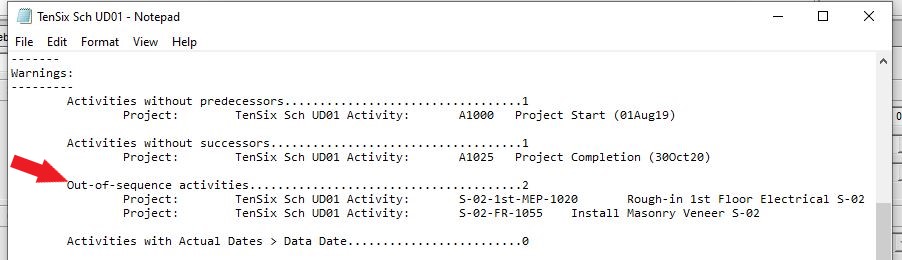
Personally, I like to address any activities listed on the Primavera P6 schedule log under Out-of-Sequence, OOS activities at this time.
Figure 5 – The Primavera P6 schedule log Out-of-Sequence, OOS activities list
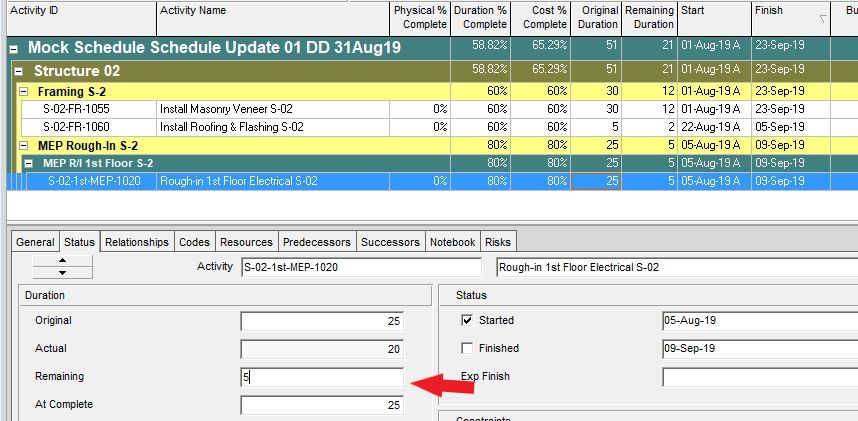
Now I enter the remaining duration, RD or set the estimated finish dates based on the project team input.
Figure 6 – Setting the remaining duration for an activity
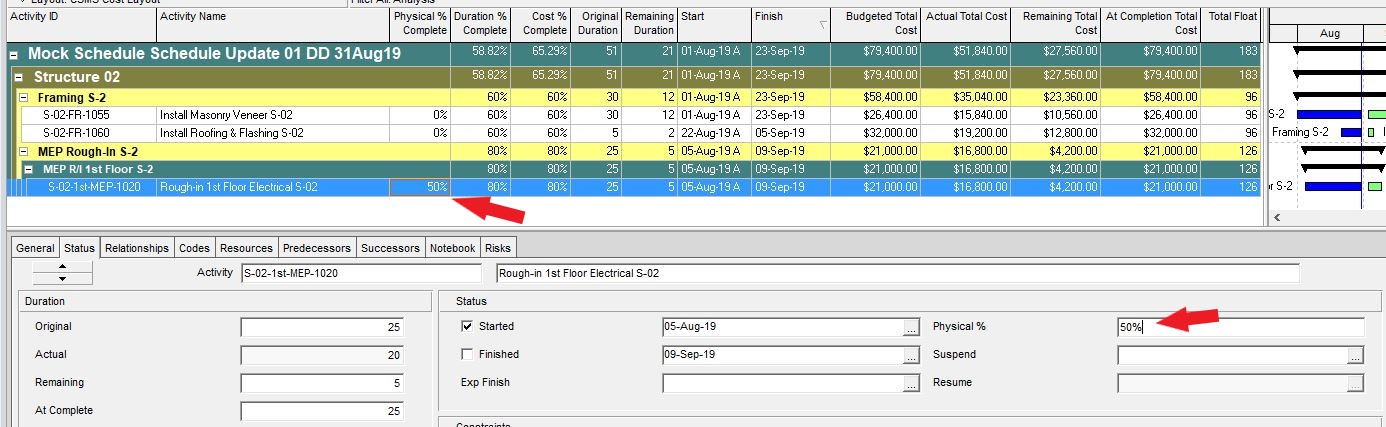
Finally, I enter the work completed % complete value input in the “Physical % Complete” area. I DO NOT adjust the “Duration % Complete” value for an activity. I let the calculation based on Original Duration, Actual Duration, and Remaining Duration set this value. I schedule the program again.
Figure 7 – Activity with “Physical % Complete” and “Duration % Complete” entered
Once this is completed, the project schedule progress update is complete. I have an accurate current as-built project status.
Analyze the Progress
This update process is simple and still shows the variance between physical progress and activity duration. For example, if the physical % complete for an activity is 50% (for work in place) and the duration % complete is 70% (based on the remaining duration or estimated finish date set based on field input), I can see that I’m not making the physical progress / production rate I planned. With this information, I can address this lack of progress for any in-progress activities, while there is time to have a positive influence.
Figure 8 – “Physical % Complete” to “Duration % Complete” variance

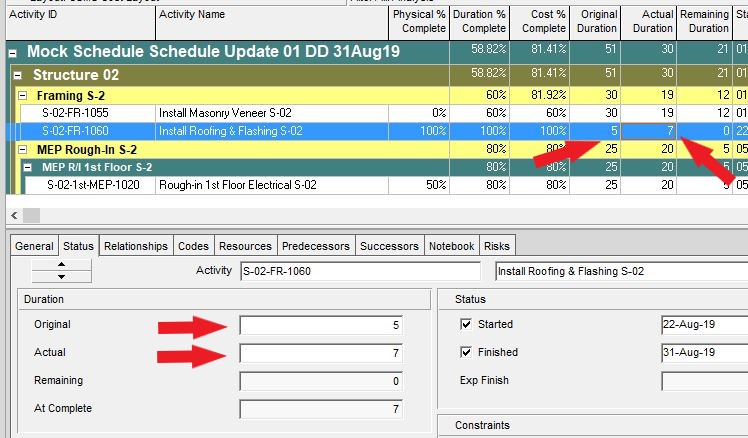
I can also look at completed activities (based on Original Duration against Actual Duration). If the Actual Duration is much greater than the Original Duration, I know I need to research and address whatever reason drove the lack of production / progress. I may have the opportunity to influence current or future similar work by the same subcontractor or field team.
Figure 9 – Original duration to actual duration variance
Resource and Cost Loaded Schedules
If there is a requirement for Resource and Cost loading, the process above will require a few changes depending on the Resource Loading requirements. If the requirements only require simple lump sum, LS cost loading, not resource hourly units or material and equipment units, the above process will work.
I prefer to create a labor resource for each trade, or subcontractor / vendor, and contractor. I then assign the appropriate resource to an activity and add the LS cost.
Figure 10 – Labor resource development
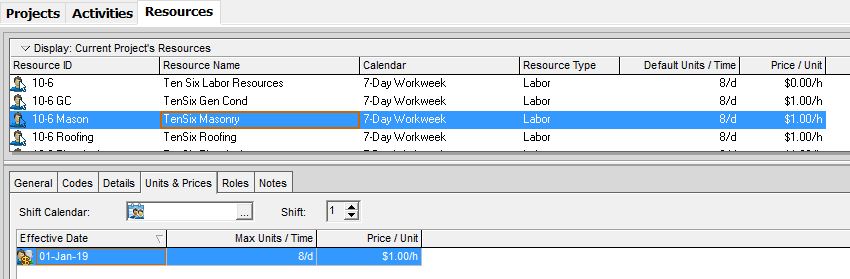
Personally, I try to have one resource per activity, not multiple resources. (Should be one point of responsibility for each activity…). I also use the USACE LS unit / cost loading process, but the cost can be added manually.
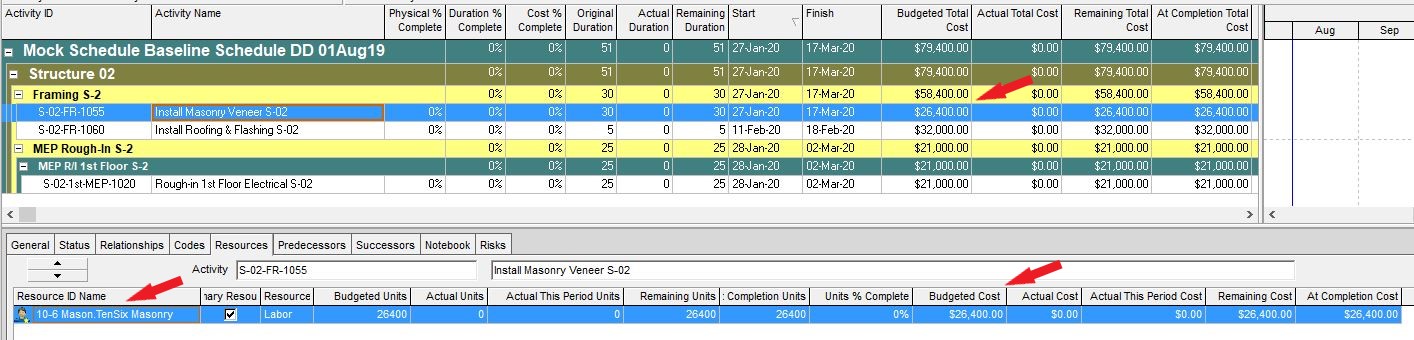
Figure 11 – Activity with resource and cost assigned
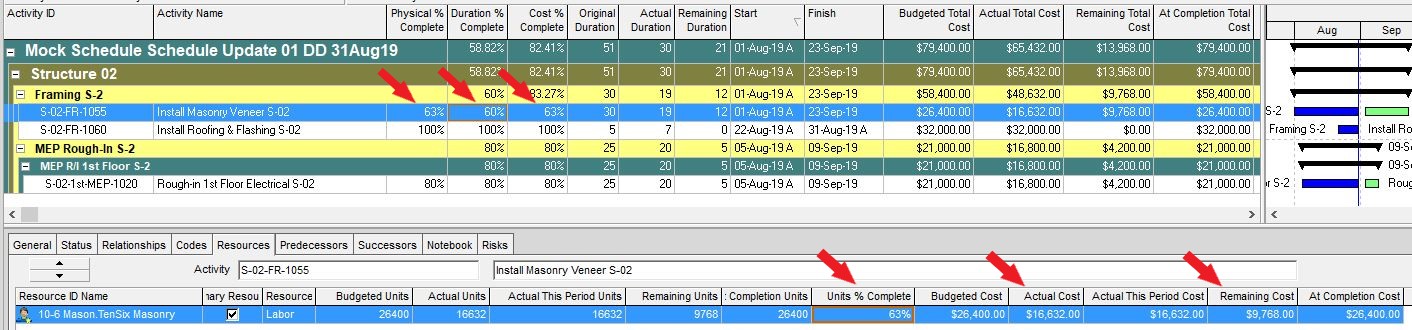
To update, in addition to the process above, I manually enter the Actual Total Cost to drive the Cost % Complete to match the Physical % Complete so we’re only invoicing for work in place. I then ensure the Remaining and At Completion Budgeted Cost values are correct.
Figure 12 – Activity progress with actual cost adjusted
If the requirements require Resource and Cost loading by hourly units or material and equipment units, the above process will not work and several resource settings and task type will need to be revised. This is not an easy update process and is not addressed here.
So that’s a method that I use when updating progress in Primavera P6.
Plan your schedule….

Paul Epperson CCM, PMP, PSP, PMI-SP
Paul has extensive experience as a Construction Manager. Over time, he became convinced that there is a critical shortage of skilled planning and scheduling professionals in our industry. In 2009, he backed away from his work as a Construction Manager and began focusing on planning and scheduling. He now serves our industry as a subject matter expert in this area.
You can visit Paul’s LinkedIn account to learn more about him and his website is http://www.conschmanservices.com