This is my first of a series of posts for new users of the Oracle Primavera Professional client. This post covers how you create a project in P6. It is intentionally opinionated and prescriptive with the aim of getting the newbie user up and running as fast as possible. The detail and options available will be dealt with elsewhere.
The format of the post is a set of instructions for the newbie to complete and this is followed by some explanation. I make use of the Oracle Primavera Professional client throughout. So let’s get started.
Steps To Create A Project In Oracle Primavera P6
This post assumes you have the rights to create a project in P6 database you are attached to. Also, that you are doing all this to learn how to use P6 for the first time.
![]()
1. Go to the Projects layout. I’m using Oracle Primavera P6 Professional Client v15.1 so if the Projects layout is not on my screen, I have to click on the projects icon on the left-hand side. Believe it or not, there is no menu option to get there.
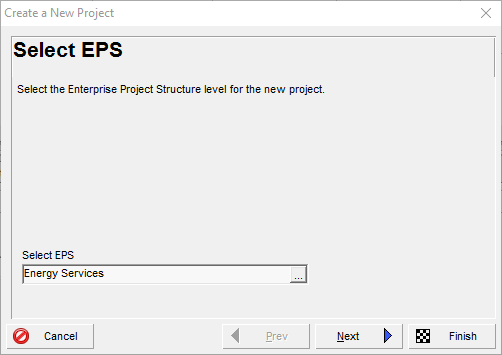
2. Select the EPS Node where the project is to be created.
All projects in P6 must belong to an EPS Node, which is a hierarchy intended to arrange projects in the way that makes the most sense for the organisation owning them. If this is your own database then your project can be created under any EPS Node you want. If you have been given access to someone else’s database then you will need to ask them where to create your project.
Once you know which EPS Node to create the project, scroll down the list of EPS Node’s and Projects until you find it.
Click on the EPS Node in the Projects Layout to select it.
3. Create the new project by holding down the Control key and pressing the N key. The Create a New Project dialogue may be displayed. If it is, click on the Finish button to exit the dialogue.
 Take a look at your screen and you will see the highlighted project with a Project Id similar to NEWPROJ-1. The number at the end may be different.
4. The bottom half of the screen should contain a set of tabs. Select the General tab and complete it as follows:
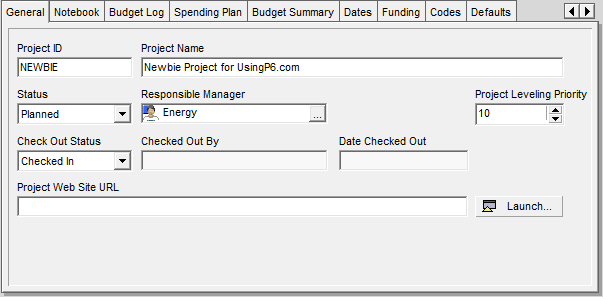
- Change the Project ID to identify the project using a maximum of 20 characters. I would keep it to 8 capital characters or less. Many organizations will tell you exactly what the Project Id will be. I have set the Project ID to NEWBIE in this example.
- Change the Project Name to describe what the project does. I have set the Project Name to Newbie Project for UsingP6.com which describes exactly what it is.
- Click on the Status and set it to Planned.
The other settings can stay as they are.
5. Select the Defaults tab and complete it as follows:
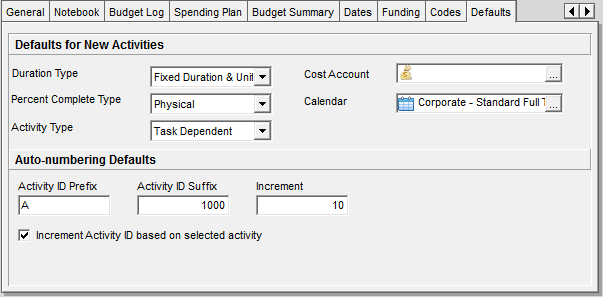
- Verify the Duration Type is set to Fixed Duration & Units, and change it if it isn’t.
- Change the Percent Complete Type is to Physical as it is most probably set to Duration.
- Verify the Activity Type is set to Task Dependent, and change it if it isn’t.
- I’m going to assume the Calendar is set to something sensible.
The other settings can stay as they are.
6. Select the Settings tab and complete it as follows:
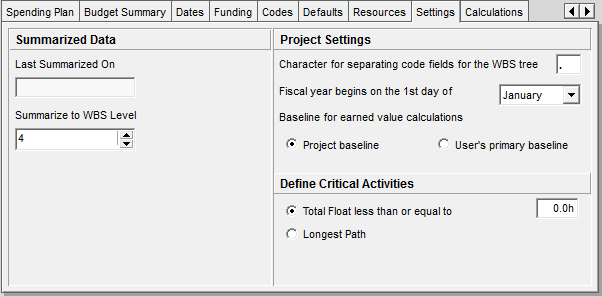
- Change the Summarize to WBS Level to 4. You may have to change this again later, but 4 is usually a better starting point than the default of 2.
- Verify the Baseline for earned value calculations is set to Project Baseline
- Verify the Total Float is less than or equal to is selected and the associated value is set to 0.0h
The other settings can stay as they are.
7. Select the Calculations tab and complete it as follows:
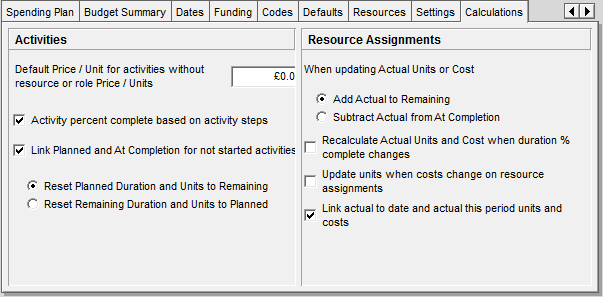
- Verify the Default Price / Unit for activities without resource or role Price / Unit is set to 0.00.
- Select the Activity percent complete based on activity steps option. It is not selected by default.
- Verify the Link Planned and At Complete for not started activities option is selected.
- Select the Reset Planned Duration and Units to Remaining option is selected. It is not selected by default.
- Select the Add Actual to remaining option for When updating Actual Units and Costs. It is not selected by default.
- Remove selection of Recalculate Actual Units and Cost when duration complete changes. It is selected by default.
- Verify Update units when costs change on resource assignments is not selected.
- Verify Link actual to date and actual this period units and costs is selected.
8. Select the Resources tab and complete it as follows:
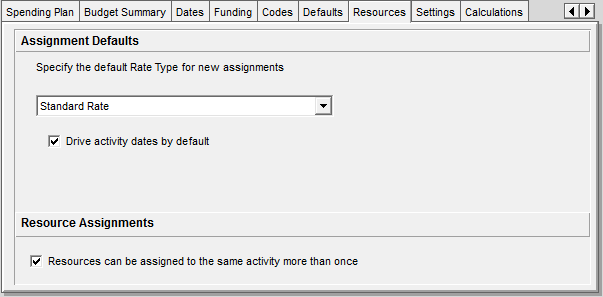
- Verify the Drive activity dates by default option is selected. This is the default.
- Verify the Resources can be assigned to the same activity more than once option is selected.
9. Finally, select the Dates tab and complete it as follows:
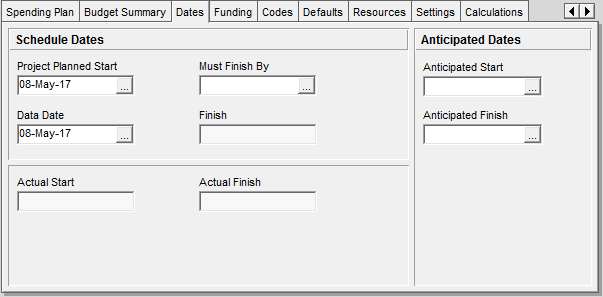
- Set the Project Planned Start to the date when the work will start on the project.
- Verify the Data Date is set to the same date as the Project Planned Start and change it to match if it isn’t.
Wrapping Up
These are what I feel are the best options to start with when you create a project in P6. Others may disagree, but I’m comfortable with these and they are probably just as comfortable with their choices. Neither is necessarily wrong.
The most difficult area is the choice of default Calendar because this can lead to some problems. If it is the wrong Calendar, then changing the Calendar may also require a change to the duration of any activities as well.
For the sake of this series, we are looking for a Calendar that works 8 hours a day from Monday to Friday.
About Barrie Callender
 For 30 years, Barrie has worked exclusively in the Project Management industry. He has considerable experience, knowledge and skills implementing enterprise project management systems across many industries. His experience in fulfilling numerous roles includes, mentoring, training, workshops, project support, process and tool implementations, working through a PMO right up to full-blown Change Management Programs. He has in-depth knowledge of Primavera P6, Microsoft Project, Deltek Cobra, Oracle Projects. He is a member of the APM Thames Valley Branch and, both the Governance SIG and the Planning, Monitoring & Control SIG.