Microsoft Project does not have a risk event register feature, but with a little effort you can create a risk register in Microsoft Project.
Projects are a risky proposition. And it’s the unique nature of projects that make them particularly risky ventures. Project Managers have one go or opportunity to get everything right on a project. It makes sense that proficient project managers consider what potentially could go wrong. Duration estimates may have been overly optimistic. Weather may be a factor. Other risk events may be realized.
Well, project managers need a way for identifying and categorizing risk events for appropriate action. In Microsoft Project it is possible to create a risk register table that maps potential risk events to activities, along with their probability and impact. In this way project managers can quickly identify and rate risks related to activity efforts.
This article demonstrates the steps required to create a risk register table in Microsoft Project.
We have in Figure 1 our demonstration project.
 Figure 1
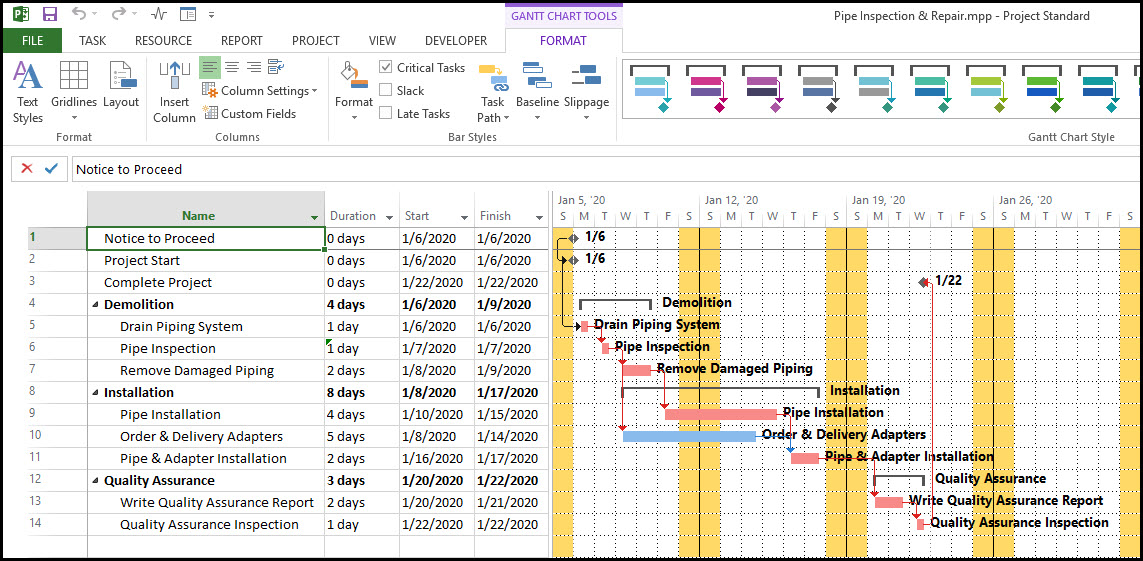
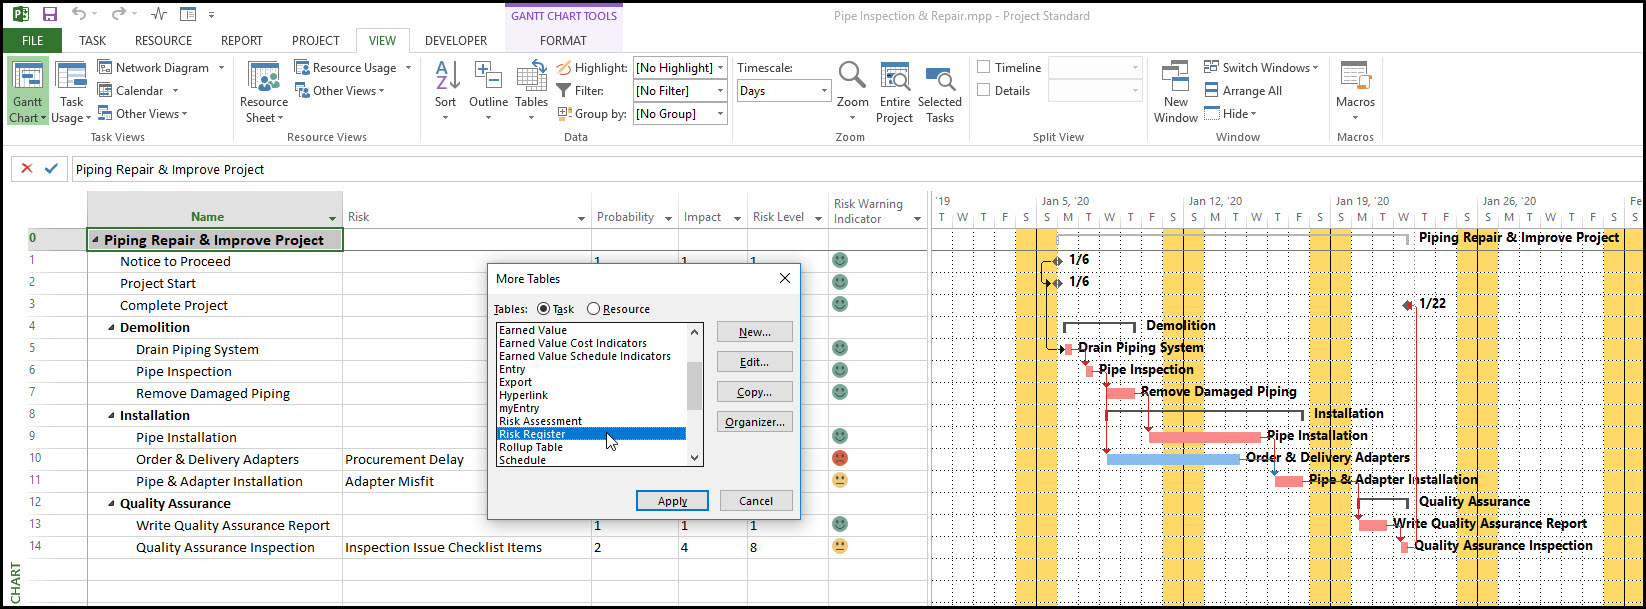
This is a small Pipe Inspection & Repair project. Some risk events that may occur on this project include procurement delays for the order and delivery of adapters, the delivered adapters may be sized wrong and not fit properly, and the quality assurance inspection may have a long list of checklist items to correct before acceptance. Project managers need a way to identify and analyze these potential risk events. The risk register supports the spotting and evaluation of project risk events.
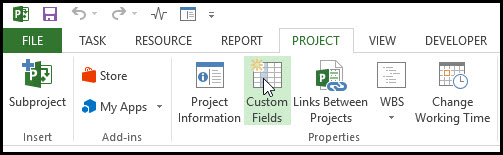
Creating a risk register table is all about custom fields. To begin the process of generating a risk register table select Project | Custom Fields, Figure 2.
Figure 2
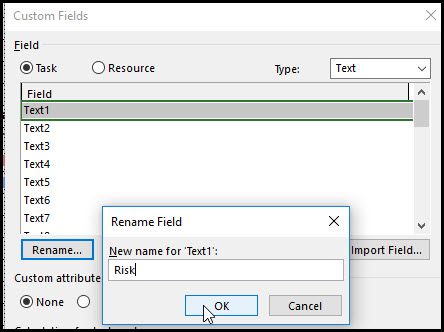
In the custom fields dialog highlight Text1 and rename it, Risk, Figure 3.
Figure 3
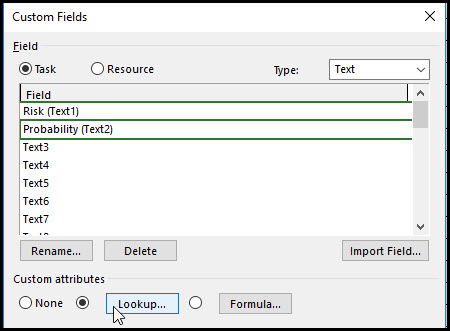
Add another text field named Probability and select the lookup custom attributes, Figure 4.
Figure 4
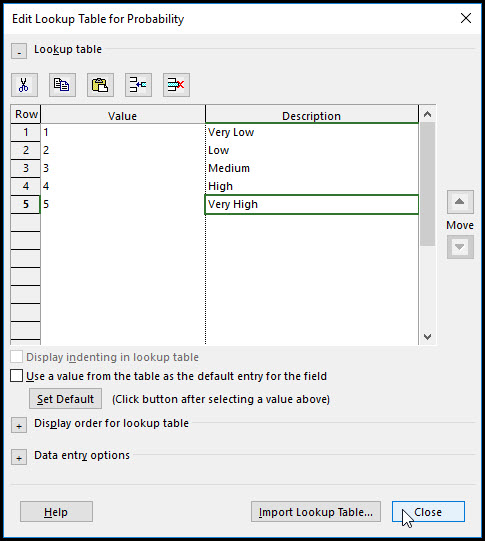
Add menu values 1 to 5, Very Low to Very High, Figure 5.
Figure 5
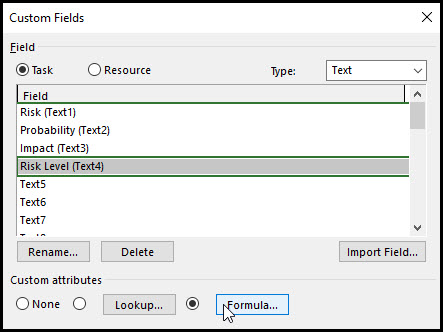
Do the same for an Impact text field. Add a Risk Level field and select the formula custom attribute, Figure 6.
Figure 6
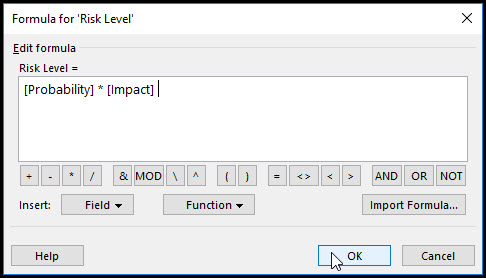
In the formula dialog, Figure 7, insert the probability field.
Figure 7

Continue and add a multiplier and impact field. Figure 8 displays the final Risk Level equation.
Figure 8
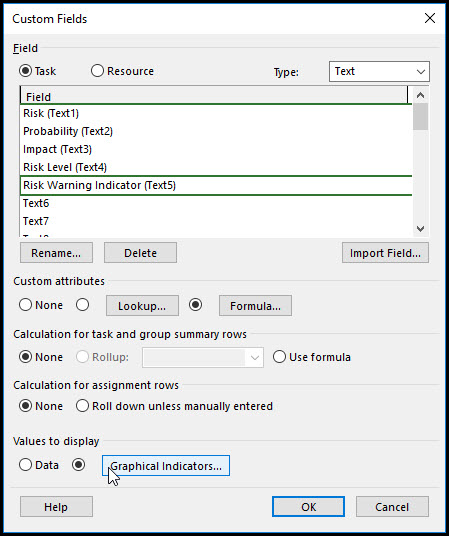
We have one more field to define, a Risk Warning Indicator, text field. In the custom fields dialog, rename Text5, Risk Warning Indicator. Select the formula custom attributes, Figure 9.
Figure 9

Enter the equation in Figure 10.
Figure 10
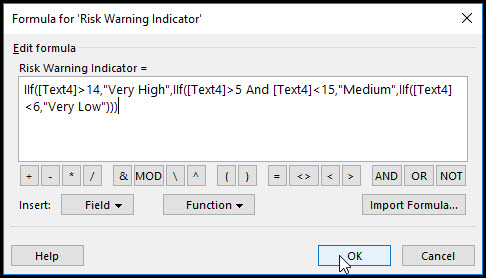
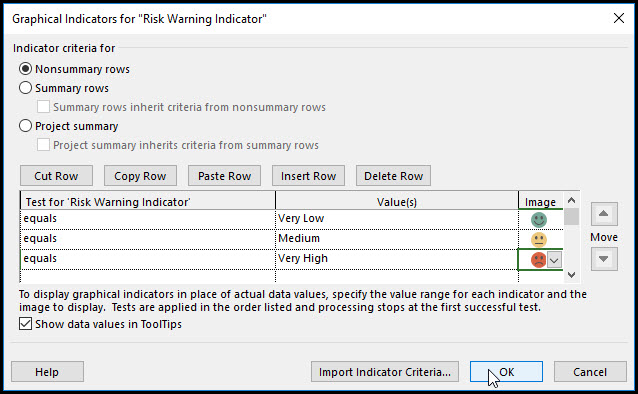
This formula identifies a risk level as very high, medium, or very low. After inserting the formula select graphical indicators, Figure 11.
Figure 11
Then insert the three indicators displayed in Figure 12.
Figure 12
Add the five text fields to the activity table, Figure 13.
Figure 13
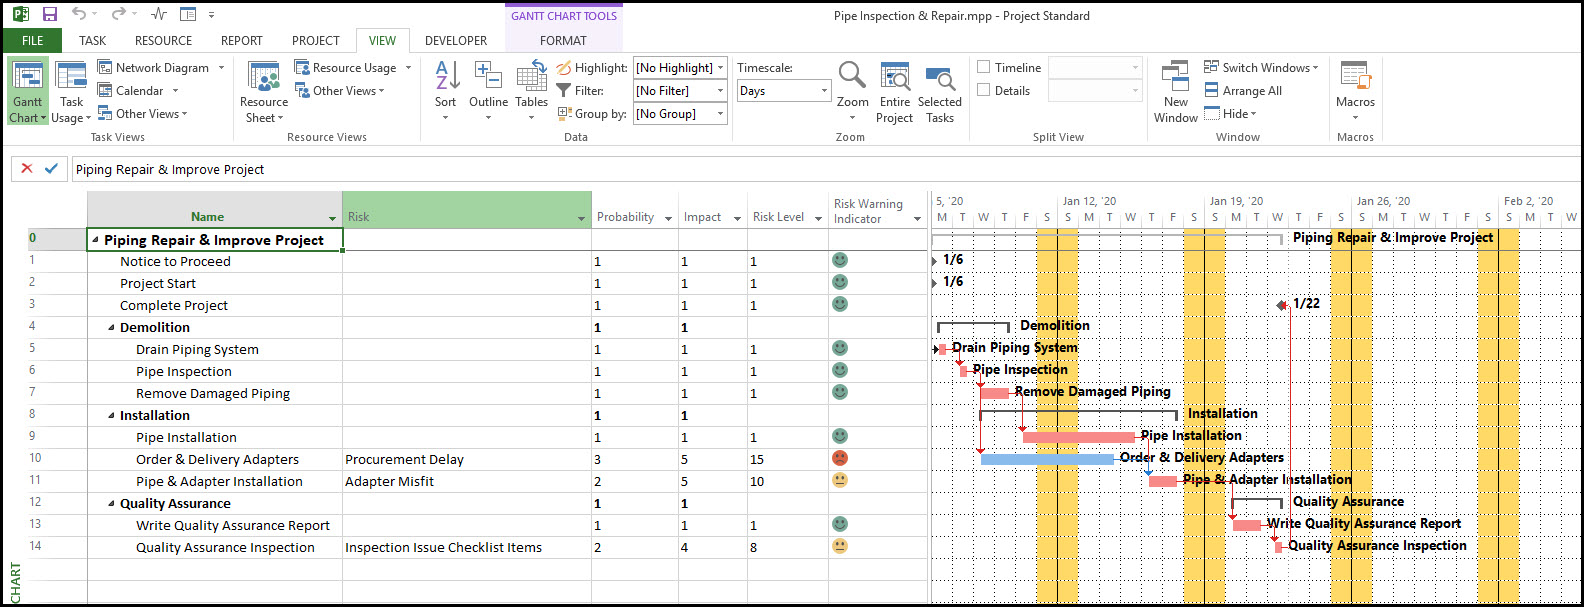
And add the potential risks to the risk register table. If there is no risk, leave the risk field blank and set both the probability and impact to 1.
The final schedule, including identified and categorized risks is displayed, again, in Figure 13. Our risk register warns that a procurement delay is a high level risk and may have a possible significant negative impact on the schedule. We may want to arrange and pay for quick delivery of the adapters to mitigate this risk. Also, the delivered adapters may not match the piping, a medium risk, because the likelihood is low. We will want to make sure the planner consults the pipe fitter and confirms the adapter model before ordering.
Finally, the quality assurance inspection is always a potential risk. We will want to thoroughly test the piping and make certain the work site is clean before final inspection. It is usually the small neglected items that become an issue during the quality assurance inspection. And are a drag on project completion.
After creation of your risk register you most likely want to leverage your risk table for other project schedules. Select View | Tables and Save Fields as a New Table, Figure 14, to save your risk register table formatting.
Figure 14
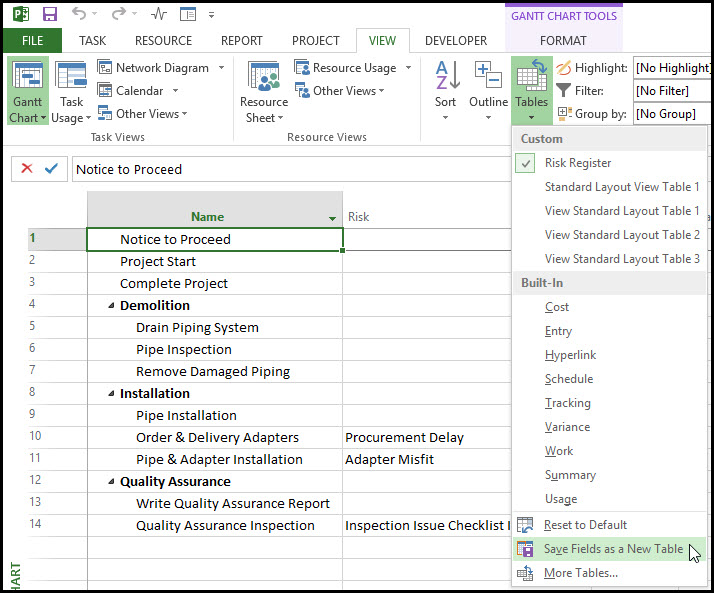
Figure 15
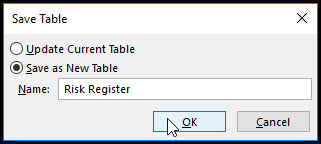
In Figure 15 we simply enter the name, risk register, and save as a new table. Then we are done. Risk register now appears in the list of available tables for the Pipe Inspection & Repair project, Figure 16.
Figure 16
To copy the risk register table to another project consult the following article Copying Tables Between Projects In Microsoft Project.
Summary
A thorough project management effort will include an investigation of project risk. Microsoft Project does not, per say, have a risk register. However, it does have all the functionality needed to create a risk register table. After generation of a risk register save the table for other project schedules. In this way risk assessment will become a common and valuable fixture in the project management effort.