Quick Tip: Using the Group and Sort feature in Primavera P6. A student recently asked me to troubleshoot a schedule she received from a co-worker. The activity table in this schedule appeared as a pure list of activities and had no Work Breakdown Structure (WBS) elements. Well, what happened to the WBS elements?
I responded that a common reason WBS elements do not display in the activities table is that the activity grouping is not set to display WBS elements. It turns out the solution to the WBS mystery was even more fundamental; the schedule had no WBS elements. Despite this I thought it good to review the activity grouping features in Primavera P6 that do require some explanation.
This article provides a quick tip explanation of the ‘group and sort by’ feature in Primavera P6 Professional.
We have in Figure 1 our demonstration project displaying the activities table that appears similar to the schedule my former student provided.
 Figure 1
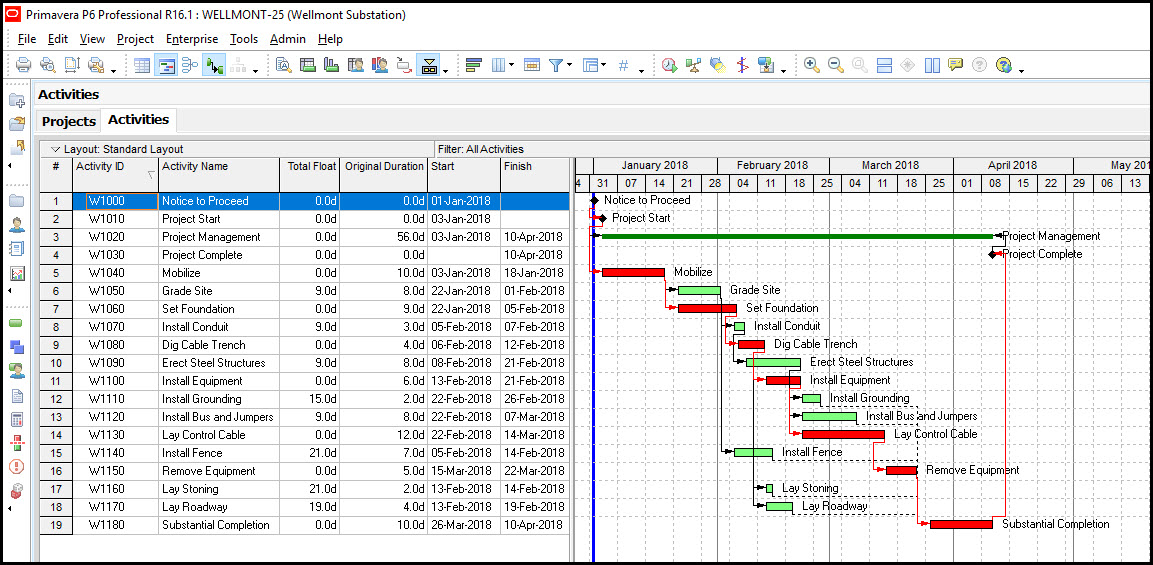
Well, I know our demonstration schedule does have WBS elements. So why do we have a pure list of activities and no associated WBS elements? For the answer to this question let us turn to the ‘group and sort by’ feature, Figure 2.
Figure 2

When we view the group and sort feature, Figure 3, we find that we have no group by criteria.
Figure 3
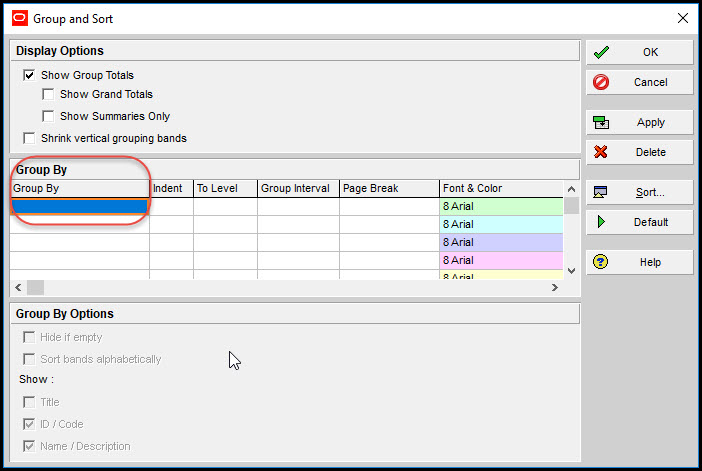
This is evident by the blank field directly below group by in the group and sort dialog. Without a group by criteria it makes sense that our activity table would appear as a pure list of activities.
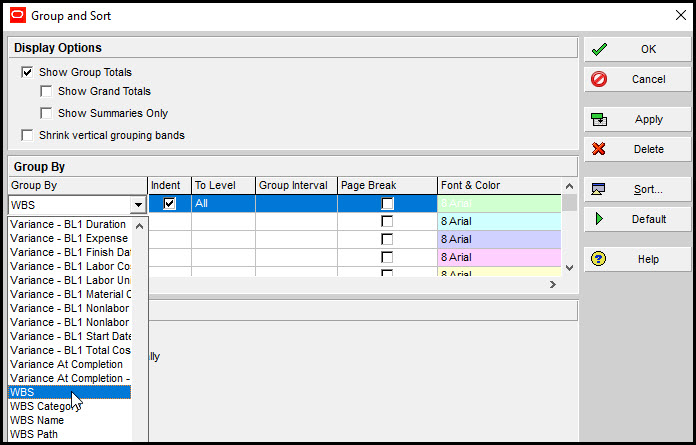
Let’s proceed and define a group by criteria. In the group and sort dialog we click the drop down menu directly below group by and select the WBS option, Figure 4.
Figure 4
We click apply and the activity table, including WBS elements, appears similar to Figure 5.
Figure 5
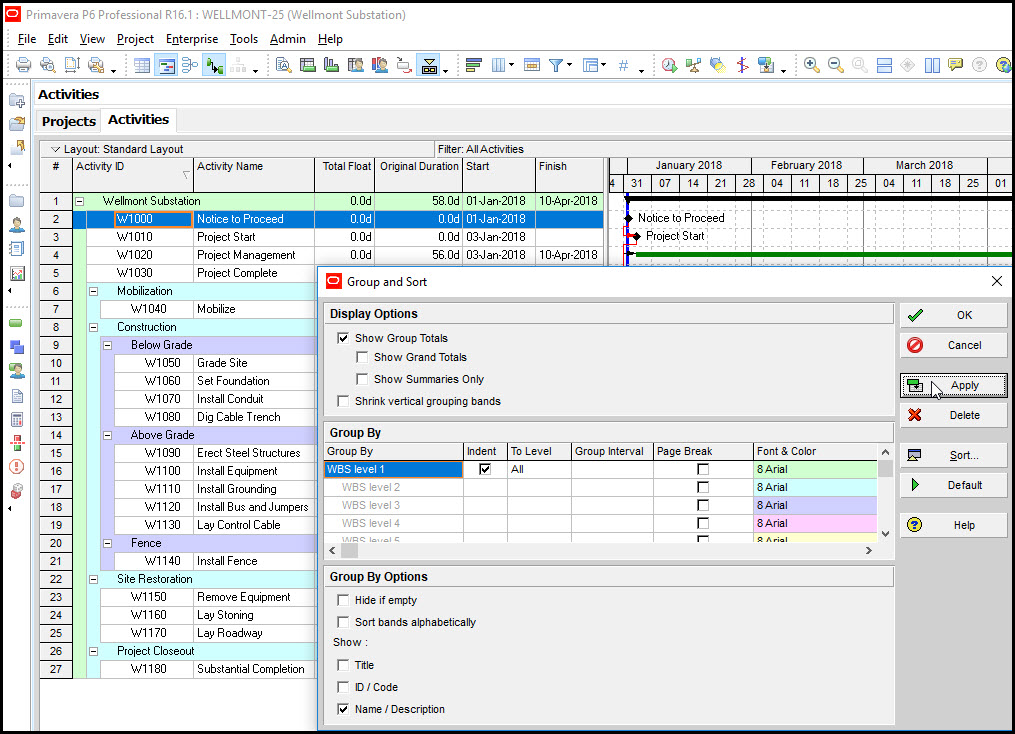
This may appear to you a minor adjustment. But not knowing how to display WBS elements in the activity table will stop the novice P6 scheduler from making any further progress.
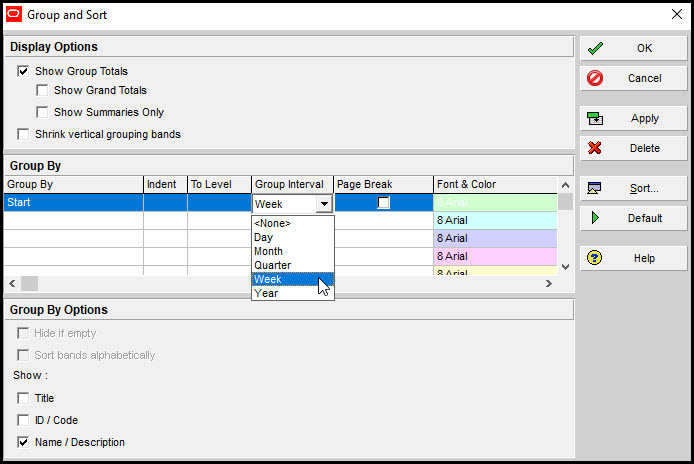
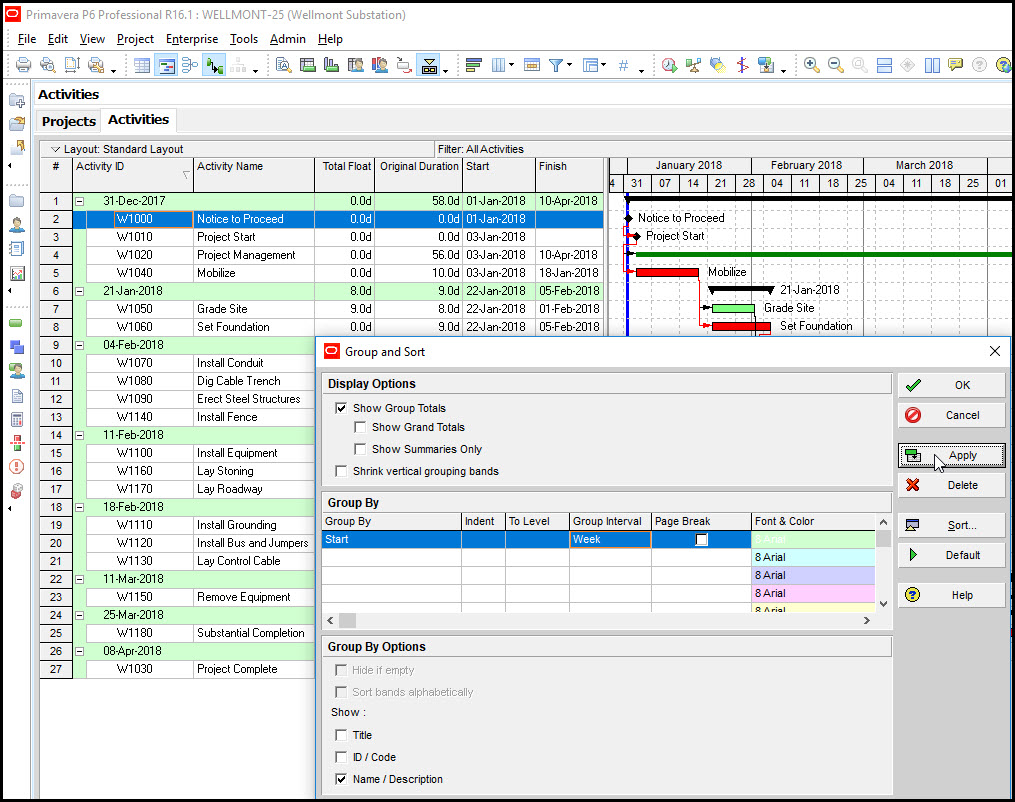
You may have observed from the group by drop down menu, Figure 4, that there are many group by settings. Let’s explore other group by options. In Figure 6 we group by activity start date and set the group interval to week.
Figure 6
Hit apply and P6 groups all activities by their start week, Figure 7.
Figure 7
Note the brackets for each week in the schedule, Figure 7. In Figure 8 we group by total float.
Figure 8
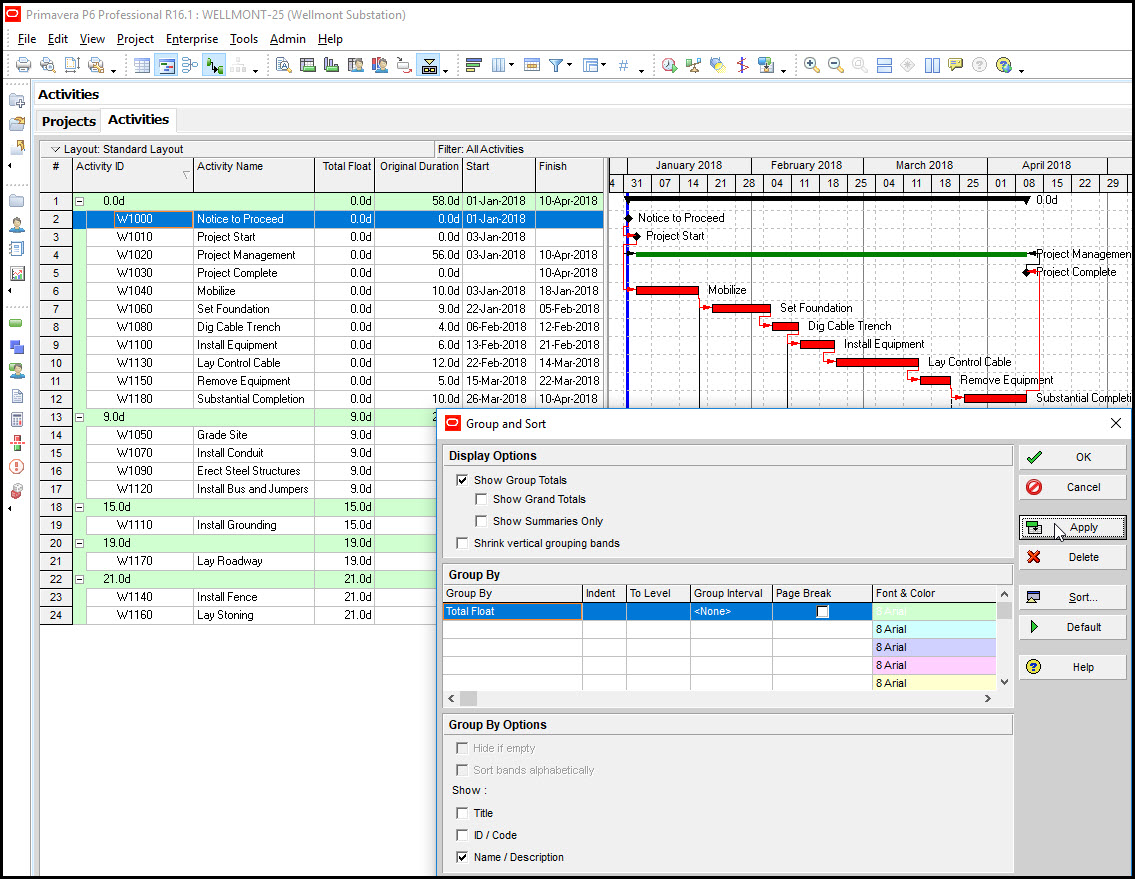
Now all our activities are grouped by how much each activity can delay without postponing the project completion date.
It is also possible to group by more than one setting. In Figure 9 we group by subcontractors and then we toggle off indent to allow for a secondary group by criteria.
Figure 9
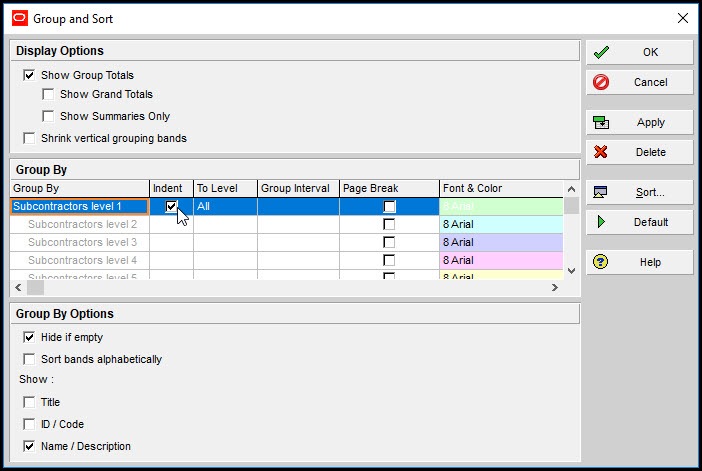
In the second row down select start as the option and week as its group interval, Figure 10.
Figure 10
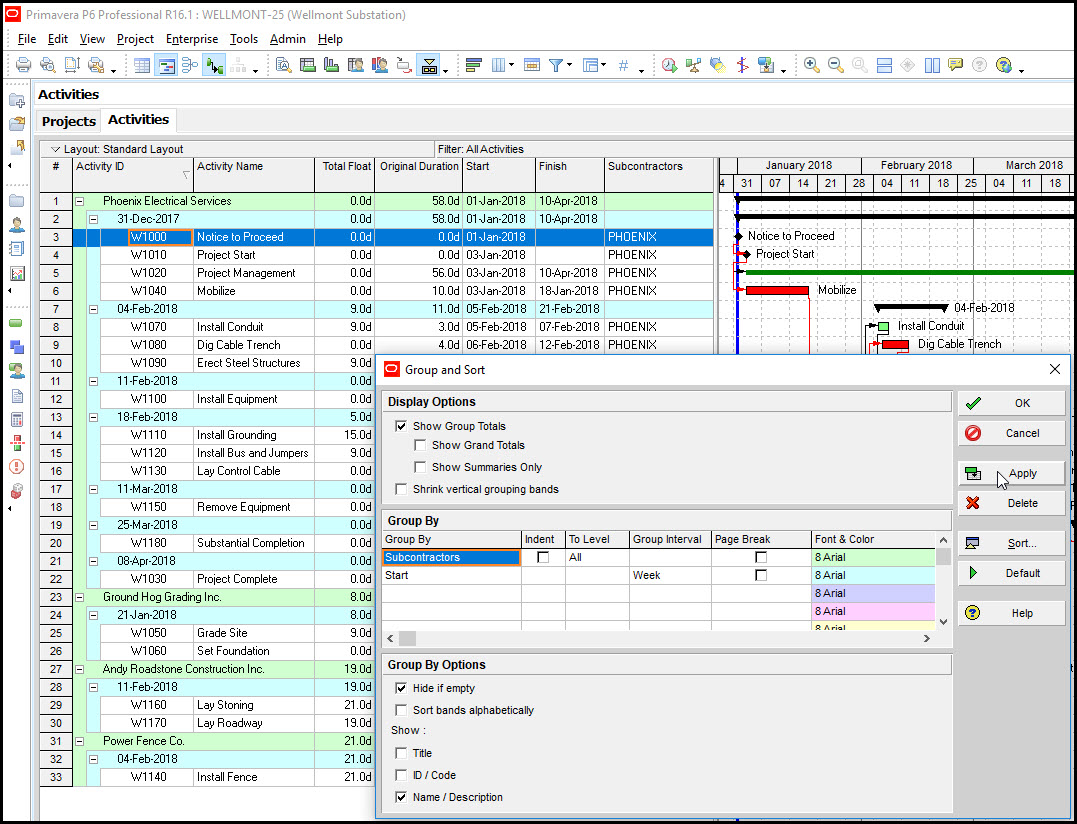
Again, click apply and the activity table appears similar to Figure 10. Observe that the activity table is now grouped by first subcontractor and second the start week of each activity.
The final helpful hint regarding the group and sort feature is how to remove grouping criteria. In Figure 11 we display the drop down menu of the start criteria and go to the top of the menu and select ‘none’.
Figure 11
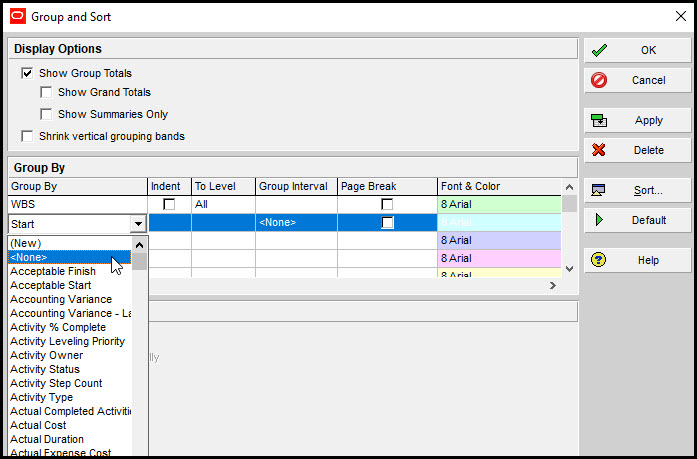
This removes the secondary start criteria from the group and sort dialog.
Summary
The group and sort feature has an abundance of possible options to select for the display of the activity table. It, however, is most common to group by the WBS elements. This will show the hierarchy of the WBS and the associated activities all in the activity table.
Schedulers may also create and assign unique activity codes, and then group the activity table by these activity codes. And as demonstrated, it is possible to group by multiple grouping criteria.