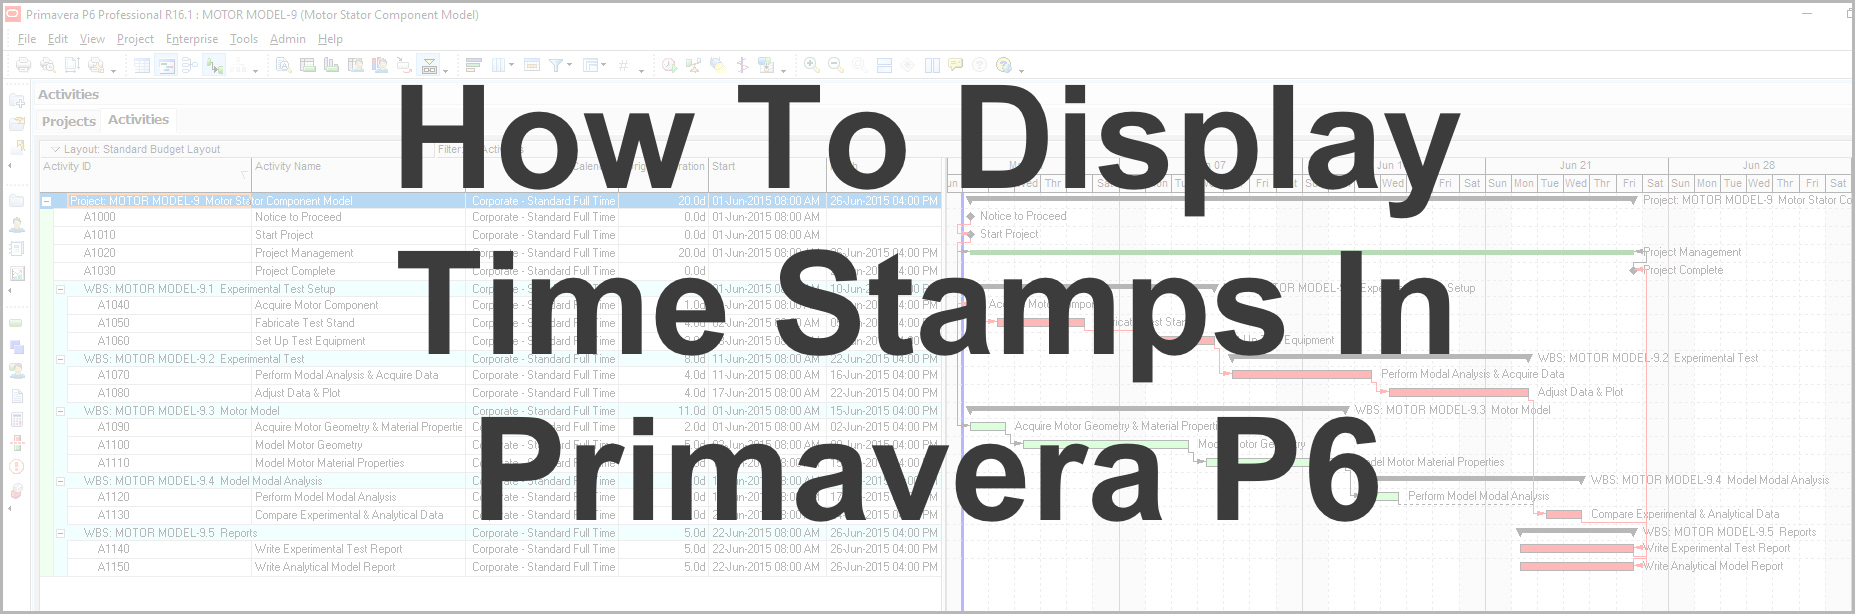
 Here’s a quick tip to display a P6 time stamp in Primavera. In addition to knowing what day your activity begins, you also want to know what time of day it starts. You therefore want to display a date time stamp on your schedule in Primavera P6.
Your respective activity begins on June 4, 2018. But is that June 4th, 8:00am, at the start of work or June 4th, 4:00pm, at the close of work? You won’t know unless you toggle on the time stamp in Primavera P6 Professional. Except if you have some half day effort or similar activities, you want all your activities to start in the morning at the start of work and conclude in the afternoon at the close of work.
This article describes a quick tip to display a time stamp to confirm the start and finish times of all your schedule activities.
In Figure 1 we display our calendar, a global calendar named Corporate – Standard Full time.

Figure 1
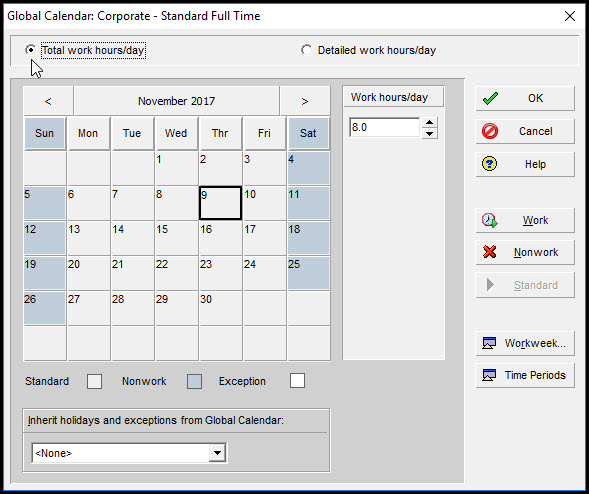
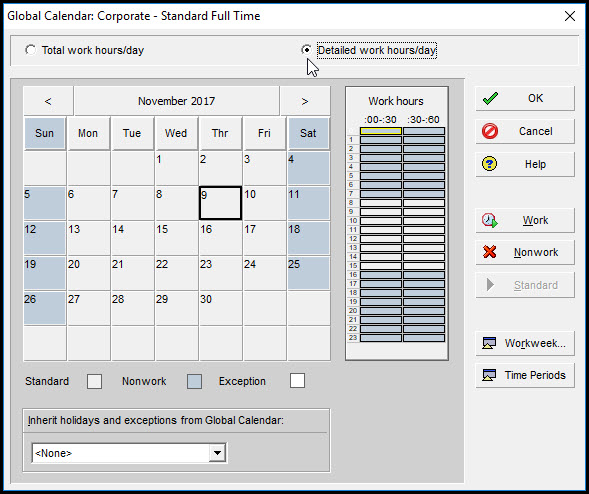
Toggle total work hours/day and note the effort is 8.0 hours/day, Figure 1. Now toggle detailed work hours/day and observe the 8:00am start time and 4:00pm finish time for each workday, Figure 2.
Figure 2
Great! Our calendar is specifying our desired workday start and finish times.
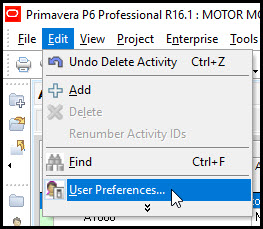
Now we want to confirm that all activities in our schedule commence at 8:00am and conclude at 4:00pm. This is done by turning on the time stamp. Select Edit | User Preferences, Figure 3.
Figure 3
In the User Preferences dialog, Figure 4, choose dates.
Figure 4
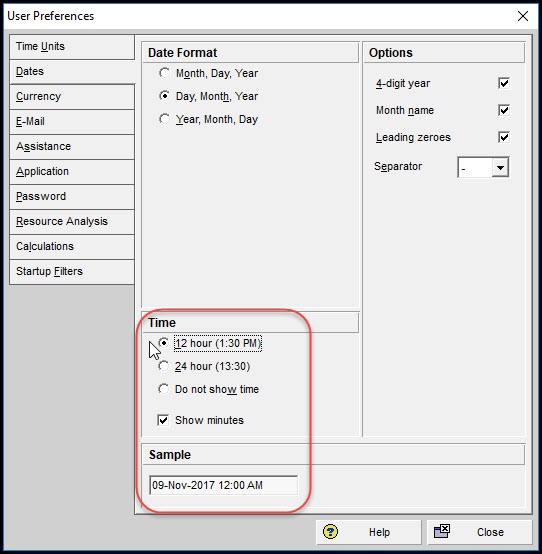
Set an appropriate day, month, and year date format setting and options to display a 4-digit year and month name. Additionally, set the time toggle to 12 hour. Also, toggle on show minutes. Note the sample date with time stamp, Figure 4. Perfect! Our schedule is now set to display the date and time stamps.
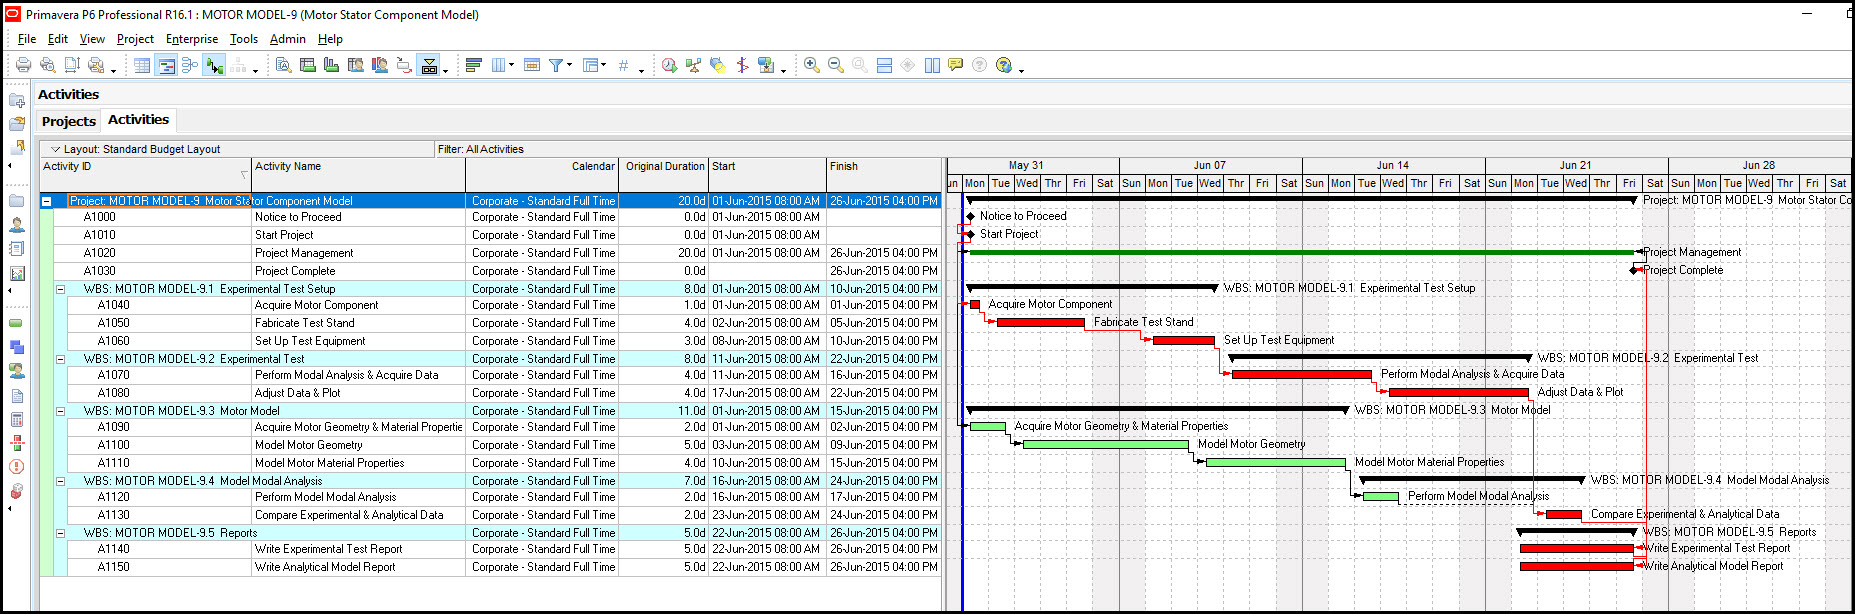
In Figure 5 we display our schedule, after entering activities, and confirm that indeed all our activities start at 8:00am in the morning and finish at 4:00pm in the afternoon.
Figure 5
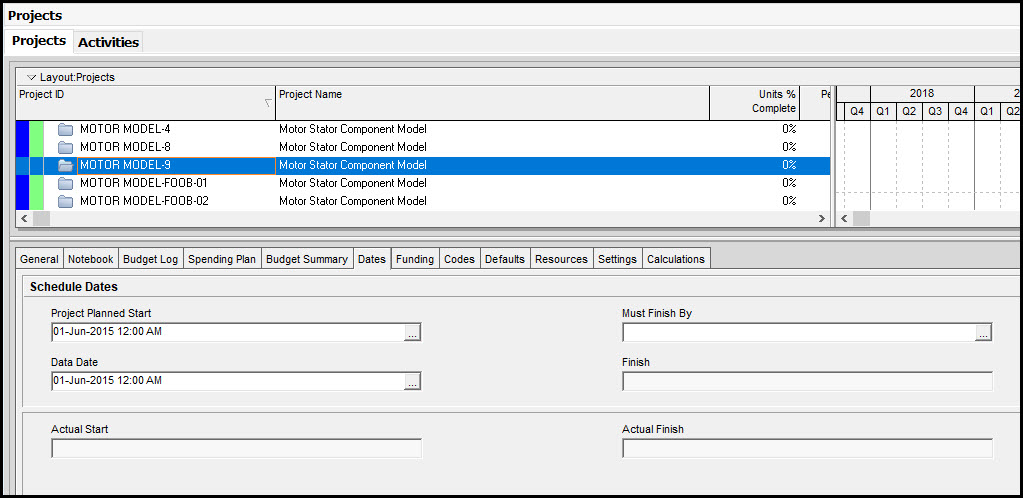
We have thus verified that activities are being added to the schedule as desired. But we are not quite done yet. In the projects tab, Figure 6, we select our respective schedule and find that our project planned start and data date are both 12:00am in the morning.
Figure 6
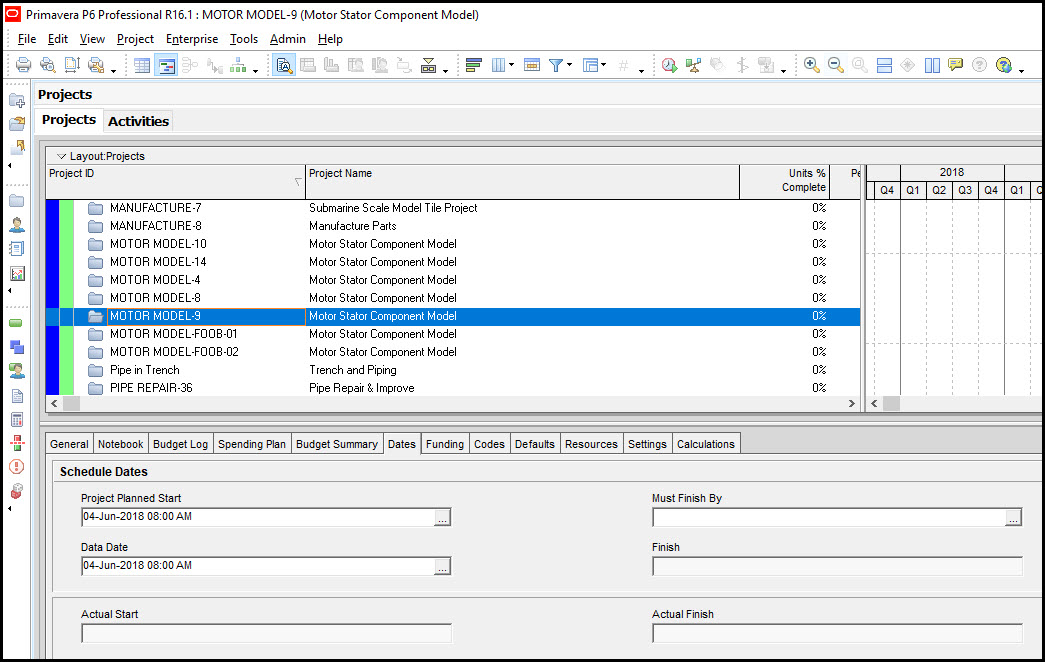
This may seem like a minor issue, as our schedule looks fine in the activities view. But if you implement an activity start filter weeks or month look ahead your filter may miss capturing some activities because the project planned start and data date are at 12:00am and not 8:00am. So set the project planned start and data date to match the calendar start times, Figure 7.
Figure 7
Summary
It is important to know the start and finish times of activities. We recommend activating the P6 time stamp in the P6 user preferences to remove all unknowns regarding the start and finish times of your activities.
You may, however, want to un-toggle the time stamp when you are printing your schedule. Paper real-estate becomes a major issue when printing the schedule, and the time stamp takes up additional space on your printout. Finally, make sure your project planned start time and data date match the workday of your calendar.