Sometimes it’s useful, or even necessary to create a sandbox database to play around in for your P6 Professional client software. In recent years this process has been made really easy by Primavera. This is because they very wisely introduced an P6 SQLite database option to the system.
Previously one would have had to goof around with SQL scripts, the dbsetup.bat tool. You may have used such tools as Oracle XE or Microsoft SQL Express to create additional databases.
Now however, the terrain is accessible to those of us who may not have advanced degrees in database administration thanks to the introduction of P6 SQLite database. Here are the steps to set up a P6 SQLite database – and they are gloriously simple.
First, run up the Primavera P6 application to access the login dialog. In this dialog, click the ellipse button on the Database field.

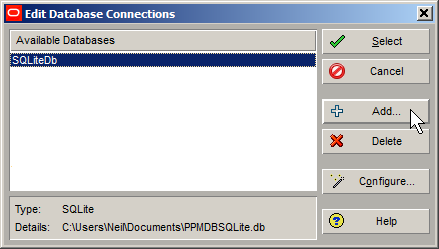
In the resulting Edit Database Connections dialog, click the Add button.
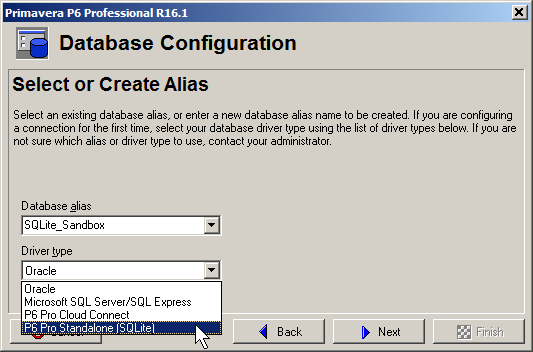
In the Database Configuration dialog, enter a name for your new sandbox database alias in the Database Alias dialog. In this example we called it SQLite_Sandbox.
Next select the P6 Pro Standalone (SQLite) option in the Driver Type field.
Once you have set these, click Next.
In the ‘Configure P6 Professional Standalone Connection’ dialog, choose the “Add a new standalone database and connection” option, then click Next.

In the next dialog, enter and confirm a new administrator password, then once again click Next.
In the next dialog, modify the default name of the PPMDBSQLite.db file so that you do not overwrite any existing SQLite database files. You do this simply by typing changes to the .db file name in the File Name field. In the example we changed it to PPMDBSQLite_sandbox.db.
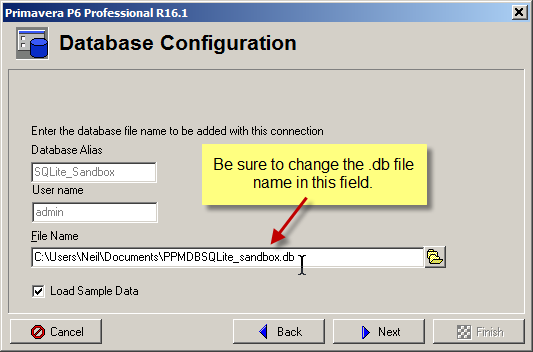
Note: you can also choose to “Load Sample Data” as part of this process using the so-named check box. This loads a bunch of sample projects, resources, calendars, layouts and other data that you may want to have for learning purposes. If you want a clean database, you can simply uncheck this box before your click the Next button.
Having modified the SQLite database file name, click Next.
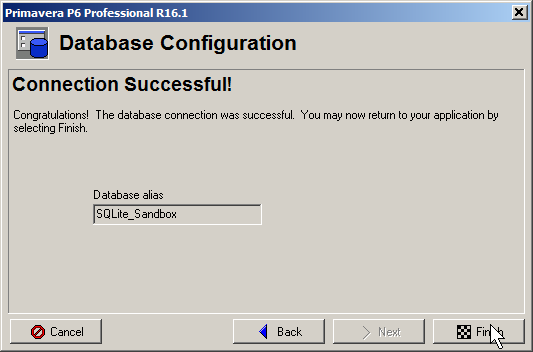
In the Connection Successful dialog, click Finish.
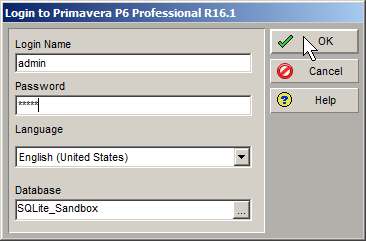
Now you can login to Primavera P6 in the normal way being sure to select your new sandbox database in the Database field.
You will see the following prompt the first time you login to your new sandbox database.
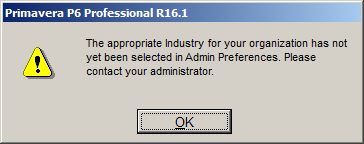
Just click OK to this. Once you enter P6 Professionals you can go to the Admin menu and click on Admin Preferences to set a preferred Industry to avoid seeing this prompt again.
Summary
So there you have it. In just a couple of minutes you can create a sandbox database for your Primavera P6 Professional client. It’s quick and easy when you choose to use the P6 SQLite database for your standalone system.