Do you know how to make the Primavera P6 split screen work so that you can simultaneously view and make changes to both your Work Breakdown Structure (WBS) and activities table? If not, then read on.
Primavera P6 Professional prides itself in being a top-down scheduling tool where you first focus on defining your deliverables, and then only later do you consider the activities required to produce those deliverables. This works well as a process because you begin with the end in mind, which some of you may know is one of Steven Covey’s principles in his notable book “The Seven Habits of Highly Effective People”.
Primavera P6 Professional software works best when you begin by first considering the end product or service that is the whole purpose of the project. Primavera P6 supports this effort by providing a schedule view that only displays the WBS or “deliverable” breakdown structure to use terminology from the Project Management Institute’s “Practice Standard for Work Breakdown Structures”.
However, once you define and decompose all your deliverables in the WBS then you may begin the process of describing the required tasks. Primavera P6 likewise has a view to support this activity creation process. But you still want to keep your “eye on the ball” or end product even throughout this task description process. P6, yet again, helps the scheduler maintain this end product focus by providing a split screen display so that the WBS can be viewed at the same time and alongside the activities sheet.
This article shows how to use the Primavera P6 split screen so the scheduler can simultaneously view the WBS and the activities sheet.
Some of you experienced Primavera P6 schedulers at this point may say that P6 can display the WBS elements directly in the activities table. Yes, this is true. But you cannot make changes to the WBS elements in the activities table. To do this, you will have to shift back and forth between the WBS view and the Activities view, which can be a cumbersome process.
In Primavera P6 there is, however, another alternative. The other way is to view both the WBS and activities in one display using a split screen. This split screen layout display is like a “command and control center” for your entire project. Not only can you view both the WBS and activities, but you can make changes to either, as appropriate.
Let’s now step through the process of using the Primavera P6 split screen option. We begin with our demonstration project in Figures 1 and 2.
 Figure 1

Figure 2
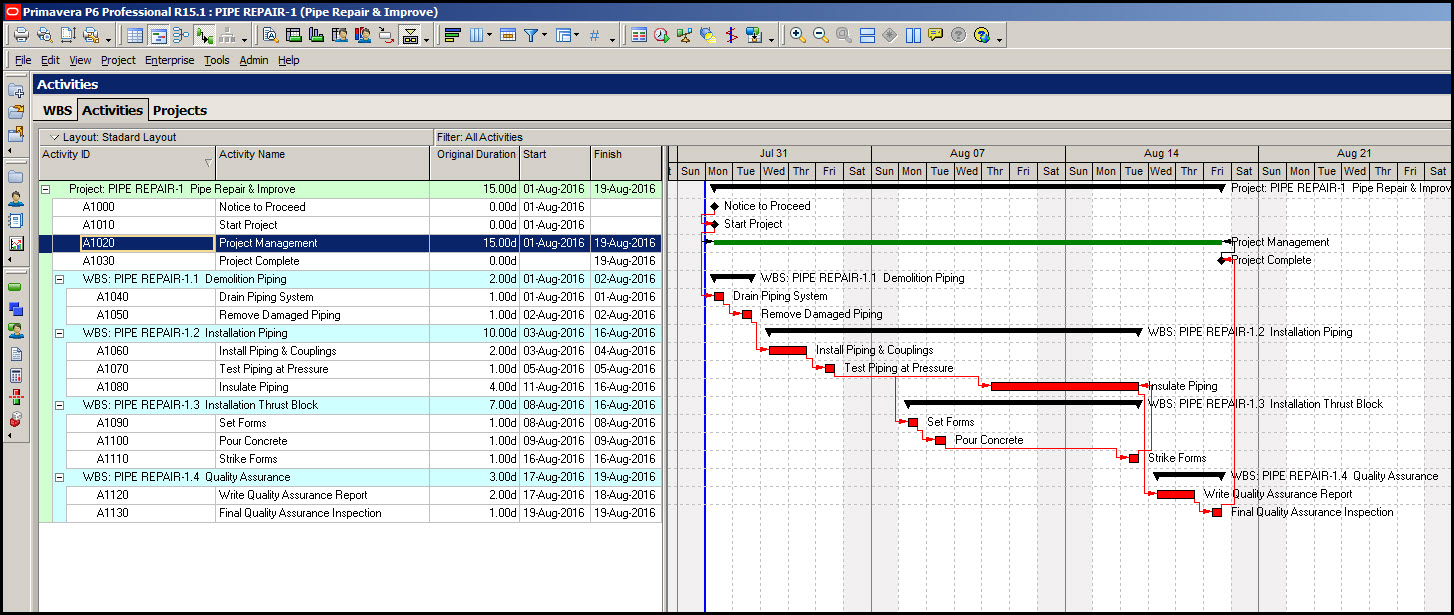
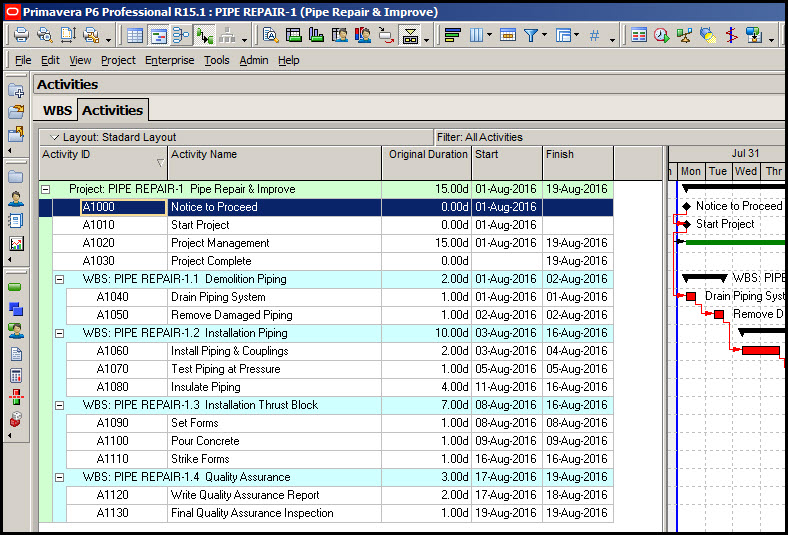
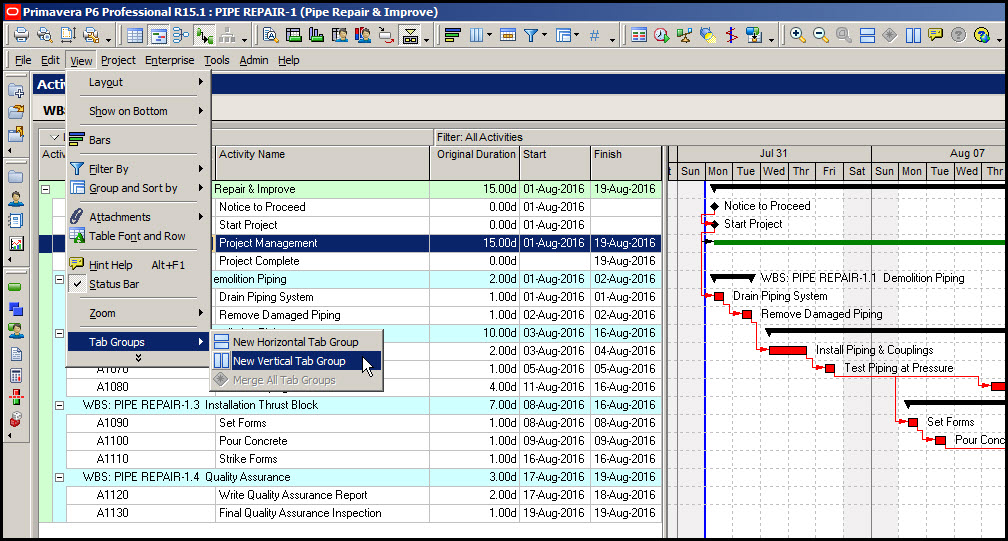
Figure 1 displays the WBS and Figure 2 shows the activities table and Gantt chart. In order to prepare for your split screen you want to make both the WBS tab and Activities tab present. The Activities tab should be active and to the right of the WBS tab, as shown in Figure 3.
Figure 3
Now simply select the View drop down menu then Tab Groups and, finally, New Vertical Tab Group, Figure 4.
Figure 4
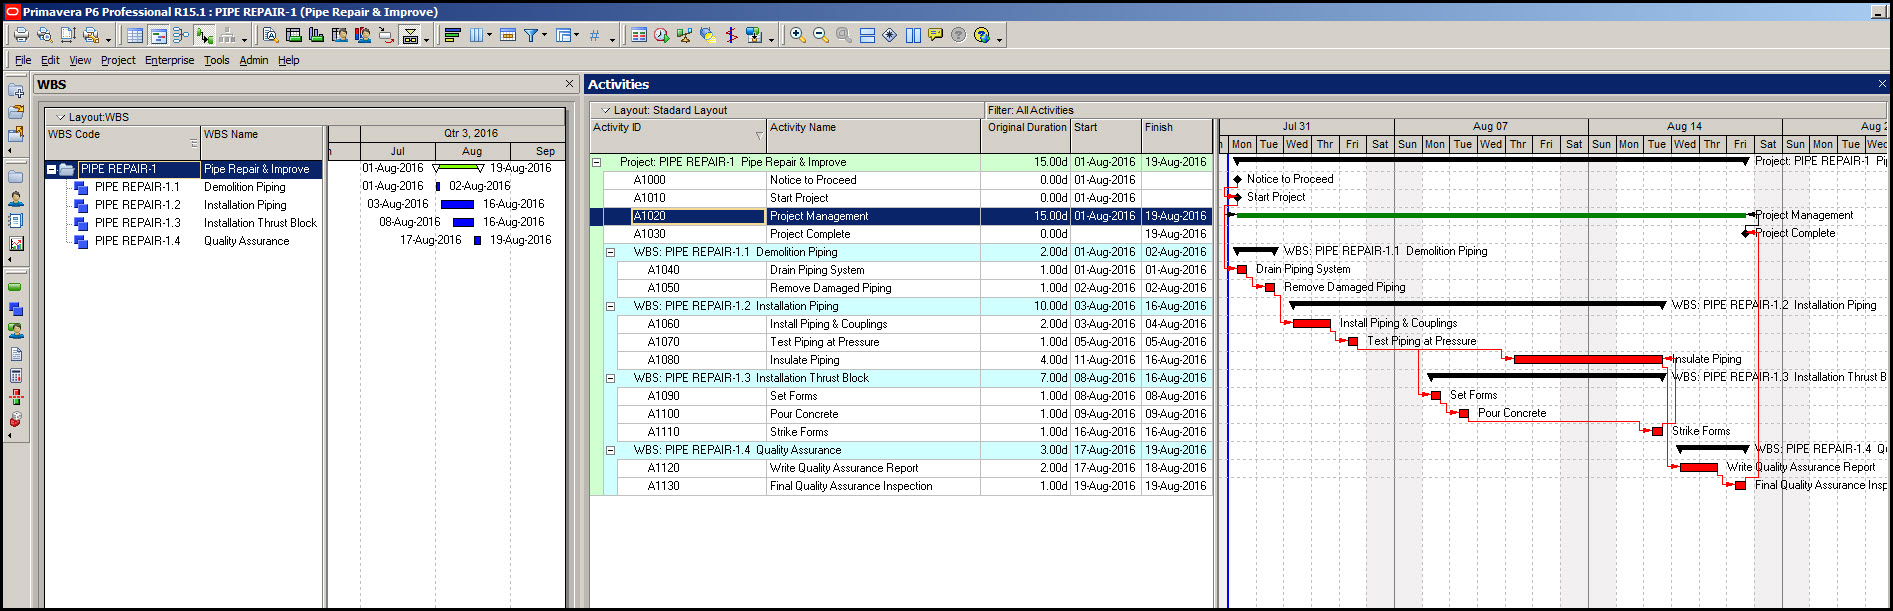
The resulting “command and control center” layout is displayed in Figure 5.
Figure 5
That’s it! Now you can add and edit WBS elements and/or Activities all in one display layout. To remove the split screen, if you so desire, select View then, again, Tab Groups, and, finally, Merge All Tab Groups, Figure 6.
Figure 6
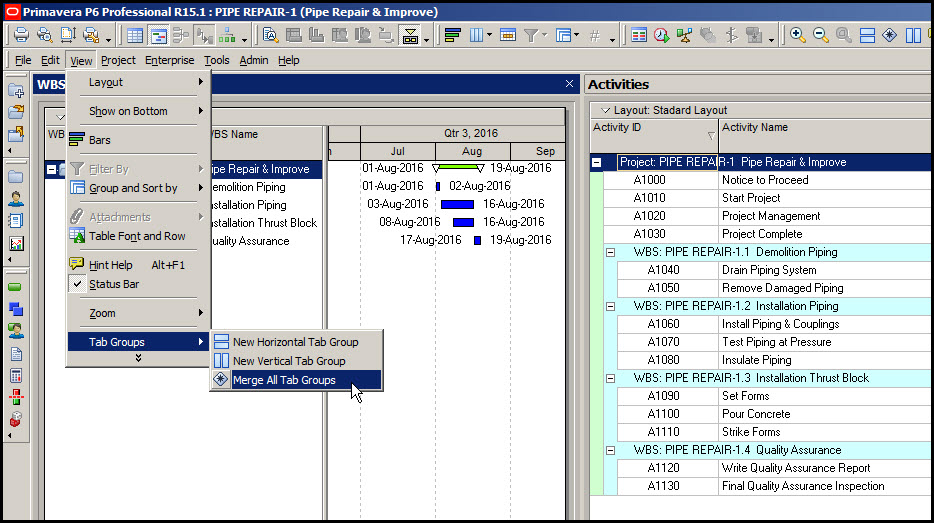
This takes you back to the WBS solo view screen layout.
Summary
That’s all there really is to it! A simple feature, the Primavera P6 split screen can have great implications on the success of your project. Really! Not only does it provide a display layout that is less cumbersome, it puts you in control of the display layout for your schedule.
This helps you stay true to Stephen Covey’s “Begin with the End in Mind” principle and sage advice “keep your eye on the ball”, as you proceed through the scheduling creation process. This seemingly minor shift in layout display, provides a broad perspective that will keep your project objectives in focus and on target.