Translating a Microsoft Project schedule into Primavera P6 Professional is a relatively straightforward process. If you want to include Microsoft Project custom fields to Primavera P6 in with that translation, than you will have to add and/or learn a few more steps to the translation process. If you are new to this subject, you may also want to read our blog “Using Microsoft Project Custom Fields” first.
The standard Microsoft Project to Primavera P6 Professional translation process includes all the typical task information: name, duration, start, and finish dates. This process, however, will not automatically capture Microsoft Project custom fields. Creating custom fields in Microsoft Project is a whole topic of discussion for another day. Once inserted in a Microsoft Project schedule the next challenge is including custom fields in your Microsoft Project to Primavera P6 translation.
Translating Microsoft Project Custom Fields to Primavera P6
This article discusses how to prepare for and how to perform an actual translation of a Microsoft Project custom field to Primavera P6 Professional.
Our demonstration Microsoft Project Schedule with custom field definition is in Figure 1.
 Figure 1
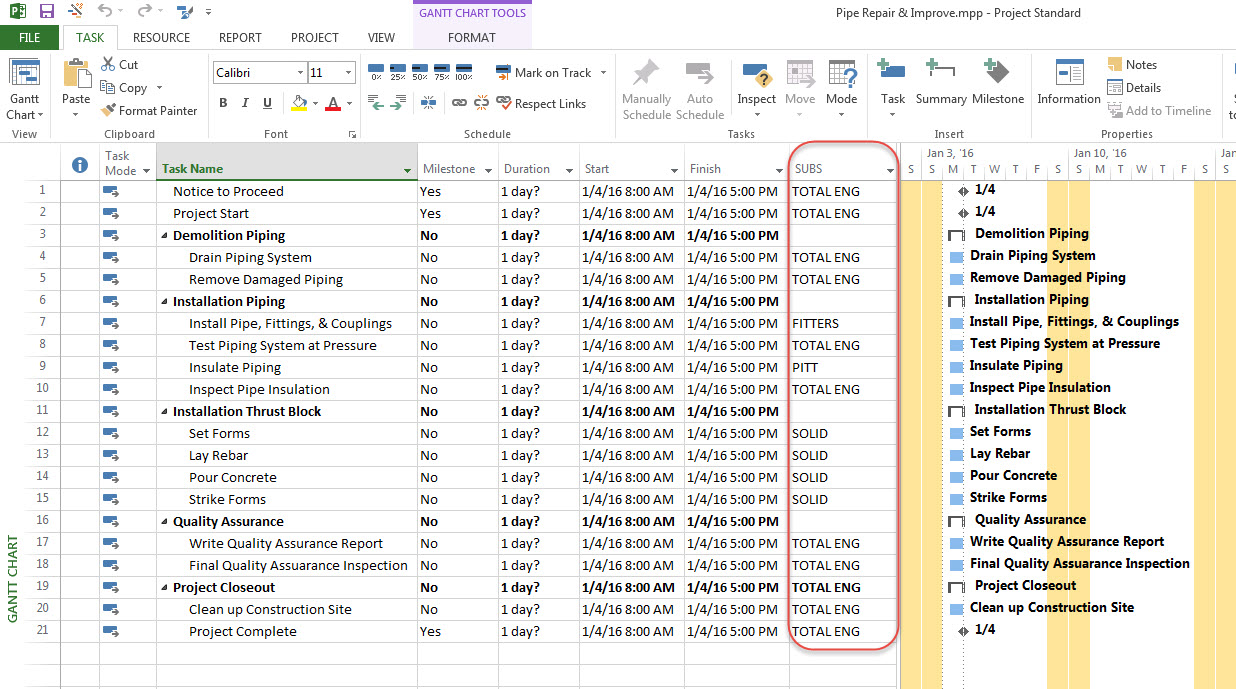
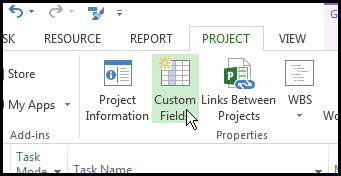
Note the column with heading SUBS. This is a Microsoft Project custom field. This field defines subcontractors performing each work task. To verify the field definition select the Project tab, Properties ribbon group, and Custom Fields, Figure 2.
Figure 2
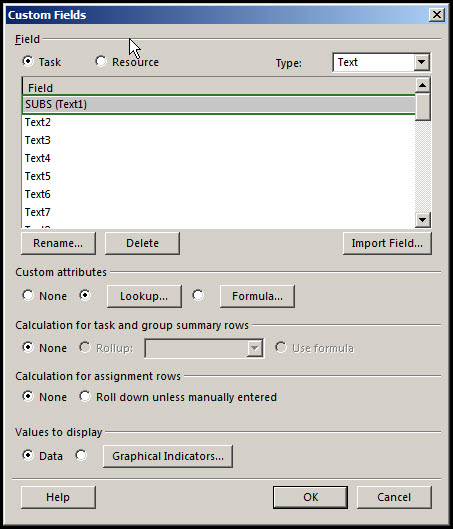
In the custom fields dialog, Figure 3, we note the Task field definition SUBS of type Text assigned to field Text1.
Figure 3
The equivalent of the Microsoft Project custom field in Primavera P6 is the user defined field. Before we perform the translation we need to create a user defined field in Primavera P6 of the same type and similar name as the Microsoft Project custom field. Select Enterprise | User Defined Fields, Figure 4, in Primavera P6 to bring up the User Defined Fields dialog, Figure 5.
Figure 4
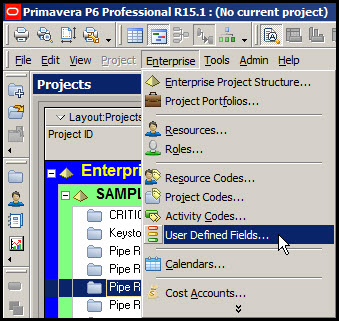
Figure 5
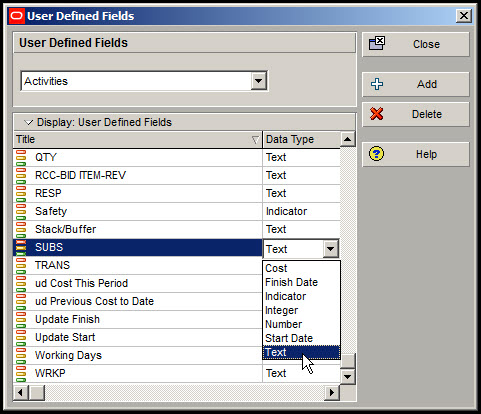
In this dialog, select Activities from the User Defined Fields drop down menu. Click + Add to create a new field. We type in the title SUBS for our subcontractors and we select the Text data type. We now have similar fields in Microsoft Project and Primavera P6 Professional. We are ready to proceed with the translation.
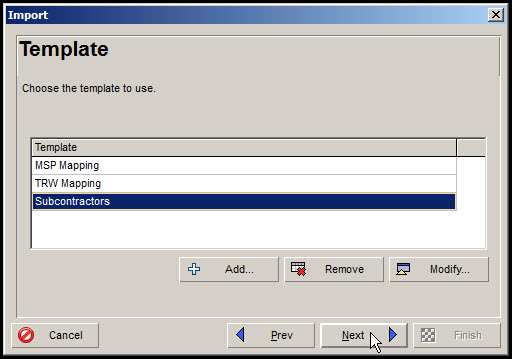
We import our XML Microsoft project file using the usual steps. However, when we arrive at the Import Template dialog, Figure 6, we select the + Add button to add a new template for our translation.
Figure 6

In the Modify Template dialog, Figure 7, we type in an appropriate Template Name, Subcontractors.
Figure 7
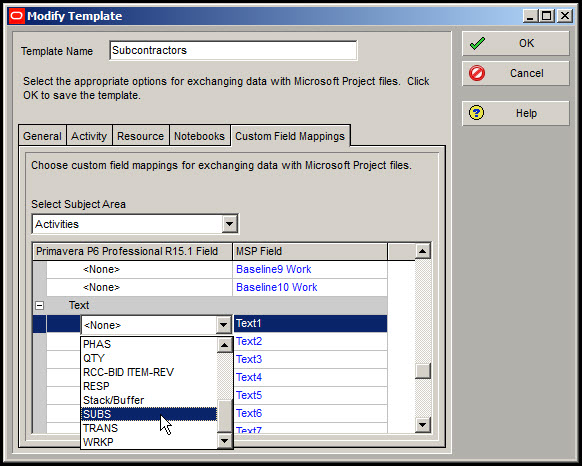
Select the custom fields mapping tab, Figure 7, and then select the Activities subject area. Scroll down until the text fields are visible. Assign the Primavera P6 Professional R15.1 Field SUBS such that the equivalent MSP Field is Text1. Click OK. Make sure you highlight the newly created Subcontractors template, and select Next, Figure 8.
Figure 8
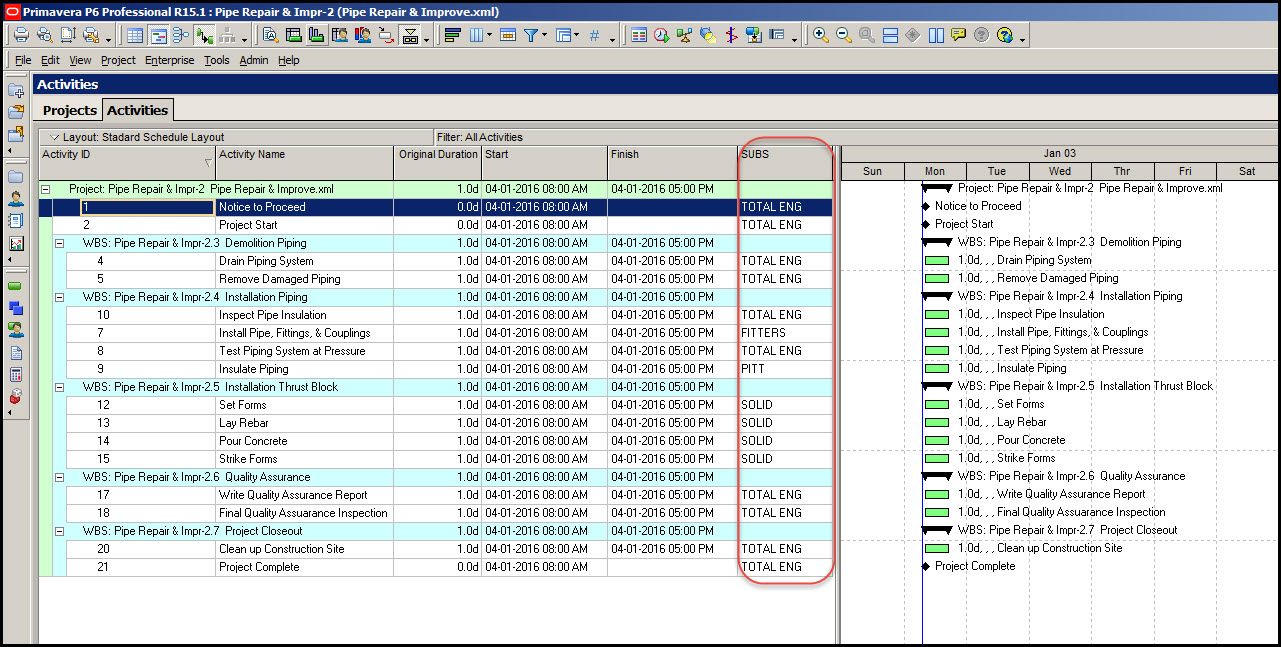
Select Finish to complete the translation. Your translated file should appear similar to Figure 9, provided your layout is set to display all the column headings in Figure 9, including the user defined field SUBS.
Figure 9
Summary
Translation of Microsoft project custom fields requires additional steps. A key to this process is to create a Primavera P6 Professional user defined field equivalent to the associated Microsoft project custom field.
Another key is to create an import template to map the Primavera P6 user defined field to the equivalent Microsoft project custom field. These two key points are important to understand for proper translation of Microsoft project custom fields.
Understanding how to translate a Microsoft Project text custom field is not just another feather in your cap; it should open the door to you translating the many Microsoft Project custom field data types into Primavera P6.