Primavera P6’s Enterprise Project Structure (EPS) organizes the entire database of projects into a manageable system reminiscent of a file structure. It also allows the administrator to control who sees what projects and what permissions they have when accessing those various projects. Even so, the list of projects can become quite considerable and you may find it desirable to trim down the list further so that you only see projects directly relevant to you.
Project portfolios is a feature in Primavera P6 that allows you to load up and implement a small set or portfolio of projects in the EPS. The advantage is you only see what you want to see and your computer’s memory requirements are significantly reduced because you are only accessing a small portion of the overall EPS.
This article describes how to create and utilize user defined project portfolios in Primavera P6.
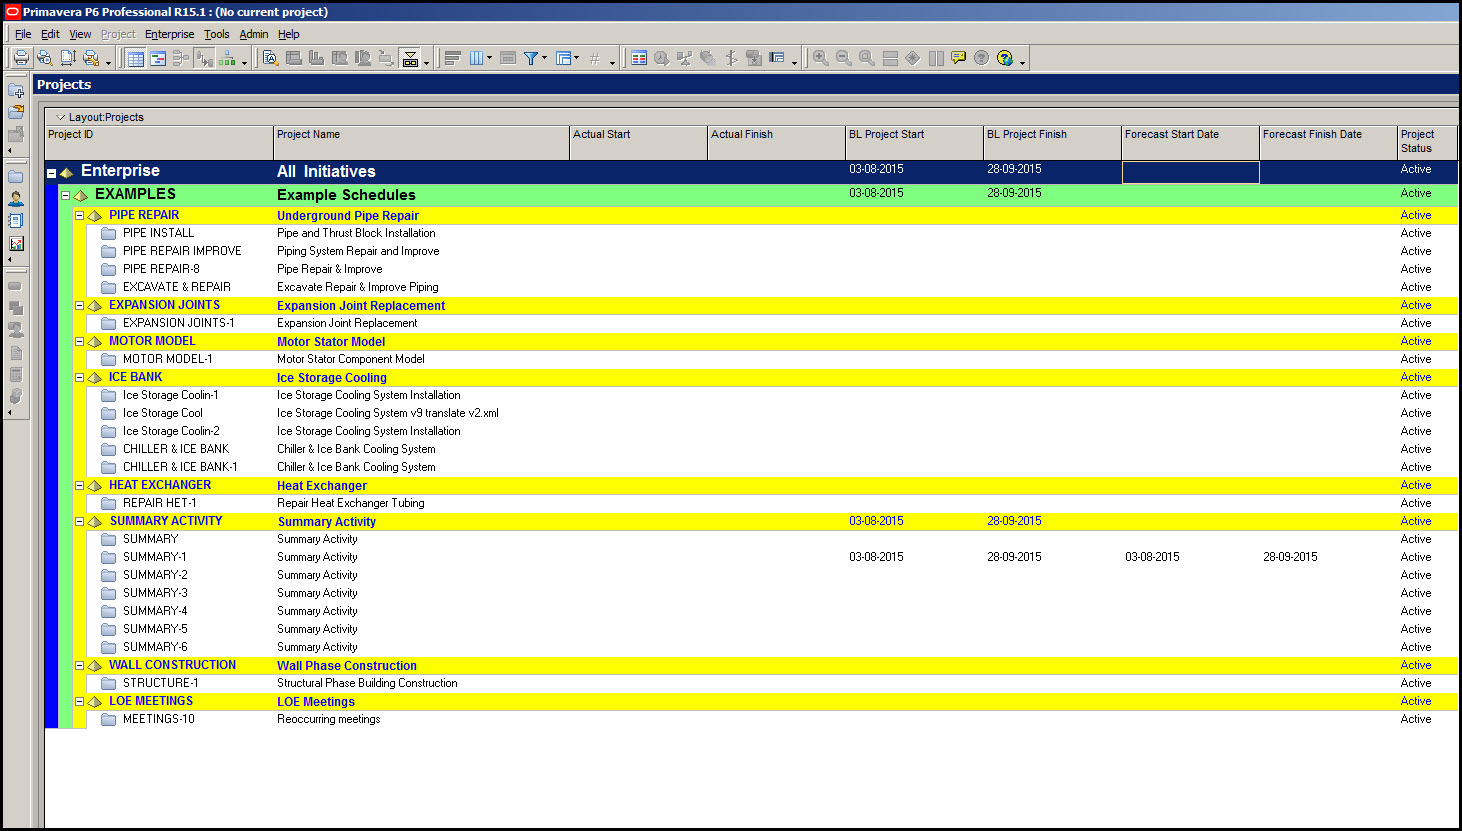
We begin in Figure 1 with the entire EPS.
 Figure 1

Note the dashboard in the lower portion of the Projects view that specifies that the current portfolio is ‘All Projects’. This means that the entire EPS is currently loaded up in the file system, which could hinder system performance.
To create a file portfolio we select Enterprise | Project Portfolios… from the top drop down menu. Click the + Add button and type in the name ‘Examples’, Figure 2.
Figure 2
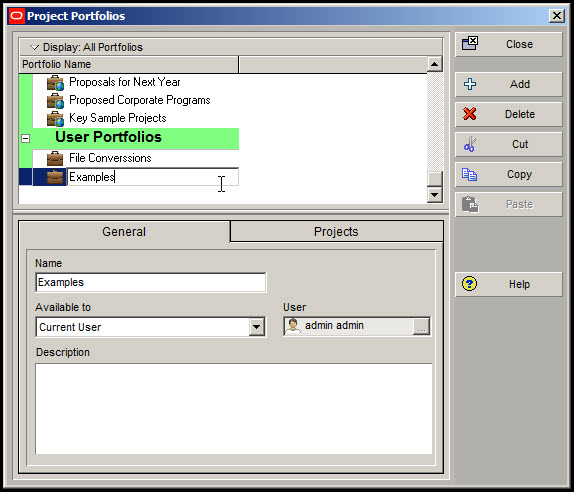
In the Project Portfolios dialog General tab bottom details make the portfolio available to the Current User. If you have sufficient privileges in Primavera P6, you could make it global by setting the availability to all users. Next, in the Projects tab bottom details, assign all the projects that you want to include the portfolio ‘Examples’, Figure 3.
Figure 3

After this you are essentially done!
Note that any project can appear in any number of portfolios, so there are no restrictions in this regard.
Activate your newly created portfolio by selecting File | Select Project Portfolio. Highlight the ‘Examples’ user portfolio and click OK. Now only your selected portfolio will be displayed.
However you may see empty nodes that are not in your Examples portfolio. To remove this clutter select the Group and Sort by icon at the top of the screen or View | Group & Sort > Customize. In the bottom Group By Options toggle ‘Hide if empty’, Figure 4.
Figure 4

This will remove the empty clutter from the screen, Figure 5.
Figure 5
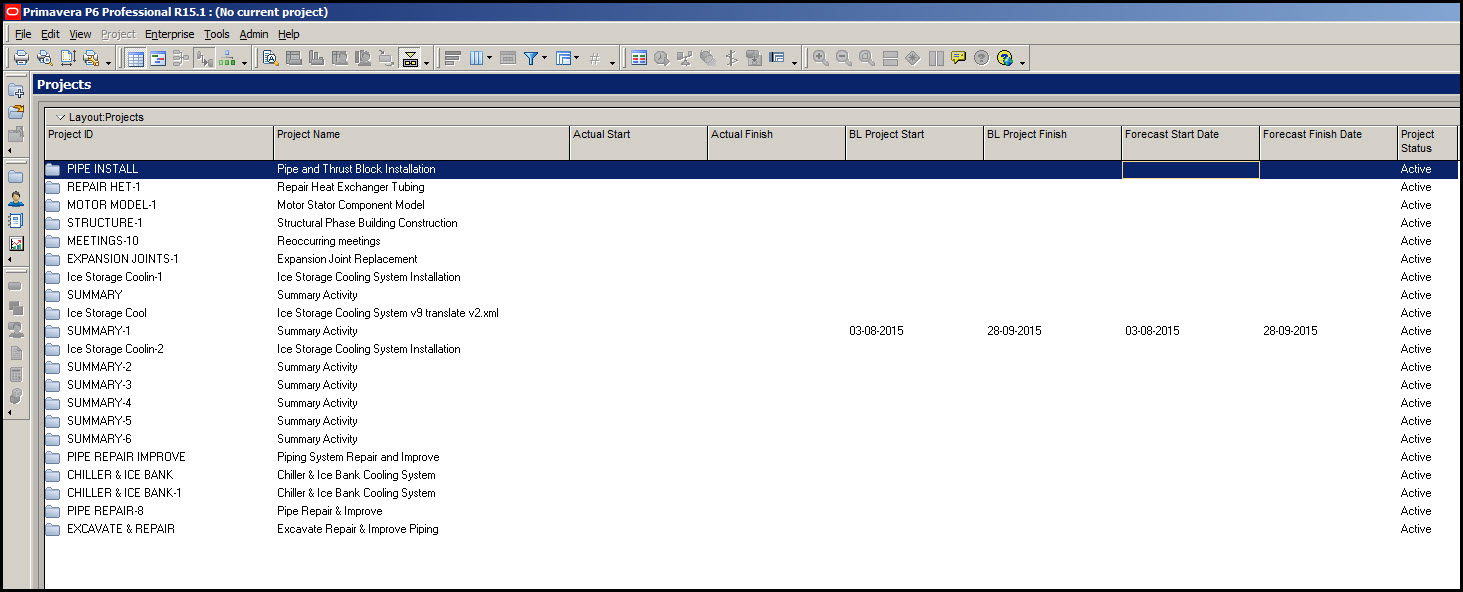
If you want to further remove the portfolios EPS nodes select the Group and Sort by icon and List. Primavera P6 will now display a simple list of files, Figure 6.
Figure 6
One more useful item to mention; if you add a new project, or copy an existing project while working within a portfolio, Primavera P6 will automatically insert it into your current portfolio. For example, if you have a portfolio called Bid Projects, and you add a new bid project while using that portfolio, P6 will automatically add that new bid project to the Bid Projects portfolio.
You don’t have to go back to the Enterprise menu and manually add it there. It will also appear in the default All Projects portfolio; however it will not appear in any other portfolio unless you manually add it; even if you added the new project to an EPS node shared by other bid projects.
Summary
Employing the entire EPS may be a huge burden on your computer memory. Primavera P6’s portfolios feature helps enable you to focus in on only the projects you are currently working on, which will free up computer memory.
Use the Group and Sort by options to further remove unnecessary clutter. It is important to note that Primavera P6 will only automatically insert new files into the current portfolio, regardless of whether the same EPS node, where you are inserting the file, appears in both the current and non-current portfolios. The ‘All Projects’ portfolio will, as stated, display every project in the EPS.