It’s almost inevitable! You have just added all your activities, the backbone of your schedule, and all are in order and numbered sequentially. Then it happens. Your upper level manager or program sponsor asks you to insert another activity right into the heart of your schedule. Are you prepared to respond to this contingency?
It sounds like a minor issue, and it is. But Primavera P6 does not automatically renumber all your activities when you insert a new activity. This has implications. The major issue is that you want to make sure when you first insert your activities that you have a size-able increment for your numbering scheme. It is recommended to have an increment of no less than ten when you first insert your activities. This will give you a total of nine activities that you can insert between each of your schedule activities.
If your numbering increment is one then you, most likely, will have to reenter or renumber all your activities’ ouch! To avoid this problem, again, use an increment no less than ten. Assuming you used the default increment when you first entered your activities there are a least two ways to insert a new activity in your schedule.
This article demonstrates a couple of ways to insert an activity in your schedule assuming you used an appropriate increment when you first entered the schedule activities.
For our demonstration we have the ‘Pipe Repair and Improve’ schedule displayed in Figure 1.
 Figure 1

Activities in this schedule were entered using an increment of ten between each activity. Good! We have been asked to split activity A1060 ‘Install Pipe, Fittings, & Couplings’ into two activities, ‘Install Fittings’ and ‘Install Pipe and Couplings’. Again, there are at least two ways to accomplish this.
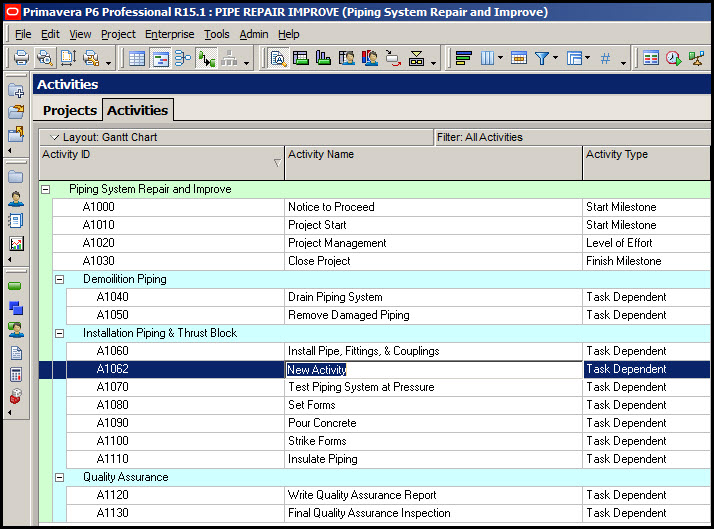
The first is way is to reduce your increment then add the activity using the standard procedure. This is done first by selecting Projects in the enterprise tool group on the left. Highlight your project. In the bottom details pane select the Defaults tab. In ‘Auto-numbering Defaults’ change the increment from ten to two. Go to the activities view and select activity A1060. Select Edit | + Add from the top drop down menu. This will insert activity A1062 in your schedule, Figure 2.
Figure 2
Now all you need to do is type in the appropriate names for activities A1060 and A1062.
A faster way to accomplish this is to simply keep the increment at ten, highlight activity A1060, and then select Edit | + Add from the top drop down menu. This will insert an activity at the bottom of the respective work breakdown structure element. Also, it will have the highest number Activity ID in the schedule; not what you want. But simply select the Activity ID and change the number yourself to A1062, Figure 3.
Figure 3

Again, all you need to do then is type in the appropriate names for activities A1060 and A1062.
Summary
The best way to avoid problems related to inserting an activity in a schedule is to make certain you enter a suitable increment for your project auto-numbering defaults before you begin entering your activities. This way you’ll have room to insert your additional activity in the schedule.
If you do have to go back and insert an activity, which is a likely event, you can either adjust the auto-numbering increment default and add the activity or simply add the activity and change the Activity ID manually. Either method will work. Primavera P6 also has a Renumber Activity ID feature that you should familiarize yourself with.