After the completion of your work breakdown structure (WBS) in Primavera P6 EPPM, it is time to define the activities that produce the WBS elements, i.e., the decomposed deliverables.
Describing the activities that produce the WBS deliverables is a major step in the project scheduling process. Successful activity definition often requires a scheduler with experience similar to the project at hand. Proper and comprehensive activity definition and the corresponding estimated planned durations is important for developing a schedule that is realistic.
This article demonstrates how to use Primavera P6 Enterprise Project Portfolio Management (EPPM) Web to define and estimate the activities that will serve as the backbone for the project schedule.
Entering Activity Descriptions
To define the activities in Primavera P6 EPPM having already created a shell project and corresponding WBS first select Activities, Figure 1.
 Figure 1
You should now see your WBS elements. Then use the columns tool, Figure 1, to adjust the columns to those selected in the Customize Columns dialog, Figure 2.
 Figure 2
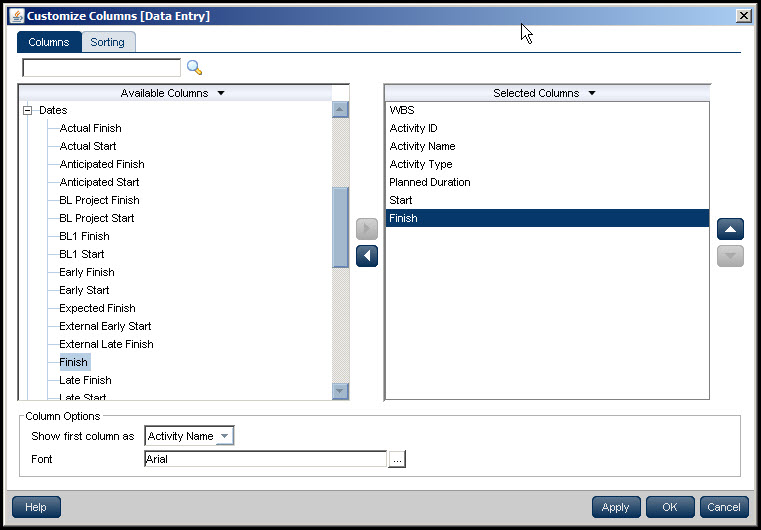
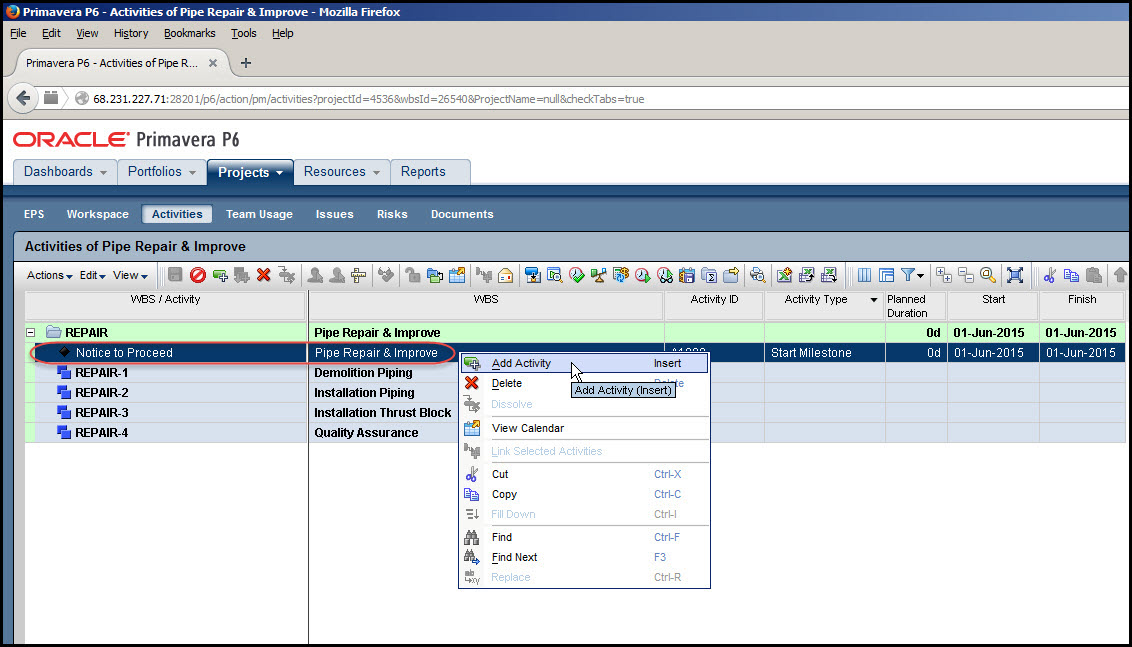
Note that you may save your columns layout for future use by selecting Save As from the drop down menu on the far right of the screen. Right click on the top level Repair & Improve project WBS element, Figure 3, and select ‘Add Activity’ from the resulting menu.
Figure 3
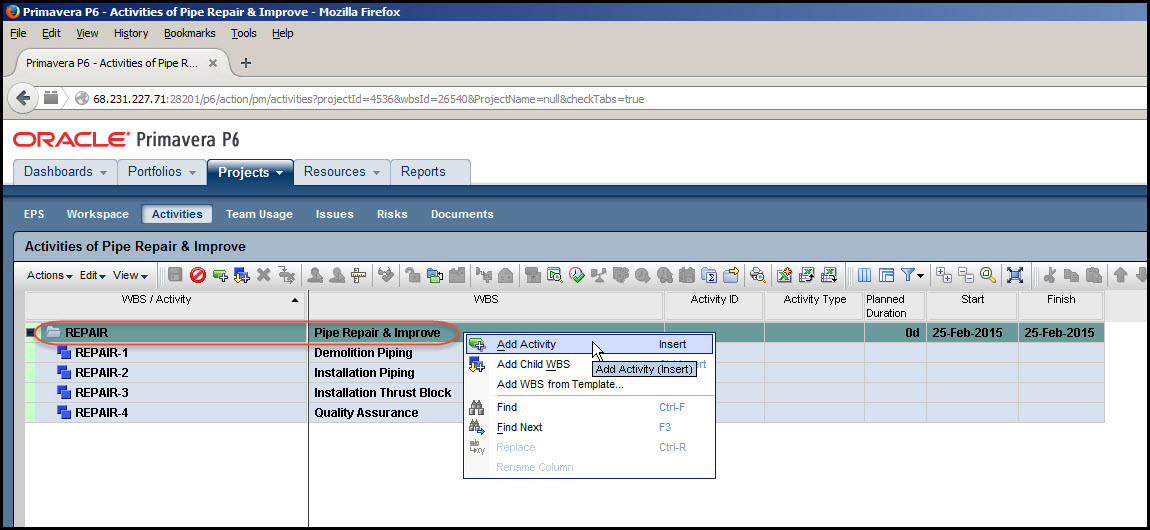
This will enable you to insert high level activities, such as Notice to Proceed, Project Start, and Project Management. Select the General tab at the bottom of the screen, and type in the activity; in this case ‘Notice to Proceed’ for Activity Name in the Details group, Figure 4.
Figure 4
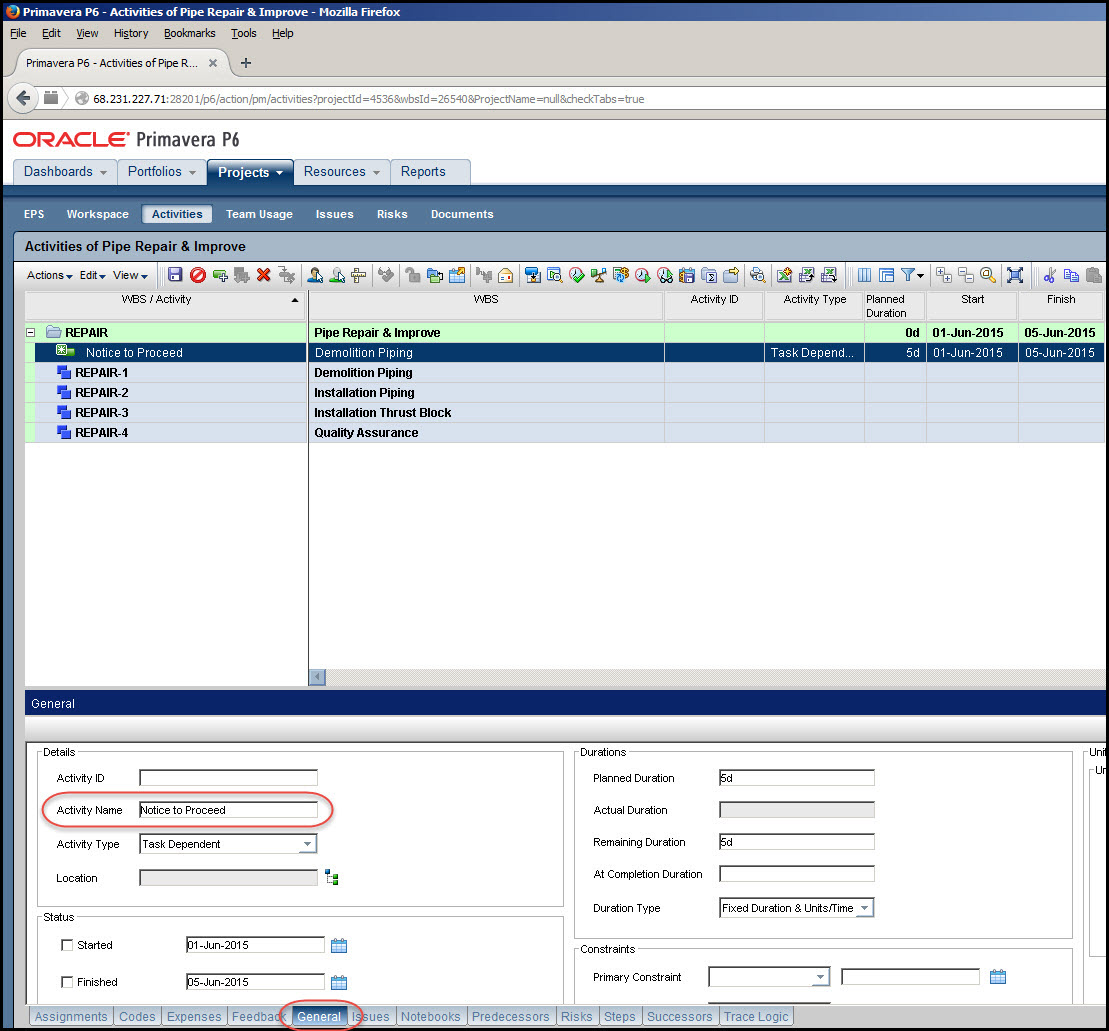
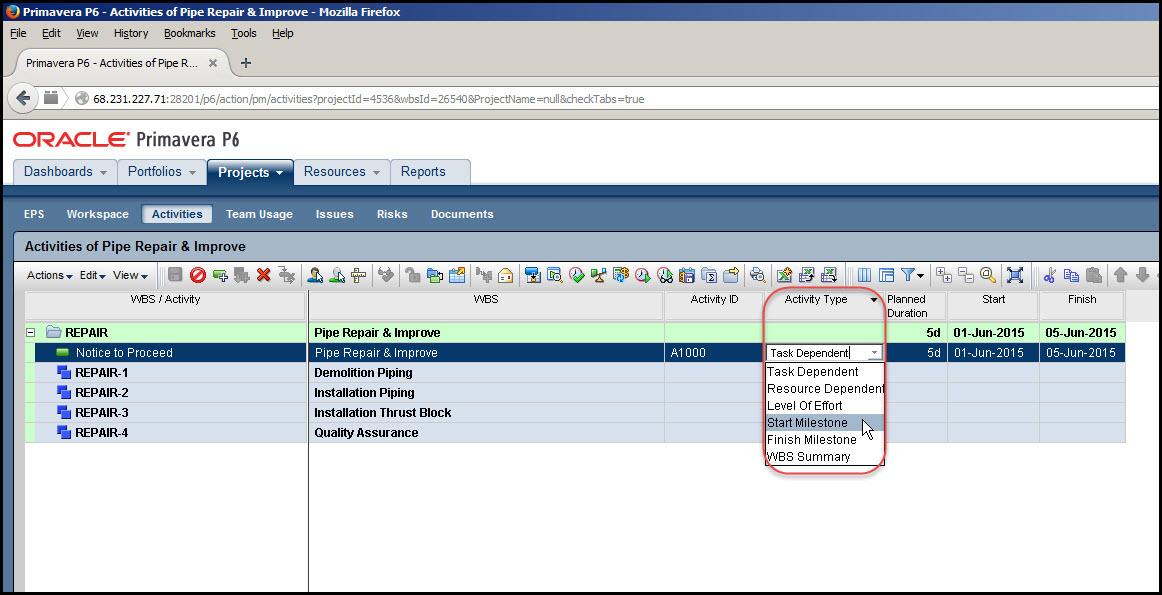
Note it is preferable to use the Activity Name block in the General bottom view for typing in the activity name and not the new cell that appears in the WBS/Activity view. In the Activity Type column select Start Milestone from the cell drop down menu, Figure 5. You may now save your schedule.
Figure 5
Next right click on ‘Notice to Proceed’ (or on the WBS element again), Figure 6, and repeat the above process to enter the ‘Project Start’ activity.
Figure 6
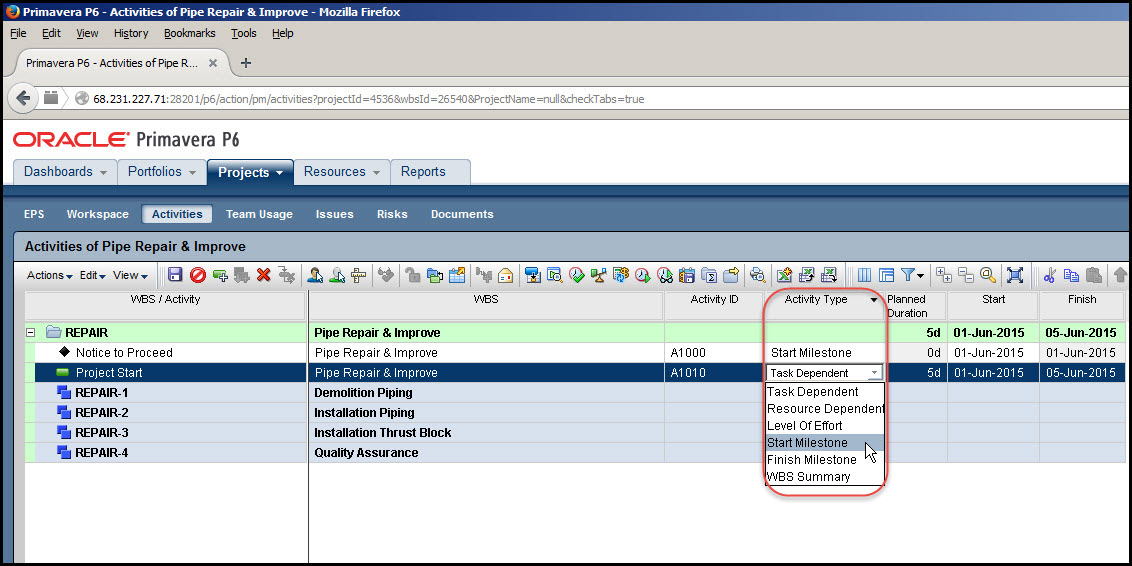
Again, type in ‘Project Start’ in the General tab, Details group, and Activity Name block, Figure 7.
Figure 7

Set ‘Project Start’ as another Start Milestone, Figure 8.
Figure 8
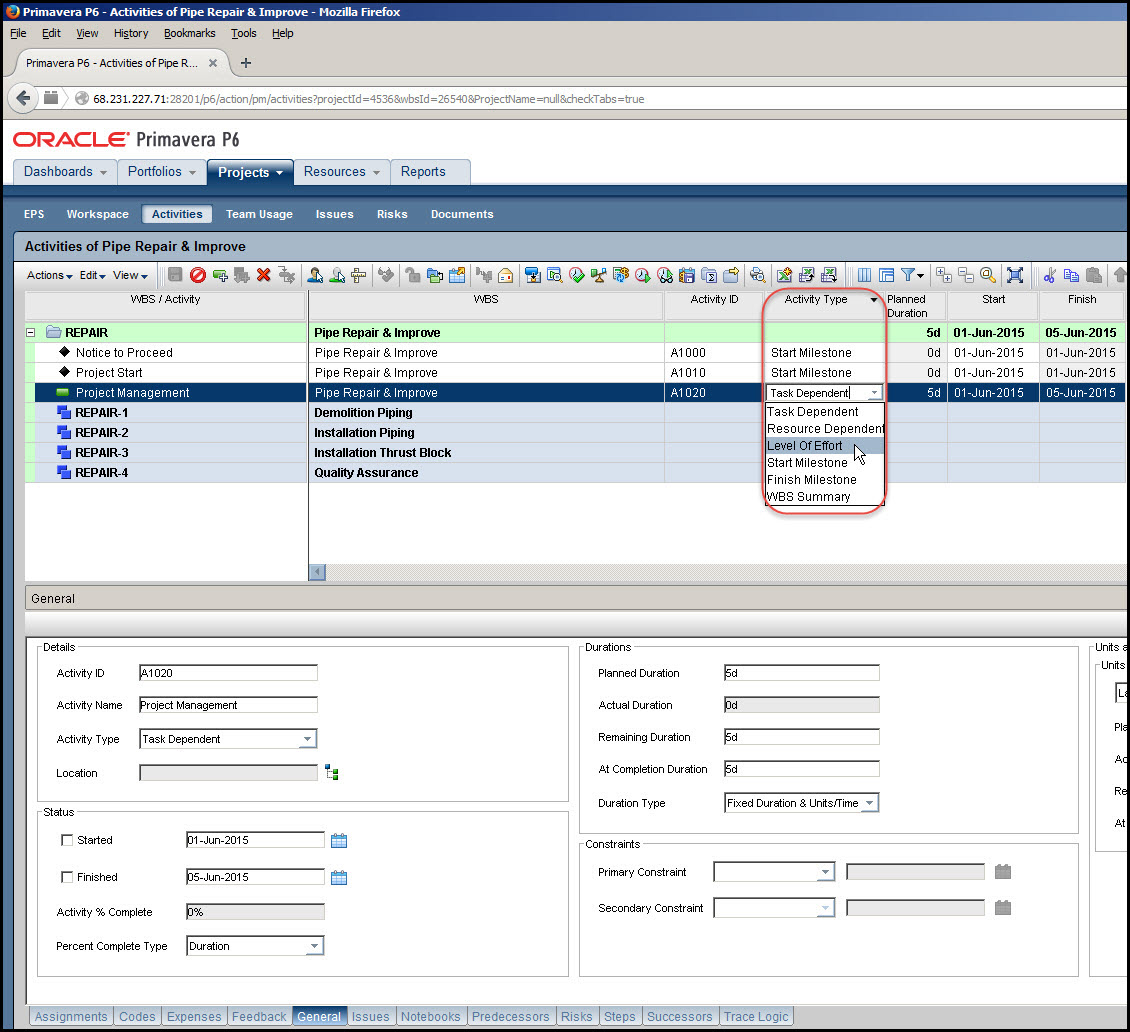
Again, repeat the above process for the Project Management activity. Set the Activity Type for Project Management to Level of Effort, Figure 9.
Figure 9
Now select the Demolition Piping WBS element, and repeat the above process to describe the activities required for the Demolition Piping WBS element deliverable, Figure 10.
Figure 10
After naming these activities, enter the estimated duration of each activity using the General bottom view Durations group or the above Activities view Planned Duration column. Repeat the above steps until all activities and their estimated durations are entered.
ID/Code and Name/Description
Now suppose you wanted to include a Name Description with the ID/Code. Select the grouping icon, Figure 11.
Figure 11
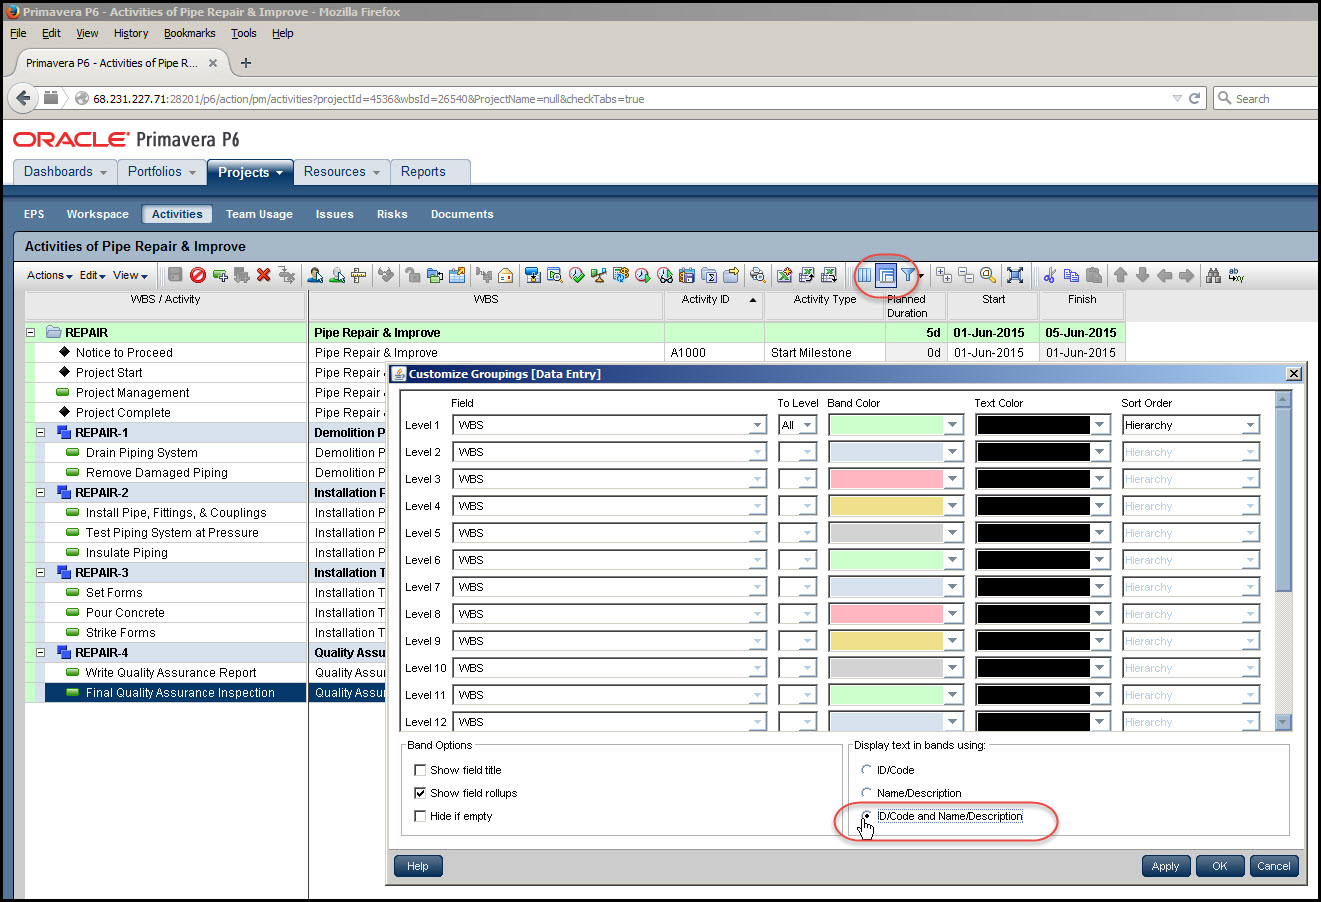
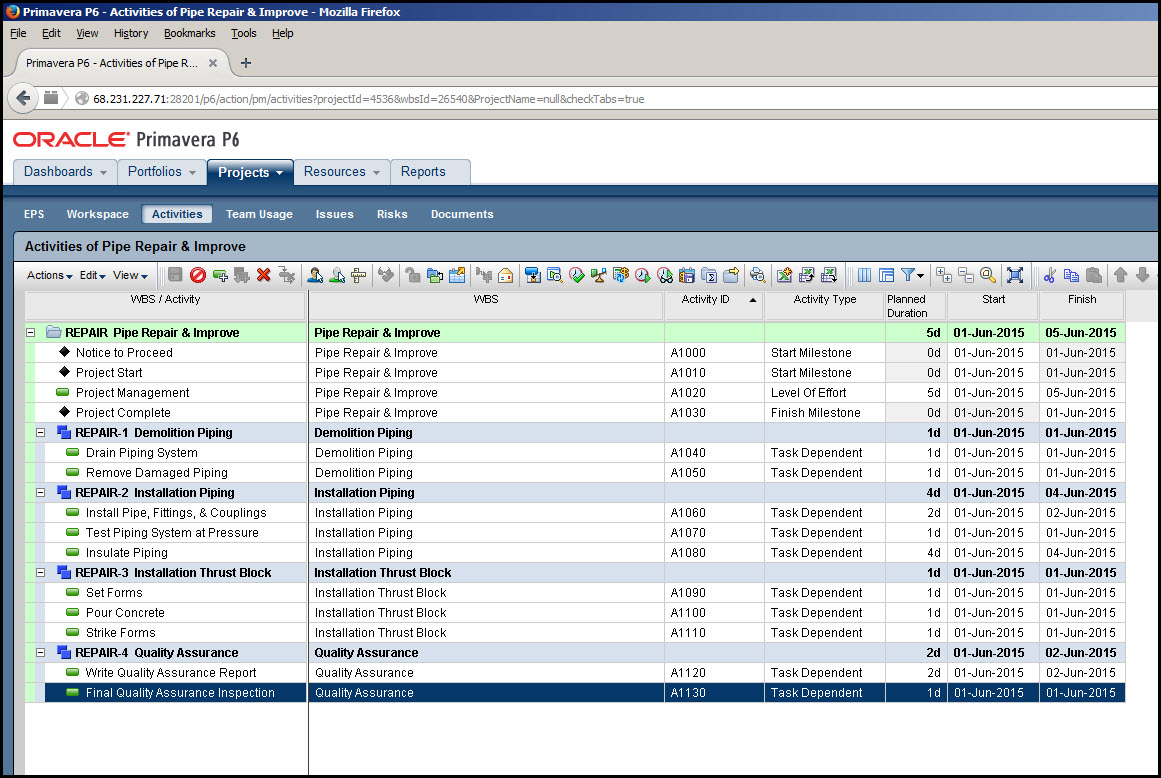
In the corresponding Customize Groupings dialog click the ID/Code and Name/Description toggle, Figure 11. Your schedule WBS and associated activities should now appear similar to Figure 12.
Figure 12
Inserting an Activity
In reality, what happens after all your schedule activities are completely entered is the need to add additional activities. So how can you insert an activity into the schedule if the need arises?
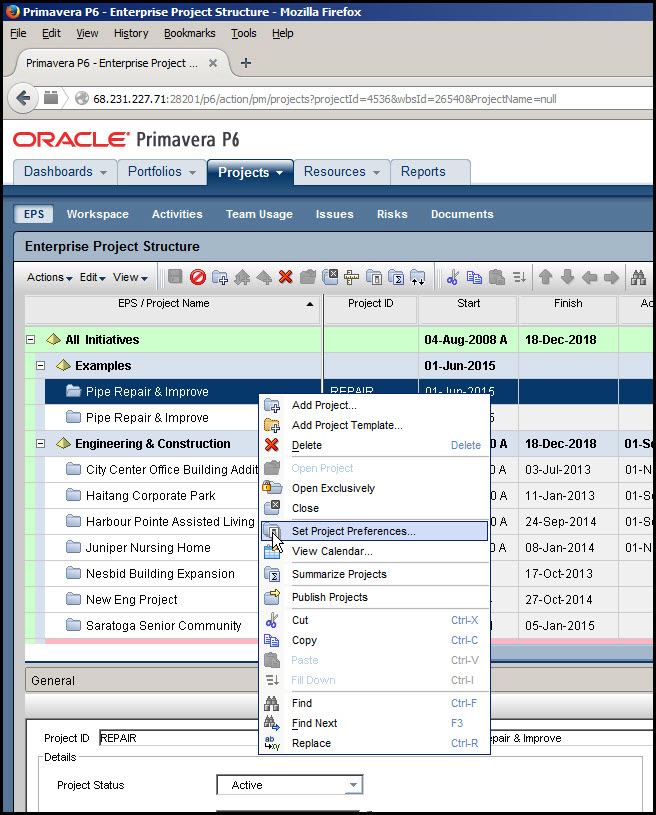
To do this you can decrease the increment setting for the activity ID if you have several activities to insert, or you can change the ID to another number in the Activity ID field in the General tab of the bottom layout. If you decide to change the increment setting, this is done by selecting the EPS tab. Right click on your current project, and select ‘Set Project Preferences’ from the resulting menu, Figure 13.
Figure 13
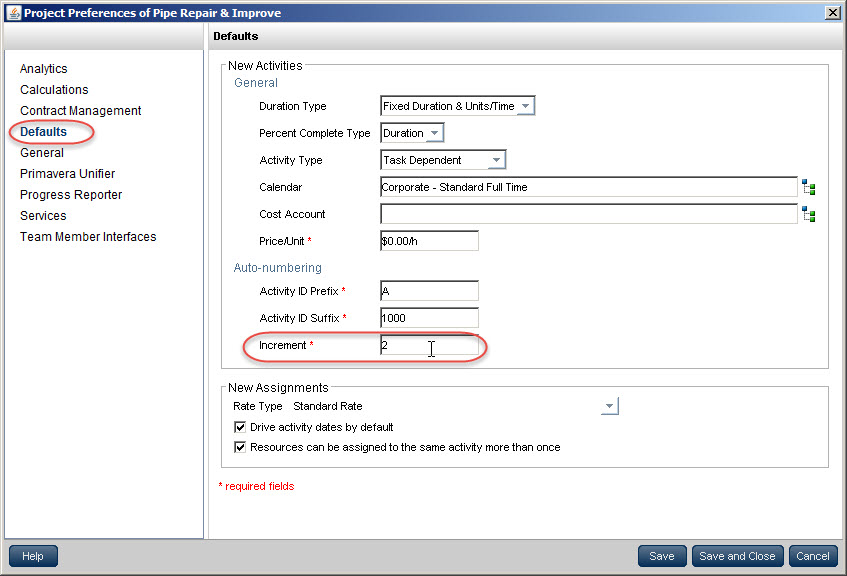
In the Project Preferences dialog select Defaults, and in the New Activities Auto-numbering group change the increment from 10 to something smaller, such as 5 or 2, Figure 14.
Figure 14
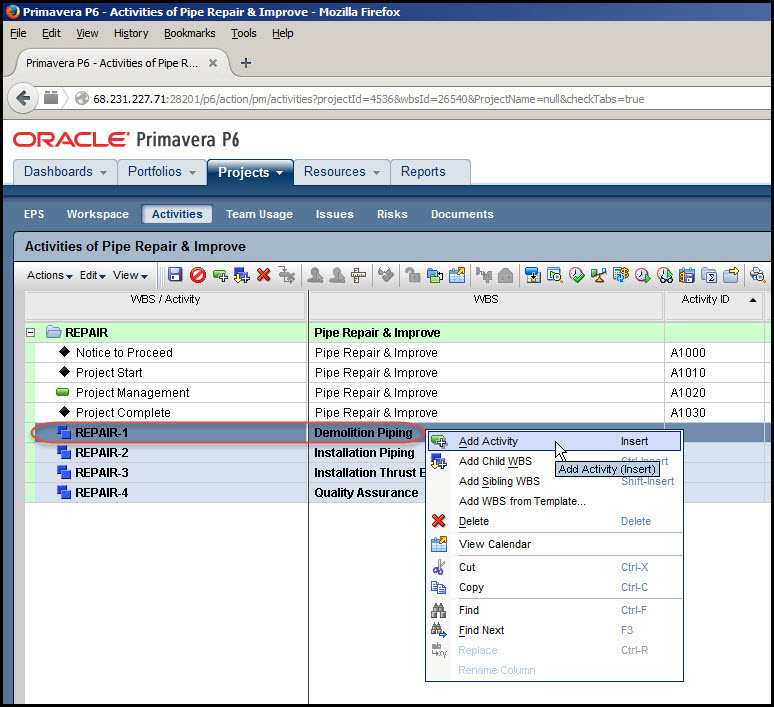
Now go back to the activities view and select the activity above that which you plan to enter. In our example, let’s say we want to include Inspect Pipe Insulation after Insulate Piping. Right click on Insulate Piping and select Add Activity from the drop down menu. In the below General tab and Details group, Figure 15, manually type in the Activity Name and also the Activity ID, in our case, A1082.
If you changed the increment setting, you may wish to return it to 10 before continuing.
Figure 15

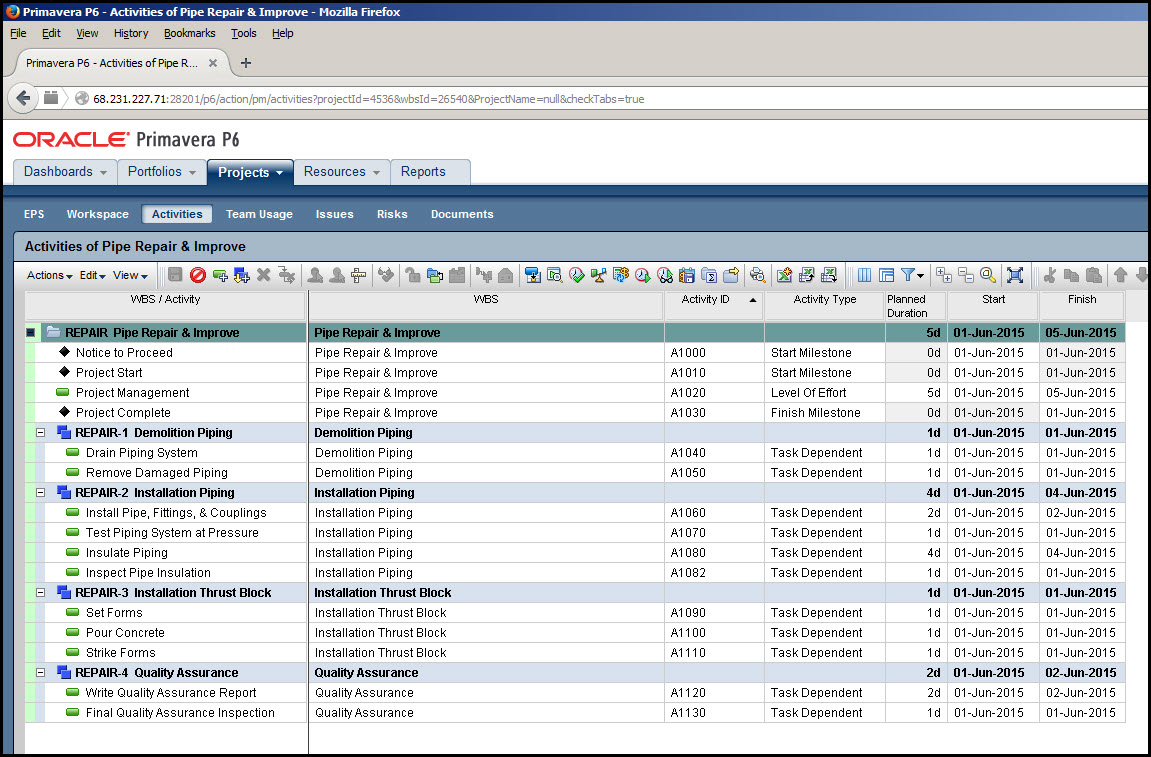
Yes, you have to manually type in the Activity ID of your inserted activity or your new activity will be assigned the highest Activity ID in the schedule. Your final schedule with defined activities and estimated durations should be similar to Figure 16.
Figure 16
Summary
Although activity definition often requires experience and skill, the process of entering activities in Primavera P6 EPPM is straightforward. Enter the activity name, type, and planned duration using the General tab in the bottom details and/or the appropriate columns in the activity view.
Use the Grouping feature to include a Name Description along with the ID/Code. And, of course, for those inevitable required activity insertions decrease the increment, and then insert your desired activity.
Remember for the inserted activity you must manually enter the Activity ID. Activity definition is a major and important step in the scheduling process. Primavera P6 EPPM allows you to both simply enter and update your schedule activities as appropriate.