When using Primavera P6 EPPM, there are times where you may want to sort and organize a large schedule with your own unique codes. Primavera P6 EPPM allows you to create your own code categories and associated code values for organizing you schedule activities.
Assuming you have entered all your project schedules’ unique activities and also estimated their durations; then the backbone of your schedule has been constructed but management requires specific reports related to your schedule activities. These requests require you to sort and organize your schedule activities by codes and code values that are not predefined in Primavera P6 EPPM. You need to create a new category and corresponding code values to organize your schedule in a way that supports these reporting requirements. Primavera has default categories and code values, but also allows you to create your own unique categories and associated code values.
This article describes how to create codes and corresponding code values for organizing your project schedule activities.
Creating Activity Codes
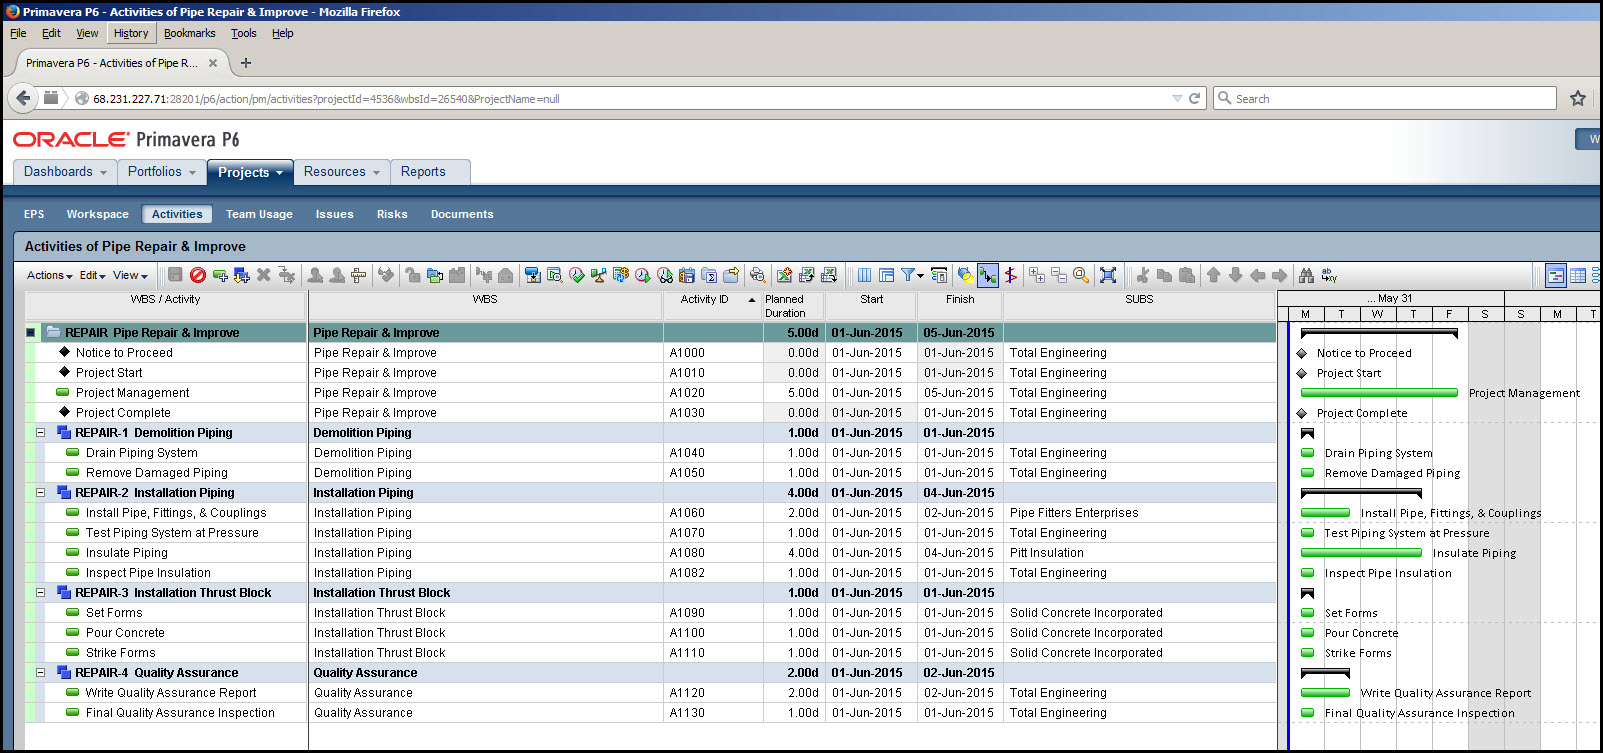
The schedule that we will sort and organize is the Pipe Repair & Improve project displayed in Figure 1.
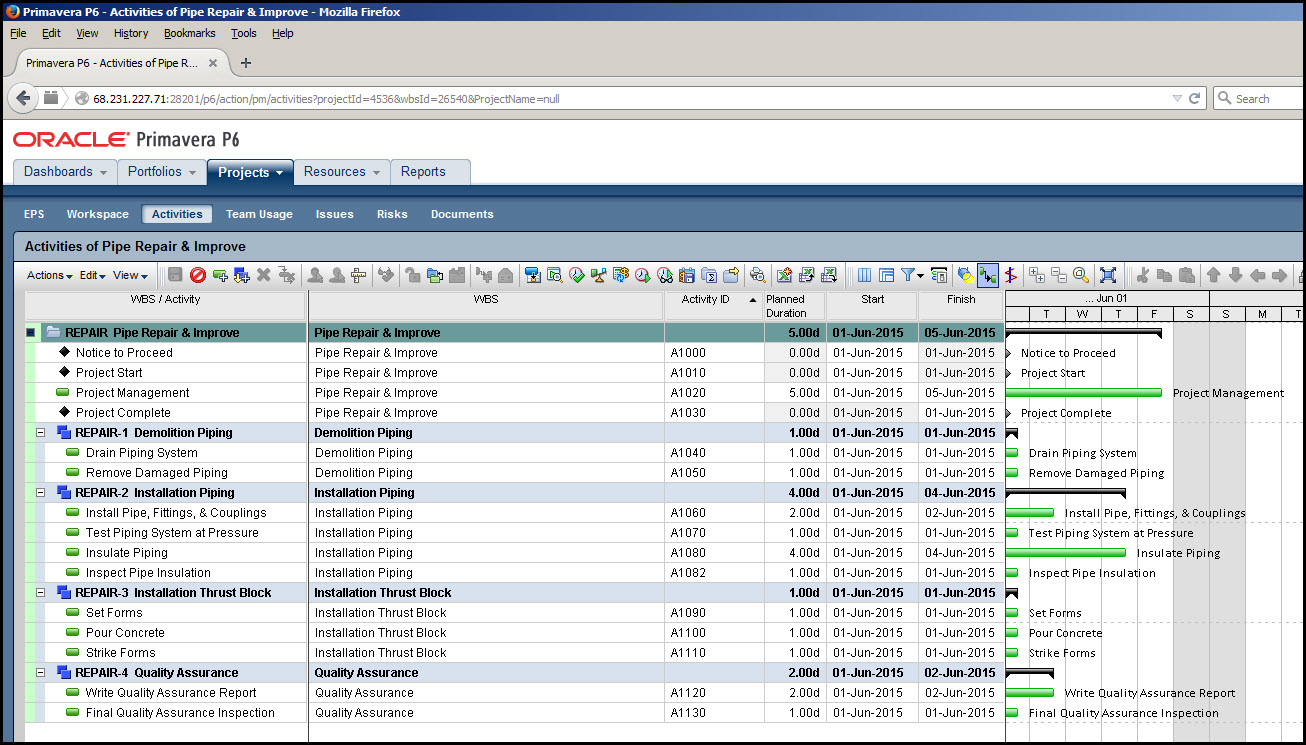 Figure 1
We want to list and sort the schedule based upon the subcontractors performing the assigned activity. To create subcontractor category and associated subcontractor code values, select Enterprise Data from the Administer drop down menu on the right, Figure 2.
 Figure 2

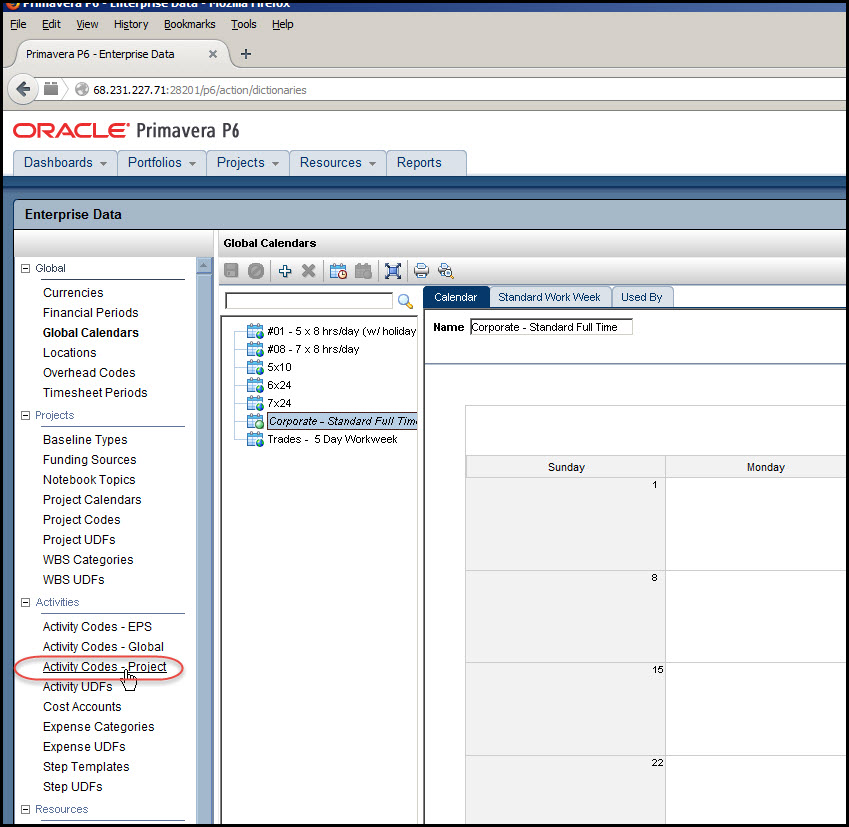
From the Enterprise Data menu on the left select Activity Codes – Project, Figure 3.
Figure 3
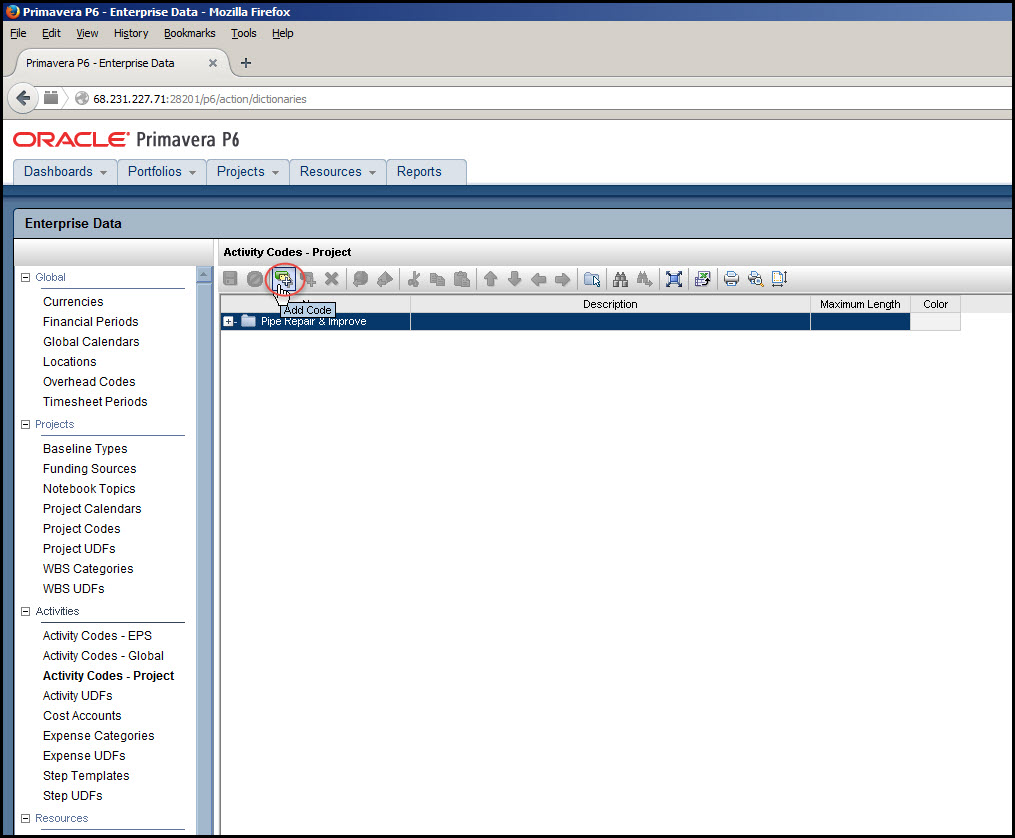
To create a new code category select the Add Code icon, Figure 4.
Figure 4
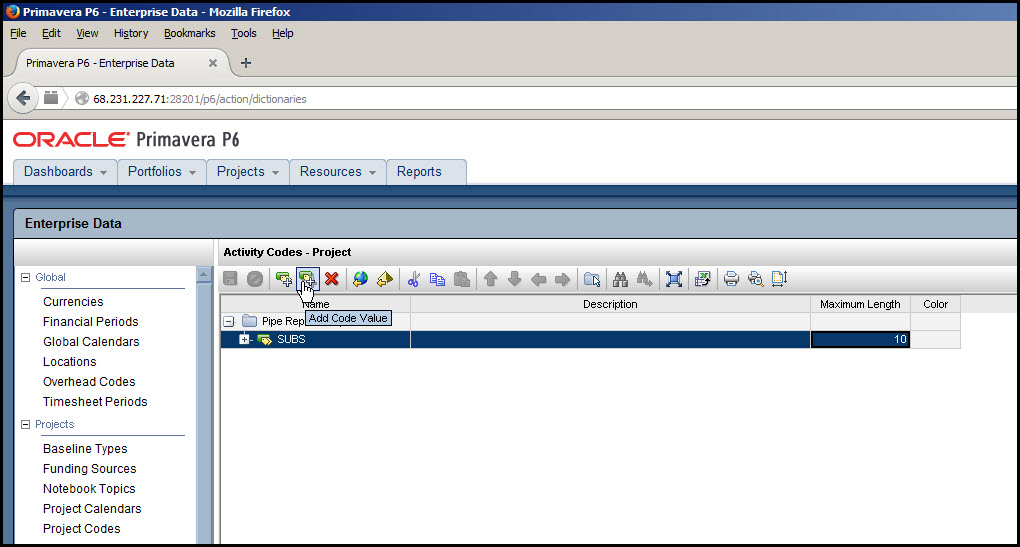
In the Name column we’ve typed in SUBS, and set the Maximum Length column to 10, Figure 5.
Figure 5
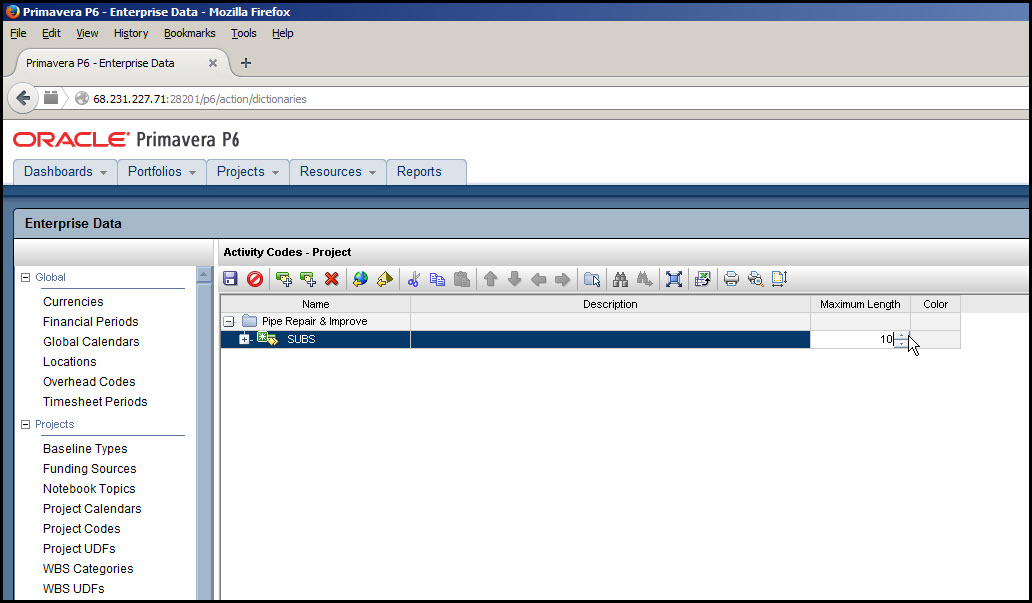
The maximum length is the number of characters allowed for naming your code value. To add your first subcontractor value to your Code category, select the Add Code Value icon, Figure 6.
Figure 6
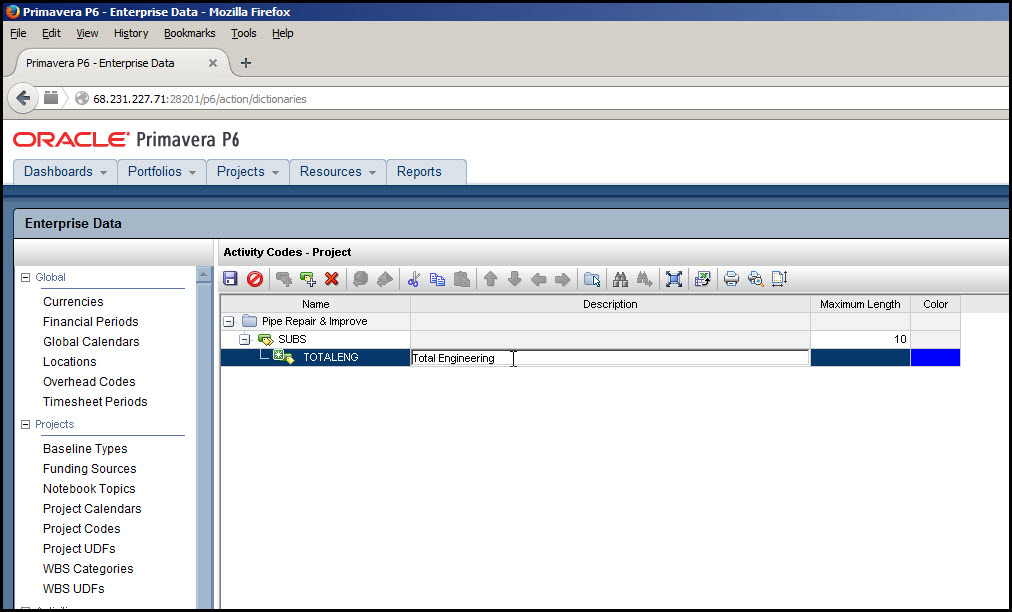
Type in the code abbreviation; in this example TOTALENG for the Name column and Total Engineering for the description column, Figure 7.
Figure 7
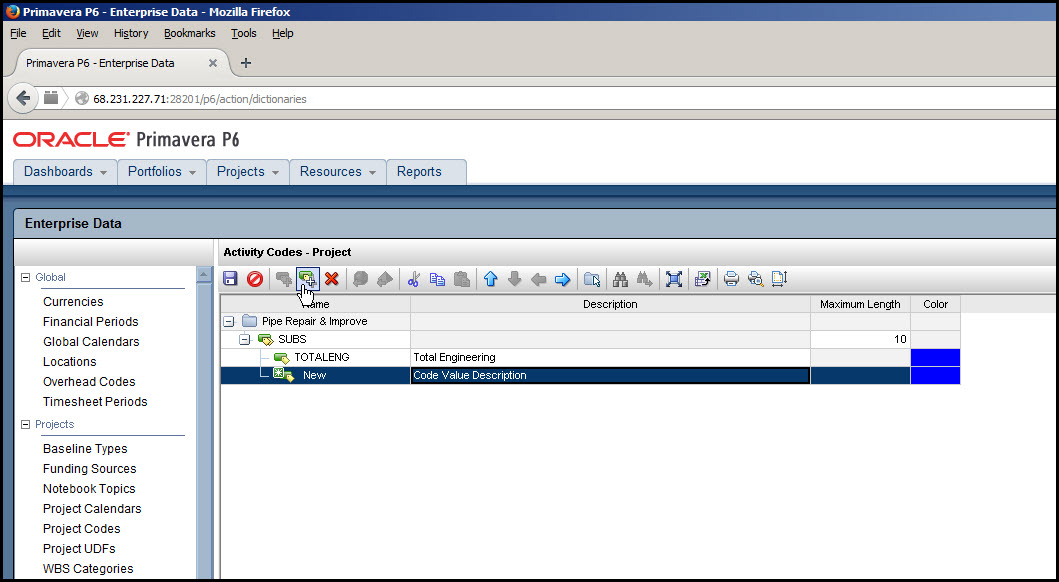
Select the Code Value icon again as needed to add the additional subcontractors, Figure 8.
Figure 8
The final list of subcontractors for the Pipe Repair & Improve project is displayed in Figure 9.
Figure 9

Assigning Activity Codes
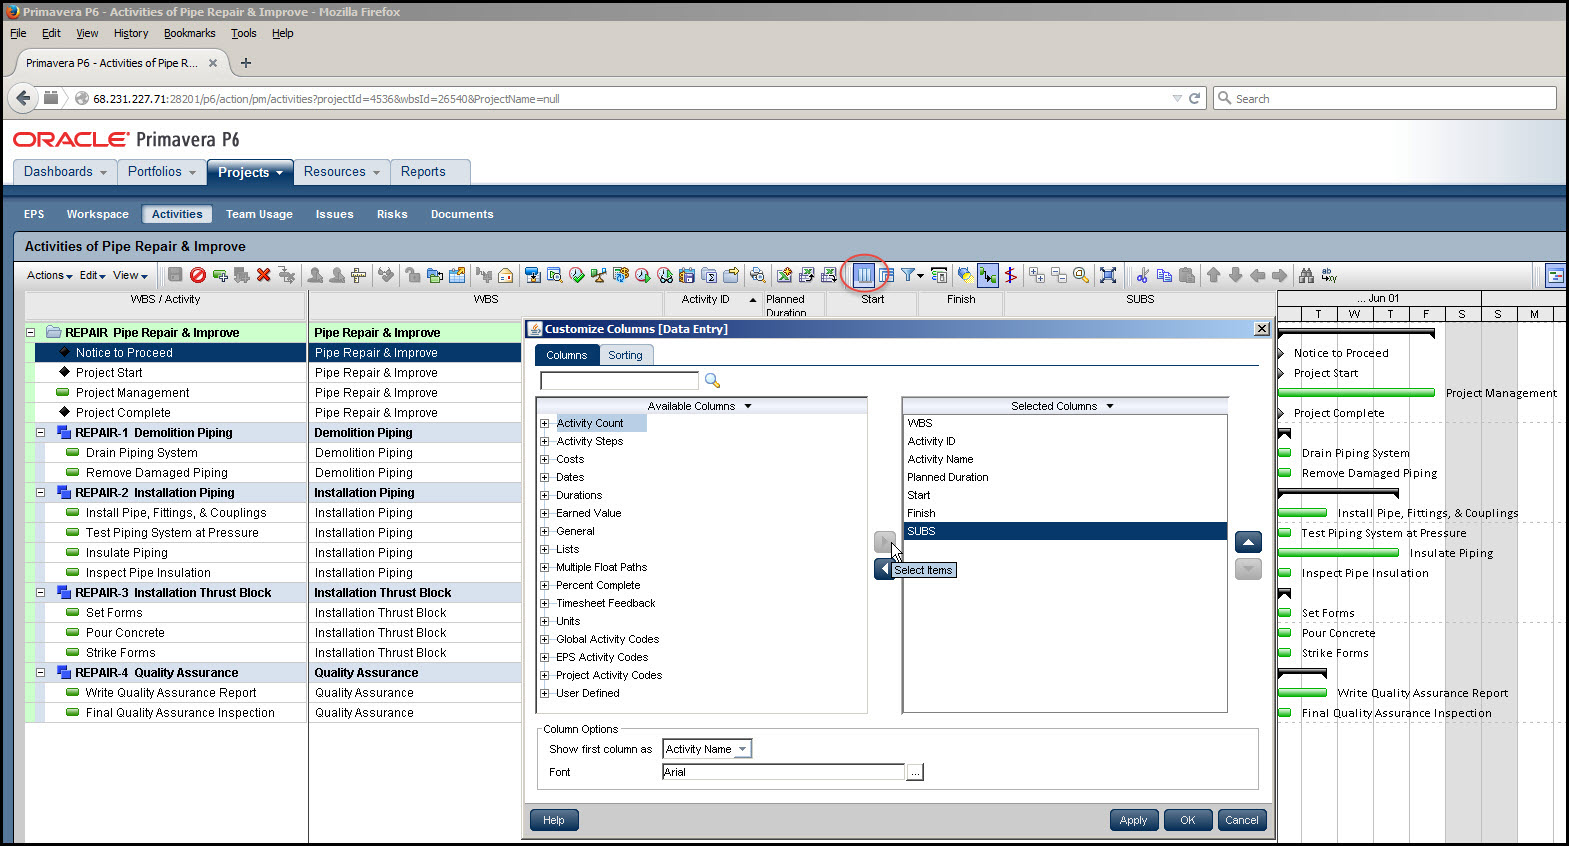
To assign codes to activities in the schedule, first return to the activities view, and select the Customize Columns icon, Figure 10, then add the newly created SUBS column to your list of columns, Figure 10.
Figure 10
Now that the SUBS column is in place, double click on the Notice to Proceed SUBS cell, and then select the ellipse button, Figure 11.
Figure 11
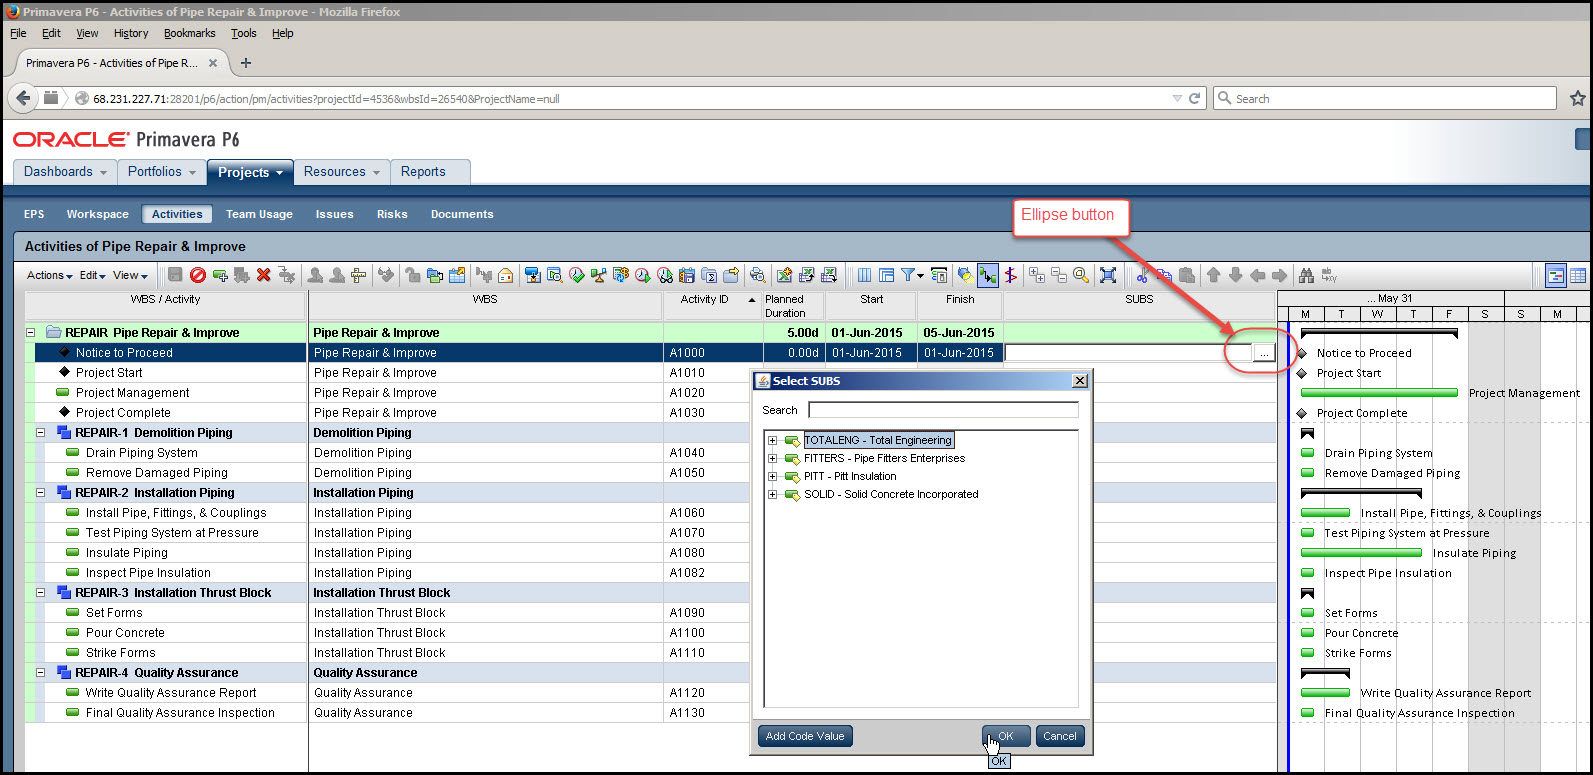
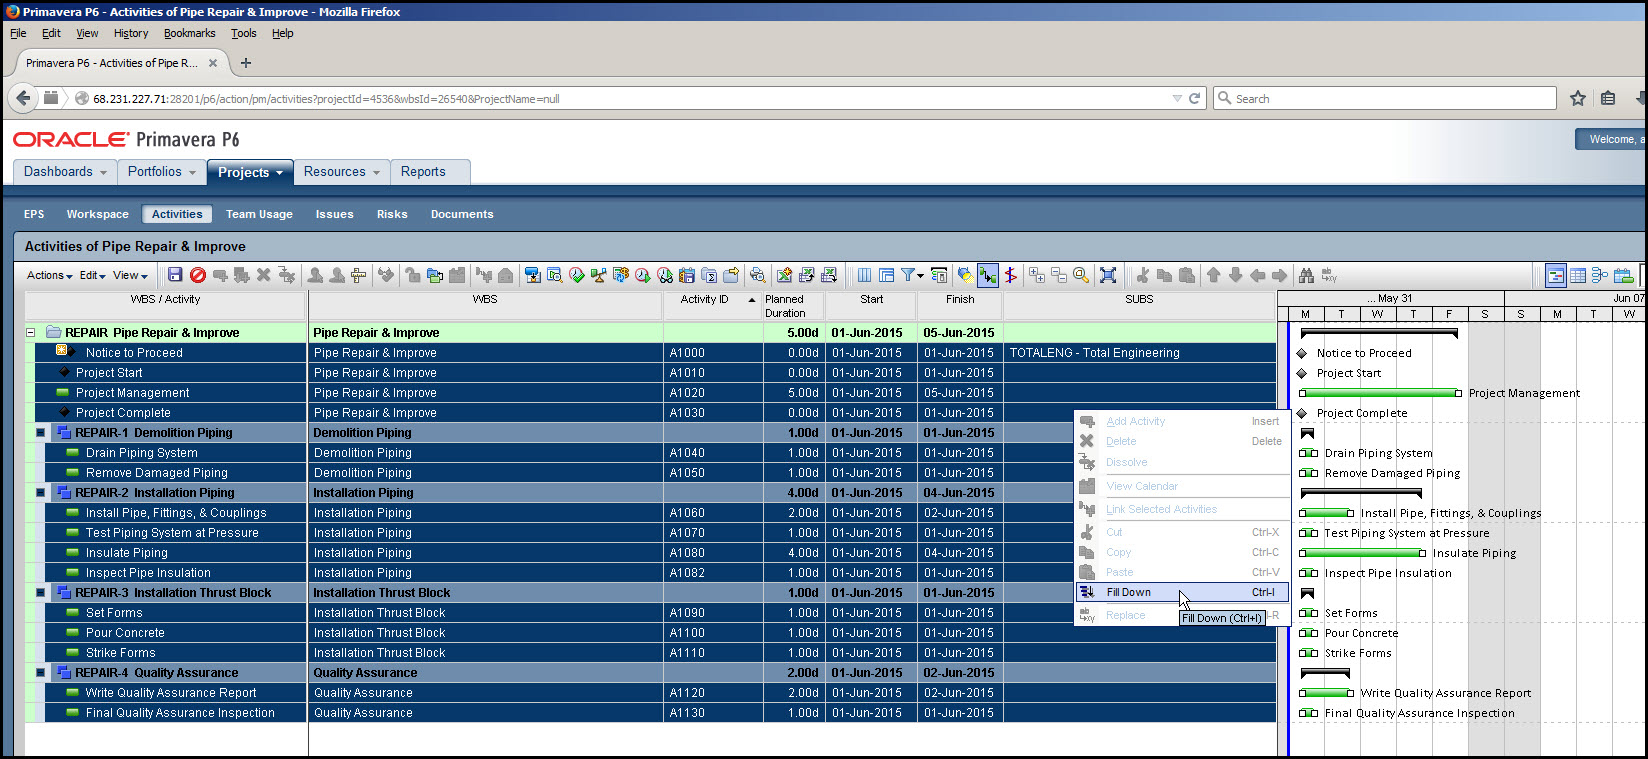
In the following Select SUBS dialog, we’ve selected Total Engineering for the Notice to Proceed activity, Figure 11. Total Engineering is the prime contractor, and performs the majority of the activities. To save time we use the Fill Down feature to copy Total Engineering to all the other activities.
We then edit the few that require adjustment in the code value assignment. To Fill Down, first highlight all the cells in the SUBS column, right click, and select Fill Down from the corresponding menu, or you can use the Ctrl+i shortcut keys to achieve a fill down as shown in Figure 12.
Figure 12
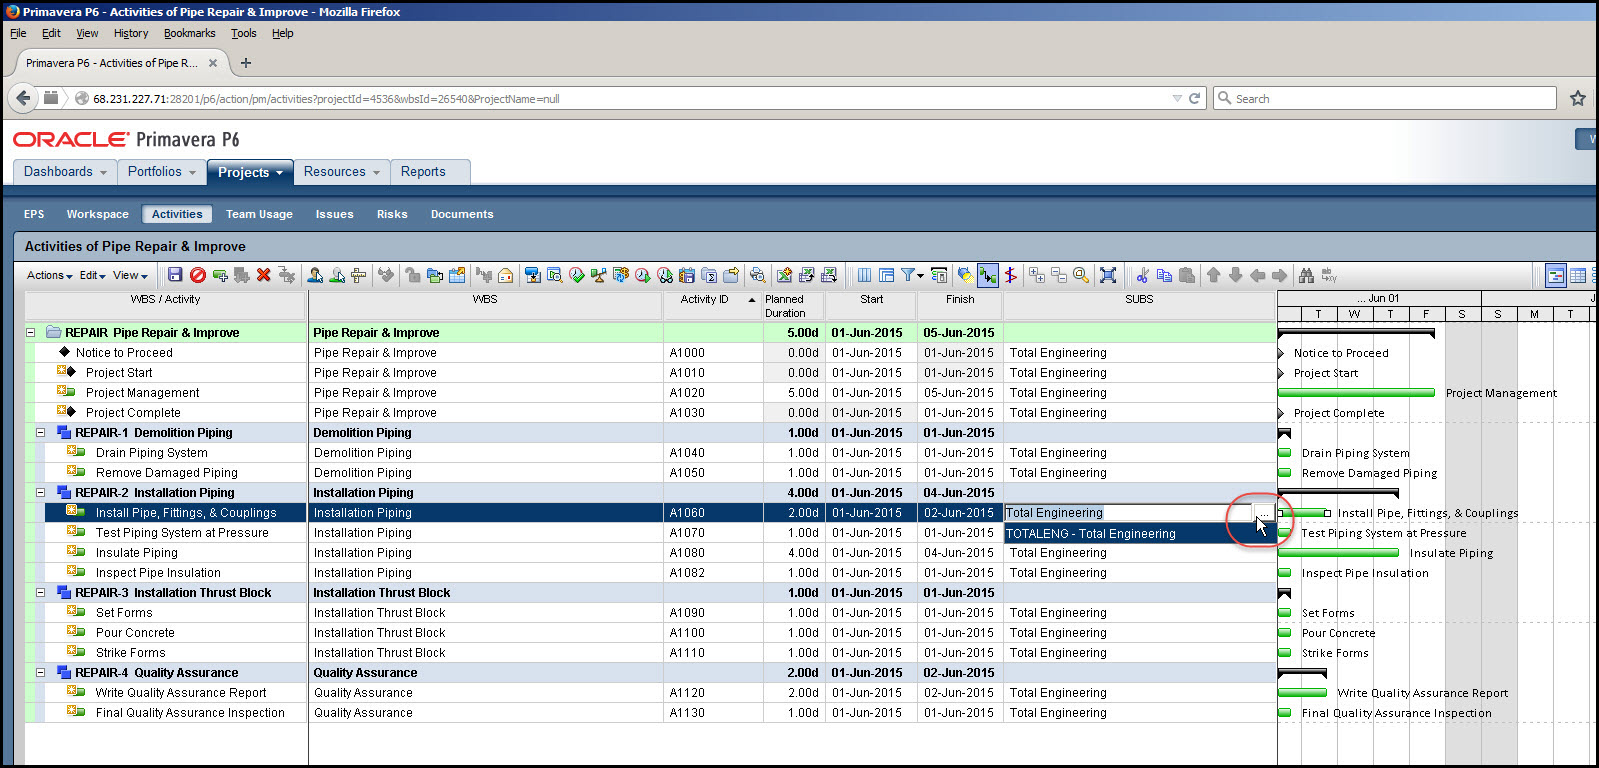
Install Pipe, Fittings, & Couplings activity is one the few requiring adjustment. Double left click on the SUBS cell for the Install Pipe, Fittings, & Couplings activity, Figure 13, and select the following ellipse button.
Figure 13
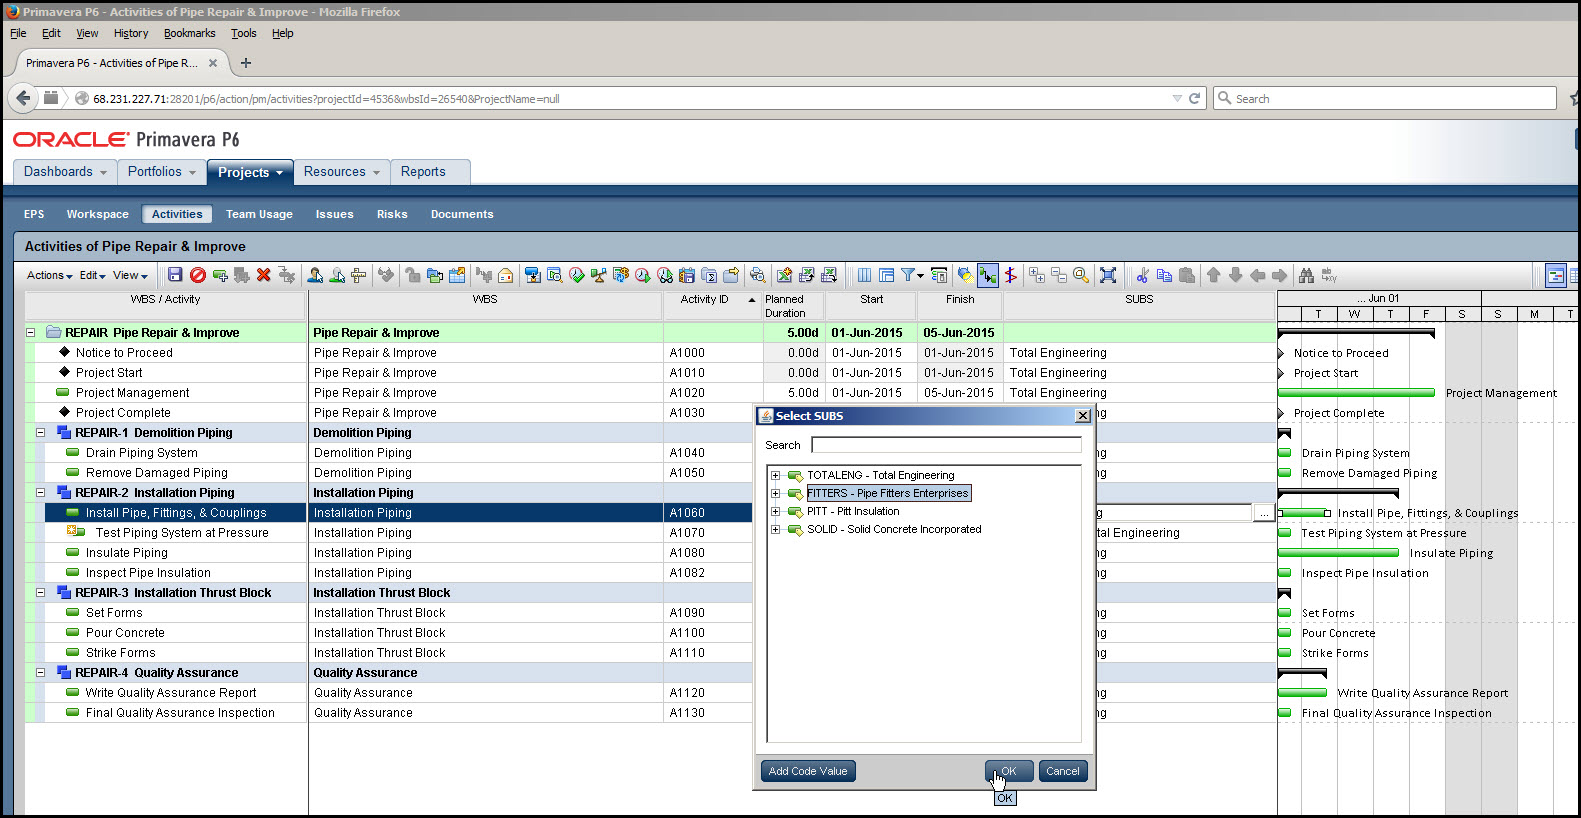
In the resulting select SUBS dialog choose the Pipe Fitters Enterprises subcontractor, Figure 14.
Figure 14
Continue editing the SUBS column until the list of subcontractors is as displayed in Figure 15.
Figure 15
Sorting Activities by Codes
To sort the activities by the subcontractor code values first we’ve selected the Customize Grouping icon, Figure 16.
Figure 16

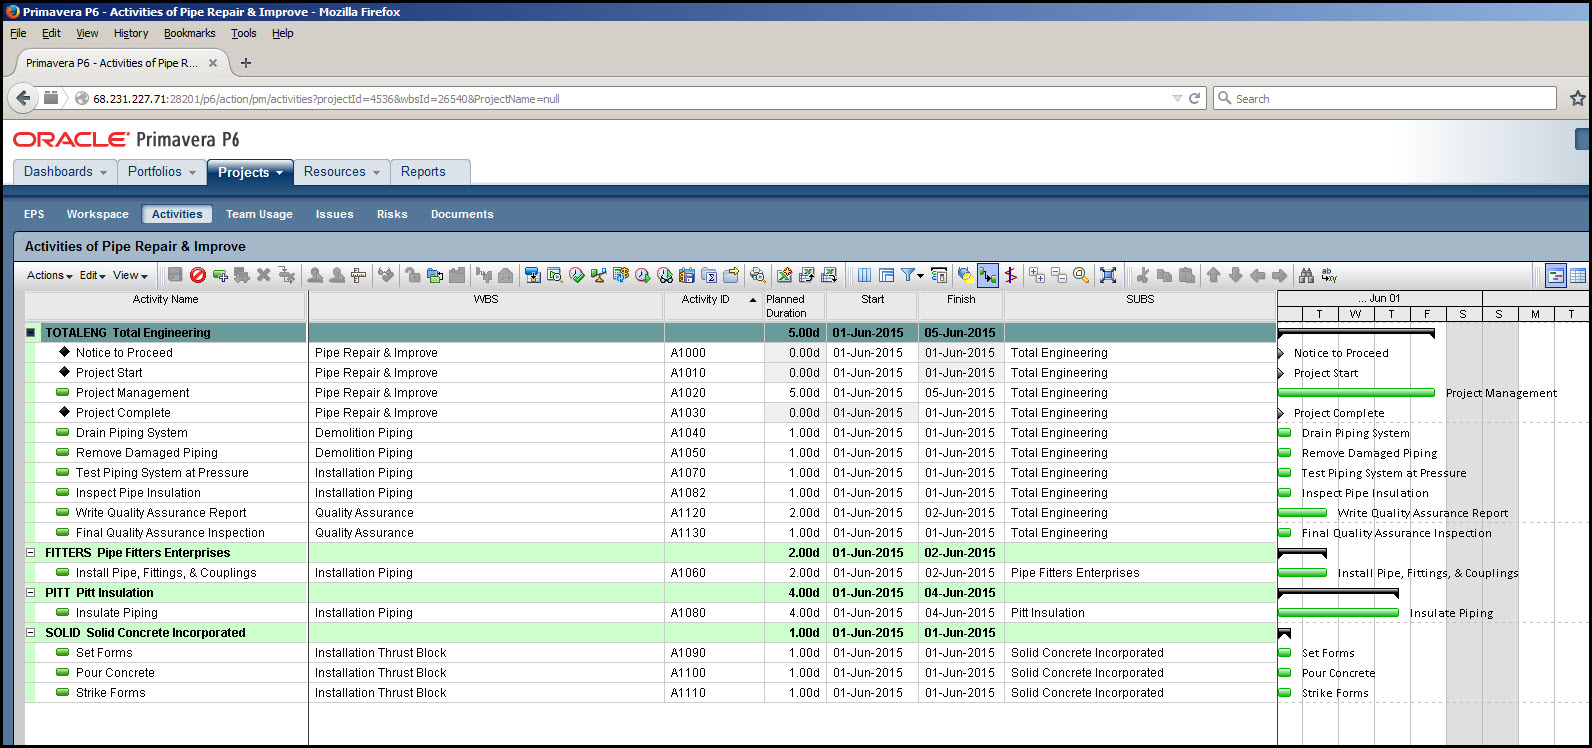
In the resulting Customize Groupings dialog we’ve selected SUBS from the drop down menu for Level 1 Field. The Pipe, Repair, & Improve project sorted alphabetically by subcontractors is as displayed in Figure 17.
Figure 17
Summary
Primavera P6 EPPM has numerous codes that you can use to sort and organize your project schedule activities. When these codes are not sufficient for your sorting needs, you can create your own codes and code values in Primavera P6 EPPM. This ability opens the door to many sorting possibilities. Once created, it is a simple matter to assign these codes to the appropriate activity. After assignment, you can use the Customize Grouping feature and your codes, as well as others, to provide reports on activities sorted and organized to your needs.