Before you begin scheduling activities in Primavera P6 Enterprise Project Portfolio Management (EPPM) Web, it is important to create a calendar that represents the default working days for project activities.
The default project calendar is used by Primavera P6 EPPM to set the working days and times for project activities. Primavera P6 EPPM is set to a default 8-hour per day, 5-day work week. You can change this default calendar to one more suitable for the contractor doing the work, such as a 10-hour per day, 4-day work week calendar.
This article describes the process of creating a default 10-hour per day, 4-day work week with holidays for your activities in a Primavera P6 EPPM project.
Creating a New Calendar
The first step in the process of setting up a calendar for your project is to create a new calendar defining your 4-day work week. Select Administer | Enterprise Data from the drop down menu on the far right side of the screen, Figure 1.

Figure 1
In the resulting Enterprise Data dialog in the Projects group select Project Calendars, Figure 2.

Figure 2

Highlight your project, in this case Project 1, and select the + icon to add a new calendar, Figure 3.
Figure 3
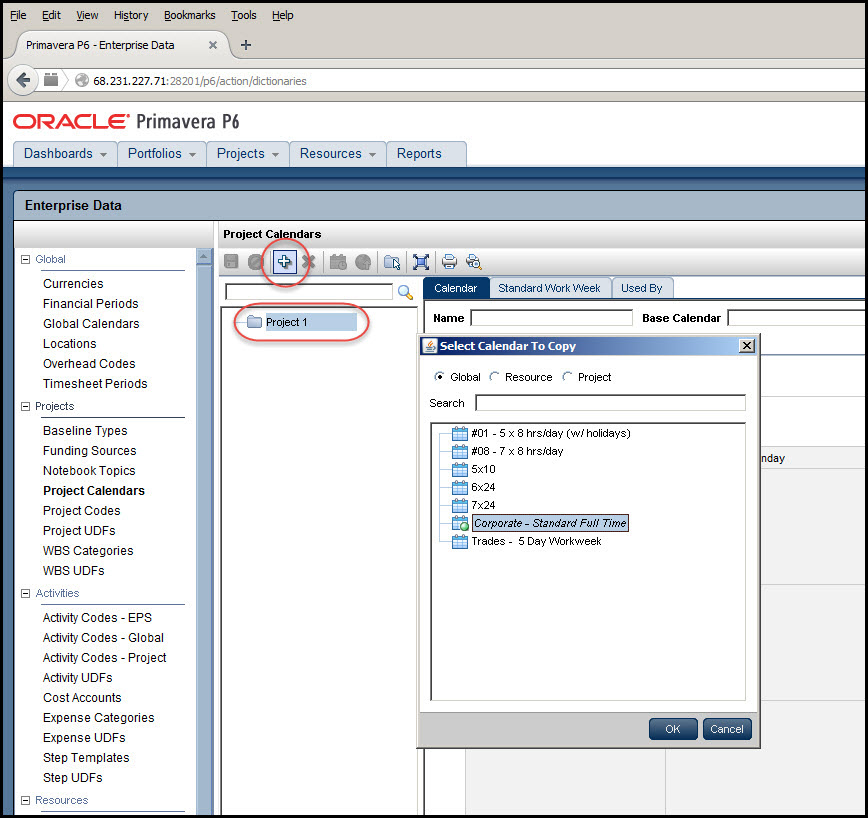
In the following ‘Select Calendar To Copy’ dialog highlight ‘Corporate – Standard Full Time’ and click OK. Type in ‘4×10’ for the name, Figure 4, and save. P6 EPPM is going to base the new calendar on an existing one, thus capturing any standard company holidays or other exception days from the copied calendar.
Figure 4

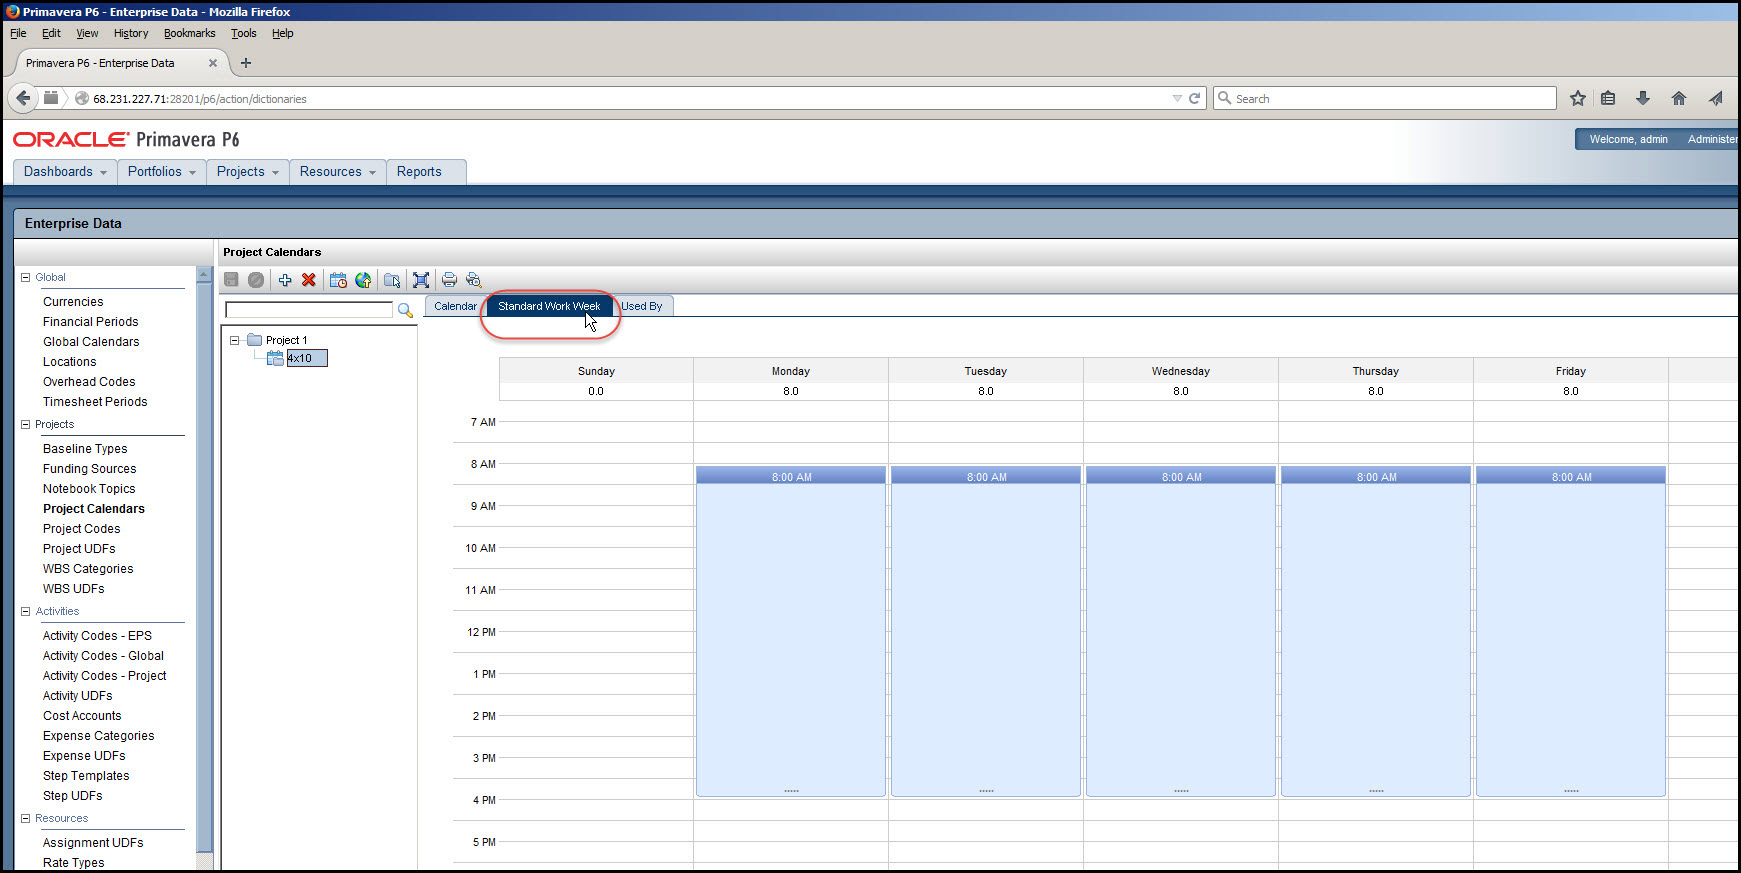
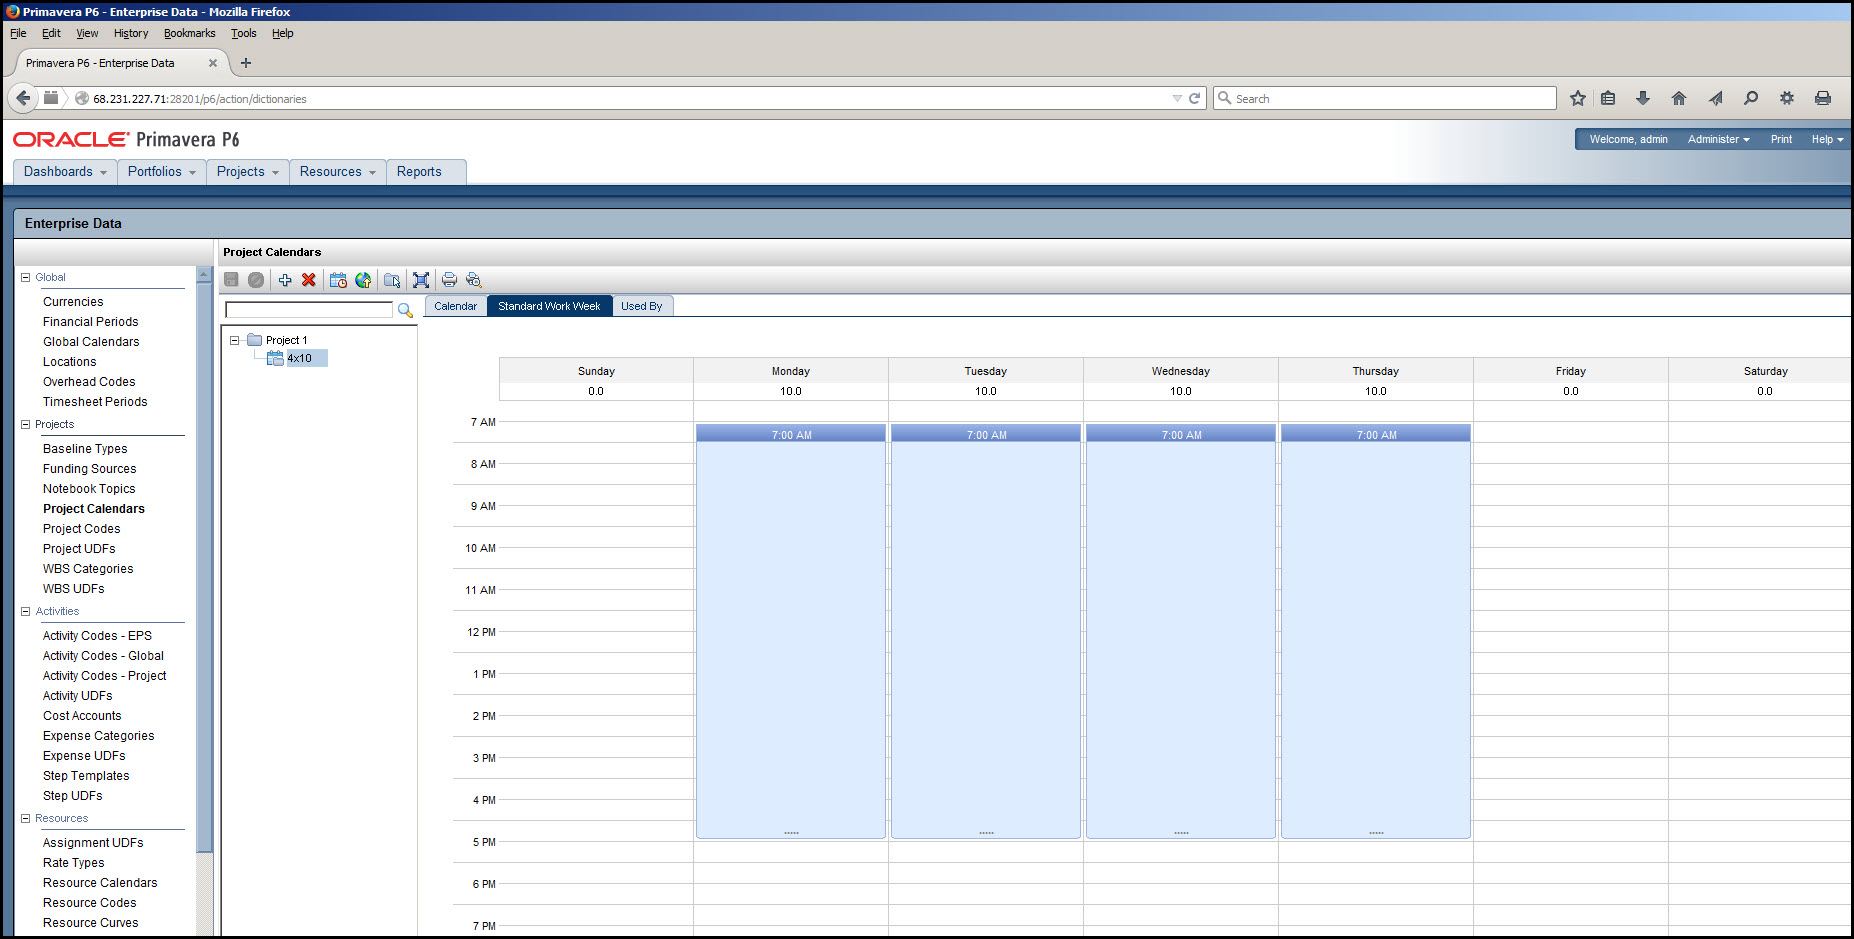
Next select the Standard Work Week tab, Figure 5.
Figure 5
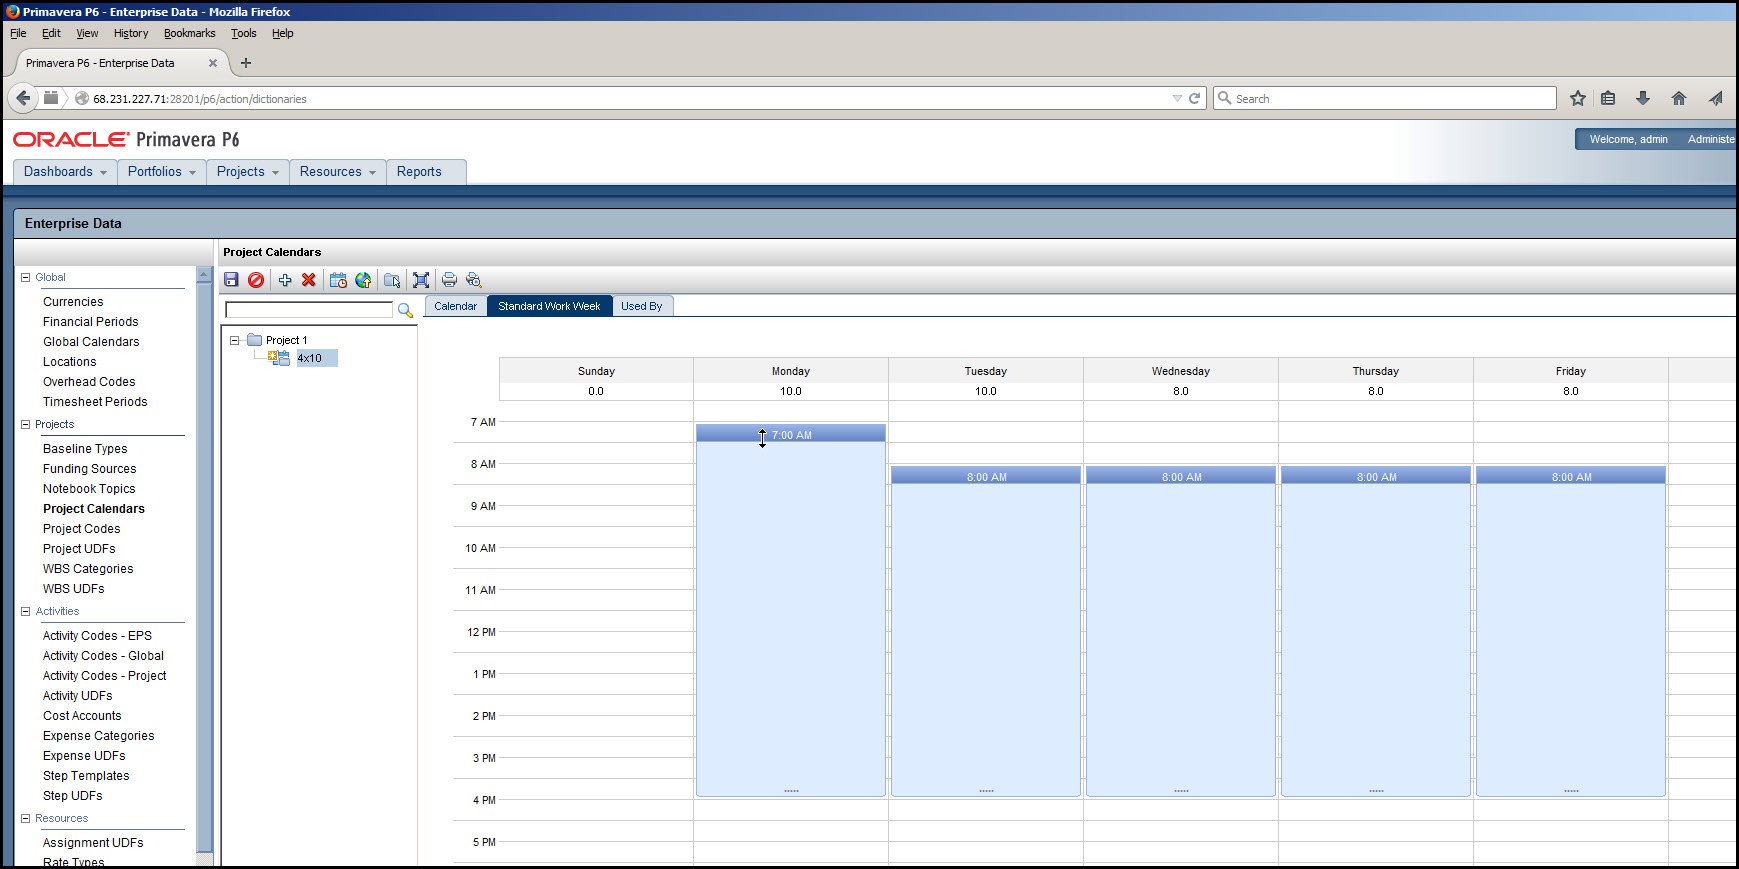
Now to change the work day from 8-hours to 10-hours left click on the edge of the morning start time and drag until the start time is 7am, Figure 6.
Figure 6
Next left click on the end time and drag until the end time is 5pm, Figure 7.
Figure 7
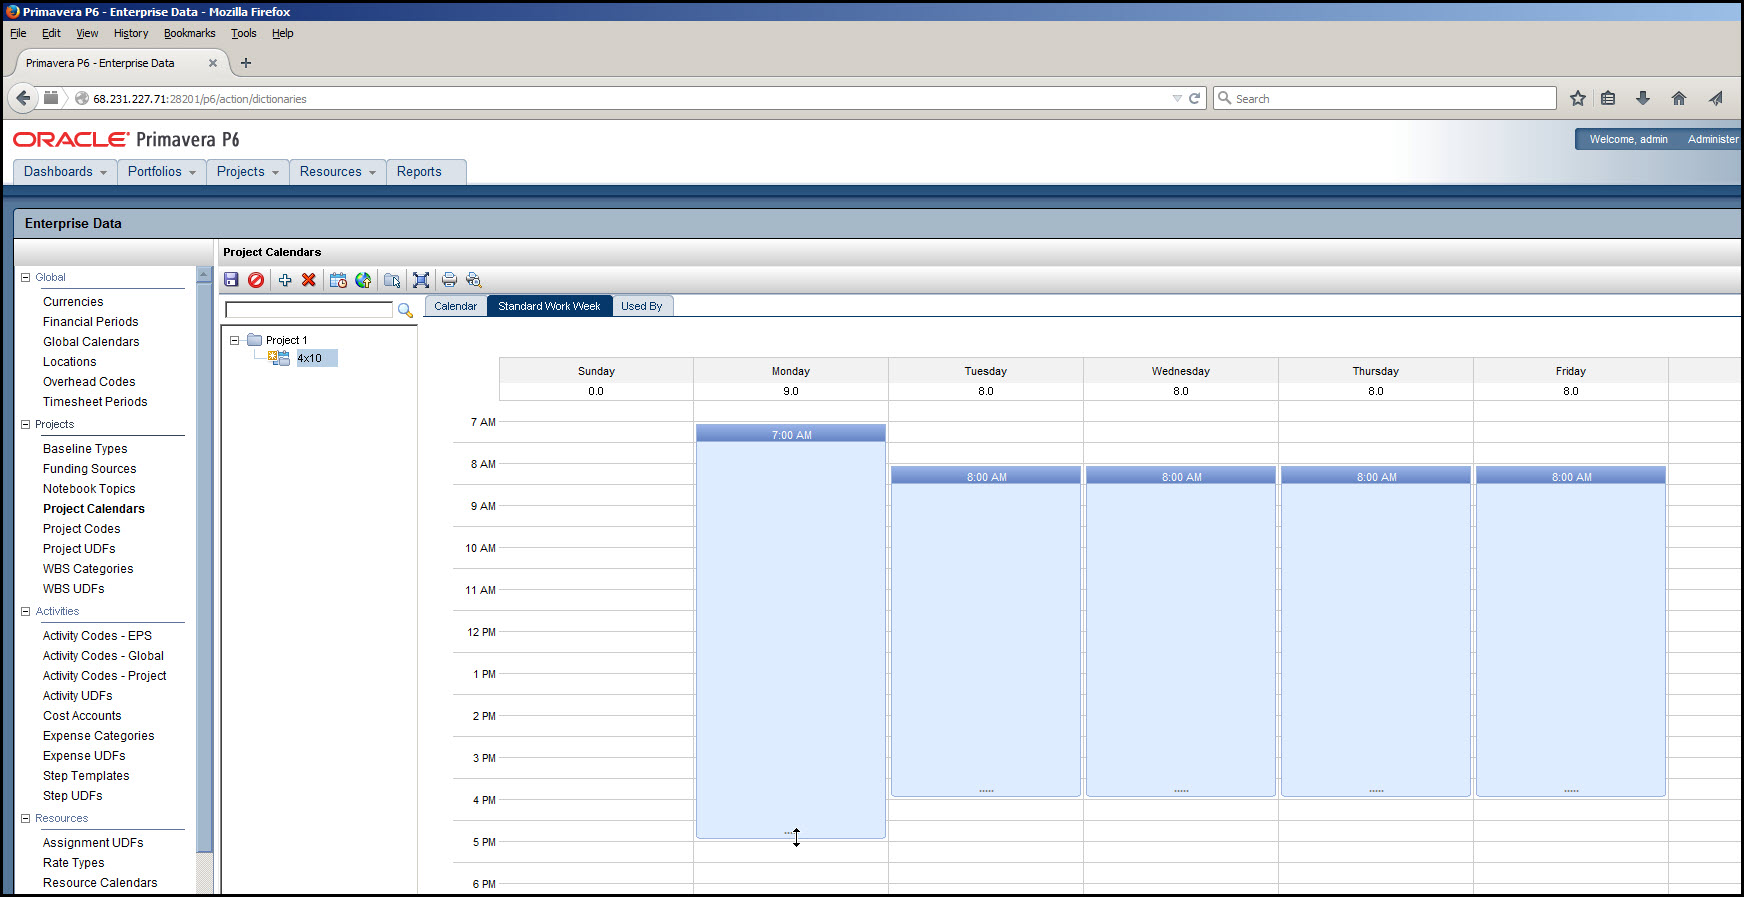
Monday is now a 10-hour day.
Another way to change the work day is to right click on the day you want to change, such as Tuesday, Figure 8.
Figure 8
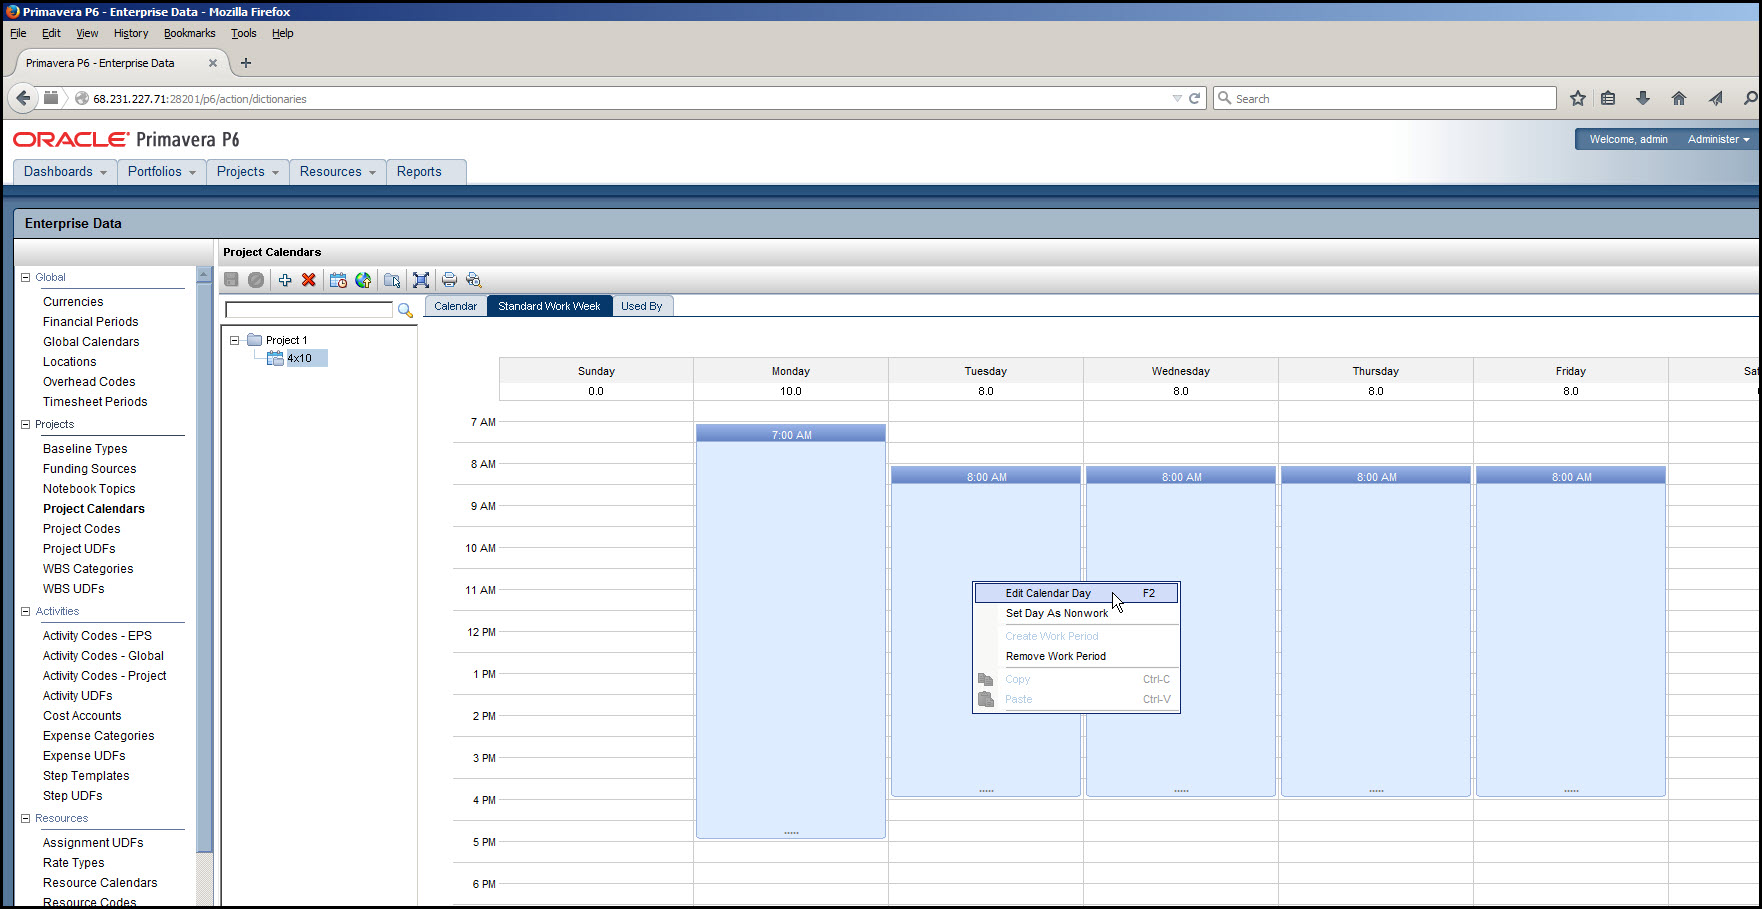
In the corresponding menu select ‘Edit Calendar Day’. In the ‘Edit Day’ dialog select the ‘Detailed work hours’ toggle and enter a start time of 7am and an end time of 5pm, Figure 9.
Figure 9
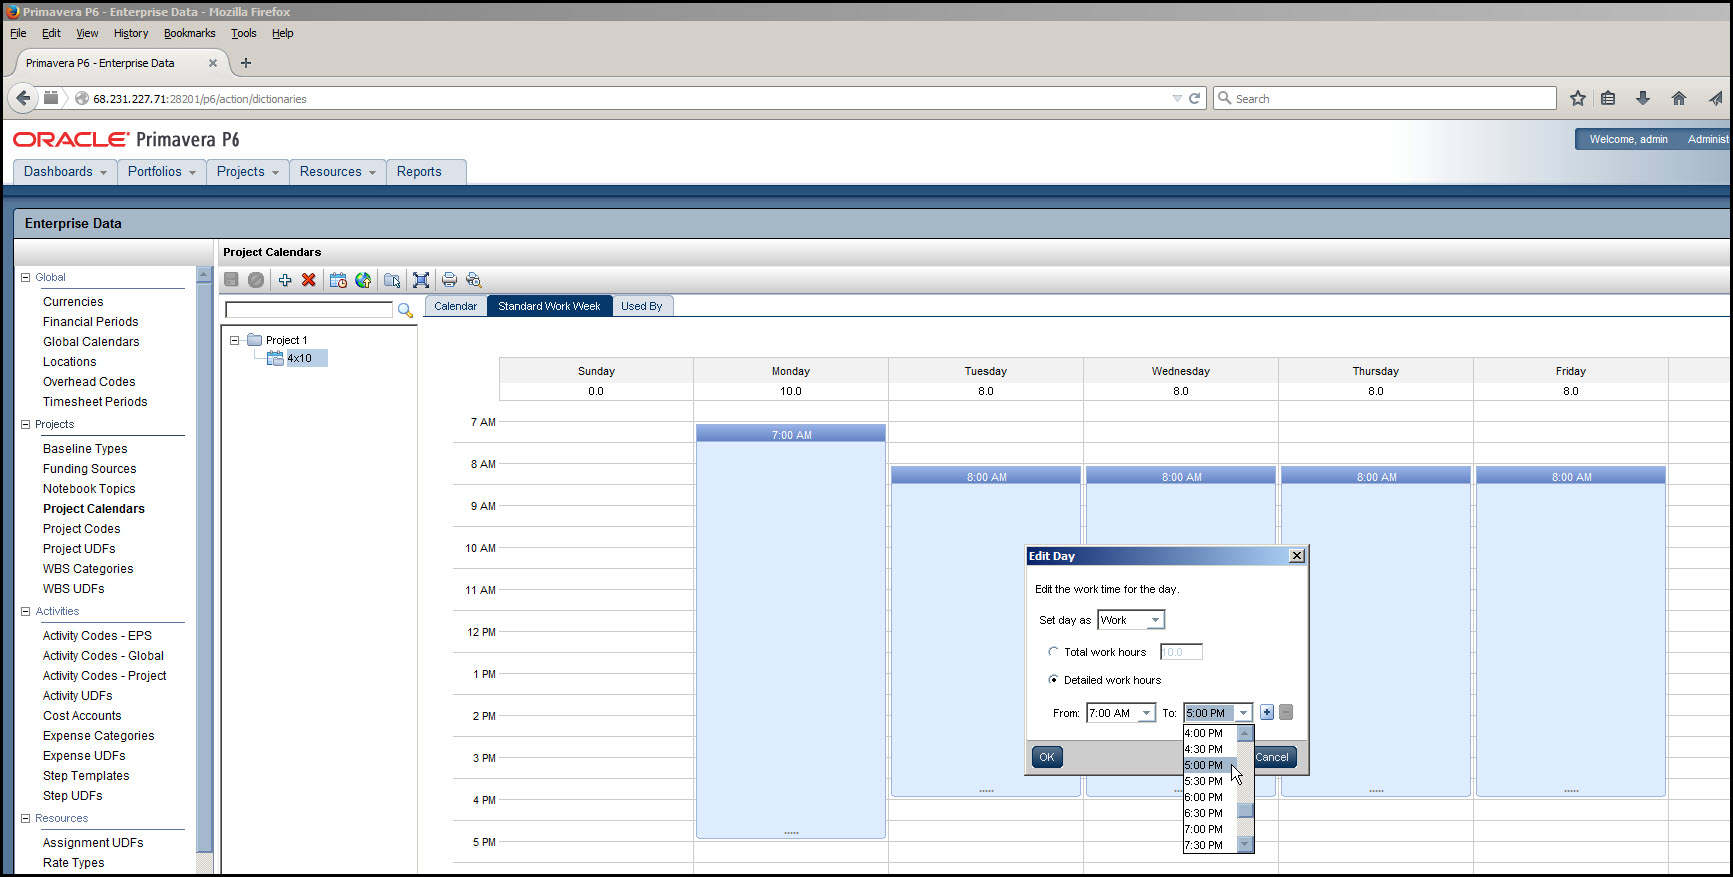
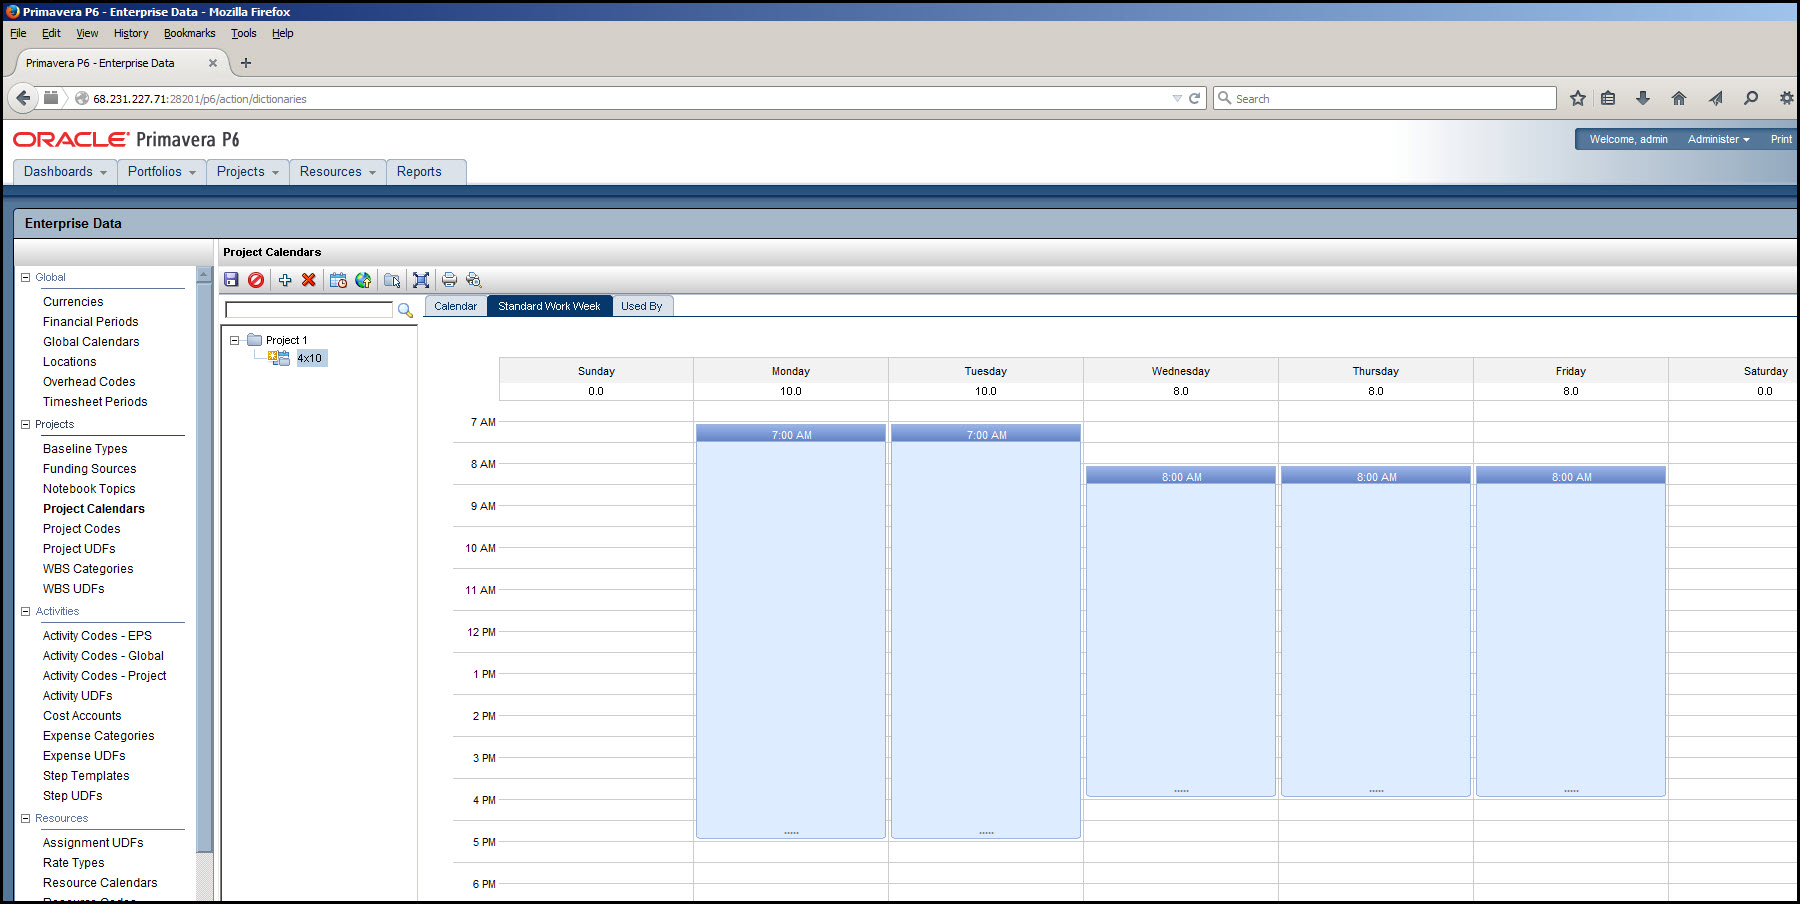
Figure 10 shows the schedule with Monday and Tuesday 10-hour work days.
Figure 10
Using your preferred approach set the work days for Wednesday and Thursday to 10-hours per day. Friday is a non-work day, so to set Friday right click on Friday, and in the following menu select ‘Set Day as Nonwork’. Another approach is to select ‘Edit Calendar Day’, and in the ‘Edit Day’ dialog that follows change ‘Set day as’ from Work to Nonwork, Figure 11.
Figure 11
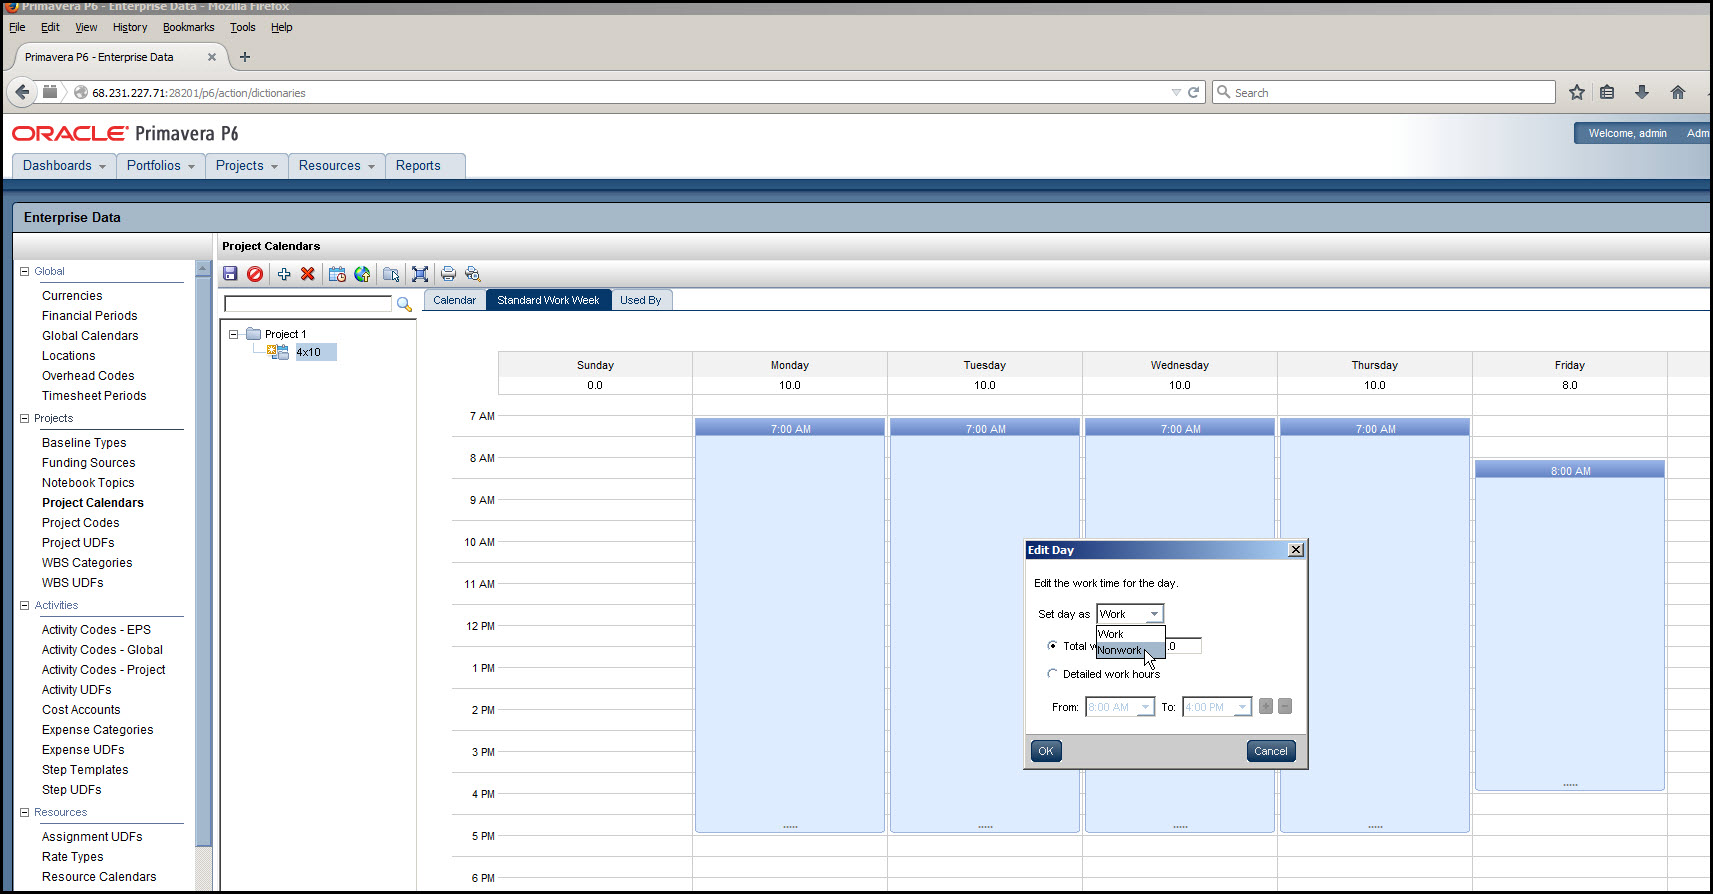
Figure 12 displays the resulting 4-day work week.
Figure 12
Holiday Exceptions
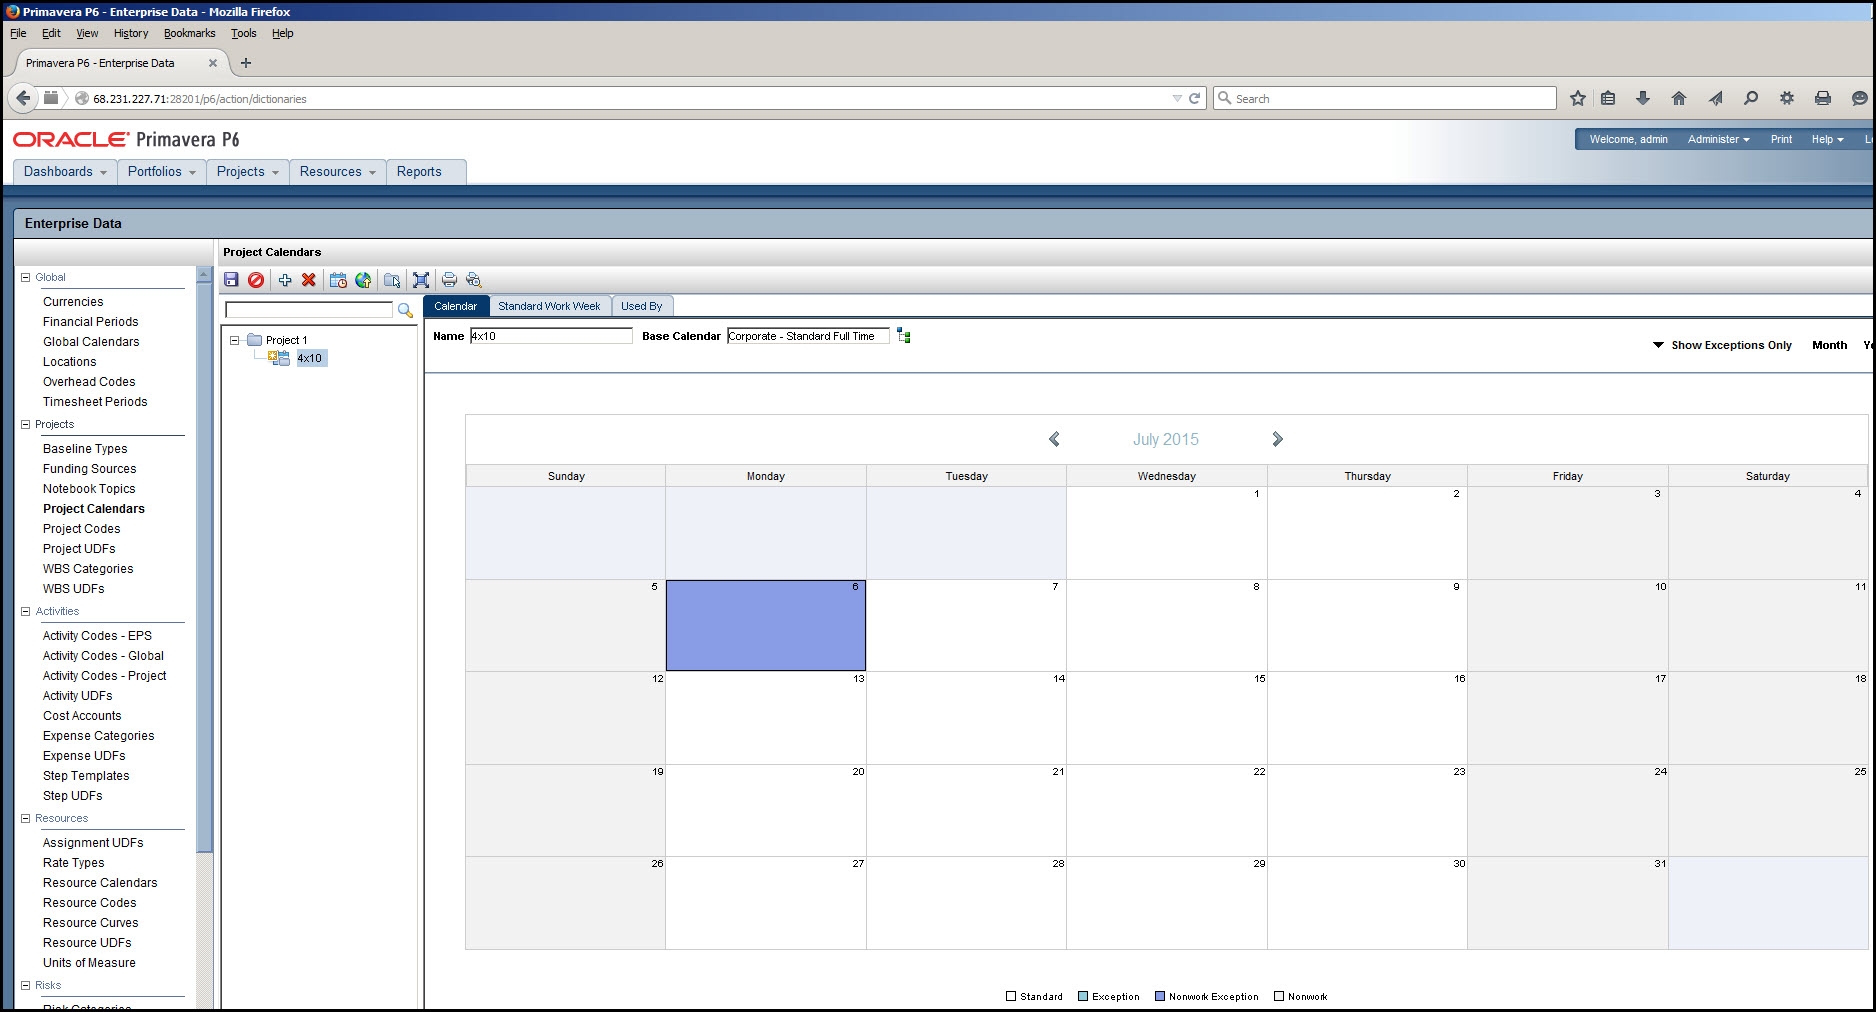
So how do we account for Holiday non-work days in our new calendar? Let’s use the July 4th Holiday as an example. July 4th, 2015 is a Saturday, so right click on Monday, July 6th. In the menu that appears select ‘Set Day as Nonwork’, and save the calendar, Figure 13.
Figure 13
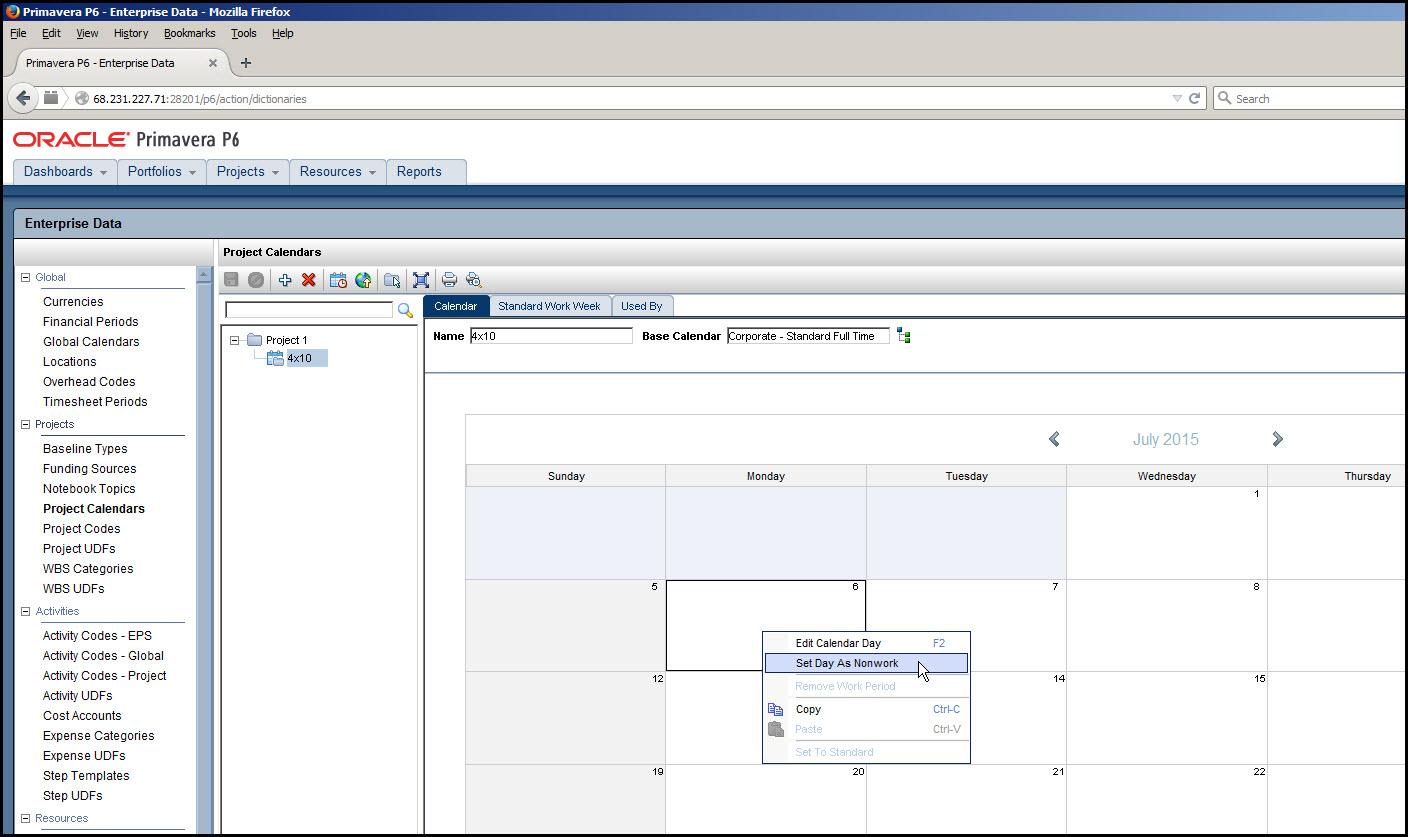
Figure 14 displays the schedule with the July 6th Holiday exception.
Figure 14
To remove a Holiday right click on the Holiday and select ‘Set to Standard’.
Another Step
Before you can declare victory you have another step to perform. Select the Set Time Periods icon, Figure 15.
Figure 15
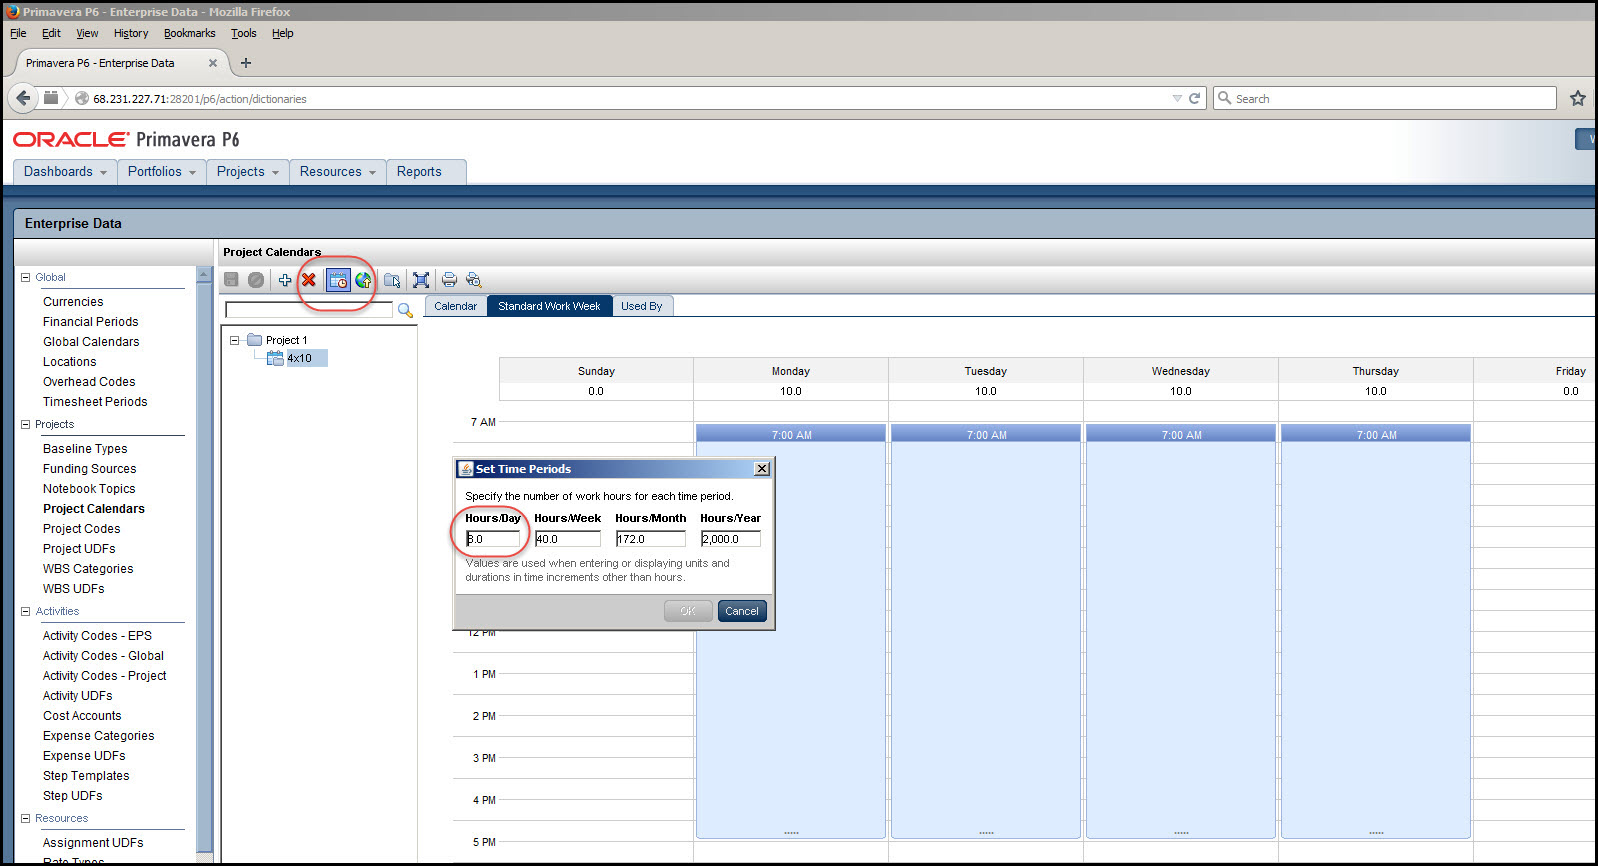
This brings up the Set Time Periods dialog, Figure 15. Make certain the Hours/Day cell is set to 10.0, Figure 16, to match your four day 10-hrs/day work week.
Figure 16
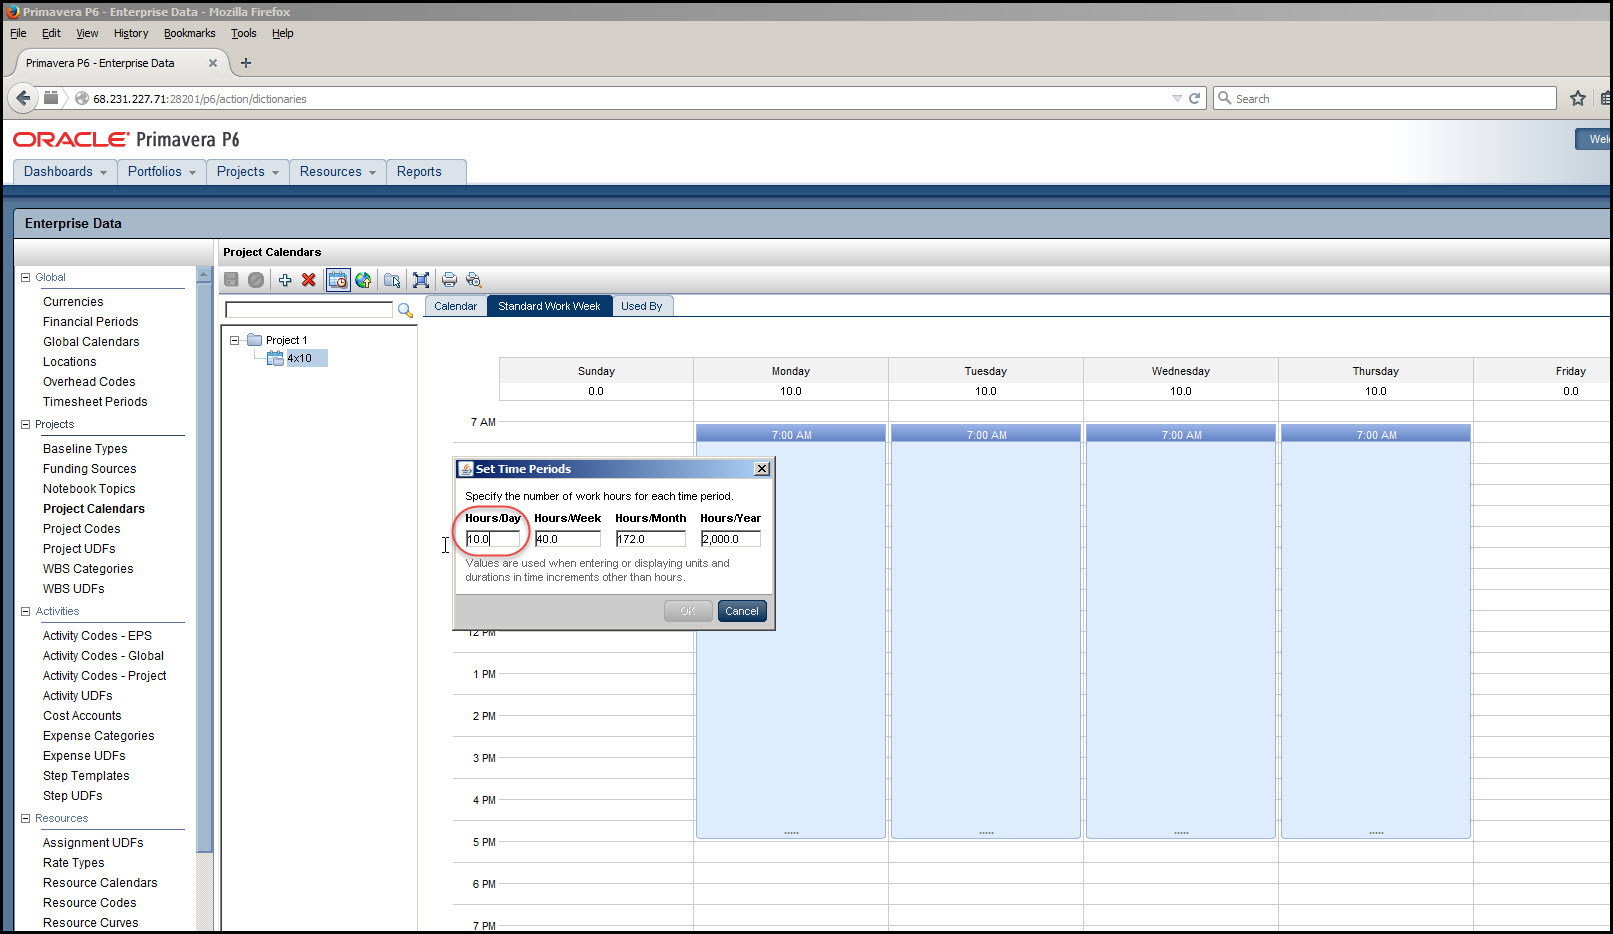
If you don’t do this and leave the time period Hours/Day as 8-hrs/day then Primavera P6 will consider each eight hour period of your 10-hour day as one day for the Original Duration computation. So a one day duration activity on the Gantt chart corresponds to an Original Duration of 1.25-days. A 4-day duration activity on the Gantt chart is reflected as a 5-day Original Duration activity.
Again, set the Hours/Day cell in ‘Set Time Periods’ dialog to 10.0 Hours/Day, Figure 16. Note be sure to hit tab after entering the Hours/Day to activate the Ok button, and, of course, select OK.
Set Default Calendar
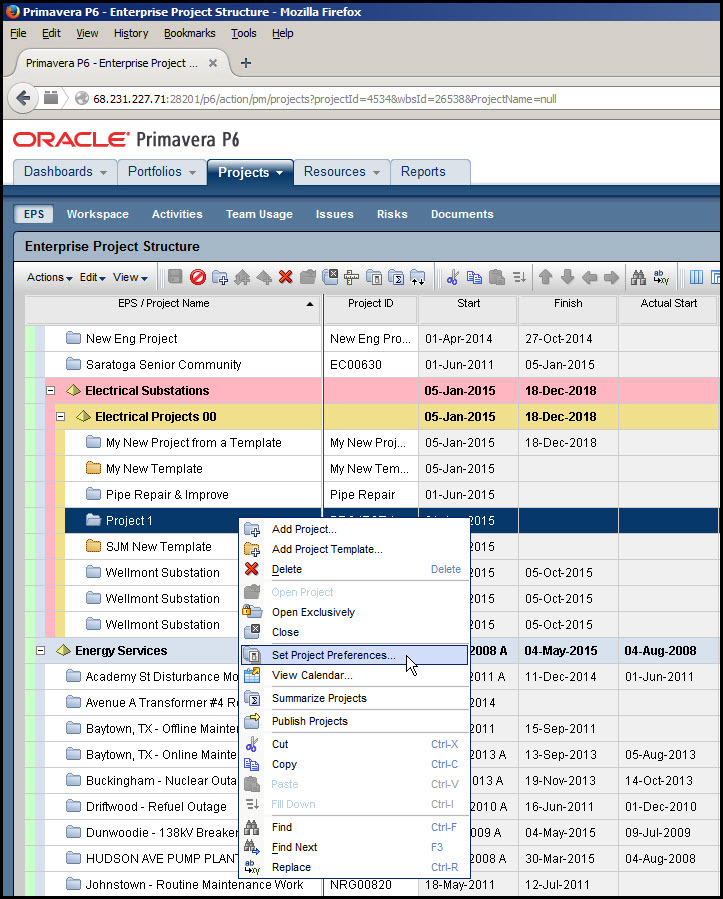
Now your calendar is ready for prime-time. The last step in the setup process is to set your newly created 4×10 work week calendar as the project default calendar. Select the Projects tab and the EPS view (use the EPS button to see the projects). Right click on your project and select ‘Set Project Preferences’, Figure 17.
Figure 17
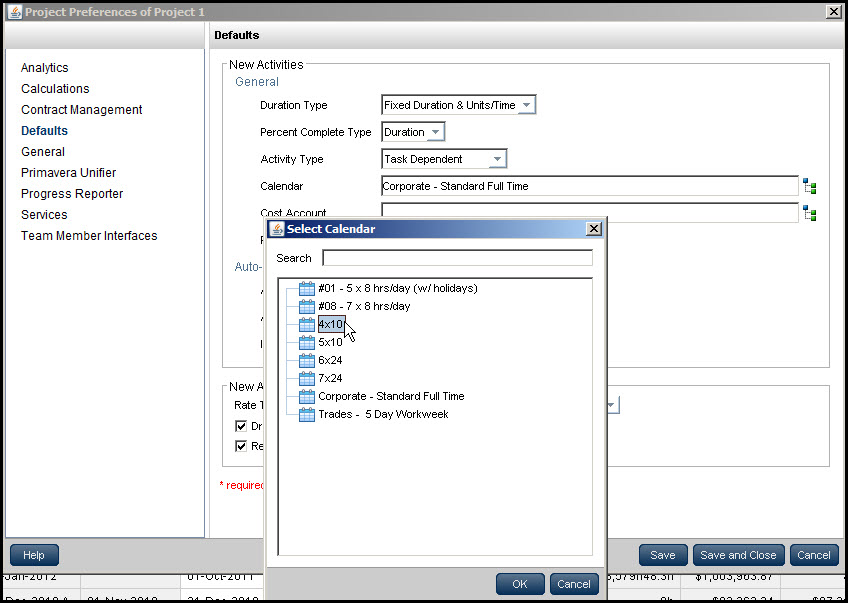
In the Project Preferences dialog that follows, select Defaults and then the Calendar field’s button, Figure 18.
Figure 18

In the corresponding ‘Select Calendar’ dialog, Figure 19, select the 4×10 calendar as the default.
Figure 19
Summary
Primavera P6 EPPM defaults to an 8-hour per day, 5-day work week, but a 10-hour per day, 4-day work week (or whatever you might need) can be easily defined and then assigned as the default calendar.
Holidays can be defined by making them nonwork days for a specific date by right-clicking and choosing ‘Set Day as Nonwork’. Just make certain the Hours/Day in your Set Time Periods dialog match your 10-hour day schedule and everything will work well.
Don’t forget that last step, if you do you may get strange results with duration entries and resource assignments.