It is not untypically that at the beginning of your project you contemplate the activities that will become your schedule. But before you start creating a schedule around these activities you should first consider what the major deliverables of your project are. Further, you should decompose these deliverables into components to create what is known as a Work Breakdown Structure (WBS).
The first step in scheduling a project is to use the WBS to decompose the project into its major deliverables, i.e. major product or service components. After the creation of the WBS you can then think about the activities required to make those component deliverables. One of the many benefits in creating the WBS first, is to ensure your project is product and customer focused.
This article discusses the WBS, and demonstrates how to create a simple WBS in Primavera P6 Enterprise Project Portfolio Management (EPPM).
Top Down Approach
Unlike some desktop scheduling programs that are somewhat of a bottom up approach, Primavera P6 has you create a WBS at the beginning of the project. This is known as a top down approach. Primavera P6 EPPM recognizes the importance of the project management team keeping their “eye on the ball” throughout the project life cycle. This means that you maintain a focus on the end product or service, which is the whole purpose of the project.
The WBS helps you maintain this focus on the product. At its heart the WBS is a deliverable-oriented decomposition of the project into smaller components. So the WBS focuses on the deliverables, and it is simply a breakdown of all the components making up the product in an organized fashion. Primavera P6 has you create the WBS first, so that the activities on the project schedule flow from the WBS in a top down method, and not the other way around.
Example WBS
Before creating a WBS in Primavera P6 EPPM, let’s take a look at a diagram of our example WBS. Figure 1 displays an example WBS for an Underground Piping Repair and Improvement project.
 Figure 1

As you can see in Figure 1, the Underground Piping Repair and Improvement project is broken down in an orderly fashion into smaller components. The ideal WBS breaks down the deliverables into bite sized chunks suitable for the application of the corresponding work activities. For the simplicity of illustration our example WBS only goes down to level three. However, it is not uncommon for the WBS to go down to further levels.
Creating a WBS in Primavera P6 EPPM
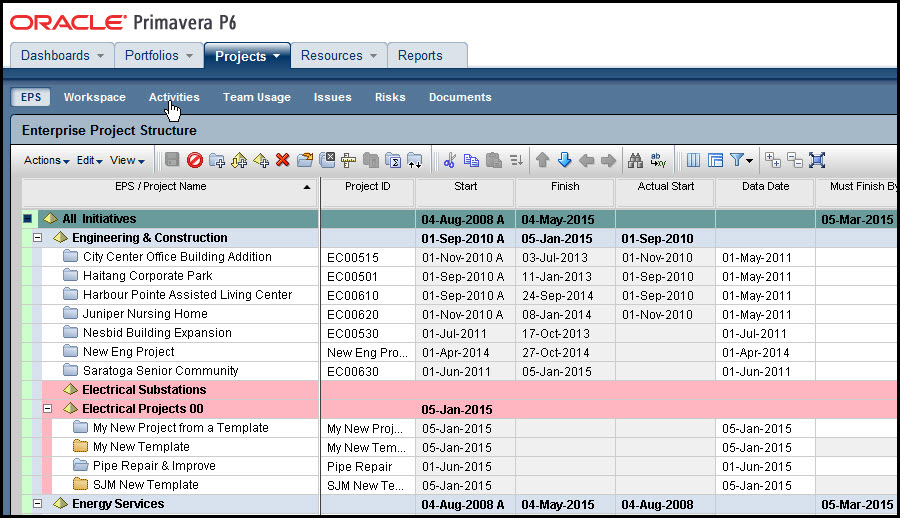
To create a WBS in Primavera P6 EPPM having created a shell project named ‘Pipe Repair & Improve’, click on the Activities button on the Project navigation bar, Figure 2.
Figure 2
This may bring up the following prompt, Figure 3.
Figure 3
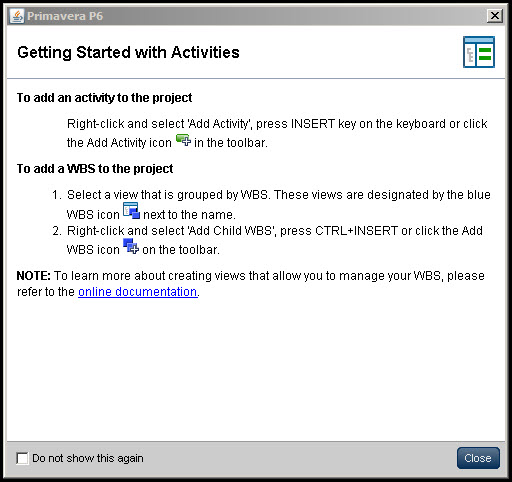
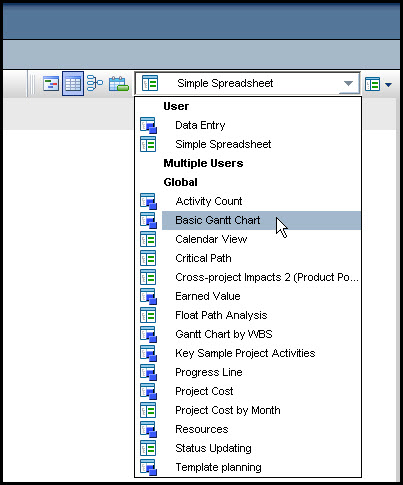
Select close to continue on the Activities page. Click on the Activities view drop down menu on the right hand side and choose the Basic Gantt chart option, Figure 4.
Figure 4
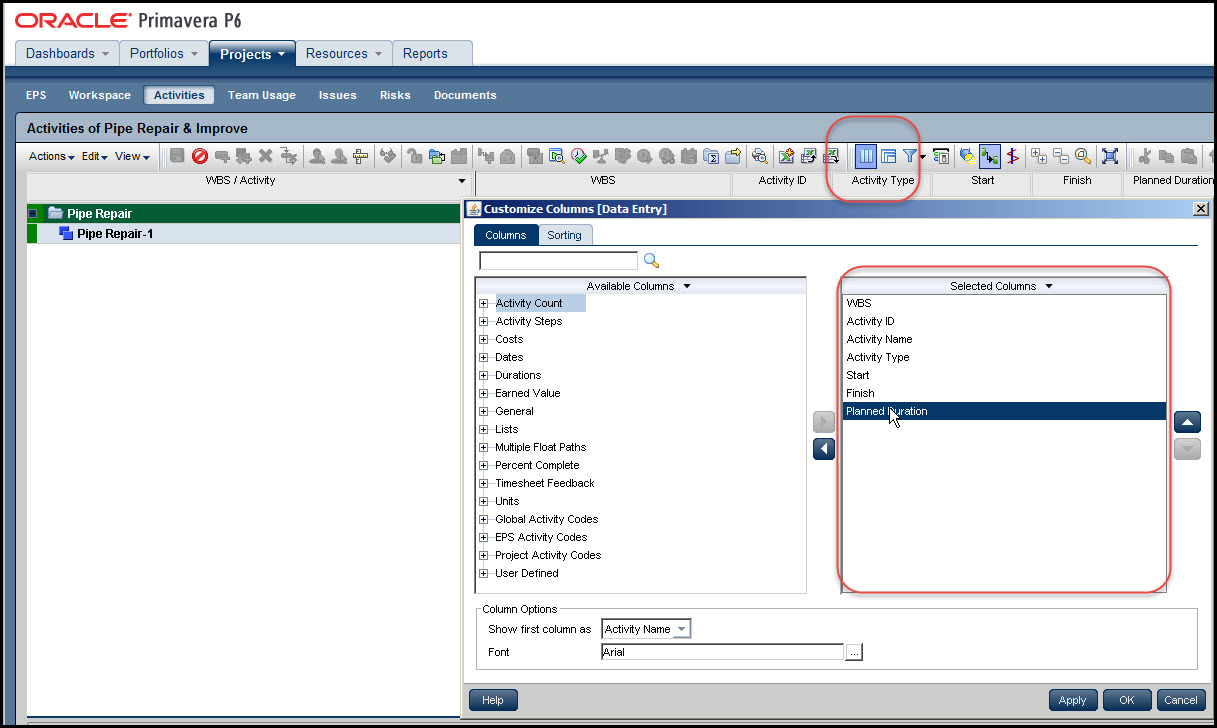
Click on the columns button, Figure 5, and add and/or remove columns until the dialog appears as in Figure 5.
Figure 5
Select OK to apply and close the dialog. Next select the customize groupings button, Figure 6.
Figure 6
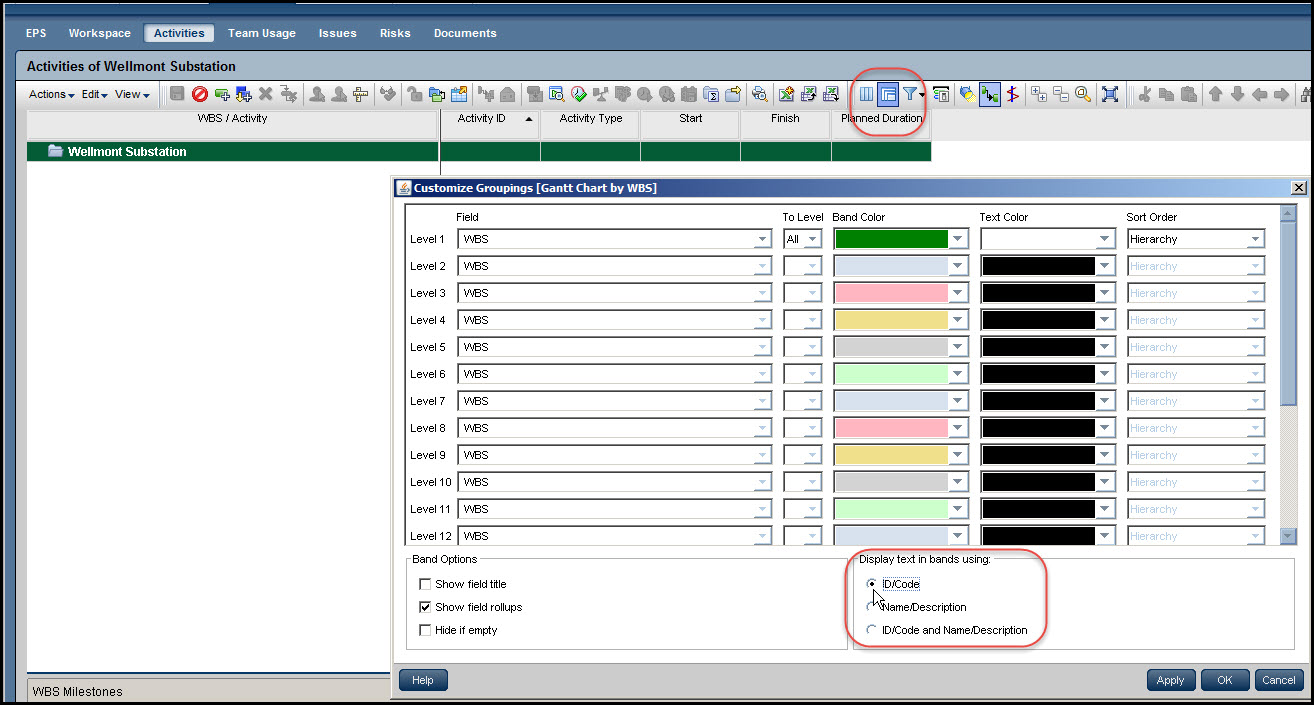
In the Customize Groupings dialog verify that the Level 1 field is set to WBS. Next toggle on the ID/Code radio button in the lower right corner of the screen in the ‘Display text in bands using:’ box. Click OK to save and exit. Finally, save a copy of the view layout by selecting ‘Save View As’, Figure 7, and typing Data Entry in the resulting dialog.
Figure 7

Select and right-click on Pipe Repair & Improve WBS element and then choose ‘Add Child WBS’, Figure 8.
Figure 8

Select the General tab at the bottom of the page and type in Project Management in the WBS Name dialog box, Figure 9.
Figure 9

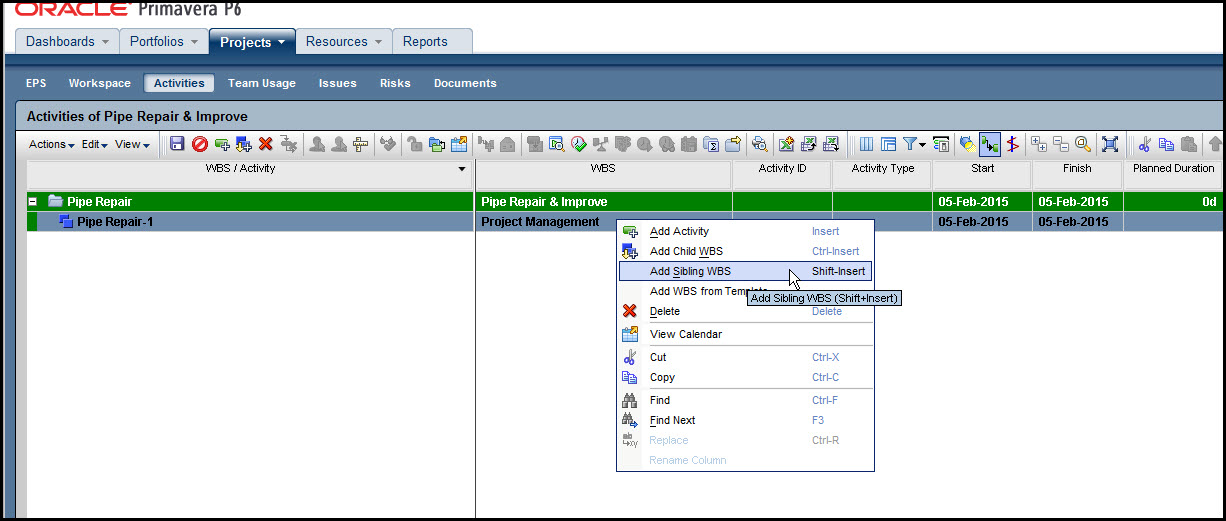
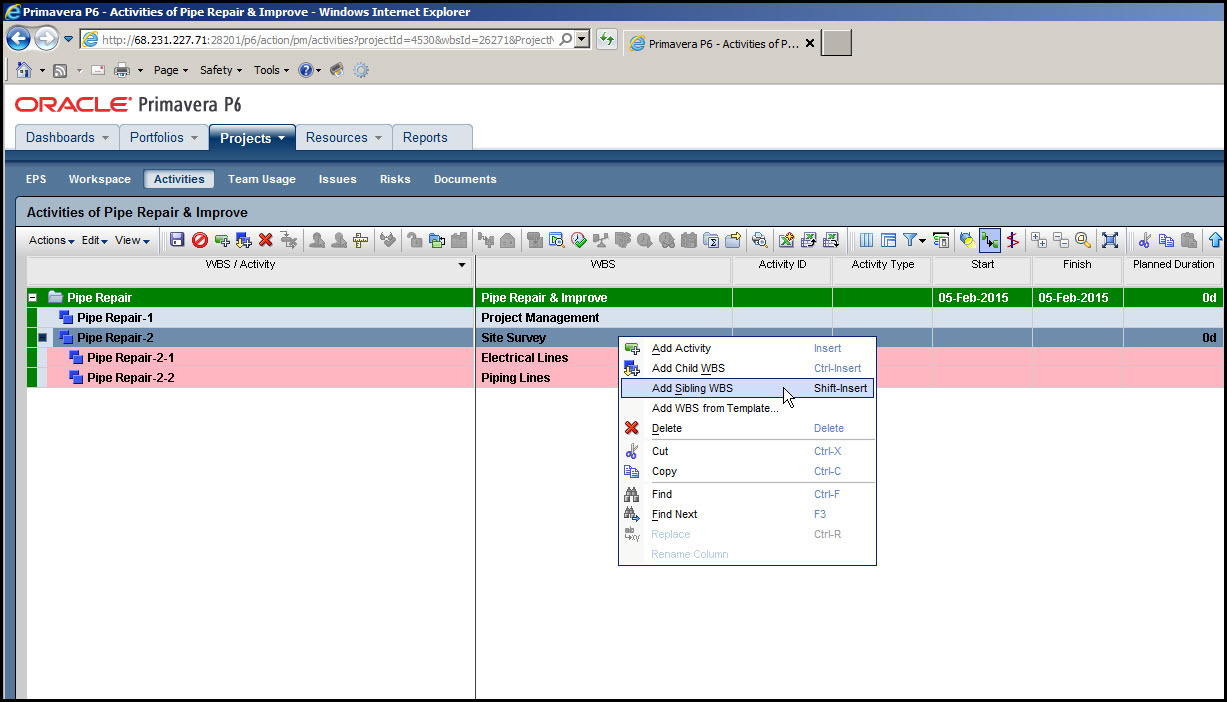
Next highlight and right-click on Project Management and select ‘Add Sibling WBS’, Figure 10.
Figure 10
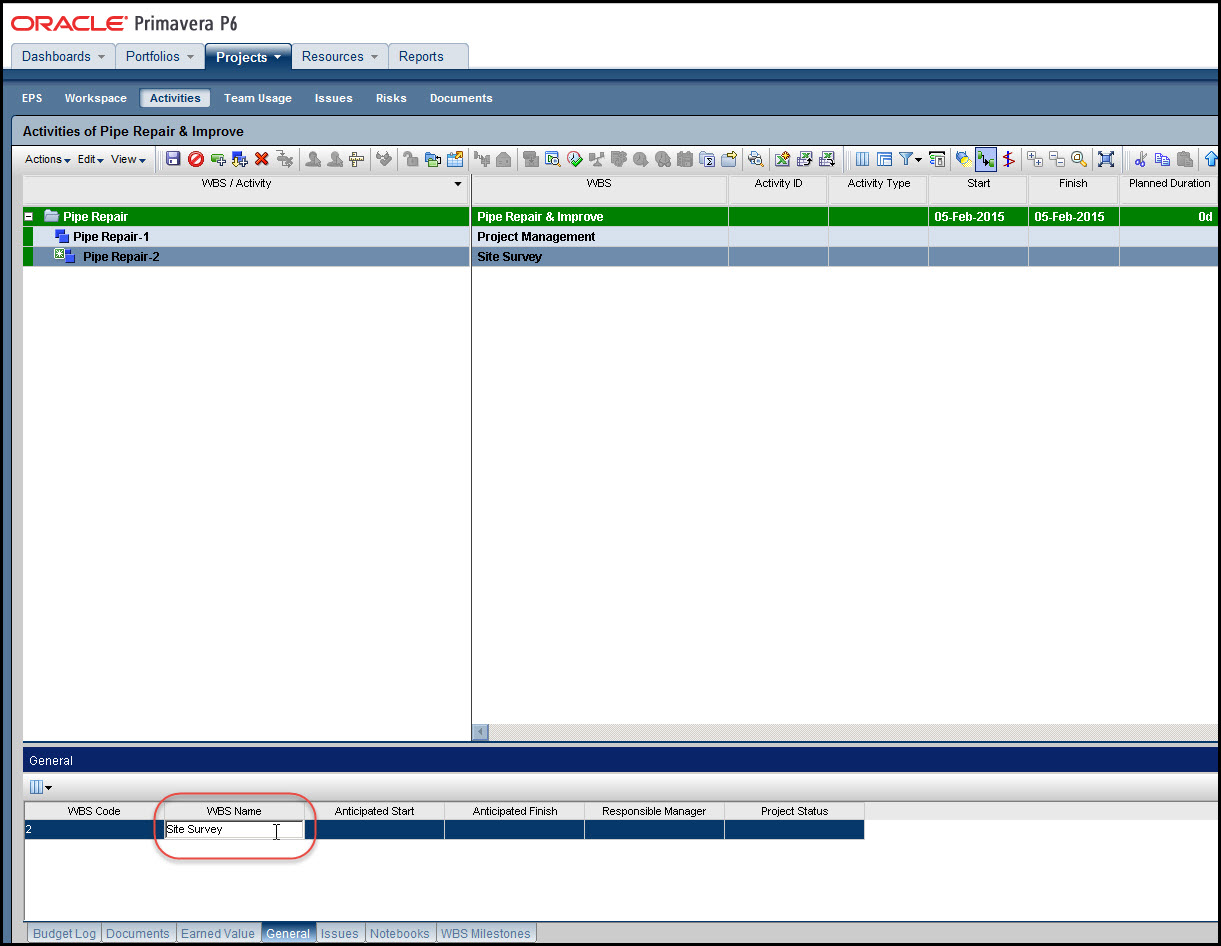
Type in Site Survey in the bottom WBS Name dialog box, Figure 11.
Figure 11
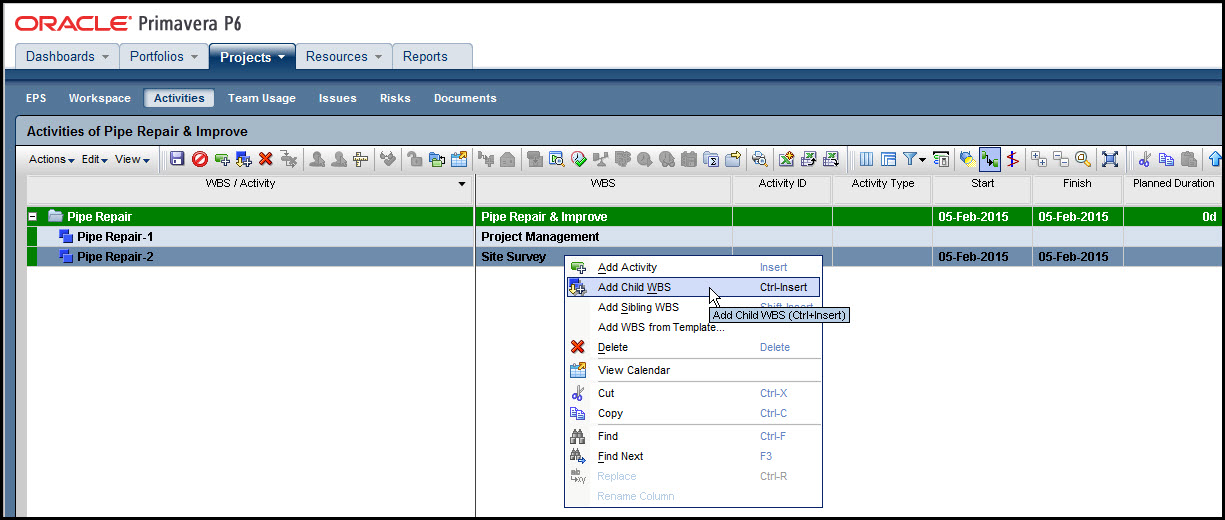
Site Survey has two children, so to enter these first right-click on the Site Survey WBS element and select ‘Add Child WBS’, Figure 12.
Figure 12
Second, type in Electrical Lines in the Name dialog box. Third, right-click on Electrical Lines and select ‘Add Sibling WBS’, Figure 13.
Figure 13

Fourth, type in Piping Lines in the below Name dialog box.
Now to add the Safety Plan WBS elements highlight and right-click on Site Survey and select ‘Add Sibling WBS’, Figure 14.
Figure 14
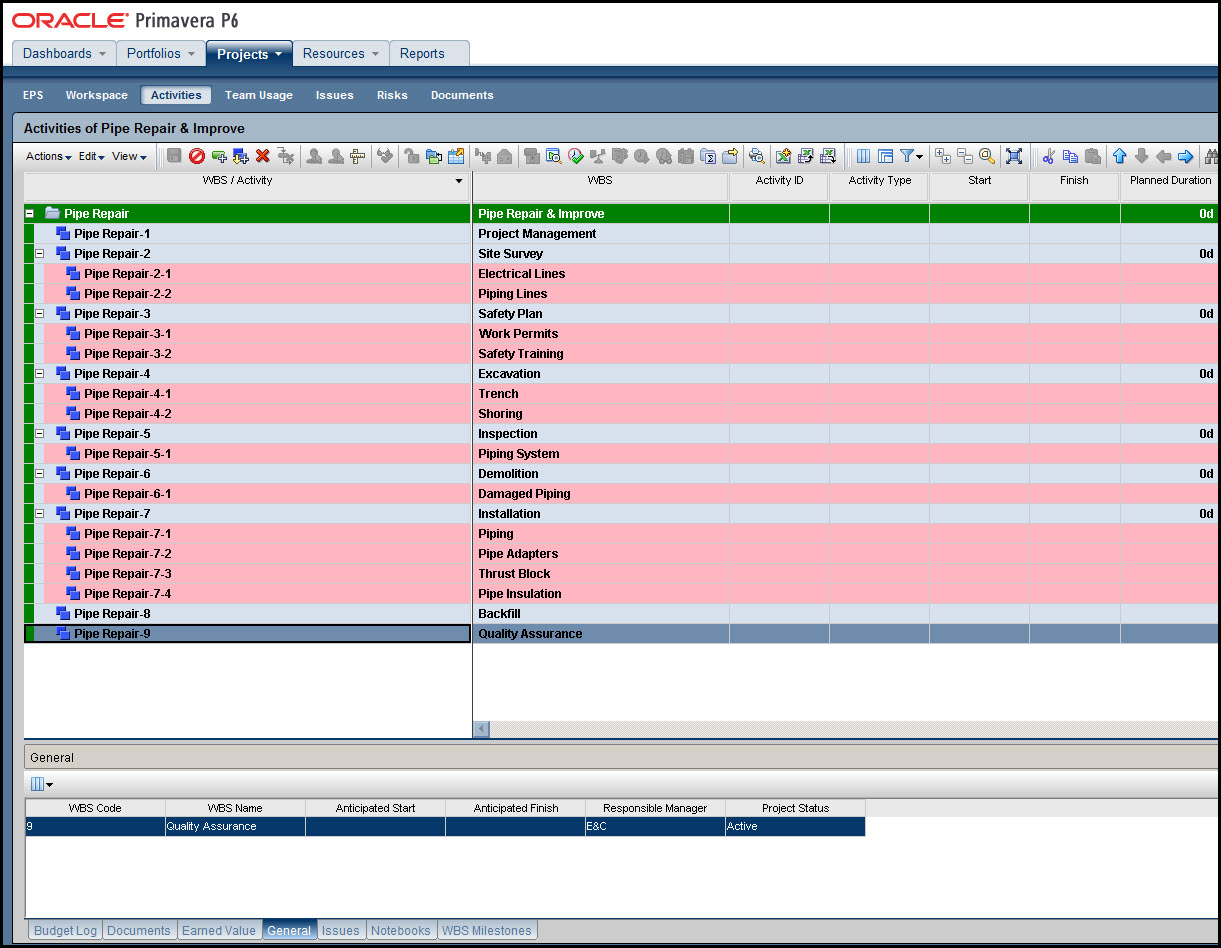
Continue to shift between ‘Add Child WBS’ and ‘Add Sibling WBS’ as appropriate to completely enter the Pipe Repair & Improve WBS displayed in Figure 1. Be sure to save the WBS regularly. The WBS requires saving after each WBS element entry. You can, of course, delay saving the WBS, but then you might lose your work should the intranet connection go down. After completely entering WBS elements to emulate the WBS diagram in Figure 1, your WBS should look similar to Figure 15.
Figure 15
Summary
The concept of a WBS may be confusing at first. Focus on breaking the deliverables down into component product elements that are small enough such that work activities can be clearly defined and assigned to these elements.
The WBS elements are not activities, but they help define the activities necessary to create the WBS elements. Once the deliverable WBS is sketched out it is a straight forward process to input the WBS into a shell Primavera P6 EPPM project. Shift between ‘Add Child WBS’ and ‘Add Sibling WBS’ insert commands to add WBS elements at the appropriate level.