For all those who are Microsoft Project 2007 experts switching to the 2010 or 2013 version, here’s another blog in the ‘where the heck did that go?’ series.
In this article we’ll take a look at how to find that rather useful Project Summary Task option in the ribbon area of the 2010 version.
In a nutshell…
Go to the Format tab (1) and click the Project Summary Task (2) option over on the right of the ribbon.
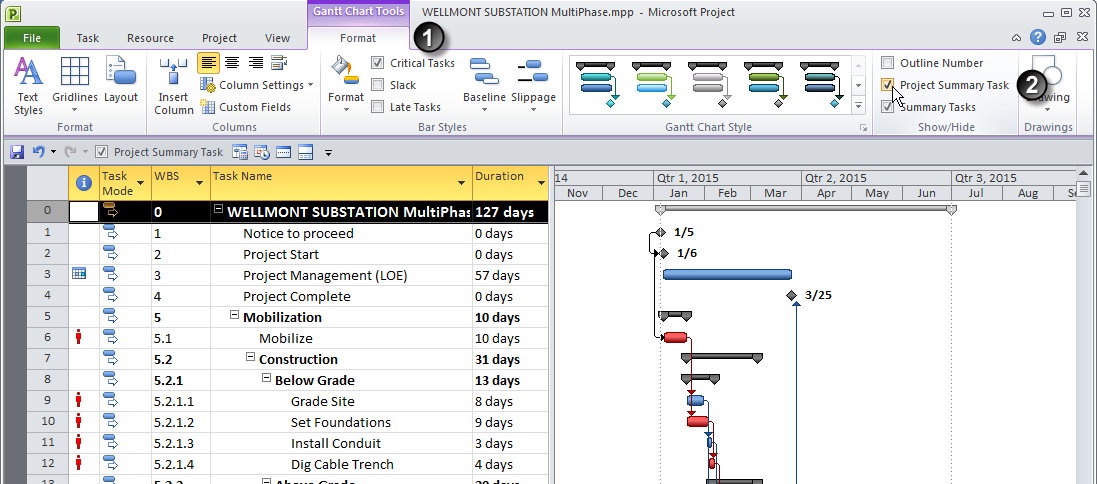
The Project Summary Task can be a most useful feature when your project has multiple root-level WBS summary elements; giving you a convenient top-level view of the overall project. Best practice scheduling guidelines generally advise that the WBS have a single top-level root, which we should aspire to achieving using the Indent command. However, when needs dictate otherwise, this ability to toggle an additional top-level summary on and off can be a very helpful tool.
Although the ribbons have caused a little heartburn for those first switching over to the newer office tools, generally speaking they are a considerable improvement and do give the user faster access to common functions. They just take some getting used to.
Quick Access Toolbar
For items that do seem to be continually illusive, there’s always the customizable Quick Access Toolbar.
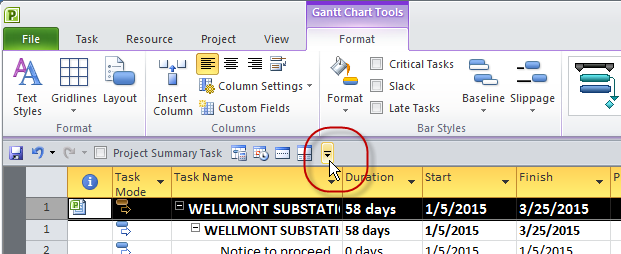
This allows you to add tools that you frequently use to a bar located above the table area. The arrow button on this bar (shown above) allows for easy customization of the Quick Access Toolbar.
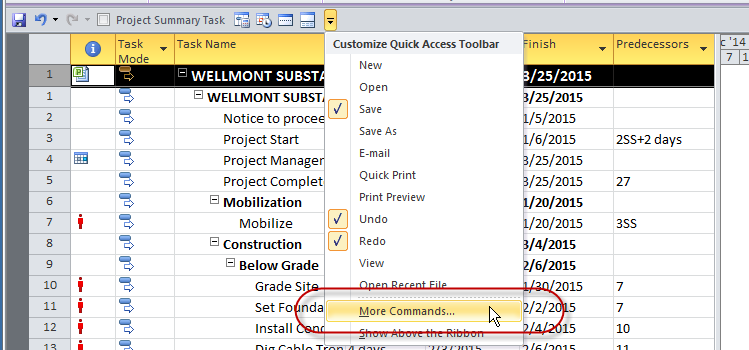
By clicking on the arrow button, you can choose the More Commands… option. You can then select from an alphabetical list of all the functions in the system by using the Add >> button in the Quick Access Toolbar dialog. This will save you a little time digging around for the commands you want in the ribbons.

The ribbon toolbar that Microsoft introduced took a little getting used to, both in Microsoft Project as well as the rest of the Office suite. Many folks find things a lot easier with it and now you may do as well, especially knowing where the Project Summary Task option is.