With the advent of Microsoft Project 2010, a new capability was introduced that allows you to select whether or not a particular task will be calculated as part of the critical path.
This article looks at how to use the Manual and Automatic Scheduling modes for tasks and what impact this can have on your critical path.
Out of the box, new tasks created in Microsoft Project are set with the Manually Scheduled attribute. In the Task Mode column, you will see a push-pin icon assigned to the task row indicating that it is a manually scheduled task. Manually Scheduled tasks appear in the Gantt chart as a faint bar and only appear after you enter a ‘Duration’ value. Prior to that, there is no bar displayed. You will also note in the following screen shot, that the Start and Finish date columns have no values.
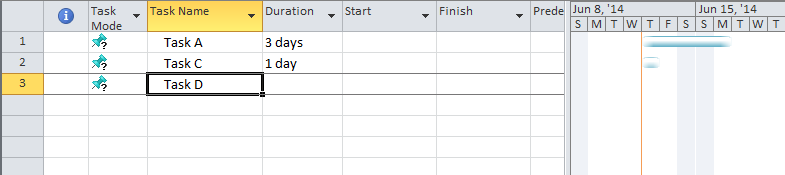
Other interesting feature about Manually Scheduled tasks is that you can enter text values into the Duration, Start and Finish fields. Microsoft Project basically ignores these fields so you can use them to make rough notes about durations, start and finish dates without committing anything to the scheduling engine.
You will also find that you can assign resources, links, constraints, project and resource calendars to Manually Scheduled tasks, but these will also be ignored by project and won’t affect schedule calculations.

So what’s all this for? Early stage planning is one good example. When the project is in the conceptual stage and the details are far from clear, then these Manually Scheduled tasks can be used as a placeholder. We know some work is going to happen, but as yet don’t know the duration, who will be doing it or when it’s supposed to start.
Understand that at any time you can switch a Manually Scheduled task to an Automatically Scheduled task and back again. So you’re not boxed in by starting some sections of the plan using these types of activity. To do this, simply click on the Task Mode column field and choose the mode you want from the pick list.

They can also be used in a more permanent way to mark out events in the Gantt chart that are important but that are not part of the critical path.
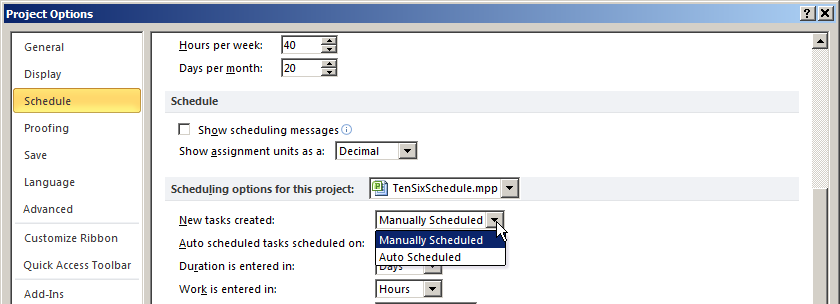
You can change the Manual or Auto Schedule default for new tasks using the Schedule settings in the File tab’s Options dialog.
Critical Path
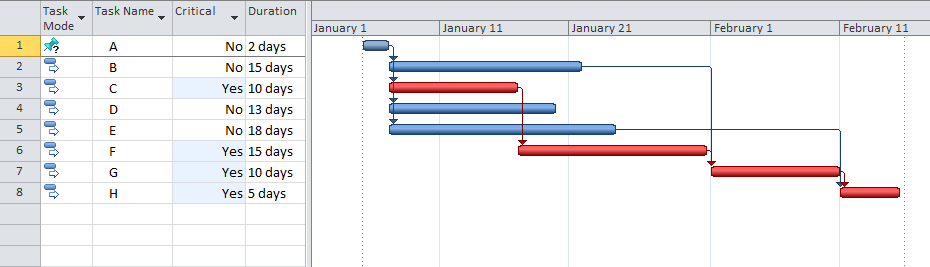
As this final example shows, a manually scheduled task will not show up as critical even when it is linked to other tasks. In the following screen shot you can clearly see that task A is by all accounts on the critical path. The link is driving the successors to start after task A has finished, but Microsoft Project has not calculated it as critical.
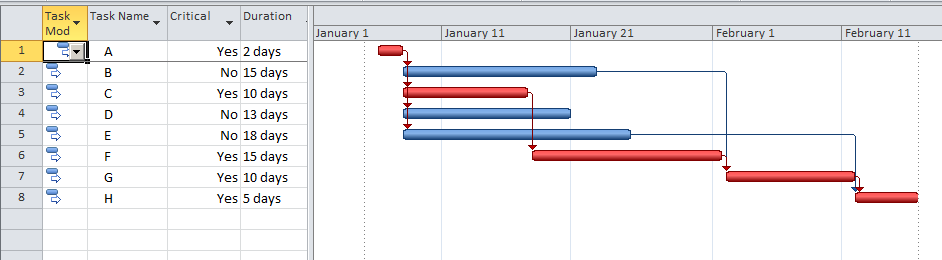
However, if we change the Task Mode to Auto, task A joins the critical path.
Hopefully this gives you an insight into how to use the Manual and Automatic Scheduling modes for tasks that was introduced on Microsoft Project 2010. You can see from the examples above what impact this can feature can have on your critical path.