When scarce resources need to be deployed within one or among many project schedules, the Oracle Primavera P6 Professional Leveler function can be helpful in solving overload situations. This article describes the basic steps for using the Primavera P6 Professional resource leveler function.
About the Leveler
The Leveler tool allows you to schedule activities in a way that reduces or eliminates overloads for resources assigned to more than one activity within a project or across many projects. It can do this based upon the priority parameters you define at the activity or project level. This provides for prioritization of activities based upon the project they are in and also their ranking within a single project. When the leveler is used, it attempts to move activities to reduce or remove an overload for a particular resource. Used effectively the Leveler can be a powerful tool for capacity planning, running what if scenarios and helping you determine the impact of resource over-allocations.
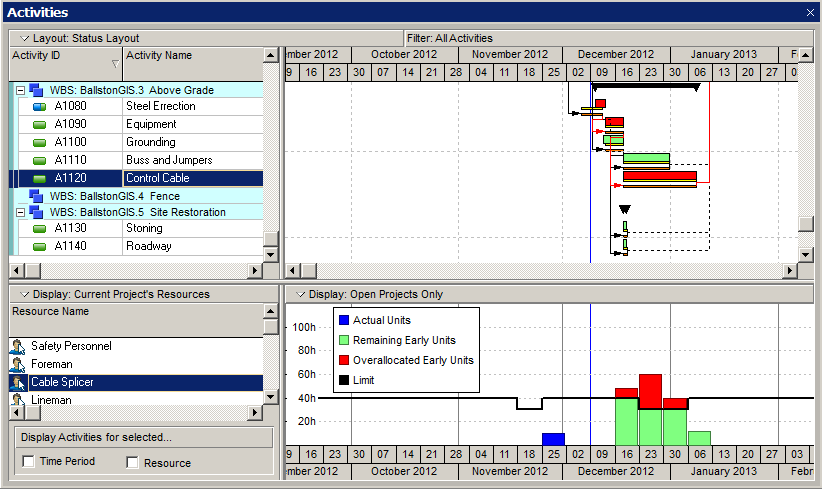
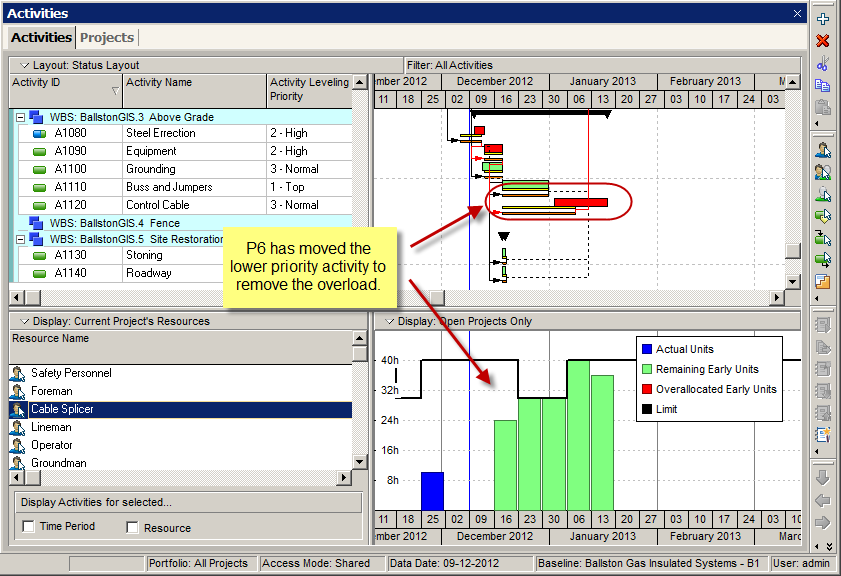
Above: Using the Resource Usage Profile, overallocation for the selected resource can be seen as red bars above the limit line.
Setting Up for Resource Leveling
The first step in the leveling process is to determine priorities. You can do this at the project level, activity level or both, depending on your particular situation. Primavera P6 Professional provides built in fields for prioritizing your projects and activities.
Project Leveling Priority – in the Projects view of P6 Professional you will find a column below the General category of the Columns dialog named Project Leveling Priority.
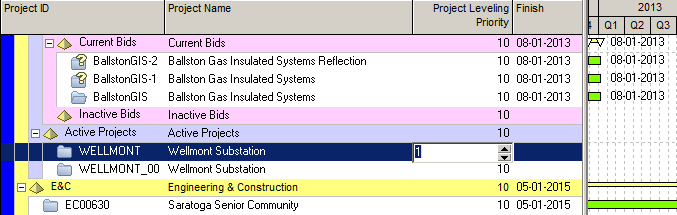
This allows you to set a number against a project that indicates its priority with regard to other projects; the lower the number, the higher the priority. By including this field in the Leveler’s settings, the Leveler will calculate and move activities based upon the project’s priority over other projects being leveled.
Activity Leveling Priority – in the Activities view, P6 Professional provides a field named Activity Leveling Priority in the General category of the Columns dialog.
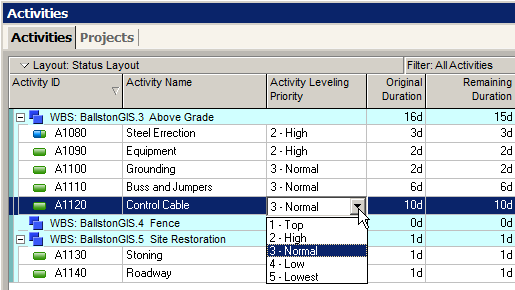
The priority rankings range from Top to Lowest and can be set against activities within the schedule to guide the leveler as to which activities it should move, or not move.
Note: you can also create numeric activity codes to define your own priority levels if the presets are not to your needs.
Once you have entered priority values for your projects and/or activities within a project, you are ready to use the P6 Leveler.
Using the Primavera P6 Professional Resource Leveler
Primavera P6 Resource Leveler Usage
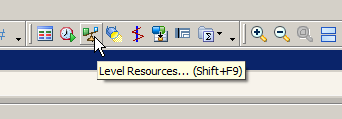
Click on the Level Resources icon on the toolbar.
This will run the Level Resources dialog. In here you can define the parameters for the leveling process. Look at each of the options carefully and decide which options you wish to select. In this example we are going to level our project using both its project and activity leveling priorities.
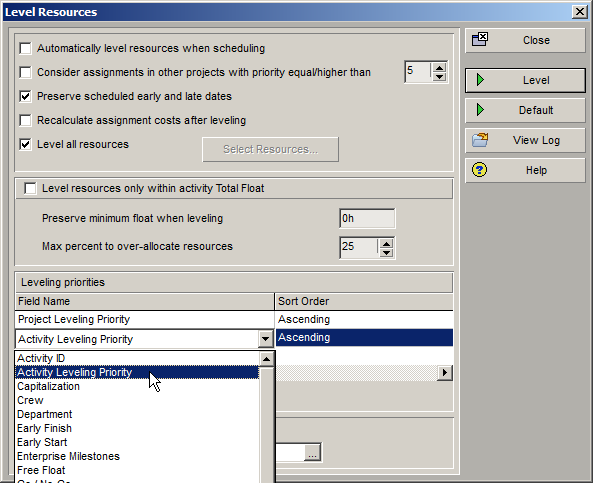
Using the Add button, you can add each of the required leveling priority fields into the table area and then determine an ascending or descending sort order for each one.
Running the Primavera P6 Resource Leveler
Once you have selected the required options for leveling, click the Level button to start the process.

P6 Professional will move activities in order to eliminate or at least reduce the resource overload issue.
Going Forward
The resulting dates represent the optimum positioning for the activities based on current resource loadings. However, if you reschedule the project without telling P6 Professional to use the resource leveling option, the dates will return to their original position. In order to maintain the new dates for the schedule going forward, you have a few options:
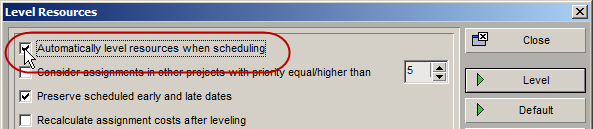
Select the “Automatically level resources when scheduling” option in the Level Resources dialog.
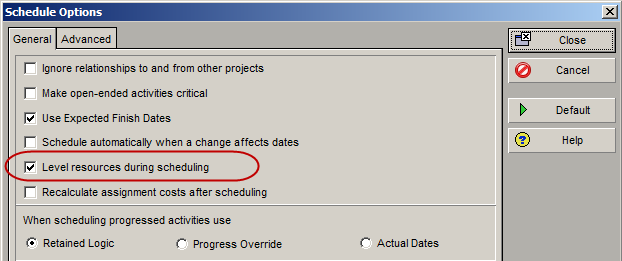
Set the “Level resources during scheduling” option in the Schedule Options dialog prior to scheduling the project.
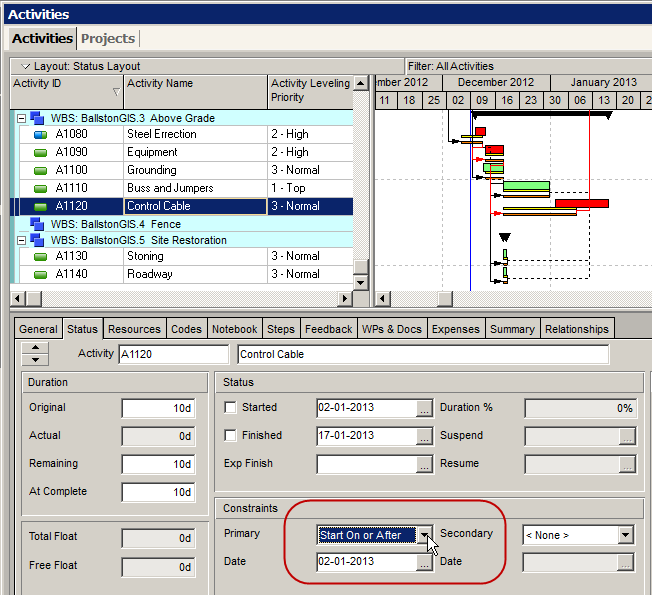
Apply a start constraint to the adjusted activities using the Status tab of the Activity Details view. This will fix the start date for the activity in its new location allowing the typical scheduling options to be used.
For more Primavera P6 articles click here