Before you begin scheduling tasks in Primavera P6 it is important to create a calendar that represents the default working days for project tasks. The default project calendar is used by Primavera P6 to set the working days and times for project tasks. Primavera P6 is set to a default 8-hour per day, 5-day work week. You can change this default calendar to one more suitable for the contract, such as a 10-hour per day, 4-day work week calendar.
This article describes the process of creating a default 10-hour per day, 4-day work week with holidays for your tasks in a Primavera P6 project.
Create a New Calendar
The first step in the process is to create a new calendar for your 4-day work week. This is done by selecting Enterprise | Calendars from the main top drop down menu, Figure 1.

Figure 1

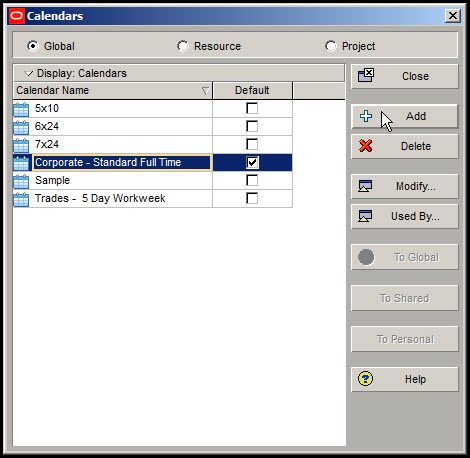
In the resulting dialog select the + Add button, Figure 2.
Figure 2
In the Select Calendar to Copy From dialog select the Corporate – Standard Full Time calendar, Figure 3.
Figure 3
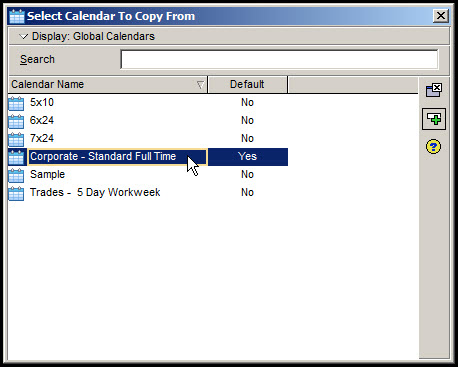
This is the standard 5-day 8-hour/day work week. Now type in the name for your calendar (e.g. 4×10), Figure 4.
Figure 4

Now select Modify, Figure 5.
Figure 5
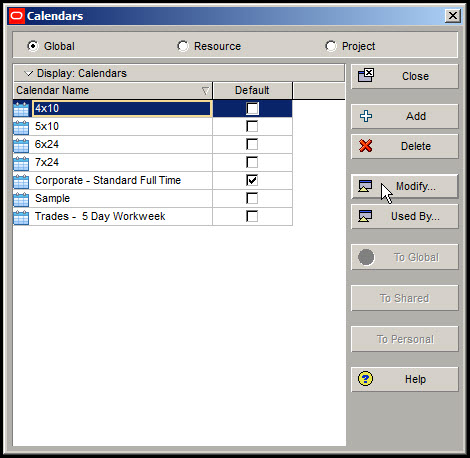
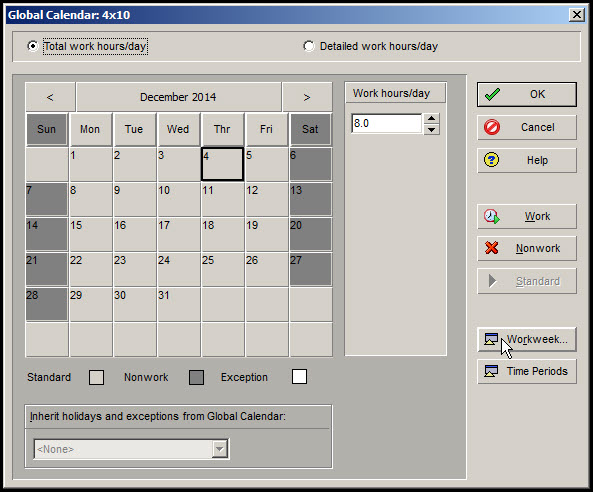
This will then bring up the current status of the 4×10 calendar, which is set to a 5-day 8-hr/day work week. To change this to a 4-day 10-hr/day work week select the Workweek button, Figure 6.
Figure 6
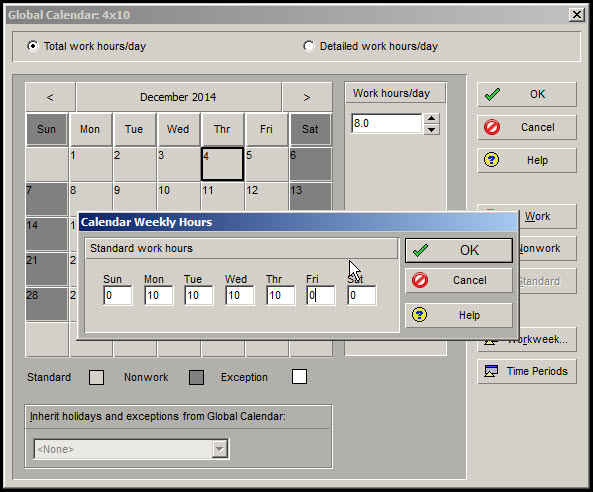
In the resulting Calendar Weekly Hours dialog, type in 10 hours for Monday through Thursday and 0 hours for Friday, Figure 7.
Figure 7
You now have your 4-day work week, Figure 8.
Figure 8

Holiday Exceptions
Now back to the Global Calendar 4×10 dialog. Highlight December 25th, the Christmas Holiday, and select the Nonwork button, Figure 9.
Figure 9
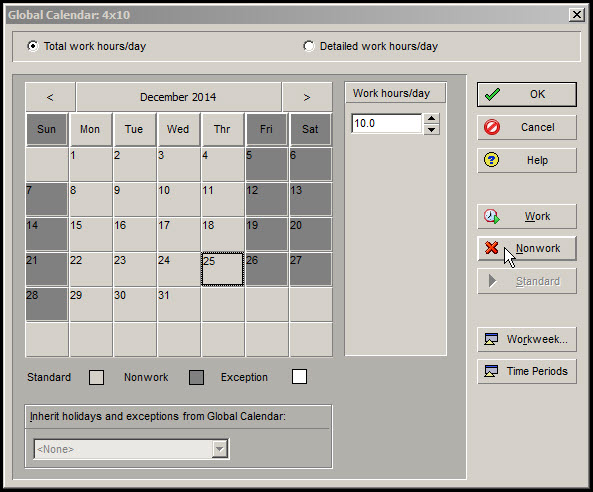
This makes December 25th a nonworking day exception, Figure 10.
Figure 10
One More Thing
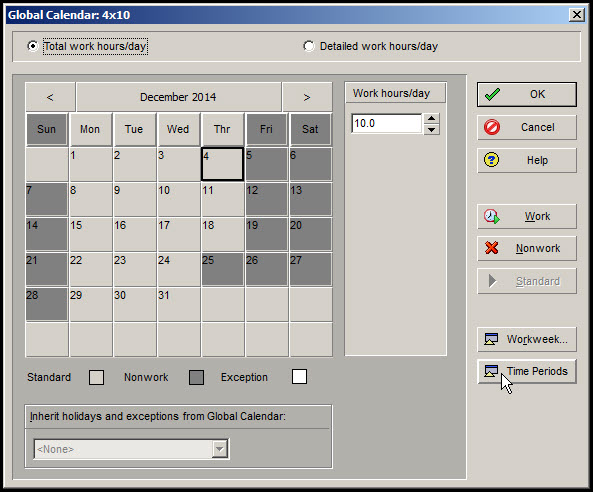
Before you can declare victory you have one more step to perform. Select the Time Periods button from the Global Calendar: 4×10 dialog, Figure 11.
Figure 11
This brings up the Hours per Time Period dialog, Figure 12.
Figure 12

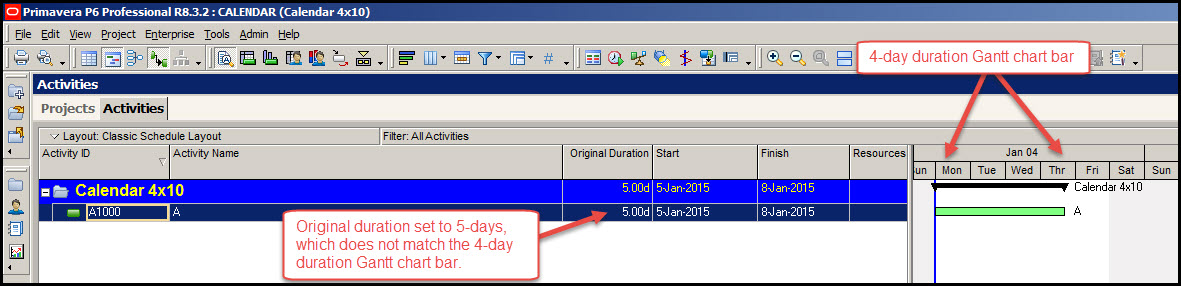
Make certain the Hours/Day cell is set to 10.0 to match your four-day 10-hrs/day work week. If you don’t do this and leave it as 8-hrs/day then Primavera P6 will consider each 8-hour period of your 10-hour day as one day for the Original Duration computation. So the Gantt chart will show a 4-day bar, but your activities Original Duration will show 5 days, Figure 13.
Figure 13
Again, set the Hours/Day cell in the Hours per Time Period dialog to 10.0 Hours/Day, Figure 14.
Figure 14

Set Default Calendar
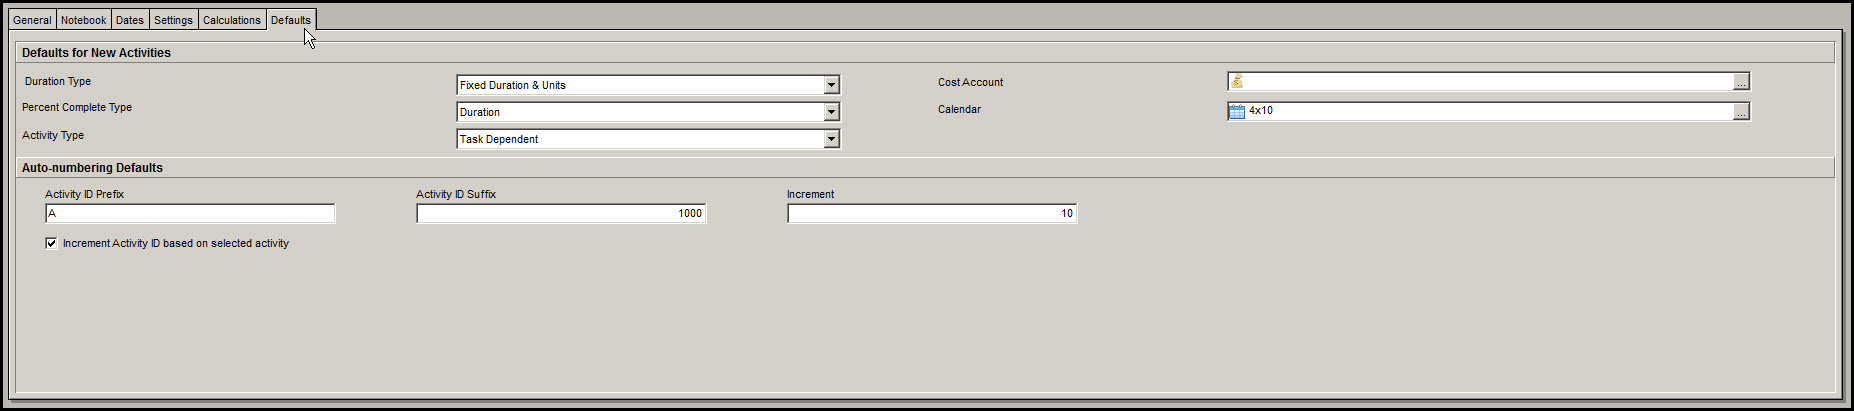
The last step is to set your newly created 4×10 work week calendar to the default. In the upper view select the Projects tab and in the lower details view select the Defaults tab. Select the calendar ellipse button, Figure 15, and assign the default calendar to 4×10, Figure 16.
Figure 15
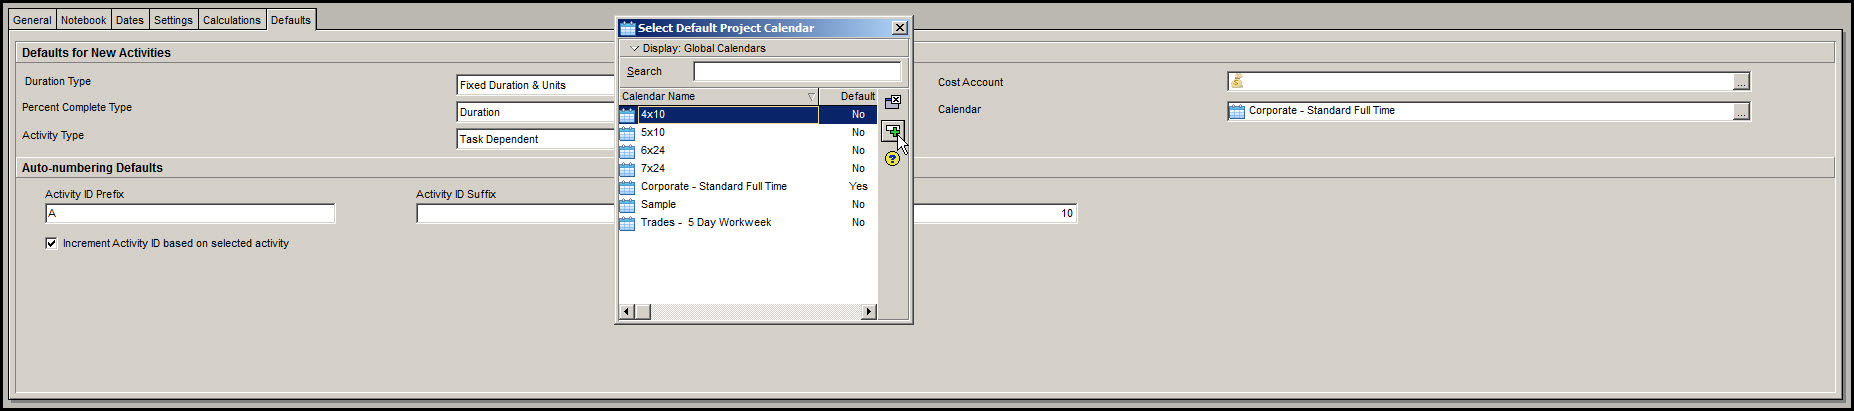
Figure 16
Summary
Primavera P6 typically defaults to an 8-hour per day, 5-day work week, but a 10-hour per day, 4-day work week can be defined and then assigned as the default calendar. Holidays may easily be defined by making them non-work days. Make certain the hours per day in your Hours per Time Period dialog match your 10-hour day schedule.
Creating and assigning a calendar in Primavera P6 is a simple process. Primavera P6 also allows for the creation of numerous types of calendars. The thing to note is that calendars are defined on a weekly Hours/Week basis and not biweekly. This makes the popular 9-hour day flexible schedule with every other Friday off a slightly trickier proposition, because the hours worked per week for the 9-hour flexible schedule are not uniform throughout the two-week performance period. Therefore you may need to average out the hours per day for each week as one solution, or go through your calendar making every other Friday an exception day. As calendars can be global, you’d only need to do this once.