A common request that we receive is from folks wanting to understand how to update work progress using the update features in Primavera P6 Professional. This article describes the major steps to updating your schedule based upon the progress of your activities. It does not go into detail about the different Percent Complete Types. This article assumes your Percent Complete Type is Duration.
It is recommended that you read the related blog entitled “Scheduling Baselines in Primavera P6”
The Three Step Process
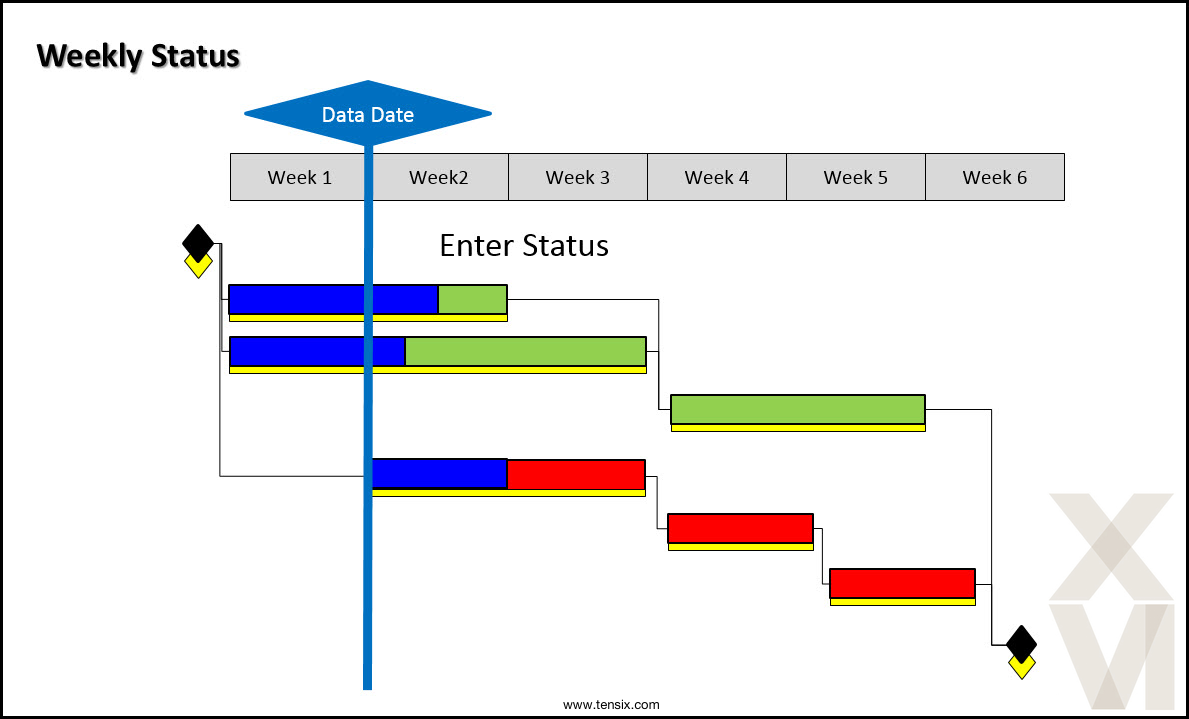
Updating the schedule with actual progress is a three step process that may be repeated at any desired interval, such as once per week. In Figure 1 we have sketch of a schedule.
 Figure 1
This diagram displays a schedule with non-critical, critical, and actual work bars. Additionally, it shows the Data Date, which is the current date of the project. If you want to provide weekly project updates then you would:
- Enter project status up to the end of the respective week
- Move the data date forward one week
- Reschedule the project
Figure 2 displays the step 1 status updates for week two.
 Figure 2
In Figure 3, step 2, the Data Date is moved forward one week.
Figure 3

Finally, Figure 4, step 3, displays the activity progress after scheduling the project.
Figure 4
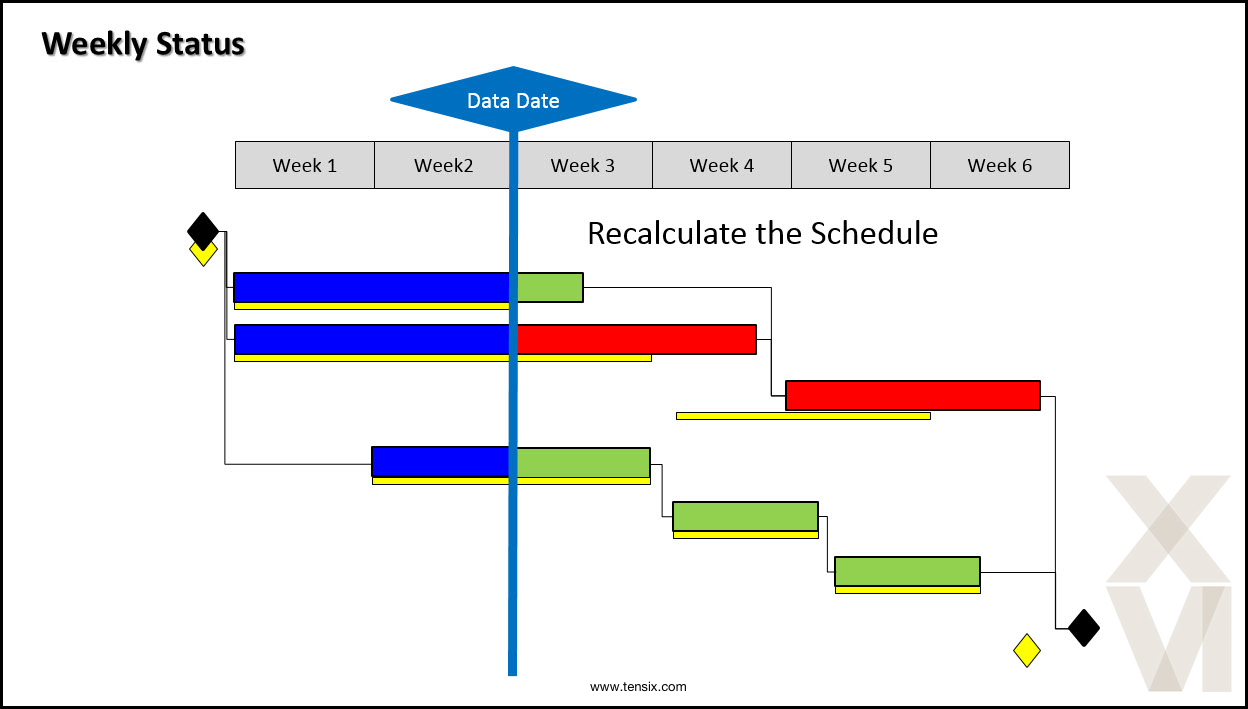
The process, again, is Enter Status, Move Data Date, and Recalculate the Schedule. Get the rhythm down for this three step update process and you will avert many of the problems associated with project status updating. One note of advice: always make a backup copy of your schedule before commencing the update process.
Construction Project Example
Figure 5 displays an example schedule describing the structural phase of a building construction project.
Figure 5
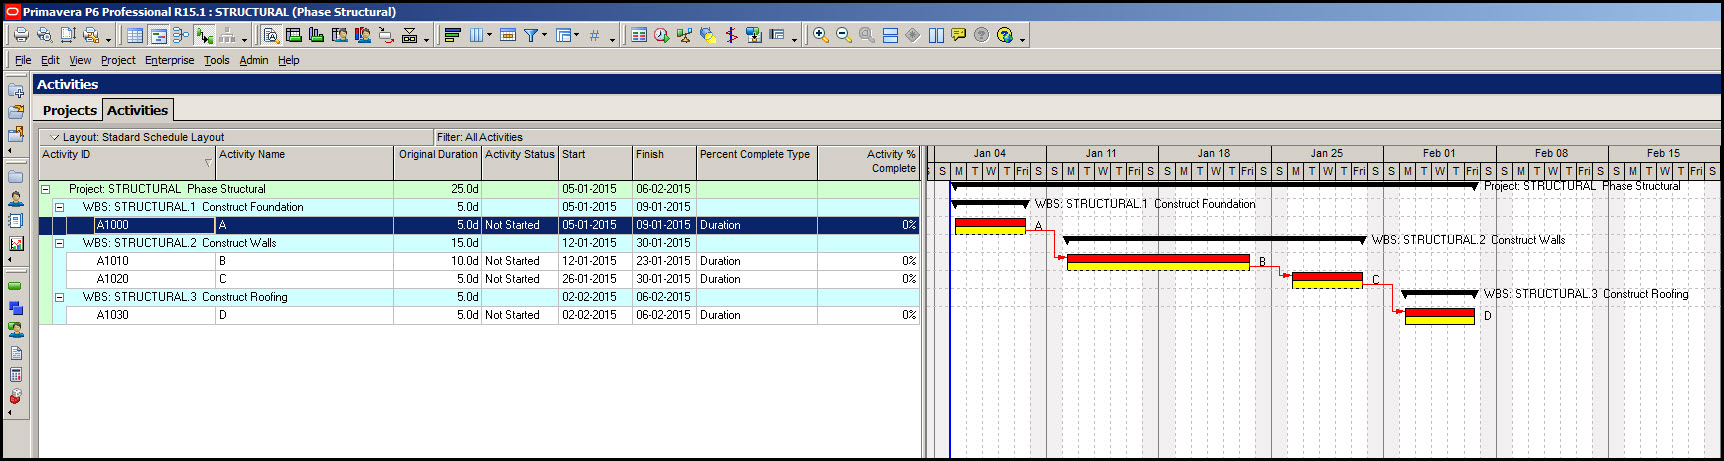
Note, in particular, the Percent Complete Type of all activities is Duration; the simplest % complete type to implement. The yellow bars displayed in the Gantt chart, Figure 5, represent the baseline.
Week One Status Update
To prepare for the enter status step of the update process select activity A and then select the Status tab from the activity bottom details. Commence the status update by clicking the Started toggle and entering a Duration % complete of 80%, Figure 6.
Figure 6
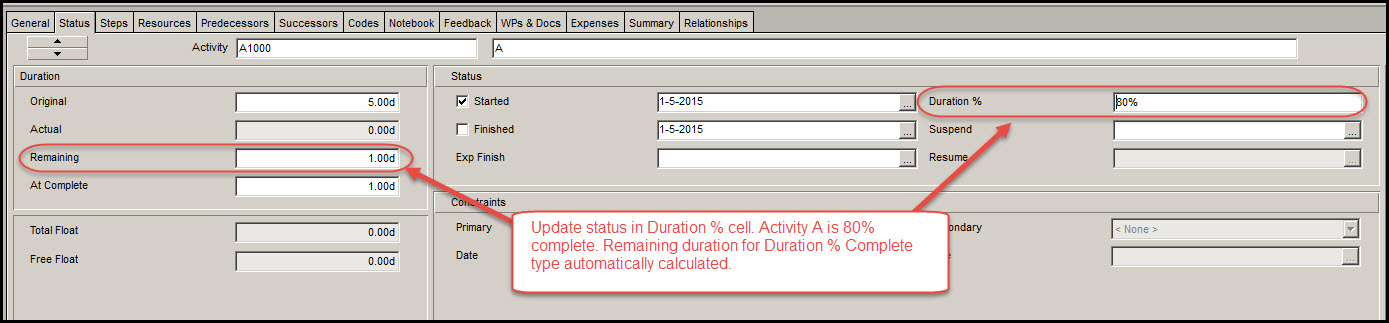
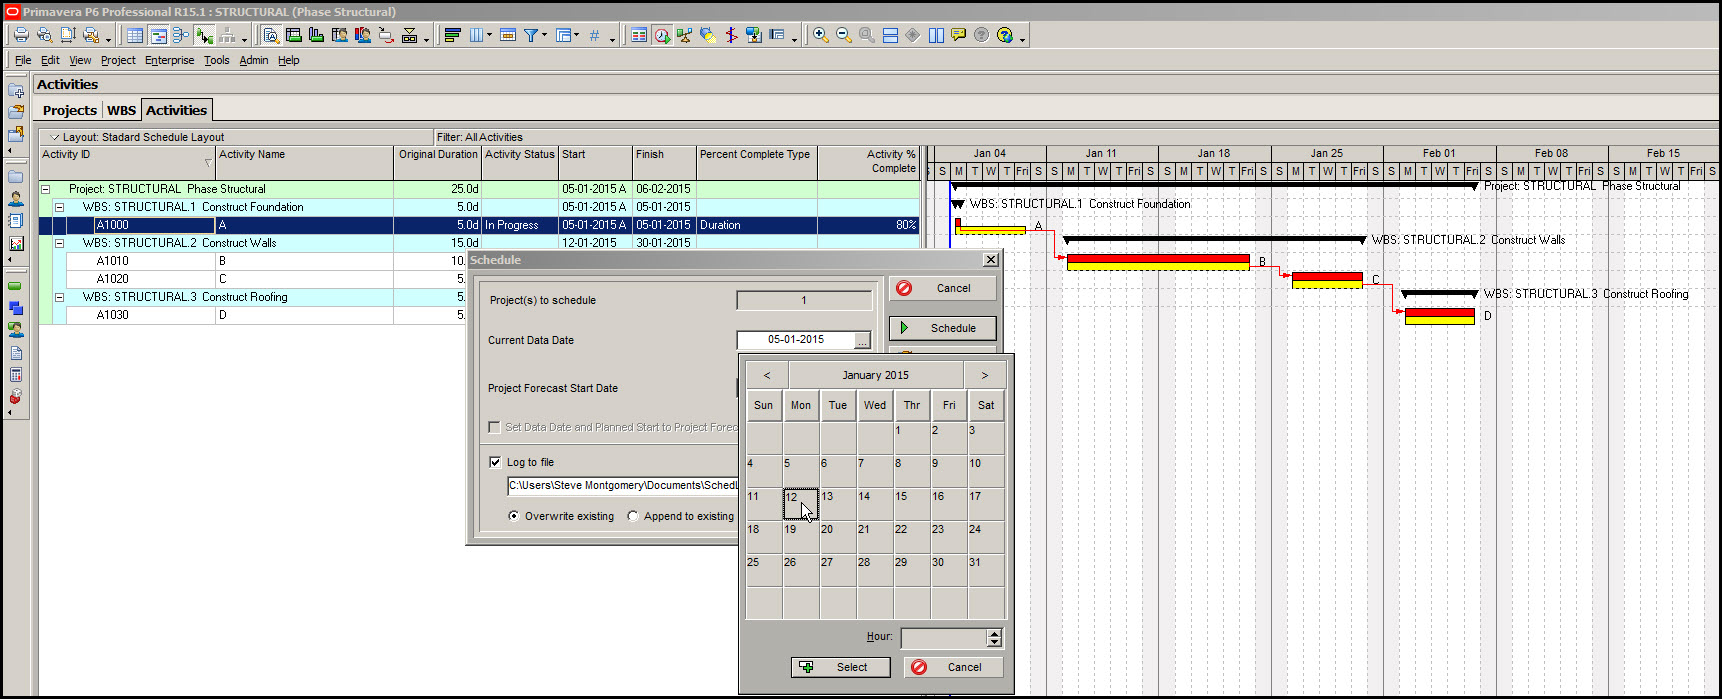
The remaining duration of 1-day is automatically computed for the 5-day activity. Now change the Current Data Date. Select the Schedule icon in the tools group at the top of the screen or select Tools | Schedule from the main drop down menu. Either method will activate the Schedule dialog, Figure 7.
Figure 7

Select the Current Data Date ellipse, again, Figure 7. In the calendar, Figure 8, advance the Data Date by one week.
Figure 8
Finally, recalculate the schedule and your Gantt chart will look similar to that shown in Figure 9.
Figure 9
Week Two Status Update
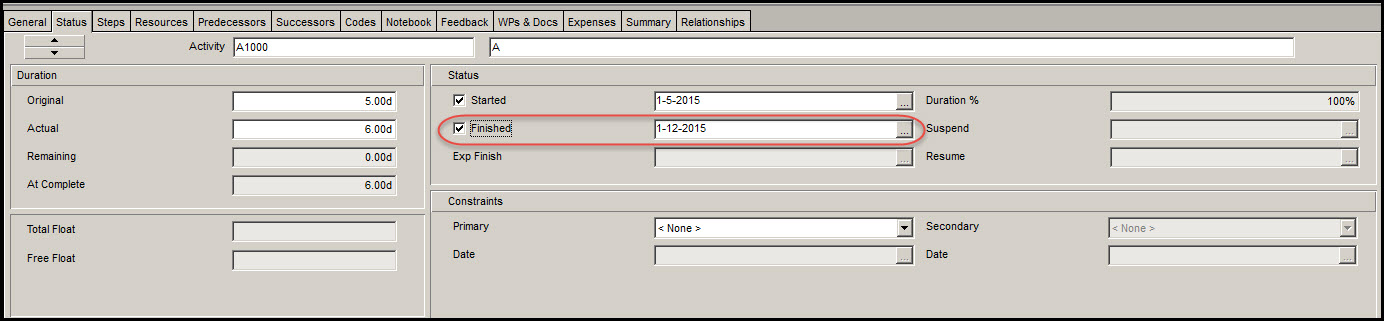
The second weeks’ update requires you to enter the status of two activities that are progressing during this week. First, select Task A and in the Status tab check the finished toggle, Figure 10.
Figure 10
Second, select activity B and in the Status tab check the started toggle and set the Duration % complete to 40%, Figure 11.
Figure 11
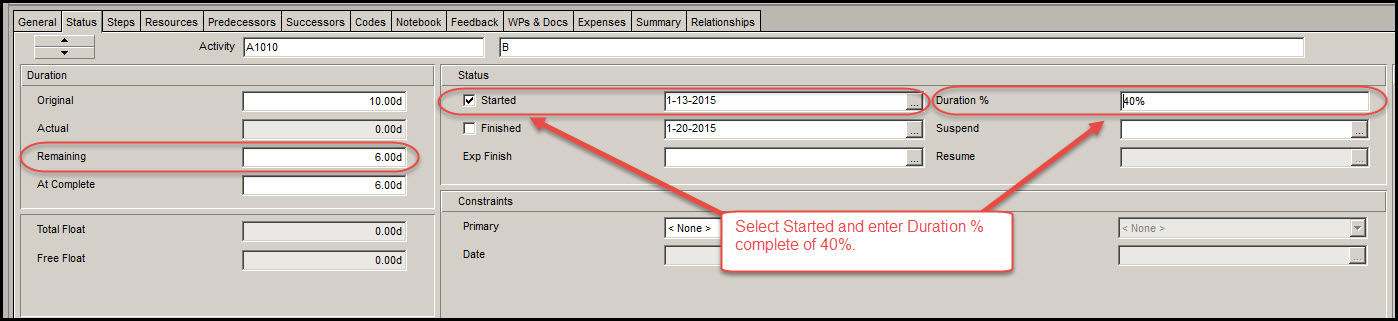
Primavera P6 computes the remaining duration of 6-days. Now select Tools | Schedule > Current Data Date ellipse, and advance the Data Date one week to January 19th, Figure 12.
Figure 12

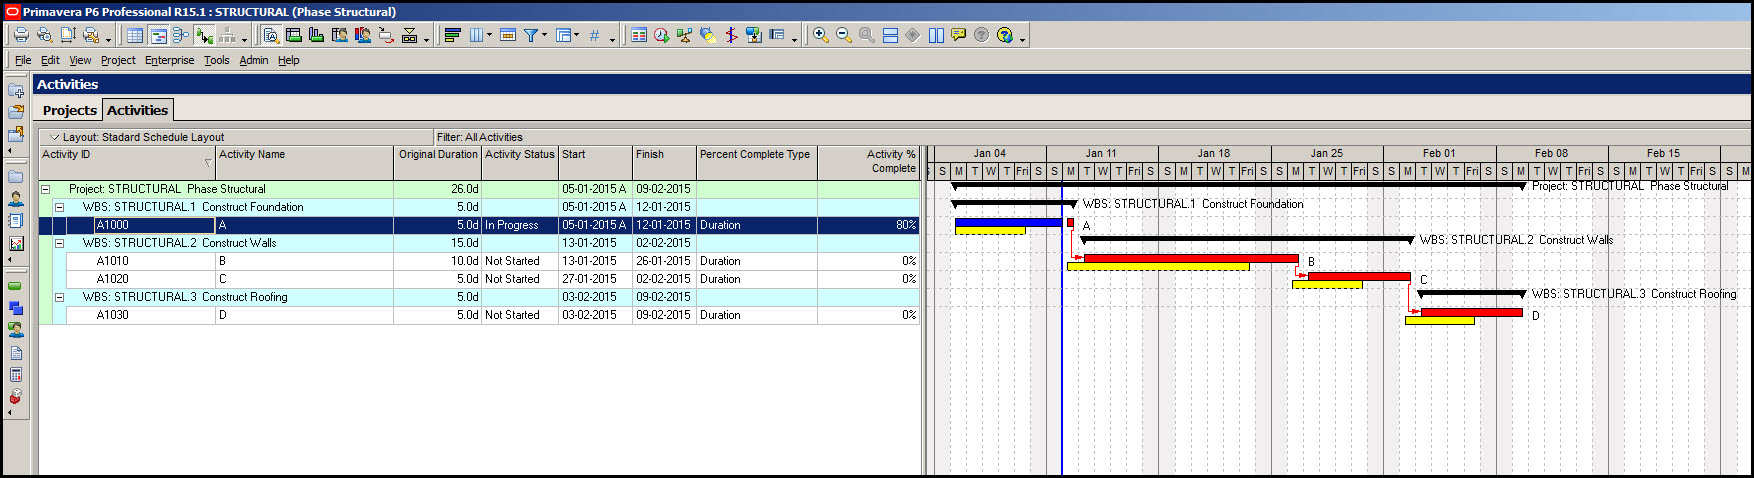
Recalculate the schedule for week two updates and view your updated Gantt chart, Figure 13.
Figure 13
Week Three Status Update
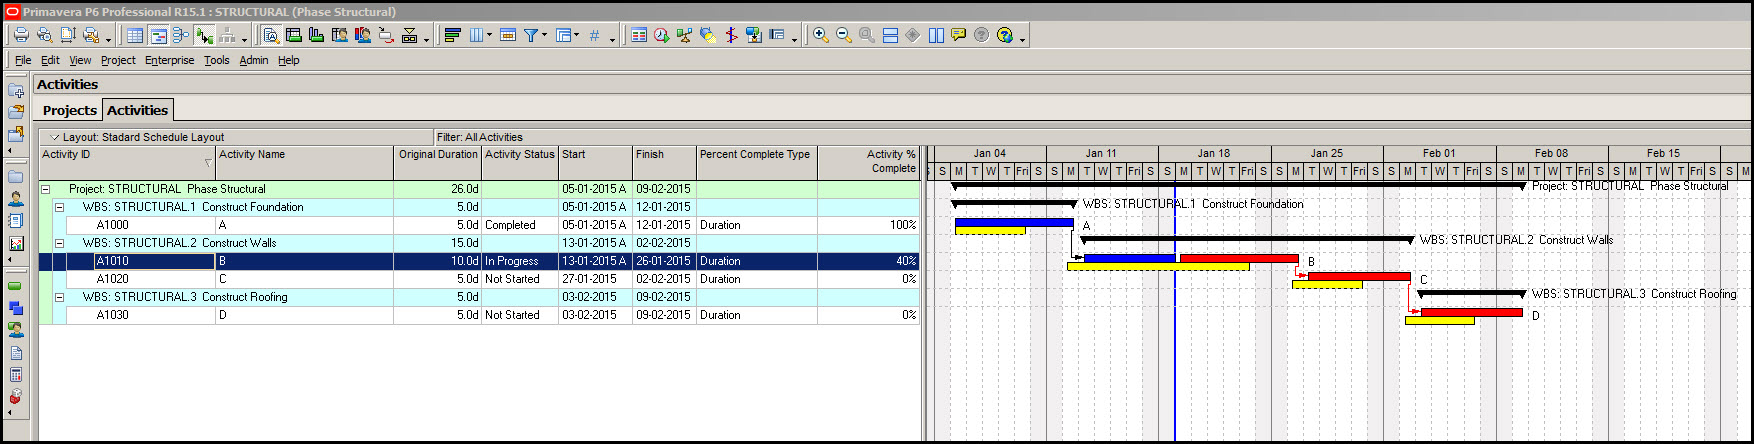
To get you into the rhythm of making status updates we update our sample project for week three. Enter status by selecting task B and in the Status tab setting the Duration % complete to 90%, Figure 14.
Figure 14

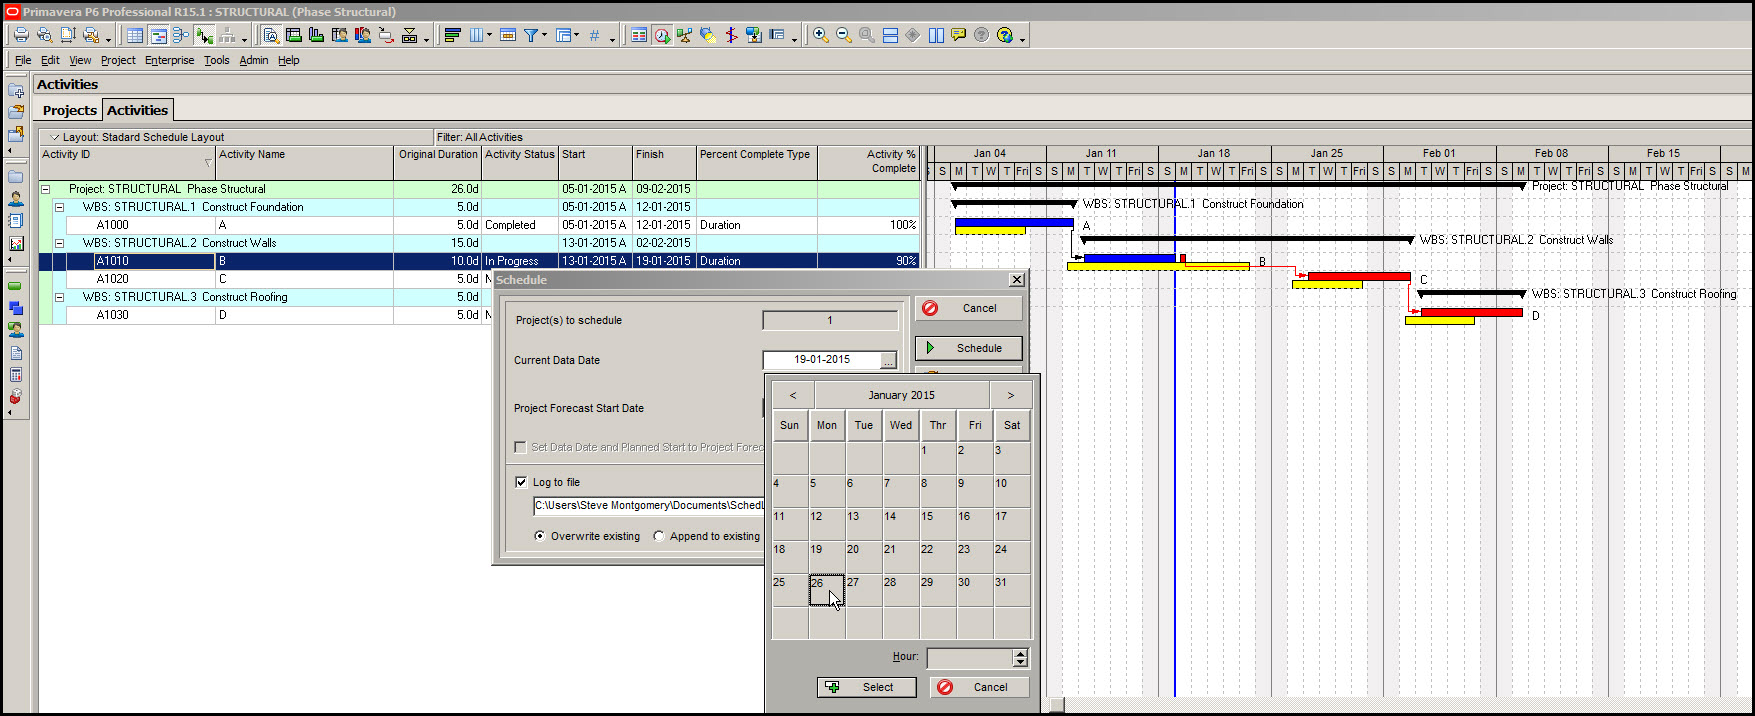
Move the Data Date one week forward to January 26th, Figure 15.
Figure 15
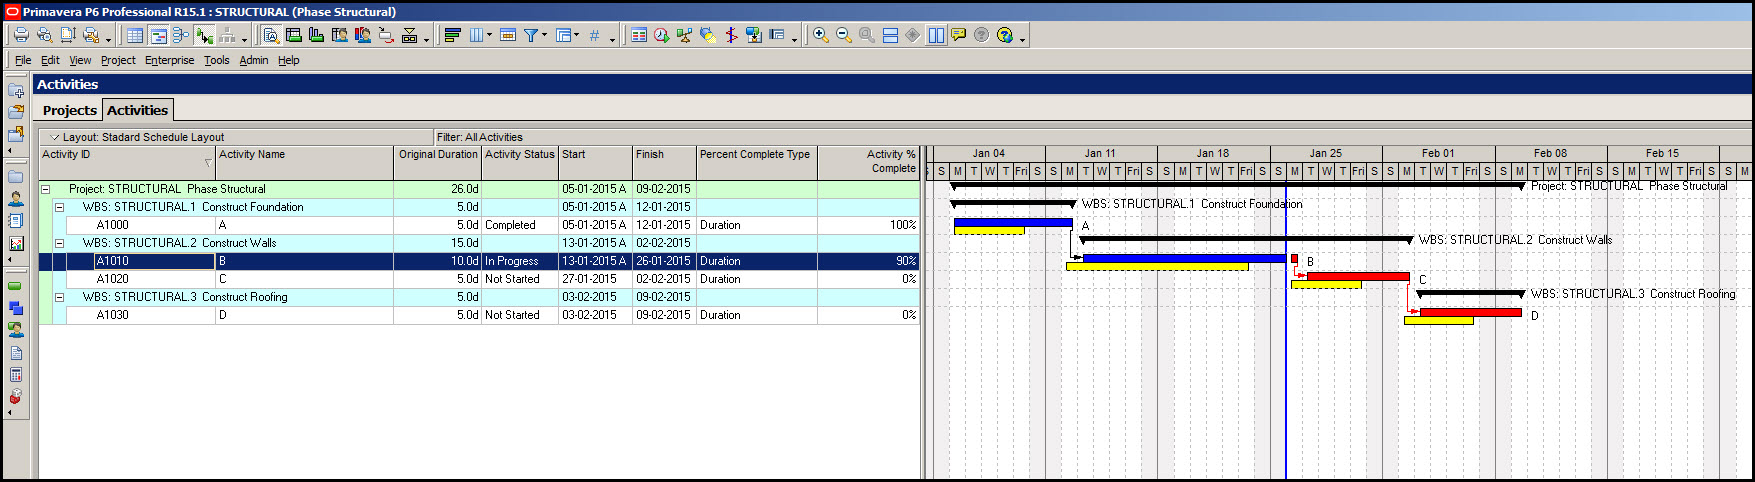
Recalculate the schedule to arrive at your three week updated schedule, Figure 16.
Figure 16
Summary
Primavera P6 has three different ways to define activity percent complete; the simplest of these three is Duration % complete. Though the % complete type may add complexity to the update process, overall status updating is a straight forward three step process:
- Enter status
- Move Data Date
- Recalculate the schedule
Maintain the accuracy of your schedule updates by repeatedly implementing this three-step process. Once you have this three step process down, then you can explore the complexities of the Percent Complete Types to further enhance the accuracy of your schedule updates.