After you’ve created your Primavera P6 schedule, there may be times when you want to view only a selection of the activities in it; particularly if it is a large schedule. This article looks at some basic techniques for filtering activities in your schedule using the Filters feature of Primavera P6.
Using a construction example, let’s say that you want to view only those activities in a certain area of the construction site. Primavera P6 allows you to create codes, which are used to organize the activities. These codes may be assigned to various activities, and then the activities can be filtered using these assigned codes. In this example we create contractor and subcontractor Activity Codes so that only the desired work performed by the primary contractor and/or subcontractors may be clearly visible.
Although our example shows the common practice of filtering activities using an activity code value, keep in mind that you can filter on literally hundreds of other activity attributes. These may include dates, date ranges, durations, activity types, IDs, descriptions, cost, baseline elements, resources, float – in fact pretty much any value you find in the Columns list.
Creating Codes
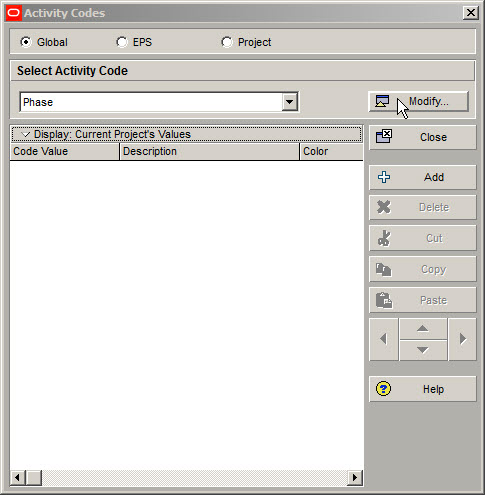
To begin the process of creating codes, select Enterprise | Activity Codes from the main drop down menu. This brings up the dialog shown in Figure 1.

Figure 1

Click on Modify from the list of buttons on the right hand side of the dialog, Figure 2.
Figure 2
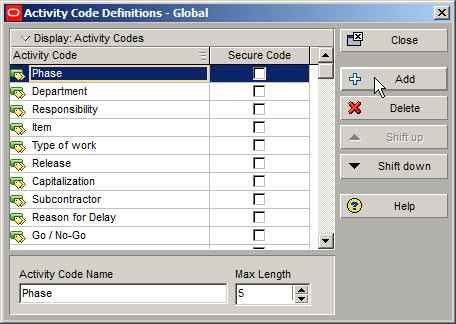
Selecting + Add from the resulting Activity Code Definitions dialog, Figure 3, will insert a new code in the list of activity codes. You may name this Contractors for our example. Before closing the dialog, set the Max Length option at the bottom of the dialog to 10. This will give you ten characters for the activity code name.
Figure 3
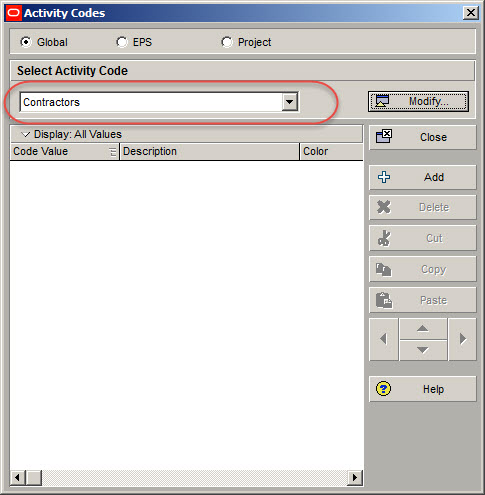
After closing the dialog you will see the Contractors code name displayed in the Select Activity Code field, Figure 4.
Figure 4
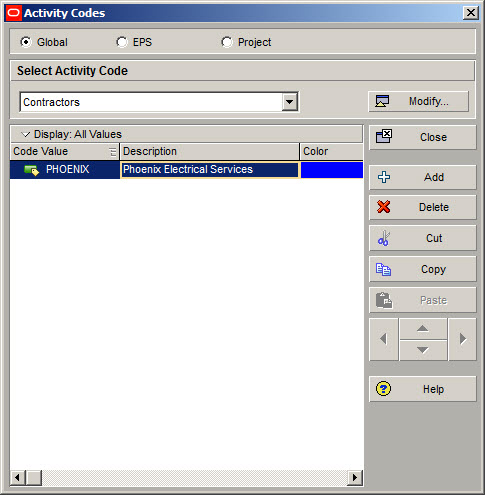
Now you are ready to begin entering contactor codes. Select the + Add button on the right hand side, and enter your first code and associated description, Figure 5.
Figure 5
Next enter a placeholder title for your groundwork subcontractors, and enter the groundwork subcontractors as a child of this title. Use the appropriate arrow key to create the child code, Figure 6.
Figure 6

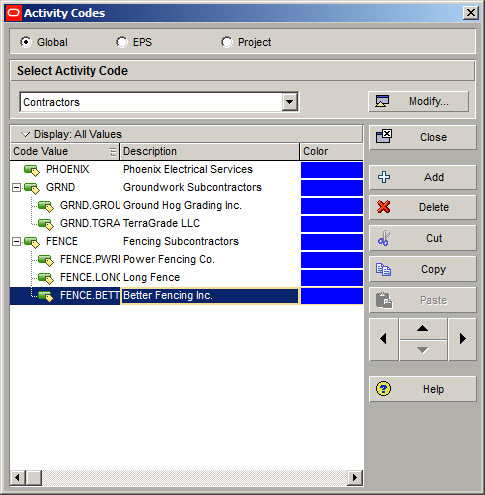
By using the + Add button and appropriate arrow keys you can create the list of contractors and subcontractors, such as those displayed in Figure 7.
Figure 7
Assigning Codes
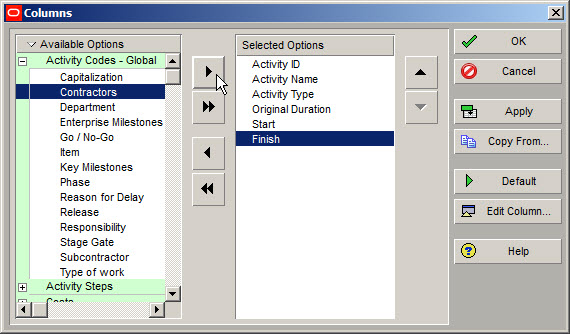
Primavera P6 creates a place in its list of available options to display the newly created contractor’s code. Use the Columns tool available in the layout toolbar group at the top of the screen to create a column in the activities view for the contractors. You may also activate the Columns tool by selecting View | Columns from the main drop down menu. The outstanding question is where do you find the Contractor’s code in the Available Options? The Contractor’s code should be in the Activity Codes – Global category. Select Contractor’s from the category list and click the appropriate arrow to add the Contractors to the list of Options displayed in the Activities view, Figure 8.
Figure 8
I should point out at this stage, that this activity code is not the same as adding a Contractor resource to the activities. It’s simply a code to allow you to filter, or even group the schedule based upon a particular value; in this case the contractor’s responsible for completing work.
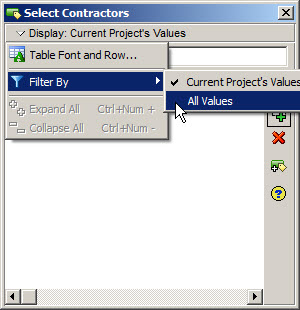
You are now ready to begin assigning Contractors to the various activities. So double click on the first activity in the Contractors column, which will bring up the Select Contractors dialog. Of course, you do not see any Contractors listed. You need to select the appropriate filter for the Contractors. Click Display | Filter By | All Values, Figure 9.
Figure 9
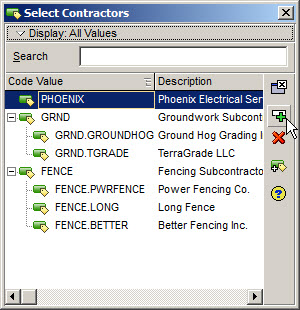
Now you should see your Contractors appear, and ready for selection. Select the Contractor/Subcontractor for the first activity, Figure 10.
Figure 10
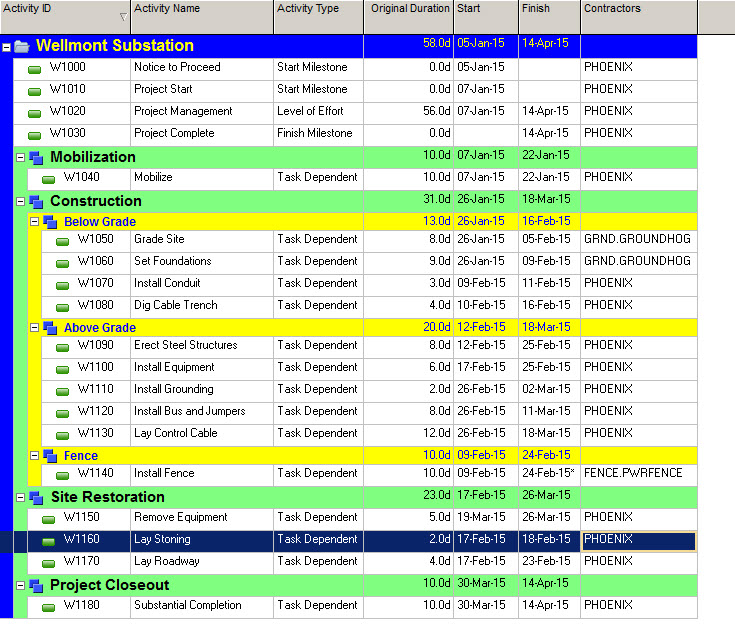
Assign Codes to all the requisite activities in the project. Our example has Contractor Codes assigned to all the activities as displayed in Figure 11.
Figure 11
Filtering Codes
Now that Codes are assigned to all the activities the final process is to create a filter and apply that filter to display only the Contractors that are of interest. Select the Filter tool in the layout toolbar at the top of the screen. You may also access the Filter tool by selecting View | Filter By from the main drop down menu. Click + New to create the desired Filter. You can name this filter Contractor Filter. In the highlighted parameters cell next to the Where select Contractors from the drop down list. Under the ‘Is’ column select equals from the drop down menu. And for the Value column assign the code GROUNDHOG. You should now have a Filter similar to that displayed in Figure 12.
Figure 12

Select OK. In your list of Filters you will now have a Contractor Filter. If you select the Contractor Filter and click Apply you will see a minimized list of activities. Only activities performed by the corresponding subcontractor from the filter will be displayed, Figure 13.
Figure 13

Summary
Filtering activities to display only the data of interest simply requires the creation of a filter or use of an existing filter. Primavera P6 provides great leeway in the types of data that you can filter on by offering filters on all activity attributes. Any activity codes you create appear in the long list of options available for displaying when creating a filter.
Primavera P6 has many functions available for filtering, grouping and sorting in all the main views of the program. Once you become familiar with the process of organizing activities, you will have mastered the full potential of Primavera P6 to provide unmatched data viewing and reporting capability.