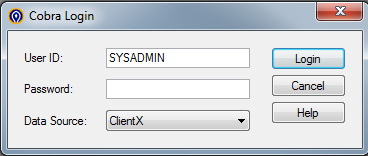
The latest version of Deltek Cobra gives you the ability to easily switch between data sources. You could always do this, even back as far as the 4.X versions, but you needed to setup different icons on your desktop, batch files, etc…doable, but not intuitive. With the latest release of Cobra, the choice of which database you will connect to is right on the login screen. This makes it a simple drop down list selection to have your install of Cobra connect to different databases.
Why would you want to do this?
Do you have a mix of cleared and uncleared work? Do you have a test and production environment where you test new routines? Are you a consultant who needs to keep your clients’ data separate? All of these are scenarios where being able to easily switch between databases can be useful.
Having different databases for your cleared and uncleared work can be vital. Keeping the data separate adds a layer of protection and avoids the risks and hassle of maintaining the security setup. Your uncleared users will not even be able to log into the secured Cobra database, but you as an administrator or power user can easily switch.
Being able to test your custom routines or external data connections, or even just do what ifs on your programs or process settings, can be vital in a large enterprise implementation. Moving between the data sources and having the unique settings used makes it that much easier to protect your production environment while maintain a robust testing environment.
As consultants, we regularly deal with multiple clients’ sensitive data and those clients are rightfully concerned about cross-pollination with other companies. Not to mention the hassle of having different results or default settings that need to be updated each time you switch between clients. Setting up separate data sources for each client is an easy way to avoid these problems.
Changing Databases
Ok, so how do you do it? First, you add your database using the normal process for your selected database engine (SQL, Oracle, etc.) and run the database scripts provided by Deltek to setup the tables for that database engine.
Next, you need to set up the data source name (DSN) connection using the ODBC Data Source Administrator found in the Deltek Cobra 5.1 group of menu items. If you are not sure how to do the database steps or do not have access to those tools, touch base with your IT department for help.
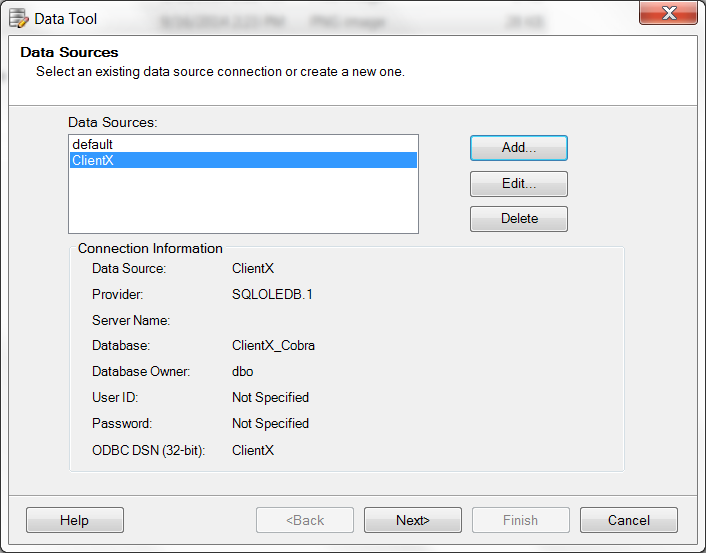
Once those steps are complete, you are ready to add the data source to Cobra. In the Data Tool, found under the “Administration” section of the Deltek program menus, simply click the ‘Add’ button to create a new Data Source.
![]()
In the Data Source dialog, enter the name you want to use to reference the database and select the ODBC DSN you, or your IT group, created in the first steps.
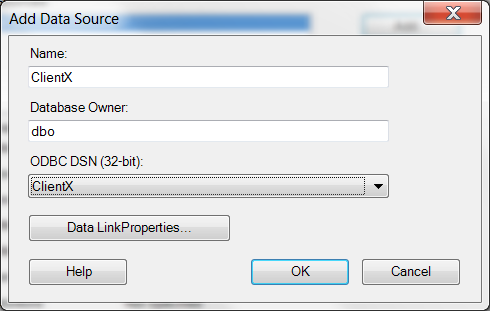
Once that is complete, click ‘Data LinkProperties’
![]()
and enter in the appropriate settings based on the database and driver your organization uses.
Next time you log into Deltek Cobra your new Data Source will be available in the drop down and you are off and running!